To avoid these ads, REGISTER NOW!

ZMotorsports Shop Projects 2.0

aka Larry

Well-known member
Joined
May 2, 2012
Messages
8,080
Location
Eastern, NC
I have done a ton of them in the past two months. I have used dorman if I supply them, but have installed several that were Chinese no name ones from Amazon that customers supplied. They have fit as well as the dorman ones do and been issue free so far. I kinda wonder if dormans doesnt come from the same place as the amazons do.

Since you guys got me thinking about this, I did a search trying to find out the available (aluminum upgrade) options out there.

Hopefully these links work. Here's what I found:

Melling - $181.00 @ Jegs

Jegs House Brand - $170

Dorman 926-959 $236 @ Amazon

Chinese Copy $54 @ Amazon

Most of these are listed for the JK, but I can't tell if there is a difference for the JL. Anyone know if these fit the later model Pentastar V6s? Dorman's site seems to say they work for both. If so, Mishimoto has one listed for a JK that's $279, and I've used their aluminum radiators in the past with good success.
 
To avoid these ads, REGISTER NOW!

stinkity stoink

Well-known member
Joined
Apr 8, 2007
Messages
735
Location
New Jersey
I am no expert, but I have done two on my ram V6, which I think is the same motor. I have read good and bad things on the aluminum ones that are supposed to be an upgrade. The bad is that sometimes they are machine bad and don’t actually fit and cause damage to the motor.
 

aka Larry

Well-known member
Joined
May 2, 2012
Messages
8,080
Location
Eastern, NC
I am no expert, but I have done two on my ram V6, which I think is the same motor. I have read good and bad things on the aluminum ones that are supposed to be an upgrade. The bad is that sometimes they are machine bad and don’t actually fit and cause damage to the motor.

When do the OE plastic ones typically fail? My JL Wrangler currently has 77K on the clock.
 

signcrafter

Well-known member
Joined
May 9, 2012
Messages
12,431
When do the OE plastic ones typically fail? My JL Wrangler currently has 77K on the clock.
I don't remember how many miles were on the ones I did but I would guess they were all over 100k or more when they failed. When I did my first one I did some reading on them and in my opinion they fail from the composite housing heat cycles over time. They do make an oring kit for them to "re seal" them but also read a lot of stories of guys that replaced the orings and then still had a leak shortly after and then replacing the whole housing fixed it. Just my opinion I formed from what I have read.

Personally if I owned one I wouldn't change it proactively. I would just keep an eye on the valley and the top of the transmission because the oil will run down on that area. When it fails change it. I don't know if the aluminum one is an upgrade or not. Like Mike I have used both and haven't heard of any issues with either of them.
 
OP
Z

zmotorsports

ALLIANCE MEMBER
Joined
Oct 20, 2009
Messages
21,439
Location
Northern Utah
Since you guys got me thinking about this, I did a search trying to find out the available (aluminum upgrade) options out there.

Hopefully these links work. Here's what I found:

Melling - $181.00 @ Jegs

Jegs House Brand - $170

Dorman 926-959 $236 @ Amazon

Chinese Copy $54 @ Amazon

Most of these are listed for the JK, but I can't tell if there is a difference for the JL. Anyone know if these fit the later model Pentastar V6s? Dorman's site seems to say they work for both. If so, Mishimoto has one listed for a JK that's $279, and I've used their aluminum radiators in the past with good success.

When do the OE plastic ones typically fail? My JL Wrangler currently has 77K on the clock.

Vincent, I have not used the Melling, but seeing as how the other products I have used of theirs, I wouldn't hesitate to give the Melling a go. I think the next one I do I may give the Melling a try. As far as I know, the 2018+ JL 3.6 Pentastar is the same as the 2012-2017 JK engine.

As for when they fail, I saw one around 75k but more common is around the 100k-125k range. I don't know that I would replace one proactively until I got to around that 125k mile mark and then maybe I'd consider it. Personally, I think "how" the vehicle is used will more depend on the failure point than the actual miles however. Heat is the biggest enemy of these. If a vehicle with relatively low miles on it does a lot of slow speed off-road traveling in warmer months where underhood temps. would be elevated, I personally think would push one to fail before a vehicle that sees less stress from more highway cruising where higher underhood heat would be less of a factor. Just my opinion though.
 

aka Larry

Well-known member
Joined
May 2, 2012
Messages
8,080
Location
Eastern, NC
Vincent, I have not used the Melling, but seeing as how the other products I have used of theirs, I wouldn't hesitate to give the Melling a go. I think the next one I do I may give the Melling a try. As far as I know, the 2018+ JL 3.6 Pentastar is the same as the 2012-2017 JK engine.

As for when they fail, I saw one around 75k but more common is around the 100k-125k range. I don't know that I would replace one proactively until I got to around that 125k mile mark and then maybe I'd consider it. Personally, I think "how" the vehicle is used will more depend on the failure point than the actual miles however. Heat is the biggest enemy of these. If a vehicle with relatively low miles on it does a lot of slow speed off-road traveling in warmer months where underhood temps. would be elevated, I personally think would push one to fail before a vehicle that sees less stress from more highway cruising where higher underhood heat would be less of a factor. Just my opinion though.

Thanks for the info as always Mike!
 

stinkity stoink

Well-known member
Joined
Apr 8, 2007
Messages
735
Location
New Jersey
When do the OE plastic ones typically fail? My JL Wrangler currently has 77K on the clock.
My first one failed at about 40,000 miles. It actually didn’t leak, but the oil pressure switch went bad and it’s on the unit. Since I was there and it was a week point I might as well change the whole thing. I replaced it with an aftermarket that lasted about about 50,000 thousand miles. When I replaced that one I used oem
 
OP
Z

zmotorsports

ALLIANCE MEMBER
Joined
Oct 20, 2009
Messages
21,439
Location
Northern Utah
What a week last week, and I didn't get pictures of hardly any of it. I started by tearing the bathroom in the coach apart to do some slight remodeling and then I had a comeback, well kind of.


The 2005 Volvo XC70 that I did the intake duct on a few weeks ago was back. Owner said it was getting worse and now had a constant CEL with a P0101 code. It ran fine when I finished up the intake duct and I performed a final smoke test on it to confirm I had fixed the multiple intake leaks, but evidently it had started running terribly, especially when cold. The owner threw a new MAF sensor at it and although he said it "seemed" to run better, it was still running poorly and throwing a CEL. When he called me, I told him to try unplugging the MAF sensor to see if it ran better or worse. He said it cleared up greatly when he unplugged the MAF sensor, so I told him it must be in the MAF circuit but it was doubtful that the original AND the new MAF sensor were bad, so I suggested he had a wiring/connection issue. He said he went through the wiring and couldn't see anything awry, so I had some time Thursday night so I had him bring it by so I could look at it.

Upon arriving, I hooked up the Autel MS906 Pro and upon observing a few PID's, I immediately noted that there was no MAF reading. That would explain the DTC. When he called, I told him I could look at it if he would go into Alldata and grab me a wiring schematic.

Of course, when he arrived I discovered that he brought the wrong wiring schematic with him as he just grabbed a generic one off of the internet, so I just went old school and went wire by wire from the MAF sensor to the ECM to confirm wire integrity. I used my Snap-on graphing multimeter just so I could watch the signal and see any dropouts or deviations while moving wires around. Once I got all four wires identified from the MAF sensor to the ECM, I went through pin by pin to check drag on each socket. I tightened up a couple of them and reassembled the wiring harness. While the ECM was out, I noticed it was an aluminum cased unit with four tamper proof Torx screws so I opened up the ECM to check the solder joints. I saw nothing out of the norm so I reassembled.

Upon getting the scan tool setup and grabbing about a half dozen PID's to watch, I had the owner start the car and immediately he said it was running better and there was no CEL. I informed him that I did not clear the CEL and really hadn't done anything other than go through the wires and connections. Evidently that was the fix.

Friday night the wife and I had to go pick up our taxes as well as had a viewing to go to so no time in the shop. However, I did have a package arrive that I had been expecting. My new pry bar set arrived.

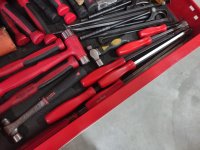
Pry bar and hammer drawer before new pry bars replaced the old version.
so1.jpg

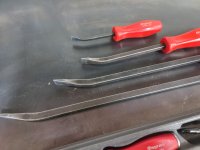
Old and new Snap-on Contour handled pry bars. I had purchased my original Snap-on pry bars in the early 2000's when I needed a new set for home, I kept my Cornwell ones and mix-matched ones at work, but I really liked the Contour handle so I bought a full set of the Snap-on's for my home shop. However, when Snap-on came out with their strike through version around 2010 I really liked them, but couldn't justify the price because I never really beat on my pry bars in the first place. BUT, I kept secretly wanting a strike through set of the old Contour handled pry bars as I don't particularly care for their new style pry bar handles.

I have been looking for either a well-cared for Contour handled strike through set or a new set for a few years now but have only run across abused and poor conditioned ones, until last week. Granted I'm sure I paid a bit more for them than I would have back in 2010, but this was a brand-new set and will get well used but not abused.
so2.jpg

These have been well used over the past 25 or so years, but not abused and never struck with a hammer, which is probably why the handles are still fully intact.
so3.jpg

so4.jpg

New strike through next to originals.
so5.jpg

New pry bars in their home.
so6.jpg

Old pry bars now in the Jeep.
so7.jpg
 
OP
Z

zmotorsports

ALLIANCE MEMBER
Joined
Oct 20, 2009
Messages
21,439
Location
Northern Utah
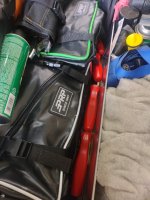
Saturday morning after moving some things around in the Jeep's toolbox to make room for the pry bars, I thought I would install my new rear glass struts and swap air filters around as well as give it a good once over.

I noticed in September when we were in Yellowstone NP, that when I was getting into the rear of the Jeep that my glass had to be assisted up the last few inches and over the past several months it was slowly getting worse. Last month when the wife and I were at the Swell off-roading, I really noticed how they had degraded. I have been less than impressed by the last few I had purchased from my local NAPA, and the Suspa branded ones that supply many of the OEM's were almost the same price as those from my local Mopar dealership. The OEM's were only about $10 more each than the aftermarket ones from NAPA, so I just bit the bullet and ordered them from my local dealership. They arrived last week but I didn't have time to install them. Saturday morning I thought I would address a couple of items on the Jeep.
sat3.jpg

OEM struts installed. Now the glass opens up smoothly and fully. Hopefully, I'll get another 15+ years out of these. ;)
sat5.jpg

Rear of the Jeep cleaned up and give a wipe down with Power House and damp towel.
sat6.jpg


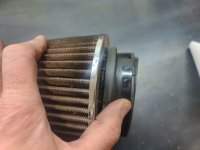
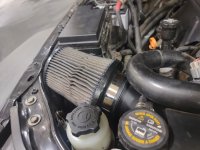
Then it was time to move on to the air cleaner situation. If you remember, last year during our annual Ouray, CO trip, I ran into an issue with my oil pressure sending unit wiring due to high underhood heat during a couple of high mountain pass climbs. I also noticed that my K&N air filter was coming away from the rubber mounting flange. Upon arriving home, I applied some 3M Weatherstrip Adhesive to glue the rubber flange to the chrome base of the air filter and for the most part it has worked well. However, when underhood heat becomes elevated I have noticed the air filter will start to "droop" away from the rubber mounting flange a bit. I also noticed this in September while we were in Central Wyoming playing in the Big Horn Mountains. During that trip I installed my old Volant air filter that had a one piece base and flange which seemed to solve the problem and ensured me I was properly protecting my engine. It never came apart enough to let dirt in, but it has been in the back of my mind ever since. Upon arriving home, I tried another round of adhesion, but got same results. Saturday I removed the old K&N filter, here you can see the glue letting go again. The other thing I don't care for about this particular filter is that it has a 4.5" opening and then uses an inner spacer to make up the size difference.
sat9.jpg

I reinstalled the Volant filter again. Afterwards, I did some more research and found a direct cross from the Volant that I know works, to a K&N that is a one-piece design just like the Volant, so it should provide the same results. Plus, I already have a couple of Outerwears to fit the K&N.
sat7.jpg

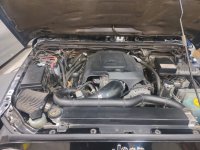
Gave the engine bay a quick blast of compressed air and checked fluids.
sat8.jpg

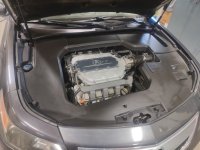
With the Jeep parked back in the house garage, I grabbed the wife's car which was filthy from the multiple storms we have had over the past couple of weeks. I wanted to give it a once over, check fluids, tires, give it a vacuum job and wipe the interior down. While checking fluids I noticed how dirtly the underhood area was so I gave it a good cleaning before heading to the car wash.
sat1.jpg

That looks better.
sat2.jpg

Thanks for looking.
 
OP
Z

zmotorsports

ALLIANCE MEMBER
Joined
Oct 20, 2009
Messages
21,439
Location
Northern Utah
With both the Jeep parked back in the house garage and now the wife's Acura after giving it a thorough wash job, I thought I would show the truck a little love.

sat15.jpg

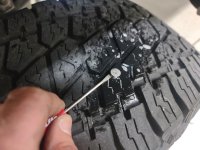
I pulled the truck into the shop and checked tire pressures as well as ran the vacuum through the interior. While checking tire pressures I noticed this in the right rear tire. The tire pressure was the same as the driver's side, so I wasn't sure if it had fully penetrated the tire, but grabbed my bottle of soapy water to check it out. No bubbles, so I pried it out a bit and still no bubbles.
sat11.jpg

Whew, it was just a short little guy,,,and no bubbles. :D
sat12.jpg

After vacuuming the interior and giving the dash a wipe down, I checked fluids and gave the underhood of the truck a little detail with you know what......
sat13.jpg

Still looking pretty decent for a 20-year old truck.
sat14.jpg


After the wife returned from some errands it was getting later in the afternoon and we thought we'd go for a drive and grab some dinner. We ended up about 70-miles from home in the big metropolis of Kamas, UT to eat at one of our favorite little diners. Their Saturday night specials are worth the hour or so drive.
sat16.jpg


Thanks for looking.
 

LXCam

ALLIANCE MEMBER
Joined
Apr 23, 2013
Messages
19,172
Location
AZ
I despise those poor connection issues, especially when you don’t identify exactly where the problem exists. I’ve had two real pita ones over the last three weeks that took a bit to isolate the area it existed in then dial it down to the exact location (thankfully no gray area here).
 
OP
Z

zmotorsports

ALLIANCE MEMBER
Joined
Oct 20, 2009
Messages
21,439
Location
Northern Utah
I despise those poor connection issues, especially when you don’t identify exactly where the problem exists. I’ve had two real pita ones over the last three weeks that took a bit to isolate the area it existed in then dial it down to the exact location (thankfully no gray area here).

I agree Cam. Over the past couple of years, I have noticed a trend in my shop and wonder if it is the same with others. I have seen people throw parts at various cars and still have issues. However, when they finally come into my shop, I have discovered that about 80% of the time it has been either a wire or connection issue. Those are pretty astounding numbers when you think about it. I can't believe the amount of parts I've been seeing thrown at vehicles lately, up to and including ECM's, but the end result has turned out to be wiring or connection issues requiring no actual parts.

That is why I explained to this guy that I would bet he has a wiring or connection issue based on the fact that the intake leak was "a" problem, just not "the" problem. But upon leaving my shop running perfectly with no air leaks I thought it was fixed following my 4 C's (Condition, Cause, Correction, Confirm) and it was confirmed I had no more air leaks, no DTC's and was running perfectly, I had no reason to think there was another issue. During a cold snap shortly after is when the problem arose again and just by the way he was explaining the issue, it sounded electrical, ESPECIALLY when I had him unplug the MAF sensor and it ran better.

Anymore when I go at a vehicle, I go at it with the assumption that I am going to find an electrical connection or wiring problem and I will be right 8 out of 10 times.
 

LXCam

ALLIANCE MEMBER
Joined
Apr 23, 2013
Messages
19,172
Location
AZ
Mike I have no doubt you had compounding issues. As you know anything downstream of a MAF screws the pooch, it’s not forgiving like a speed density system.

I’m not much on throwing parts at it either but I was recently guilty of it. One of the problems was a master intercom station they were having to reboot every day. It’s a POE device btw.

So even though I’ve never seen one of these **** the bed I configured a replacement and ran up to flagstaff (ya know, that’s just around the corner from phoenix 🙄) and swamped it out, tested it for a bit, all seemed fine and dandy and I bailed.

Four days later I get the call 🤬. So back up I go to test the cable and the POE switch output. Unfortunately I couldn’t bring our cable certifier as it’s in daily use on a major project, that would have greatly reduced the troubleshooting.

On a basic tester I was getting an odd reading on a pair, those values would come and go. Obviously a bad connection but where in a line that what I was told by my installer only had two field connections over a 200ft run. Ya well there was four and sure as **** it was the last termination I checked.

The other was a plc control input for secure status of an entire dorm. We just kicked off a controls retrofit of the facility and a year ago during our prefunctionality testing identified the condition. Now that we’re ready to shred the joint it was important to fix it first.

I told one of my guys to go check all the circuits and power supplies and see if something died which he found not to be the case. So now I got to look.

These remote I/O panels are in a 4’w x 2’h enclosure up above a walkway ceiling on a mezz level within the housing unit inside a 3ft high, 4ft deep plenum.,….. oh fn joy 🤬🤬

What I found was at first baffling. They used one common to feed both the door position switches and the intercom buttons, about a hundred jumpers. If I tested from the dc power supply to one end I got positive polarity but at the other end nothing but swamping polarity would indicate voltage. wtf??

Normally if you have a broken connection you’d have no potential like any other series connected circuit. What I found was some ***** at some point jumpered the positive side to the positive portion of the circuit and jumpered the negative side to its same the same negative side. So both sides had no return path as they were the same positive or negative side.

After removing those jumpers (btw, we’re talking a few hundred wires in a really small space) I was able to find the break in the jumpers which was nothing more than a loose connection from 15yrs ago when some other firm retrofitted the controls.

Meanwhile during all this I’m showing a ten year controls veteran all the steps as he just couldn’t follow what I was showing him. Thank gawd he was honest with me and at the end said I don’t understand how you found it. I tried explaining it again bent over in that space and by this time seriously cramping up and my back killing me. Once down i literally had to draw him a schematic of the circuit and explain to him why I got the readings I did and how I isolated the problem.


lol, sorry about all that Mike and everyone else. But I feel better getting that off my chest 🤣
 
Last edited:
To avoid these ads, REGISTER NOW!

ntsqd

Well-known member
Joined
Jan 22, 2005
Messages
987
Location
Lower left coast
Early ACVW EFI was notorious for loosing grounds (mostly due to corrosion) and then not running or running poorly. ACVW aficionados referred to it as "Fuel Infection." Justifiably so, I've thought. Why is it that the Germans (in particular) use such fine stranded wiring? It corrodes like nothing else I've encountered.

An Auto Repair instructor that I had too many years ago to mention really pushed hard on "ignore the complexity of the system, your problem will be something simple."
Every time I run up against a problem in a complex system I'm reminded of that. No matter how complex the problem seems to be, the failure is something simple.
 
OP
Z

zmotorsports

ALLIANCE MEMBER
Joined
Oct 20, 2009
Messages
21,439
Location
Northern Utah
Early ACVW EFI was notorious for loosing grounds (mostly due to corrosion) and then not running or running poorly. ACVW aficionados referred to it as "Fuel Infection." Justifiably so, I've thought. Why is it that the Germans (in particular) use such fine stranded wiring? It corrodes like nothing else I've encountered.

An Auto Repair instructor that I had too many years ago to mention really pushed hard on "ignore the complexity of the system, your problem will be something simple."
Every time I run up against a problem in a complex system I'm reminded of that. No matter how complex the problem seems to be, the failure is something simple.

I went to a seminar put on by my local NAPA nearly 20 years ago for engine performance systems and the instructor said almost the same thing Thom, no matter how complex the system, the signals still need to get from point A to point B and that is usually where the problem will lie. I didn't "want" to think it was as simple as that all those years ago, however, as time has gone by my findings have directly supported his teachings.

I also heard many years ago how good of engineers the Germans were, EXCEPT, when it came to electronics. I was told that is why they like to drink warm beer, because they can't seem to figure out how to keep their refrigerators running..... :ROFLMAO: Not sure why that's stuck with me all these years, but I still smile when I think about it.
 

madison069

Well-known member
Joined
Nov 5, 2010
Messages
4,194
Location
Monroeville, PA
I went to a seminar put on by my local NAPA nearly 20 years ago for engine performance systems and the instructor said almost the same thing Thom, no matter how complex the system, the signals still need to get from point A to point B and that is usually where the problem will lie. I didn't "want" to think it was as simple as that all those years ago, however, as time has gone by my findings have directly supported his teachings.

I also heard many years ago how good of engineers the Germans were, EXCEPT, when it came to electronics. I was told that is why they like to drink warm beer, because they can't seem to figure out how to keep their refrigerators running..... :ROFLMAO: Not sure why that's stuck with me all these years, but I still smile when I think about it.
having worked with German engineers, I'd like to think they were good with their electronic due to the environment that the tools was subjected to, but when we were told to apply kapton tape to the board to reduce vibration related damages, I started questioning their designs.
 

Finallygotit

ALLIANCE MEMBER
Joined
Jul 6, 2013
Messages
4,091
Location
Tucson, AZ
having worked with German engineers, I'd like to think they were good with their electronic due to the environment that the tools was subjected to, but when we were told to apply kapton tape to the board to reduce vibration related damages, I started questioning their designs.
Why does it seem that the Germans have this love affair with Kapton tape. I used to work for a German multinational and their extensive use of Kapton tape absolutely floored me.

:beer:
 

madison069

Well-known member
Joined
Nov 5, 2010
Messages
4,194
Location
Monroeville, PA
Why does it seem that the Germans have this love affair with Kapton tape. I used to work for a German multinational and their extensive use of Kapton tape absolutely floored me.

:beer:
I 100% know what you’re talking about. Kapton tape was their version of duct tape for Americans.

I know the stuff can handle high temp and vibration as this was being applied in directional drilling tools, but if there was an issue related to vibrations it was Kapton tape to the rescue!

Granted I was using the stuff when masking stuff off for powder coating. It withstood the temperature and didn’t leave a residue when removed.

I’ve written several guidelines on how to apply Kapton tape to the tools we worked on at the company. Running joke was there are two things we were to use to fix anything and it was Kapton Tape if it wasn’t supposed to move and a blue grease that was the same shade as a Smurf cartoon character created just for the company we nicked name “Smurf ****” if it was supposed to move!

They were a funny bunch of engineers, in German the word *** didn’t mean anything but they created the acronym A.S.S. Which stood for Auto Steering System. I was an A.S.S. Expert in the industry due to my experience with the tool. I asked the designer if they did that on purpose and they just shrug their shoulder as they were wide mouth grinning. 😂🤣
 
Last edited:
OP
Z

zmotorsports

ALLIANCE MEMBER
Joined
Oct 20, 2009
Messages
21,439
Location
Northern Utah
I haven't posted much this week as I've been struggling a bit. The wife is away for work this week and I am lost without her. I don't know what I would do without her and this week each year gives me a taste of that and I don't like it, not one bit.

I've also been thinking a lot about my good friend and mentor who passed away 9-years ago this week. I've missed him and missed our bench racing sessions where we'd discuss a lot of topics. He was a great critical thinker, and I always learned from him, no matter the subject.

I didn't schedule any side work this week and to occupy my time this week I have been working on the coach a little. I wasn't going to post this, however, after giving it some thought I feel that maybe someone else with an RV might experience something similar and I wanted to give a place to look.

Let me preface by stating that while driving the past year or so on occasion we've gotten a sewer smell inside the coach, but ONLY when driving and only with partial black tank occupancy. The wife is the first to smell it, but her sniffer is much more in tune than mine. That being said, when it has occurred, I have checked to ensure that there is water in the bowl of the toilet and therefore have that vapor barrier in place. No issues with the bowl holding water so that's not it. I thought maybe a plugged vent, so I removed the vent cap earlier this year and poured some water down it to ensure there were no blockages, nothing noted. I even went through and replaced the AAC (Air Admittance Valves) for the various sinks thinking maybe it was actually the gray tank and not the black, but that was not it either and I'm pretty confident it is the black tank, not the gray producing the odor. Where it only occurs when driving I also figured it must be something being drawn into the interior as there is a negative pressure while driving.

With checking so many things and coming up empty handed most of the year I figured the last remaining piece of the puzzle was the floor gasket at the flange, being 24-years old maybe it has gotten hard and brittle or deteriorated to the point of allowing gasses to bypass, which is really the only thing I could think of because it would have to be something below the water in the bowl. I searched and found a new OEM floor gasket from Dometic as well as an OEM bowl gasket set since I will be in there anyways and it is the same age. We have the porcelain electronic Dometic toilet in our coach so parts are not quite as easy to locate being discontinued for many years now and not a very popular toilet except on some upper tier coaches. After having all of the parts I decided to pull the toilet from the floor of the coach and check it out, especially with the wife not home.

Here is a before picture as I just started removing the cover for the electronics on the toilet and the covers along the floor that cover the hoses and wiring. The box down along the floor is skewed a bit because I have already removed the screws and started removing them before I took the picture.
bath1.jpg

Back cover removed and electronic control board and wiring disconnected and lowered from the back so the toilet could be removed.
bath2.jpg

This particular Dometic porcelain toilet is all one piece and must be removed completely to expose the working below. I was able to source the parts from a yacht company in which these toilets were also heavily used in the marine industry at some point. I taped and marked the toilet's position before removing to ensure it goes back in exactly the same location.
bath3.jpg

Unfortunately, when I removed the base of the toilet which contained the mechanical components I saw nothing wrong with the base gasket at the floor between the toilet and the flange. Well ****, I was fully expecting to see a failed gasket as that is the only logical place the odor could be coming from as it has to be something above the tank, but below the water in the bowl. :unsure: Now I'm stumped and upset with myself that I tackled all of this work and didn't find anything wrong.

I procrastinated for a night while I was kicking myself and then on Tuesday night I thought I would use my smoke machine to see if anything jumped out at me, since I was this deep in I really didn't want to just slap it back together without finding something awry.

I masked the top vent.
bath4.jpg

Then masked the floor flange and stuffed the hose from my smoke machine through the bathroom window and poked a hole through the masking tape and turned the machine on.
bath5.jpg

Within less than a minute I had smoke pouring out of the holding tank compartment. Deeper investigation showed that it appeared to be coming down from the flange, so I went inside the coach to see if I could note the origin. There was a little smoke in the bathroom, but it was coming up from around the flange and definitely not a leak in the masking tape. I went back in and out multiple times trying to make sense of where the smoke was originating. Down below it appeared to be coming from the upper portion of the flange and being directed straight down into the holding tank bay, but from the top the smoke was coming from the gaps around the flange and where the hoses passed through and run along the floor from the compartment below.

I turned the smoke machine off and scratched my head for a moment. I now knew the odor was coming from below the flange and being drawn up into the bathroom through voids in the floor and hose routing areas so that part was now making sense. I was also glad I at least found something pointing to the odor, but still scratching my head as to where.....:headscrat
bath6.jpg


I thought I should pull the flange and my best guess was that the thread sealant had possibly failed where the flange threaded onto the 3" PVC going into the black tank. The smoke was coming directly from that flange area so that was really my only thought as to the source, but at least I had the smoke verifying there was a leak, somewhere.

My next move would be to remove the 8 screws securing the floor flange to the subfloor and then unthread and remove the flange itself to see if I could detect a failure of the thread adhesive, but it was quite tight, very tight actually, to the point I was fearful of breaking the 3" PVC off coming out of the black tank and then my problems would really begin. I grabbed my two large pairs of slip-joint pliers and on opposing sides began slowly working back and forth trying to free the thread adhesive and allow me to remove the flange. Finally it started to unthread little by little and then I could turn it by hand. Unfortunately, I could see some teeth marks on the areas of the flange from the slip-joint pliers and I was concerned I may have to replace it before reinstalling it.
bath7.jpg

Once the flange was removed I could see a trail of liquid and wondered how it could be leaking. Well, this big crack at the underside of the flange may be the problem. :dunno: Yep, therein lies the problem. The flange itself is cracked nearly a third of the way around. At least NOW I know the exact origin of the problem and it can be easily abated.
bath8.jpg

I picked up a new flange on the way home from work yesterday and thinking about not wanting to damage the OD of the flange with slip-joint pliers upon installation, I thought I would hurry and build a tool to thread the flange onto the 3" PVC.
bath9.jpg


Hope I didn't gross anyone out, but this is a fact of life owning an RV. There's always some **** to deal with......:bounce:


Now I can reassemble everything with confidence that I found the problem. The 4 C's come through again. We identified we had an odor leak getting into the interior, I made a mental list of possible causes or origins of the odor and once the smoke test identified the exact area to look, I found the failed component and now just have to install the new one, being the third "C", Correction, and once reassembled I will perform the fourth "C" by Confirming the repair by performing another smoke test to confirm the leak has been corrected.


Thanks for looking.
 

rd65

Well-known member
Joined
Sep 29, 2017
Messages
2,802
Location
Granite Falls, WA
Looks like you got lucky on the flange removal with it not breaking off the rest of the way. Is something flexing enough to cause the cracking? Proof again that with the proper tools and mindset you dont have to just bow to swapping parts in hopes of correcting a problem.
 

LXCam

ALLIANCE MEMBER
Joined
Apr 23, 2013
Messages
19,172
Location
AZ
Well that ***** Mike but good thing you found it before it busted all the way off. Just a shame replacing it is such a pain in the.........:p123


But I must say I'm disappointed. I (we) have always held you in such high regard, its a real let down to find out your **** does stink after all. :spit:
 

ntsqd

Well-known member
Joined
Jan 22, 2005
Messages
987
Location
Lower left coast
I started to click on the laughing emoji, but I thought some might interpret that incorrectly.

The timing is strange, for the last couple of weeks my late mentor at the vintage racing & touring car business has been popping in and out of my hear too.

I thought that I'd ask this in a more general location, but given the frequent topic of various fluids I'm thinking this thread is a pretty good place to start.
In my days working on vintage touring & racing cars we used CRL's aerosol window cleaner for cleaning the cars of minor grime. Stuff like rubber smears on the racing car's paint, small oil leaks on the belly pan, etc. Occasionally we'd even use it on the glass if the car had any. Never on any polymer windows, those got lemon Pledge.

Since then I've been buying the CRL cleaner by the case. The last case that I bought clearly is a different formula. Their product is made by Sprayaway, but for whatever reason the CRL labeled stuff has always worked better than the Sprayaway labeled stuff. Until this last case. It's nearly useless. I gave it away. Since then I've tried several different brands and they all seem to be equally bad. I'm left wondering if this is a KA thing or a nationwide thing? Anyone else noticed a sudden reduction in aerosol glass cleaner effectiveness?
 

JDPULLER

Member
Joined
Jul 1, 2011
Messages
14
Location
Le Sueur MN
Mike I have also had the sewer gas smell and it seams to be random. I bleached my tanks and it seamed to be much better but I did come back a few months later. I think I will have to get a smoke machine that seams to be a great idea for finding a leak like this. Thanks for sharing.
 
OP
Z

zmotorsports

ALLIANCE MEMBER
Joined
Oct 20, 2009
Messages
21,439
Location
Northern Utah
Looks like you got lucky on the flange removal with it not breaking off the rest of the way. Is something flexing enough to cause the cracking? Proof again that with the proper tools and mindset you dont have to just bow to swapping parts in hopes of correcting a problem.

Yeah, I was worried something would break while trying to unthread the flange. That was before I saw the crack to the underside of the flange. When I saw that I counted my lucky stars it didn't break off.

Mike I have also had the sewer gas smell and it seams to be random. I bleached my tanks and it seamed to be much better but I did come back a few months later. I think I will have to get a smoke machine that seams to be a great idea for finding a leak like this. Thanks for sharing.

Over the course of the last year I have read probably every thread on the Monacoers.org forum, irv2.com forum and rvforum.net and everyone just keeps repeating the exact same answers; it's your vent on the roof or the water in the bowl is evaporating. Some tout the need to replace the AAC valves under the sinks, which I had already ruled out, but it's just people repeating everything they have heard, nothing specific or first hand. Forums can be frustrating because things just get repeated by people who want to sound smart, but so very few actually "get their hands dirty" and figure out the actual problem.

I've thought about posting my finding on those forums, but I'm sure I'll just get beat up and people telling me I'm crazy and that's not the problem. It will be like the air spring replacement all over again, so I'll just keep it to myself and my fellow Garage Journal peeps, all five of them......:bounce:


Good find Mike! Do you think it cracked from the movement and flex of the vehicle over the years?

Scott, I'm not sure it's from actual movement because the tanks are pretty well mounted where there is not much movement at all and the flange is screwed directly to the floor of the coach. Also, our coach being of the semi-monocoque construction, there is not any movement in the floors and walls as there are on say a coach build using the hung wall design. I have no proof, but it could have been cracked during installation for all I know and being such a short piece of pipe, from the flange to the top of the black tank is only about 8 inches, it could be that there just isn't enough space for any movement. :headscrat It's hard to say, but I will be cognitive of the position and how tight I tighten it upon assembly.


The only tig welded RV ******* wrench on planet Earth!

You know the old saying Ryan, if the only tool you have is a hammer, everything is a nail. Well, I've got the TIG welder, so why not? Plus I haven't welded in a few weeks and needed the practice. ;)
 
To avoid these ads, REGISTER NOW!
Top Bottom