To avoid these ads, REGISTER NOW!

Show off your sheet metal fab projects

Jim Stabe

Well-known member
Joined
Feb 18, 2009
Messages
801
Location
San Diego, Ca
I'll start

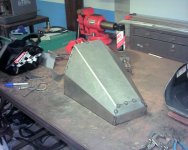
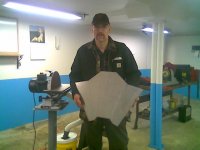
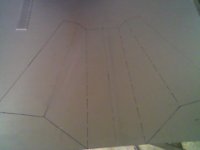
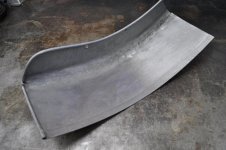
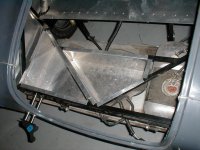
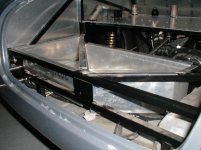
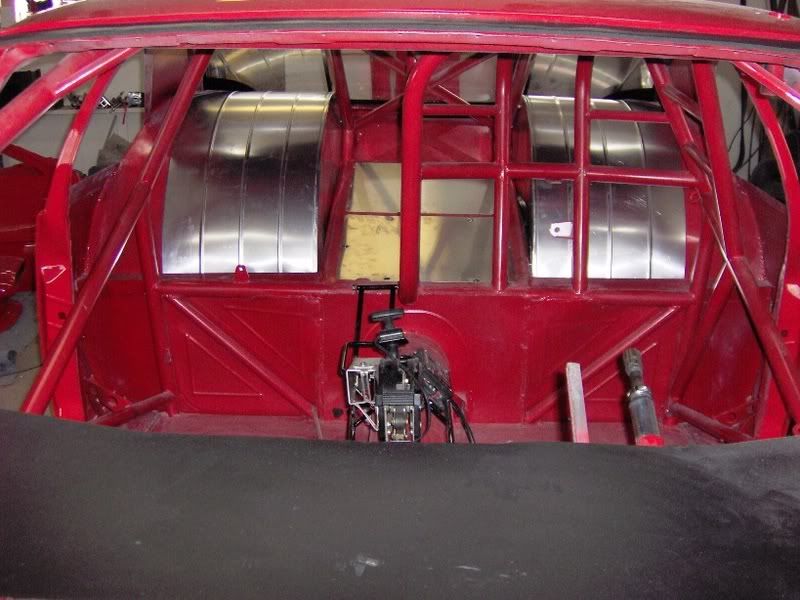
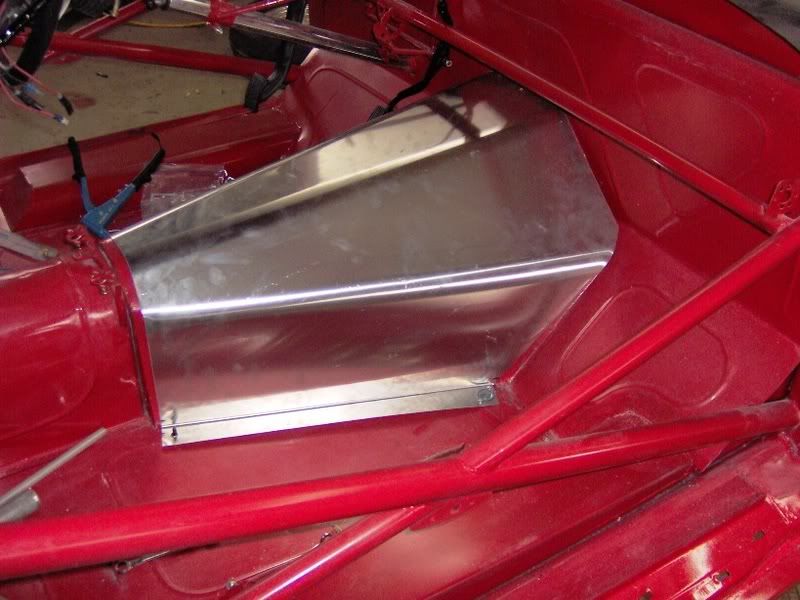
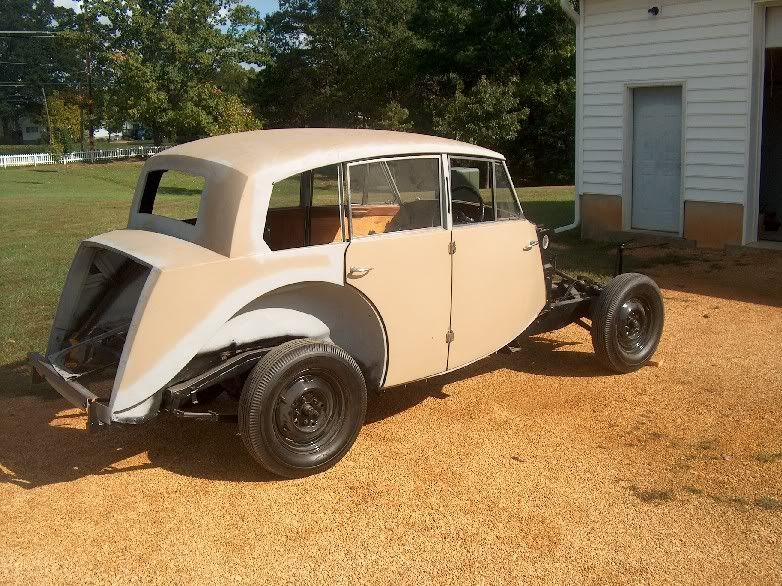
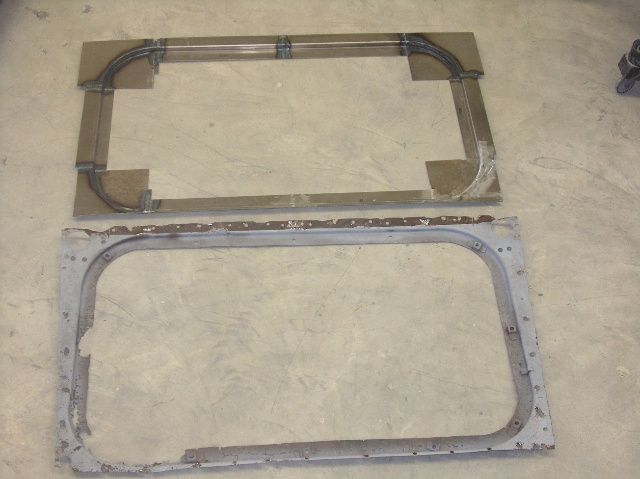
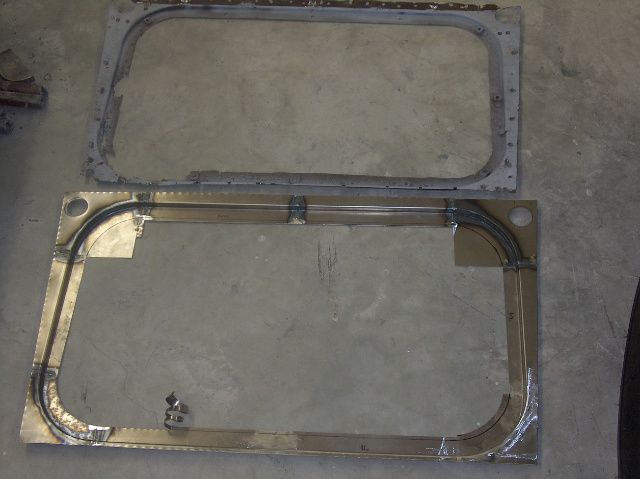
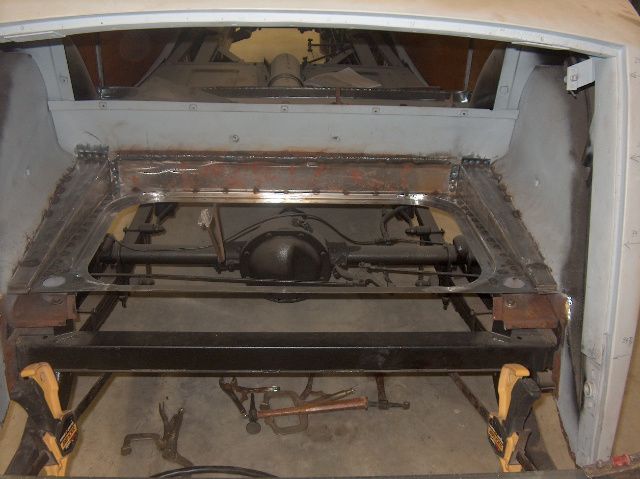
I had to make some flared rear fenders for my MGB project, the 315/35/17 tires didn't quite fit in the original space. I had to make inner fenders (tubs) as well as the external sheetmetal.

Fender 039.jpg

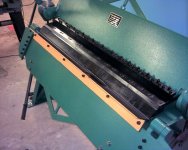
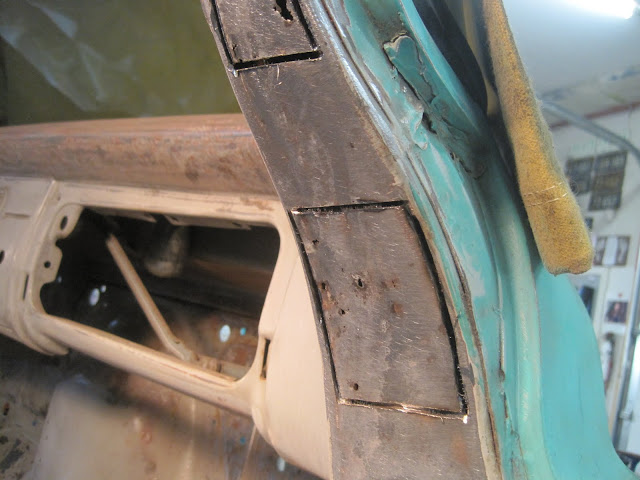
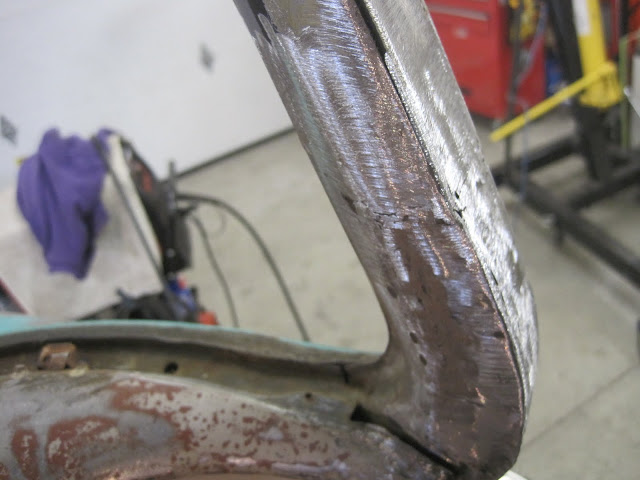
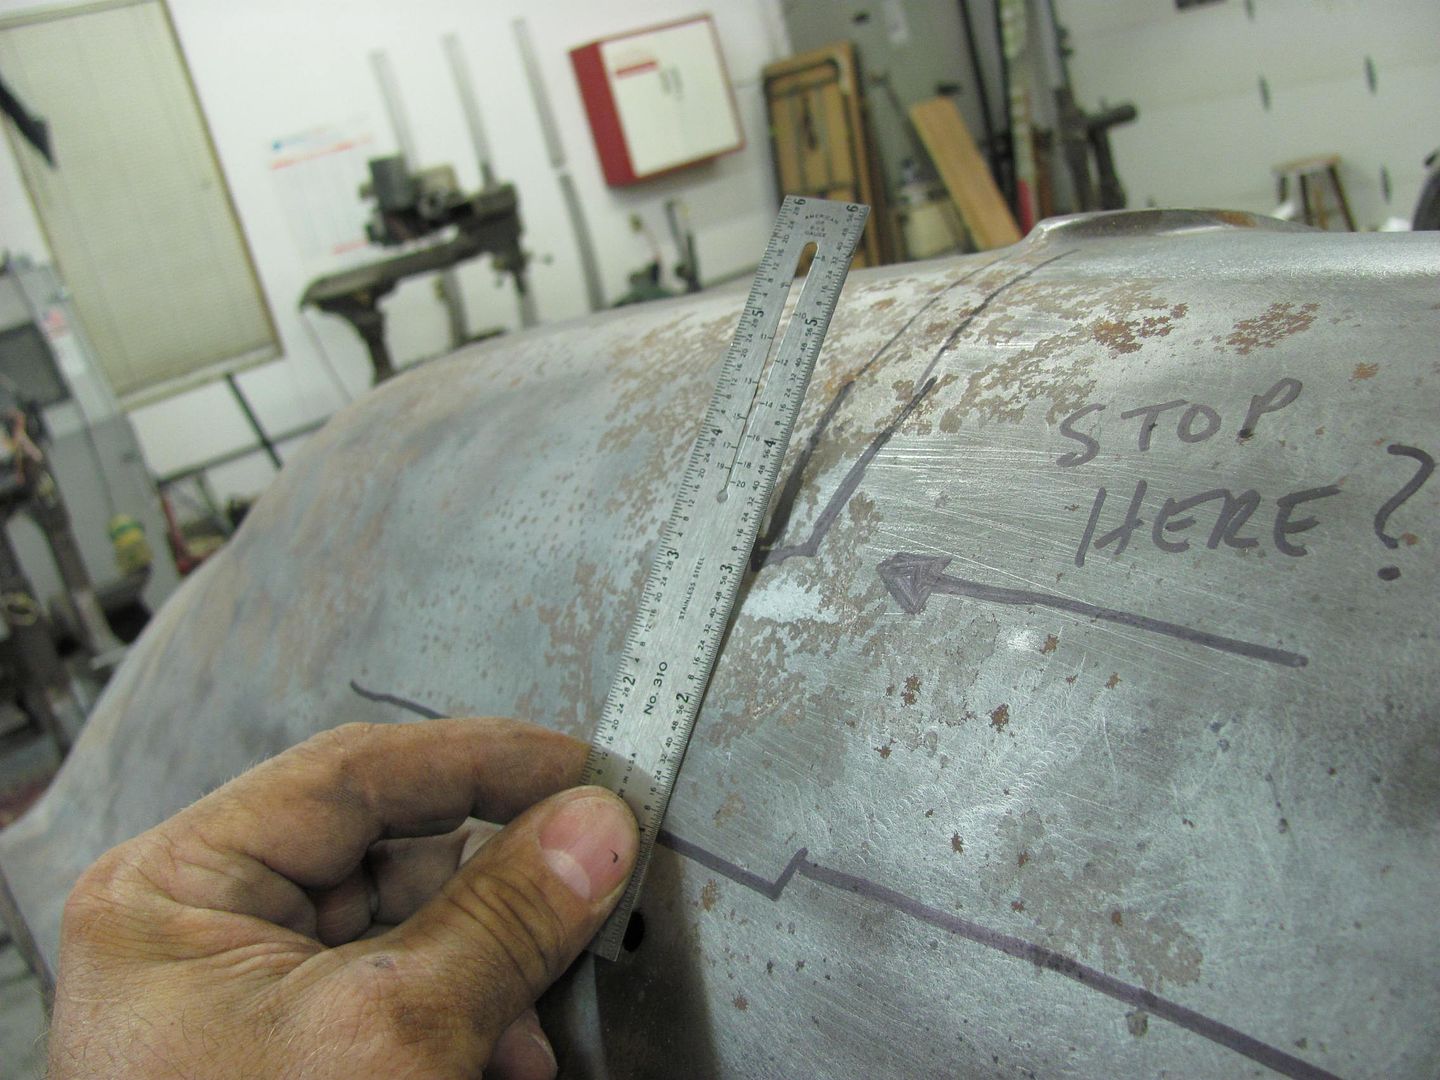
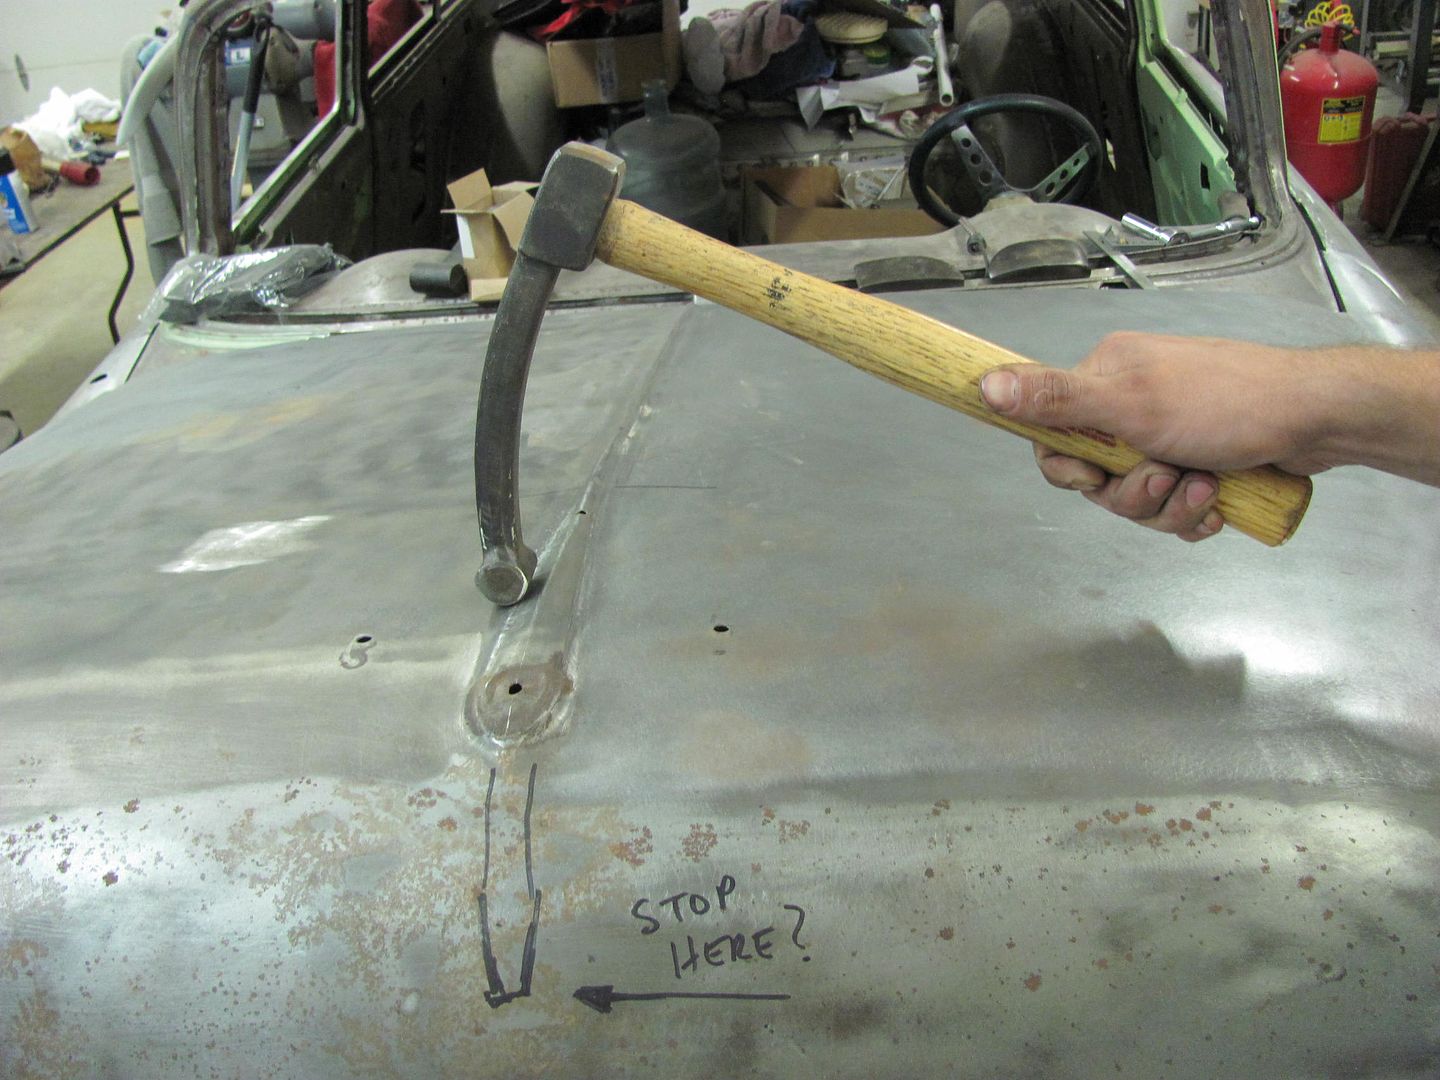
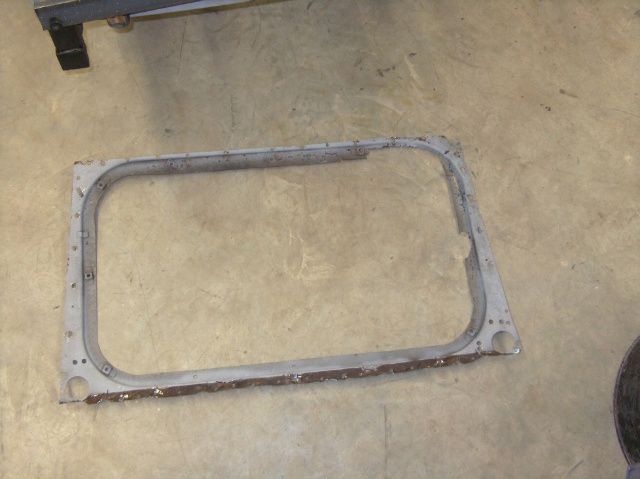
The top portion of the outer fender is made up of 3 pieces formed on the English wheel. The bend line was extended back from the door using a laser line like what you use to hang pictures straight.

Fender 003.jpg

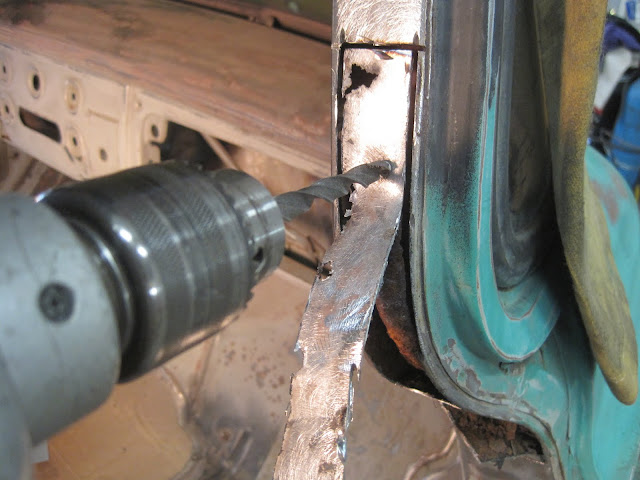
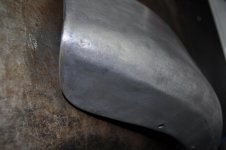
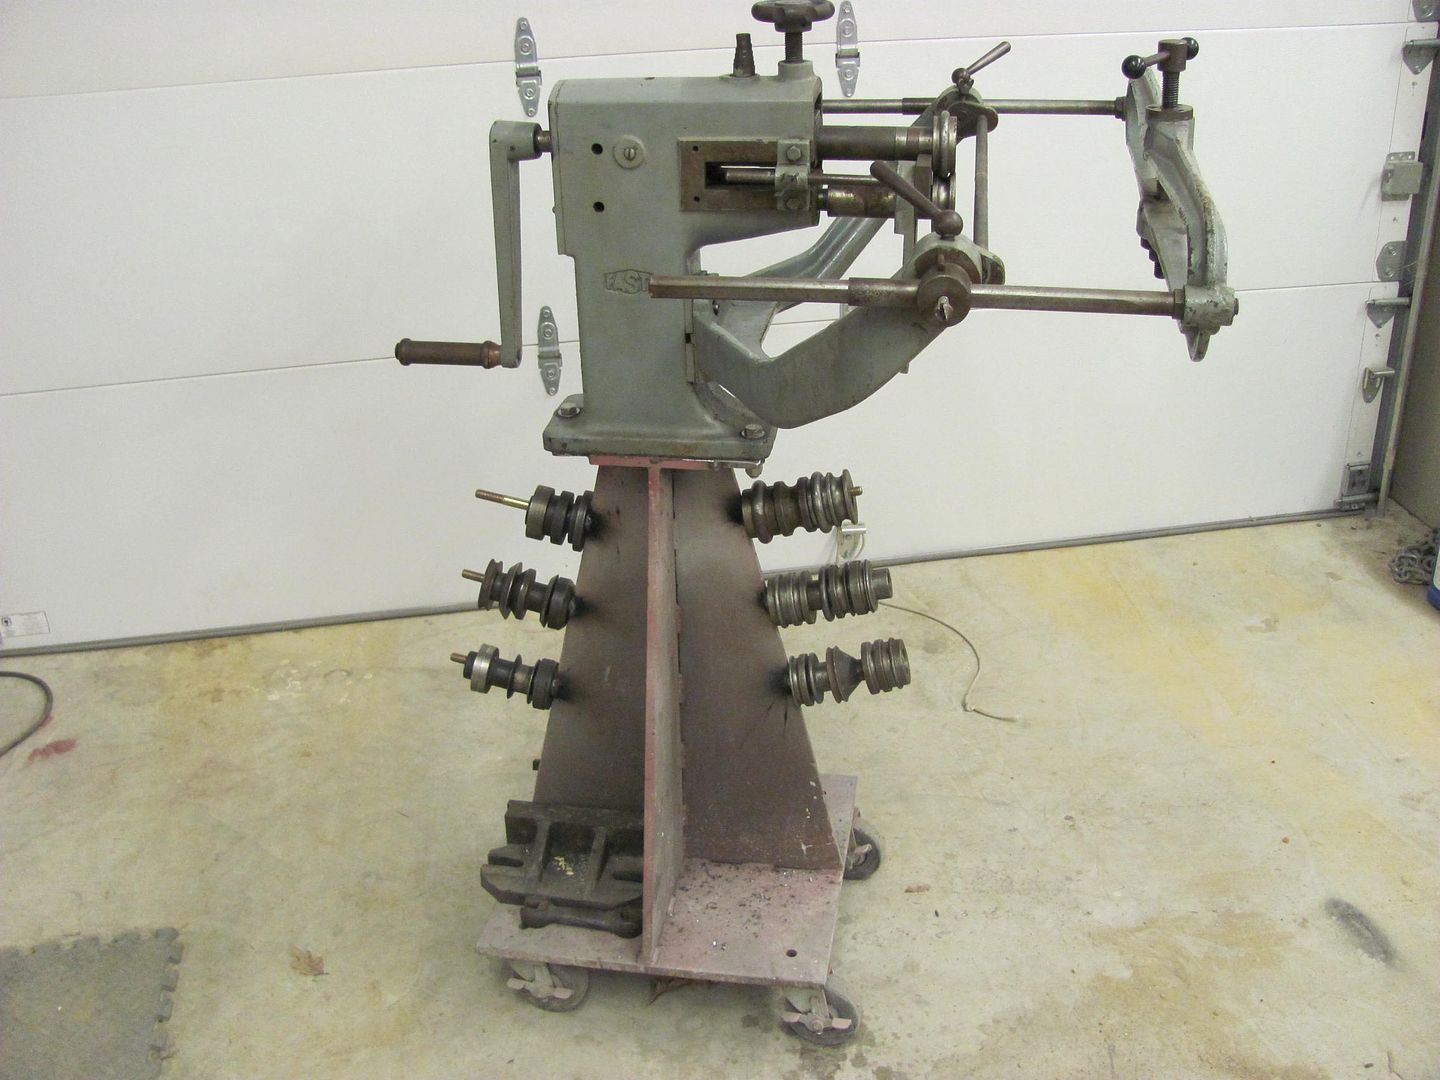
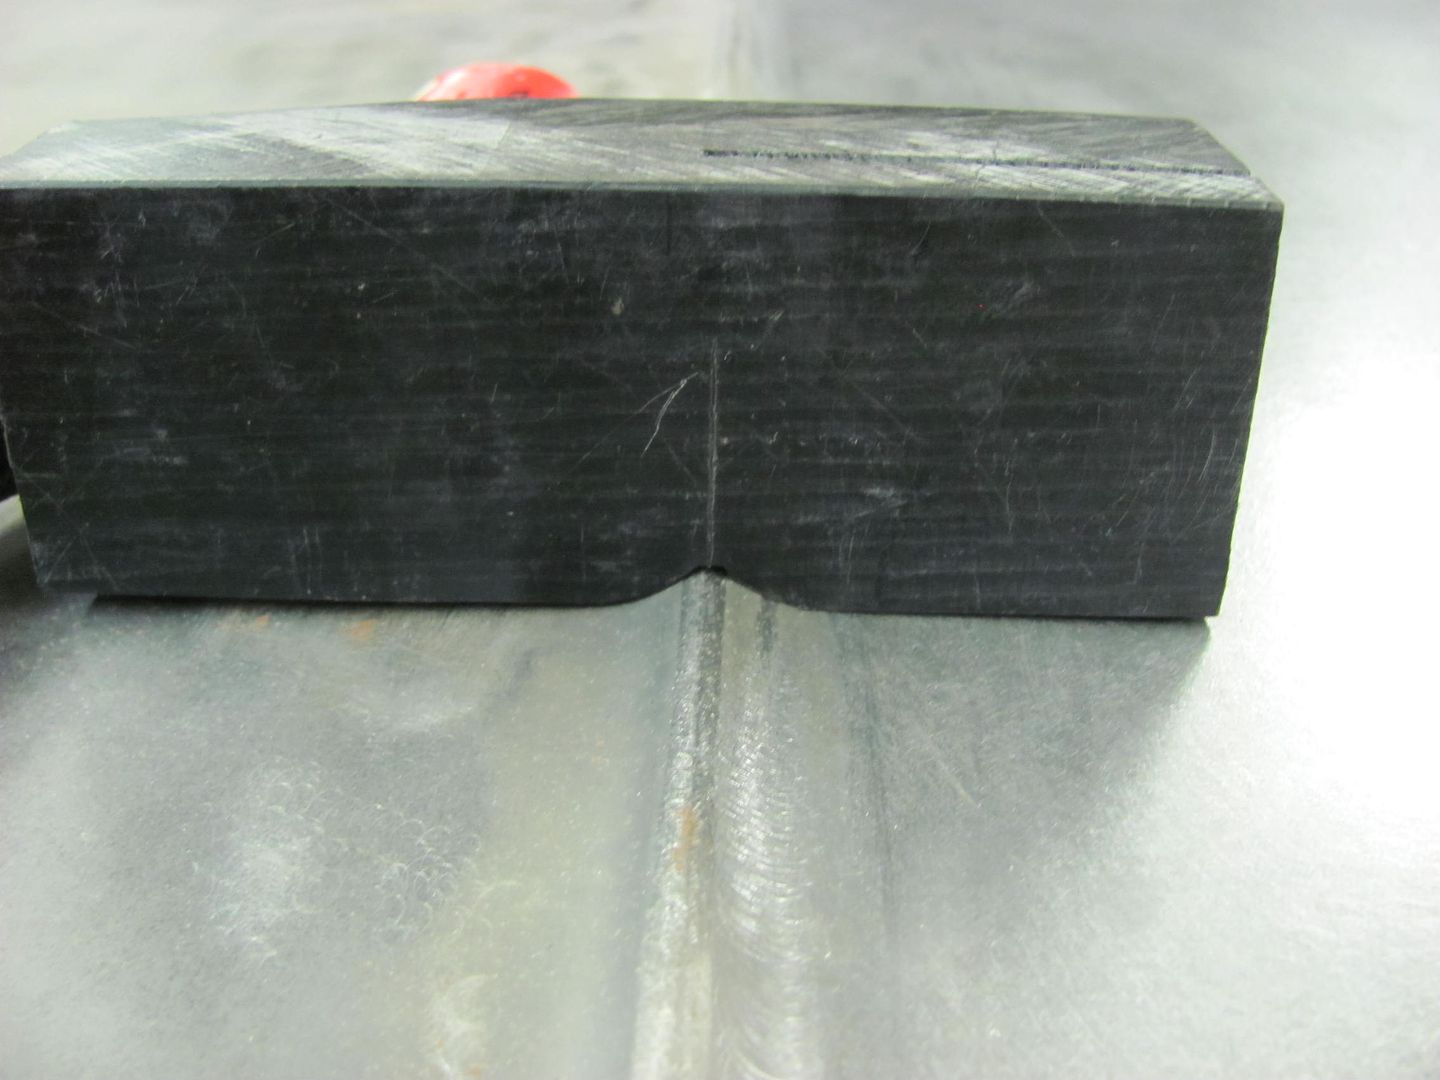
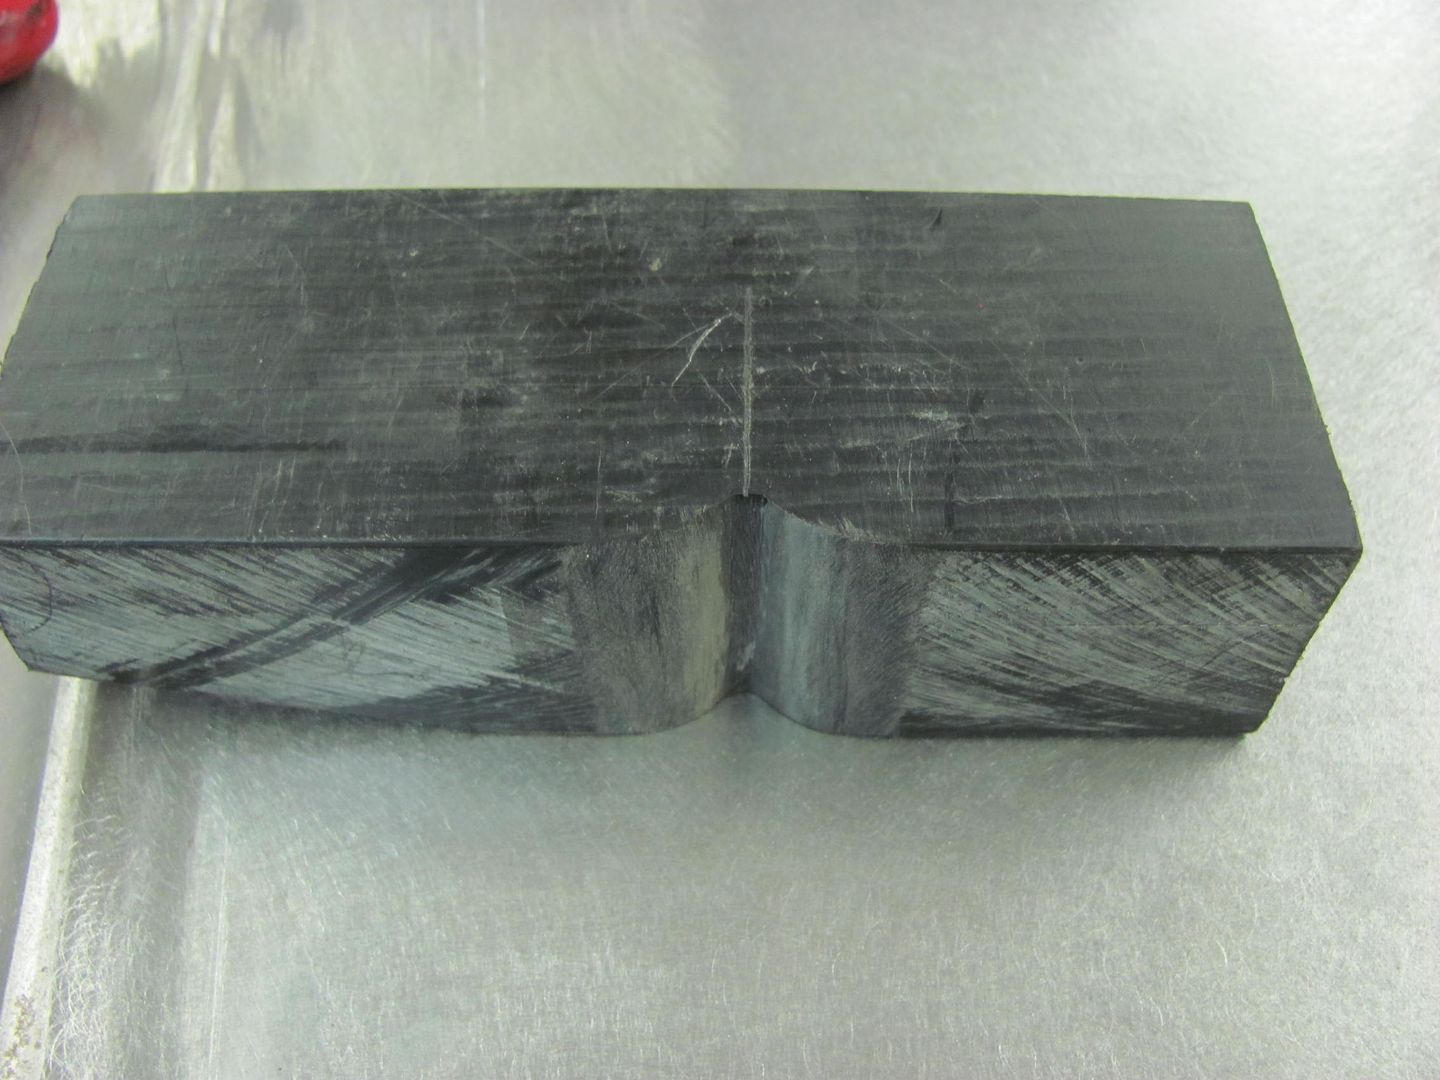
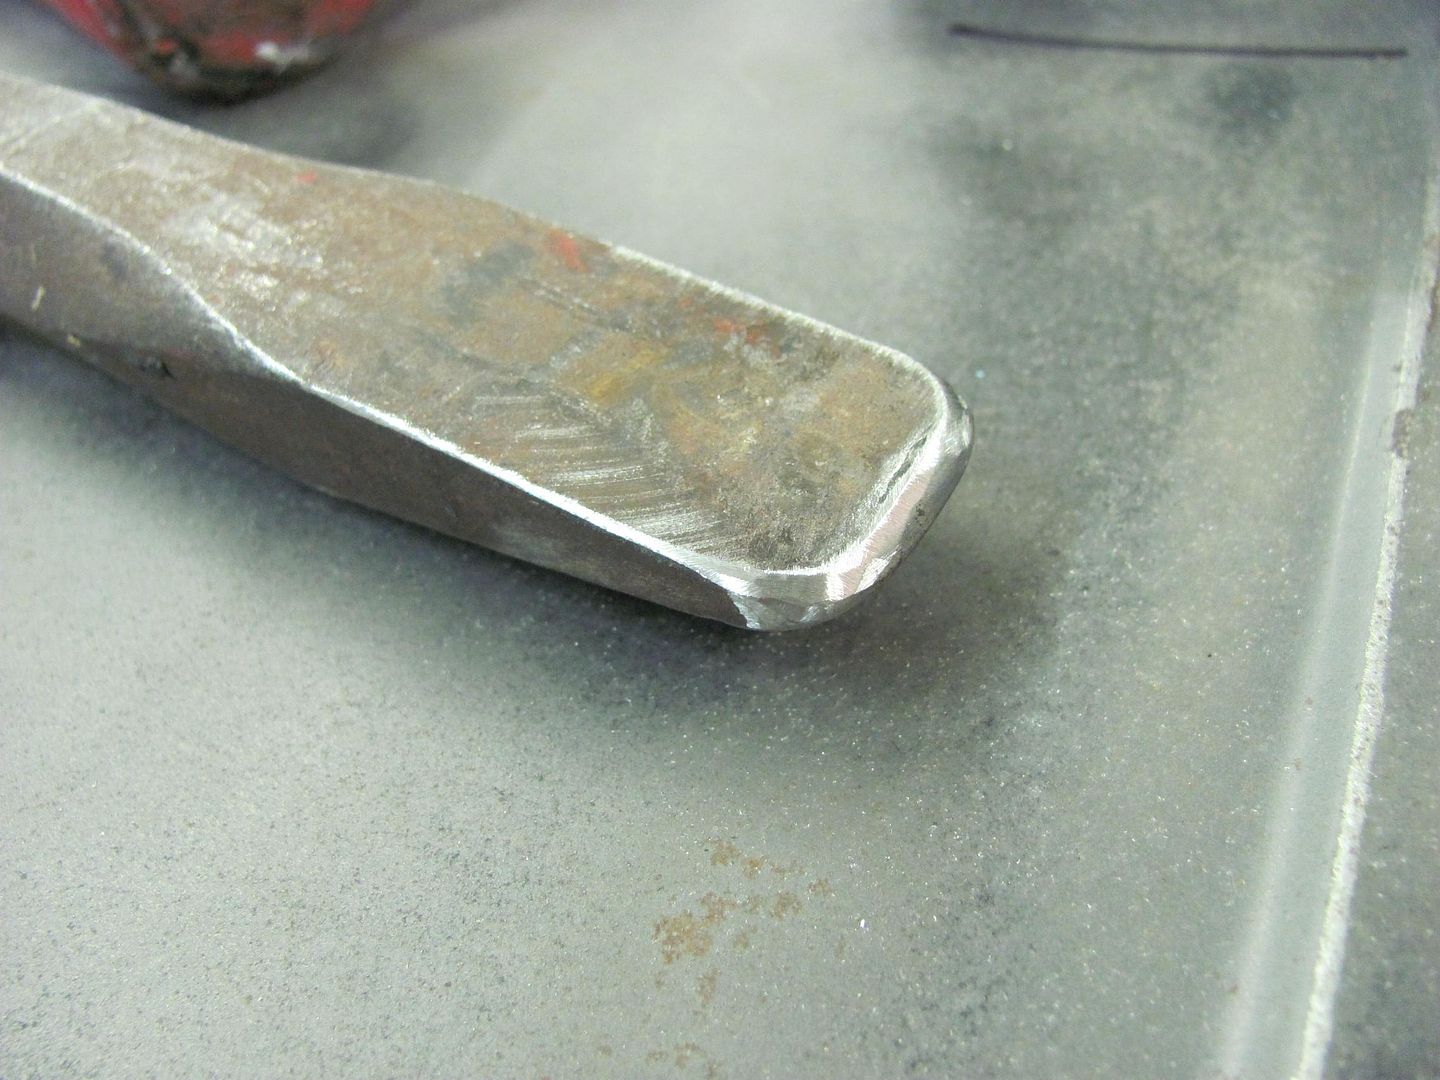
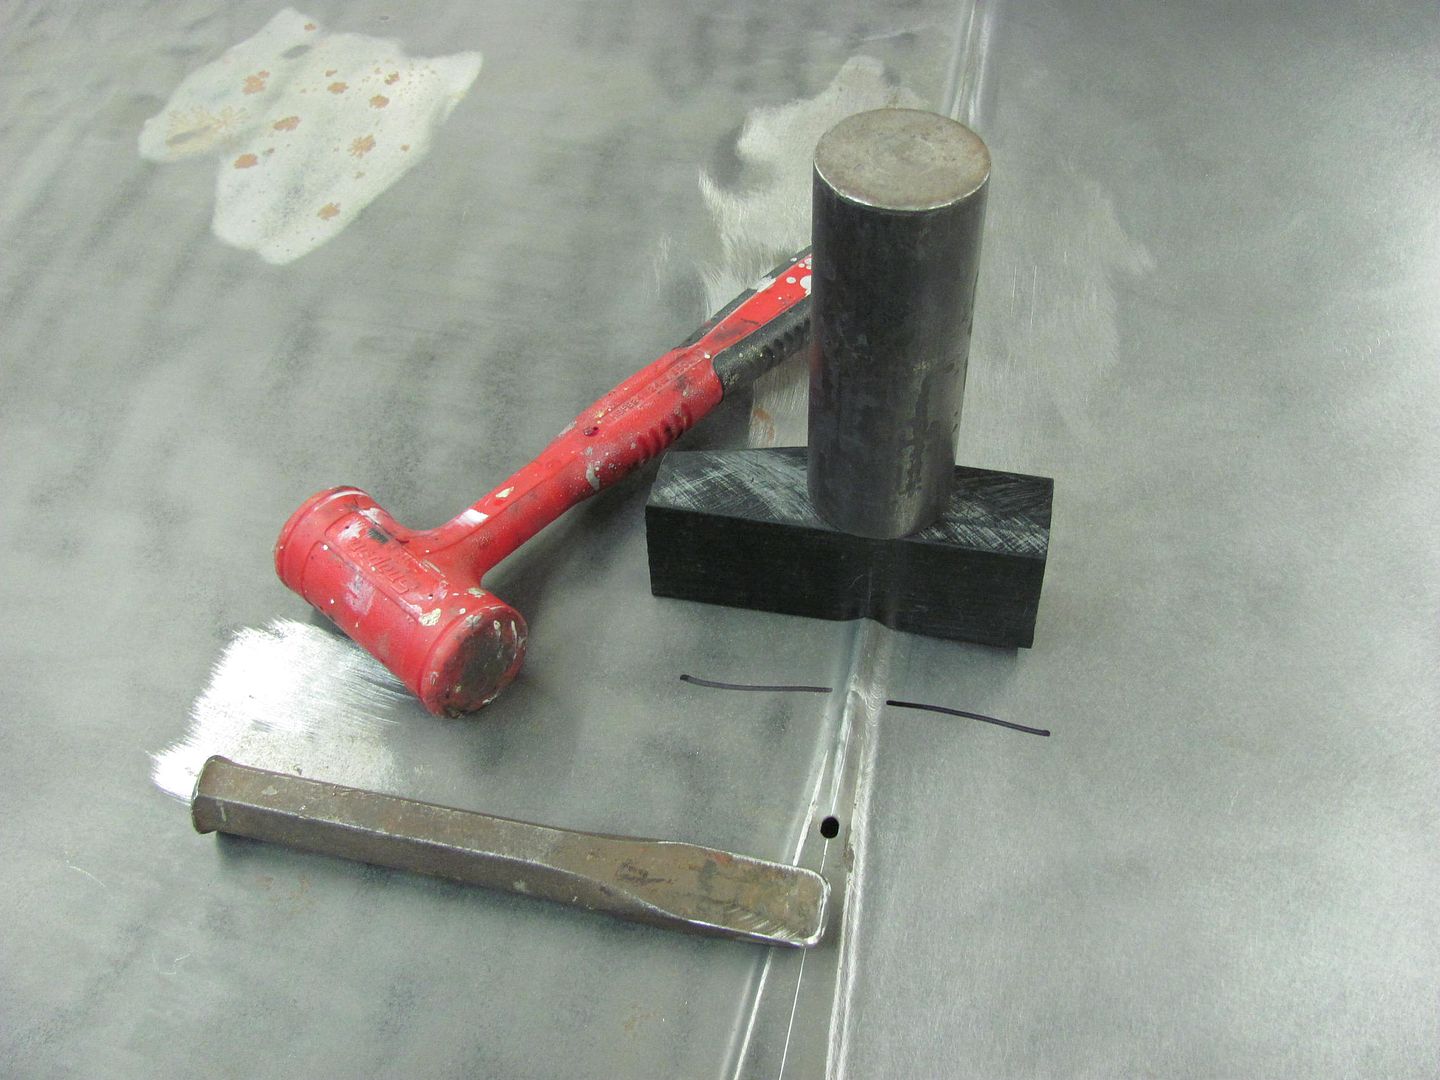
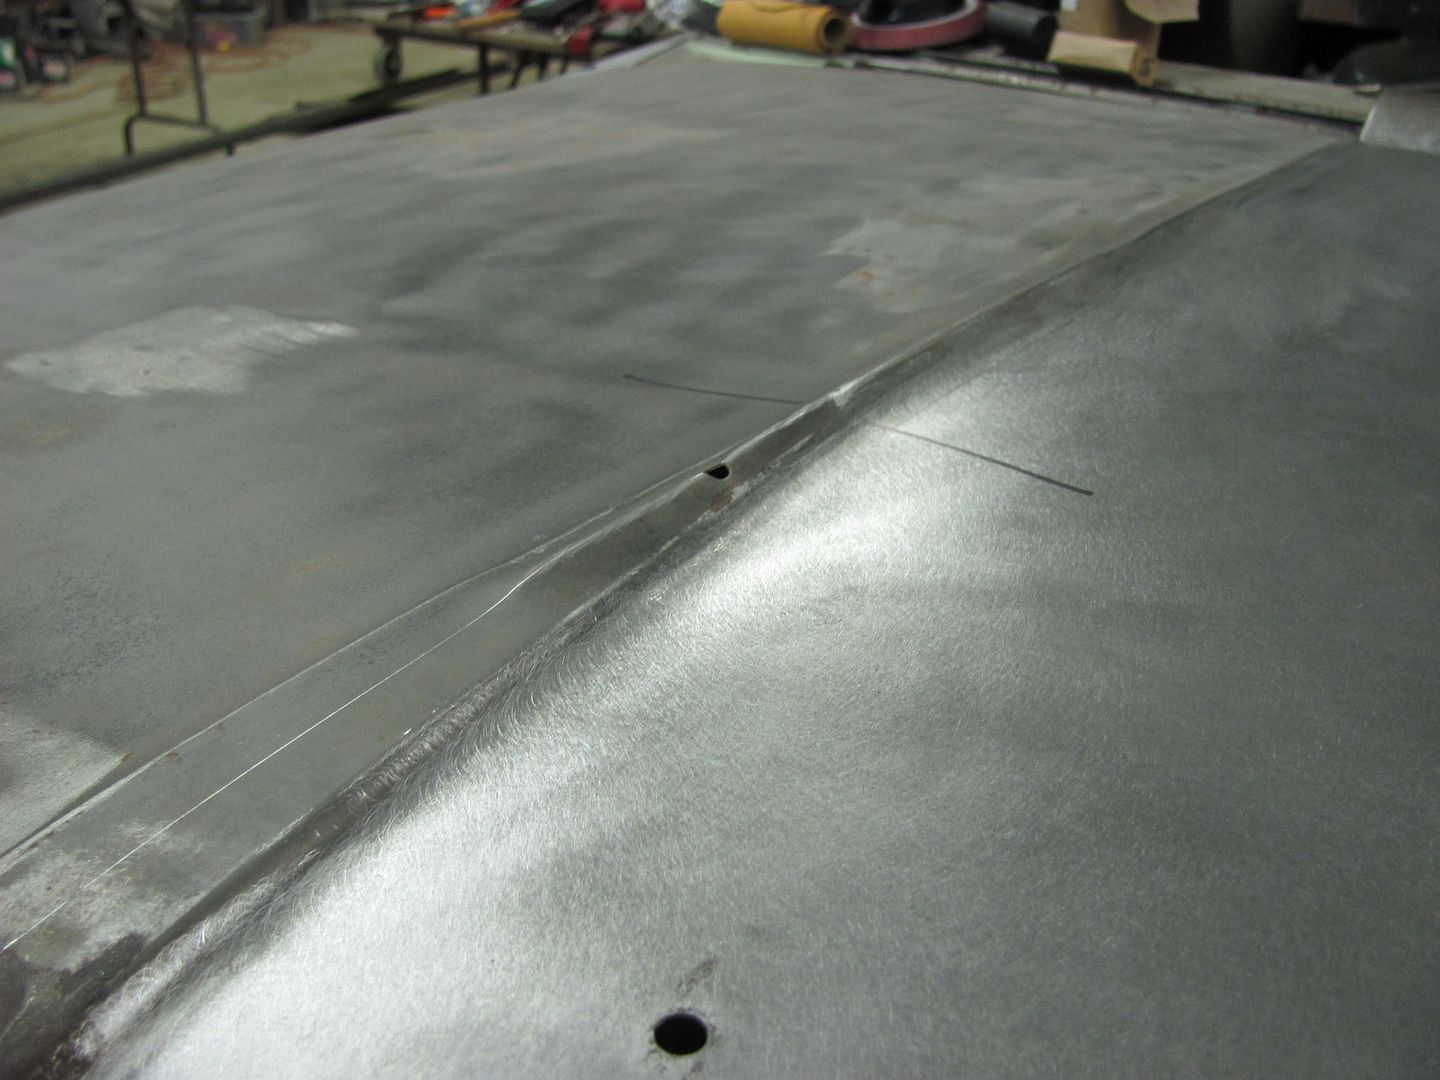
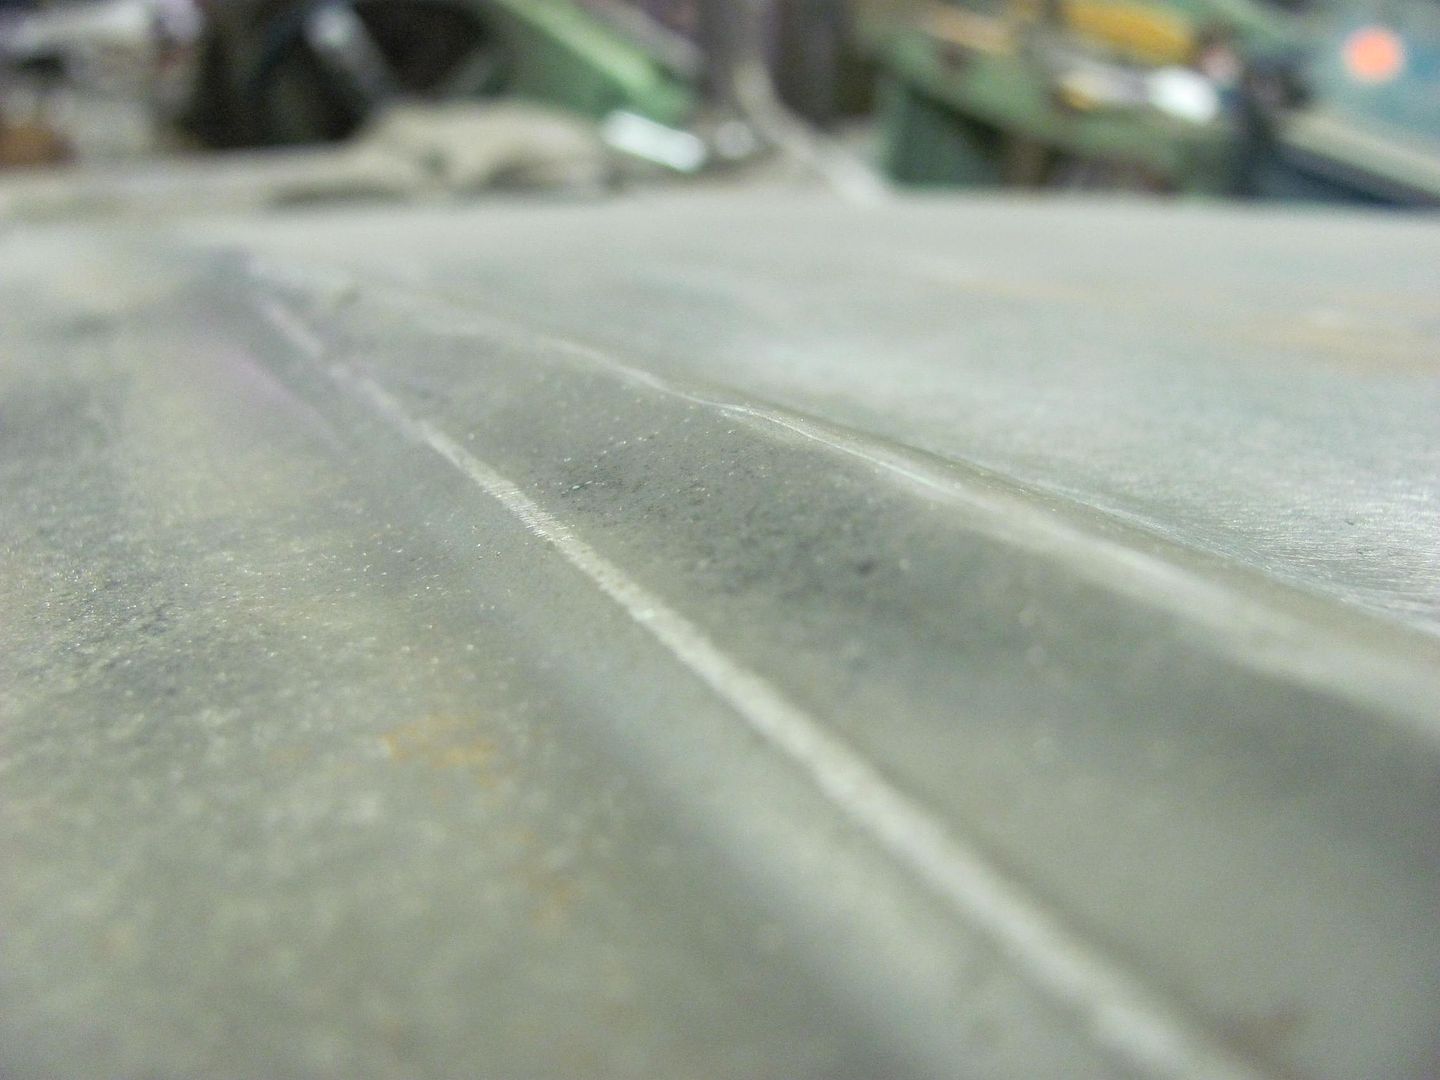
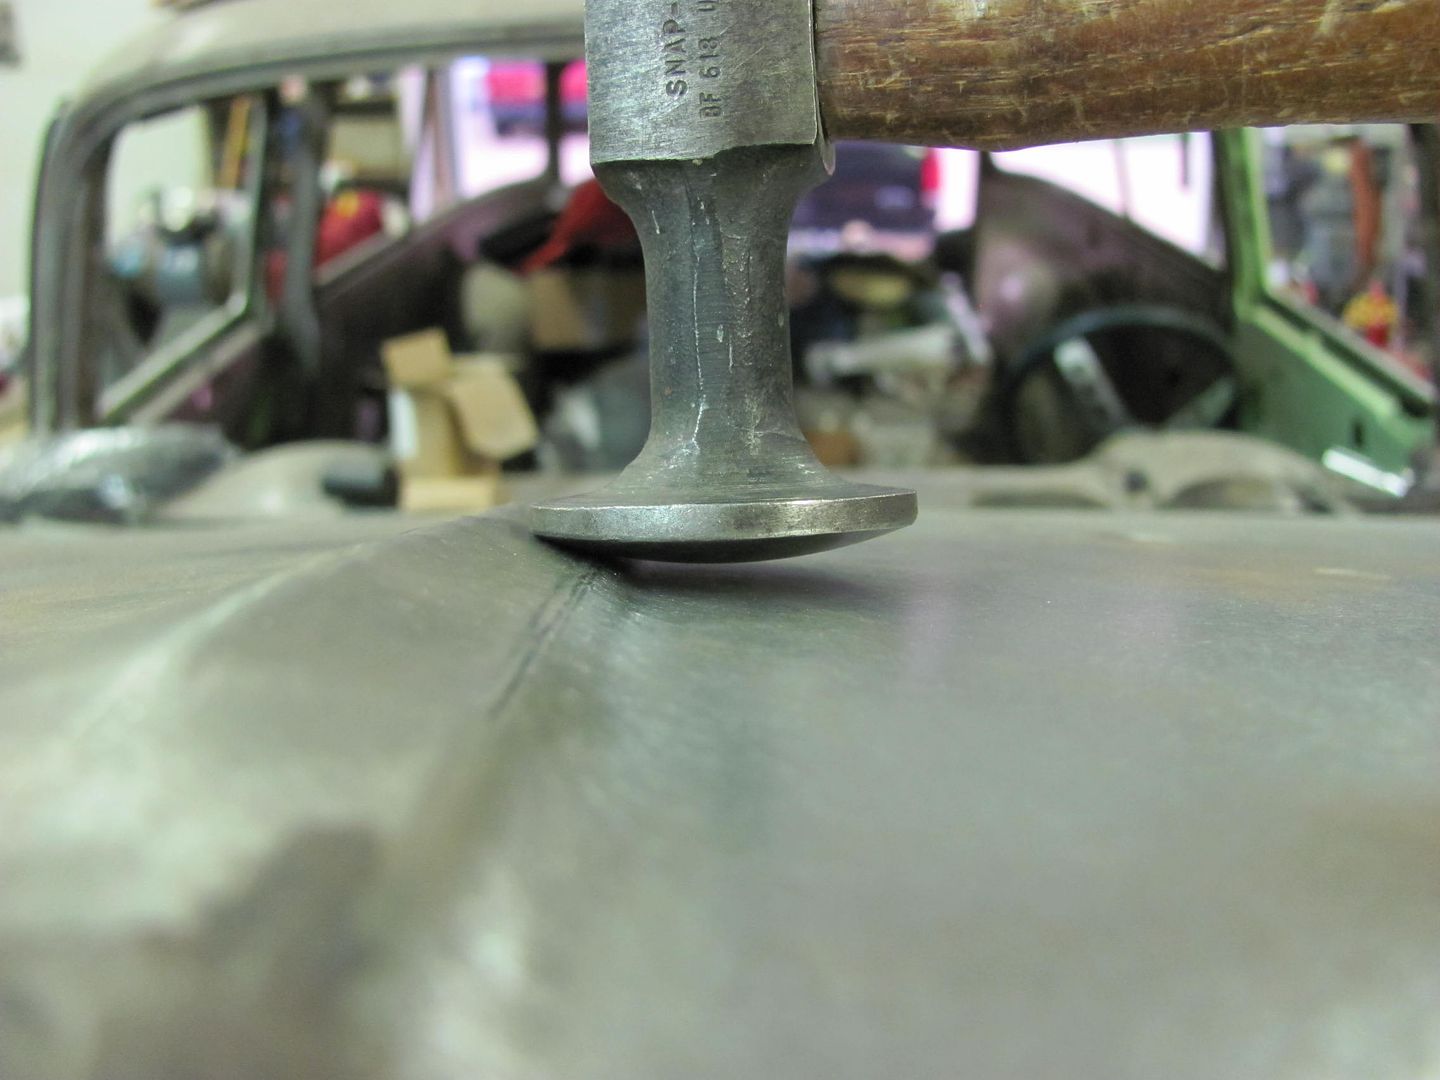
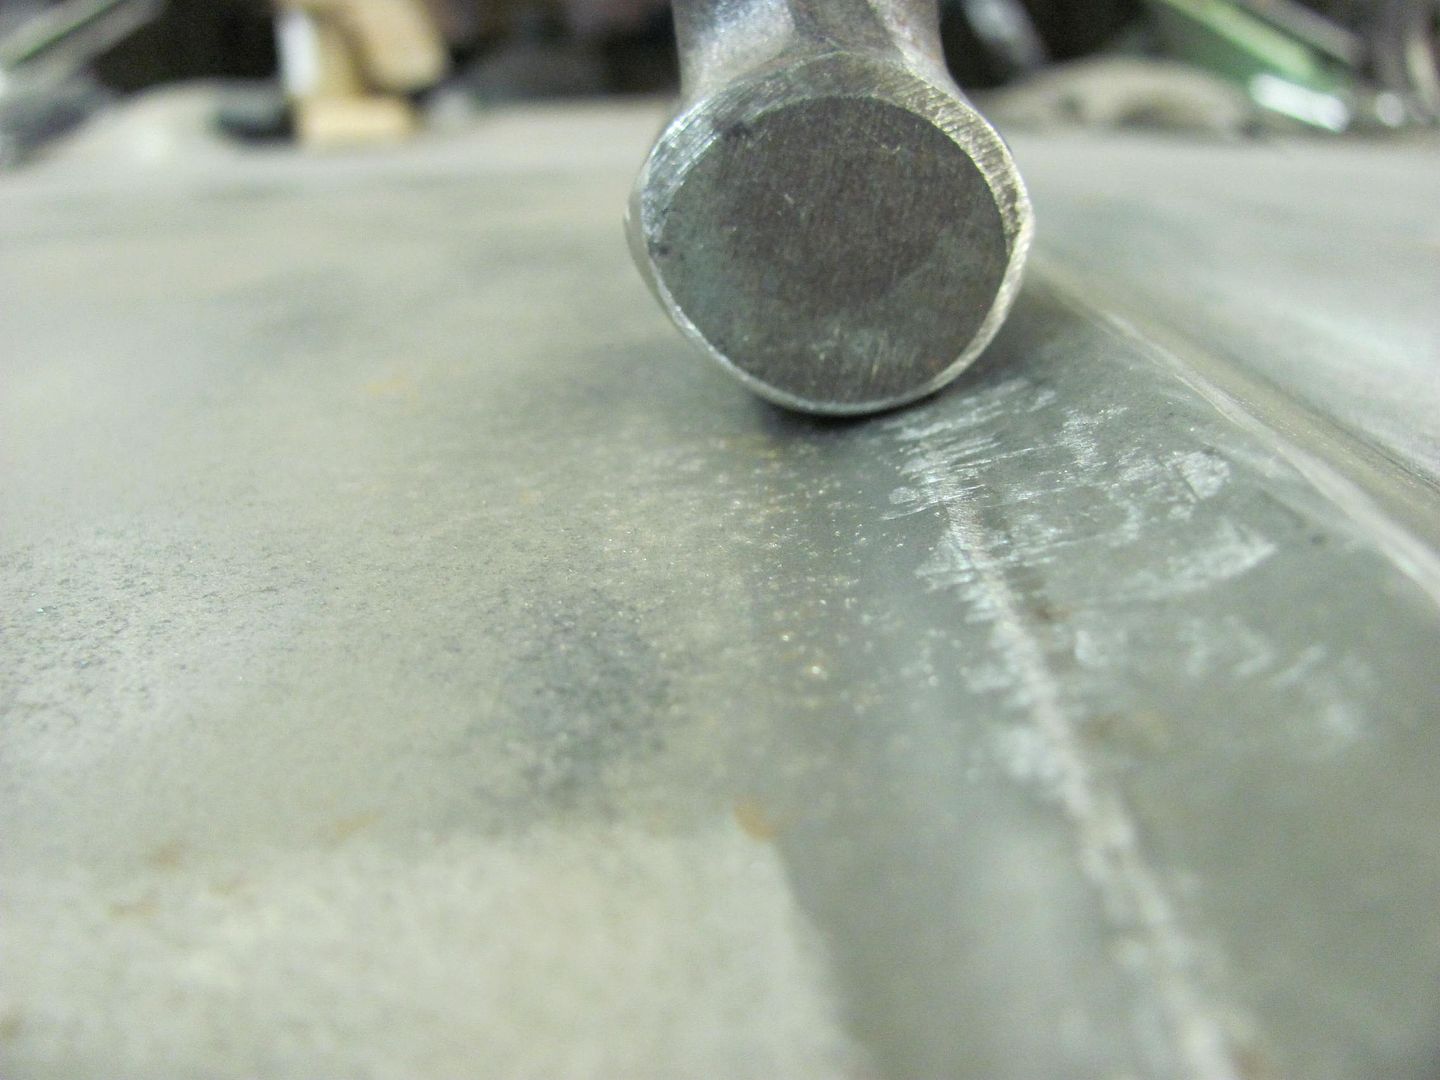
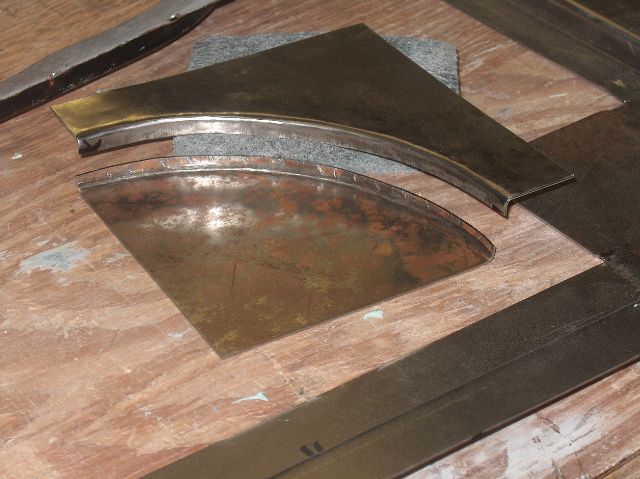
The outward flange for the body line was started with a tipping wheel in the English wheel and then the bend completed with hammer and dolly. The downward bend was also started with the tipping wheel and finished with hammer and dolly. The step tapers away to nothing at the rear of the fender.

Fender 008.jpg

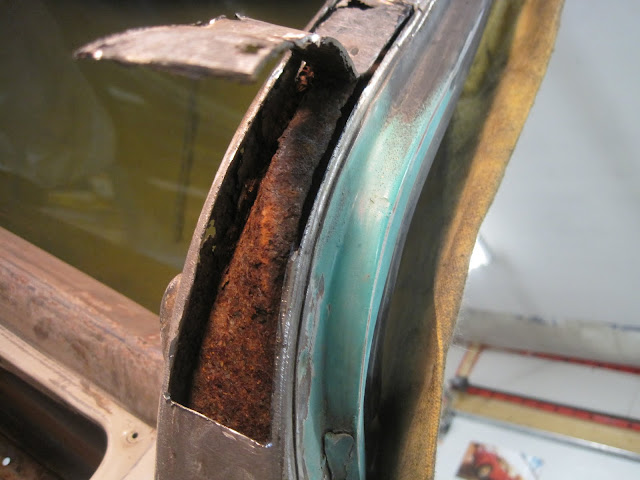
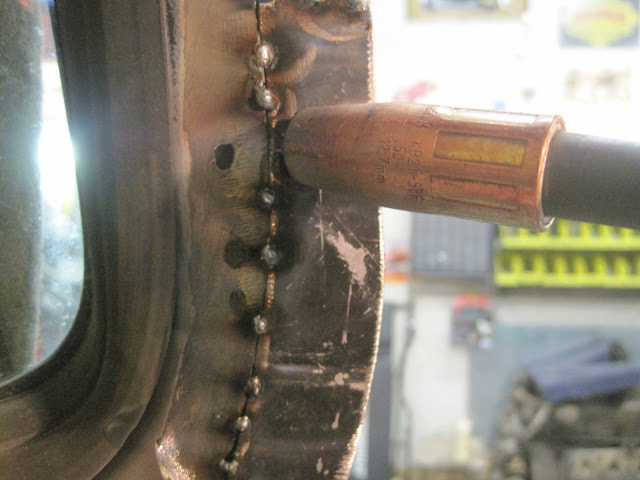
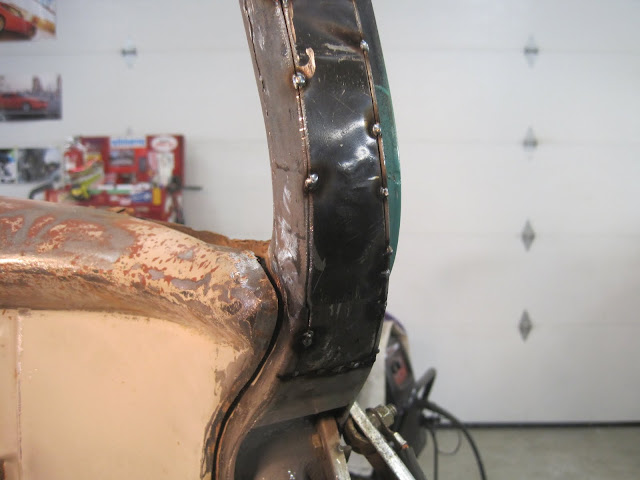
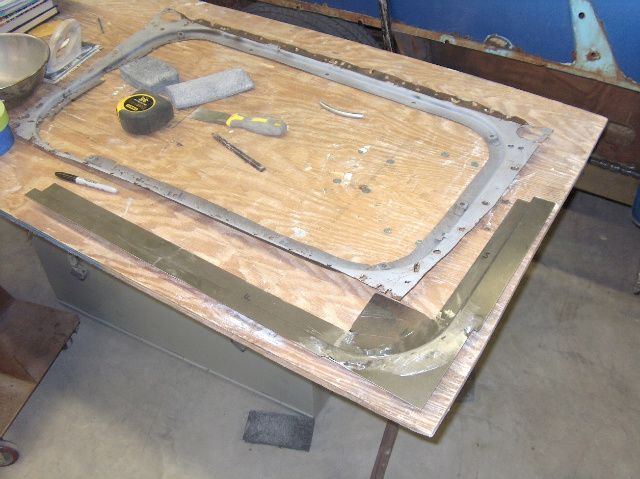
The lower rear panel was next. The outer and inner fenders were spot welded together at the wheel well flange with a HF handheld spot welder.. The flanges were formed with the tipping wheel the same way as for the body line.

Fender 023.jpg

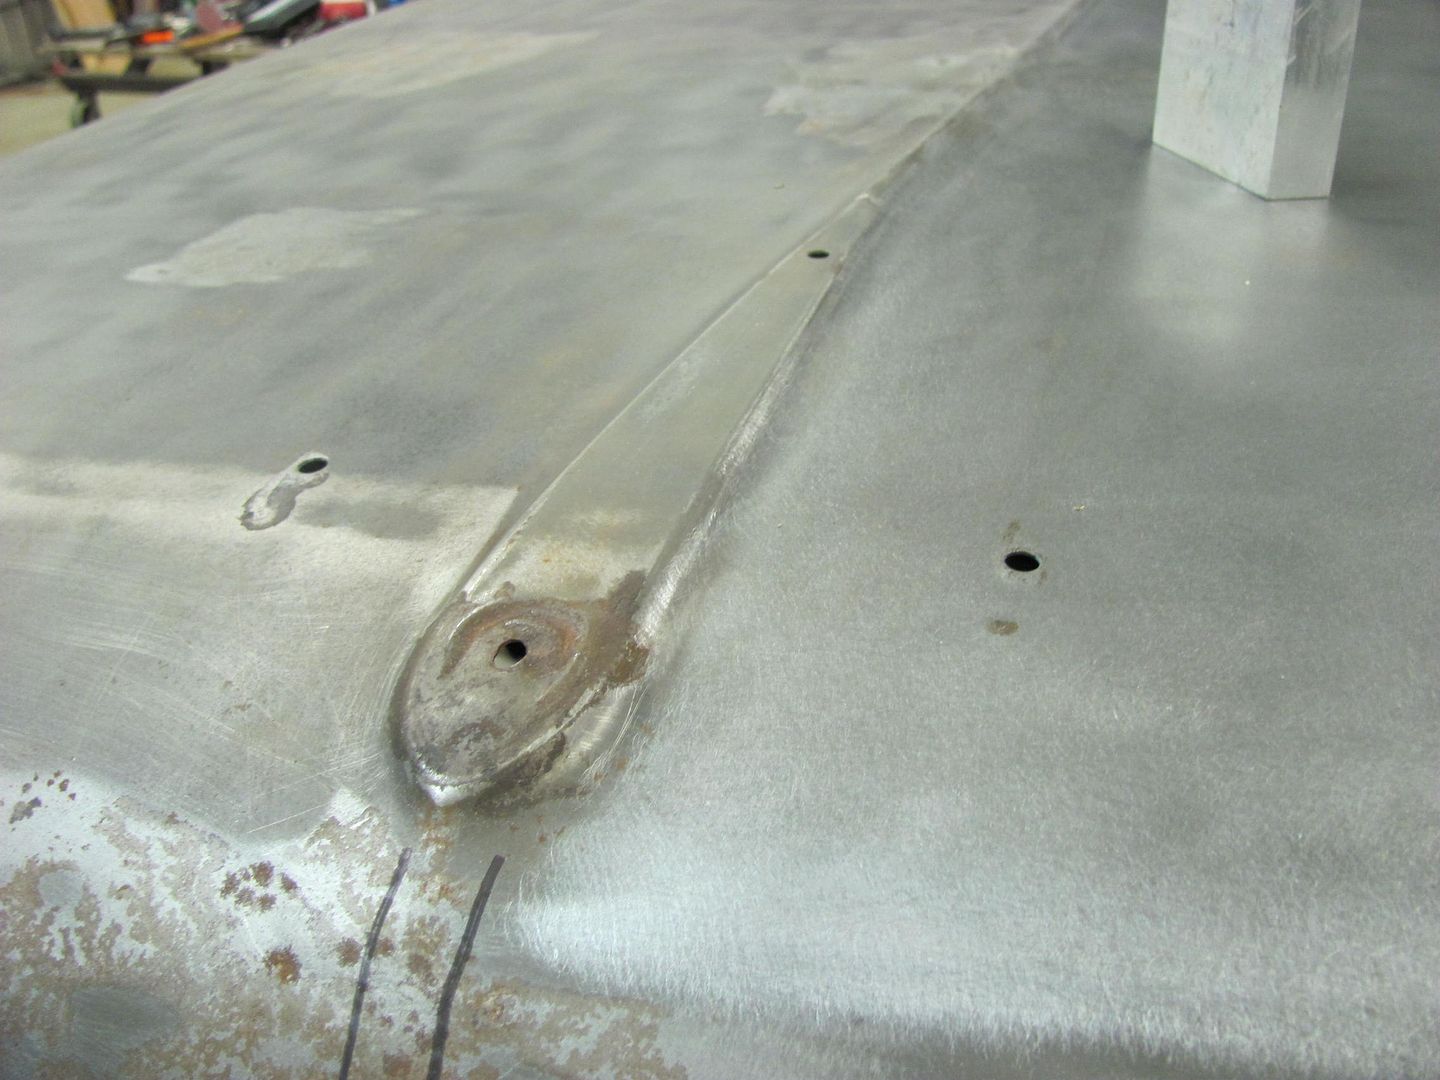
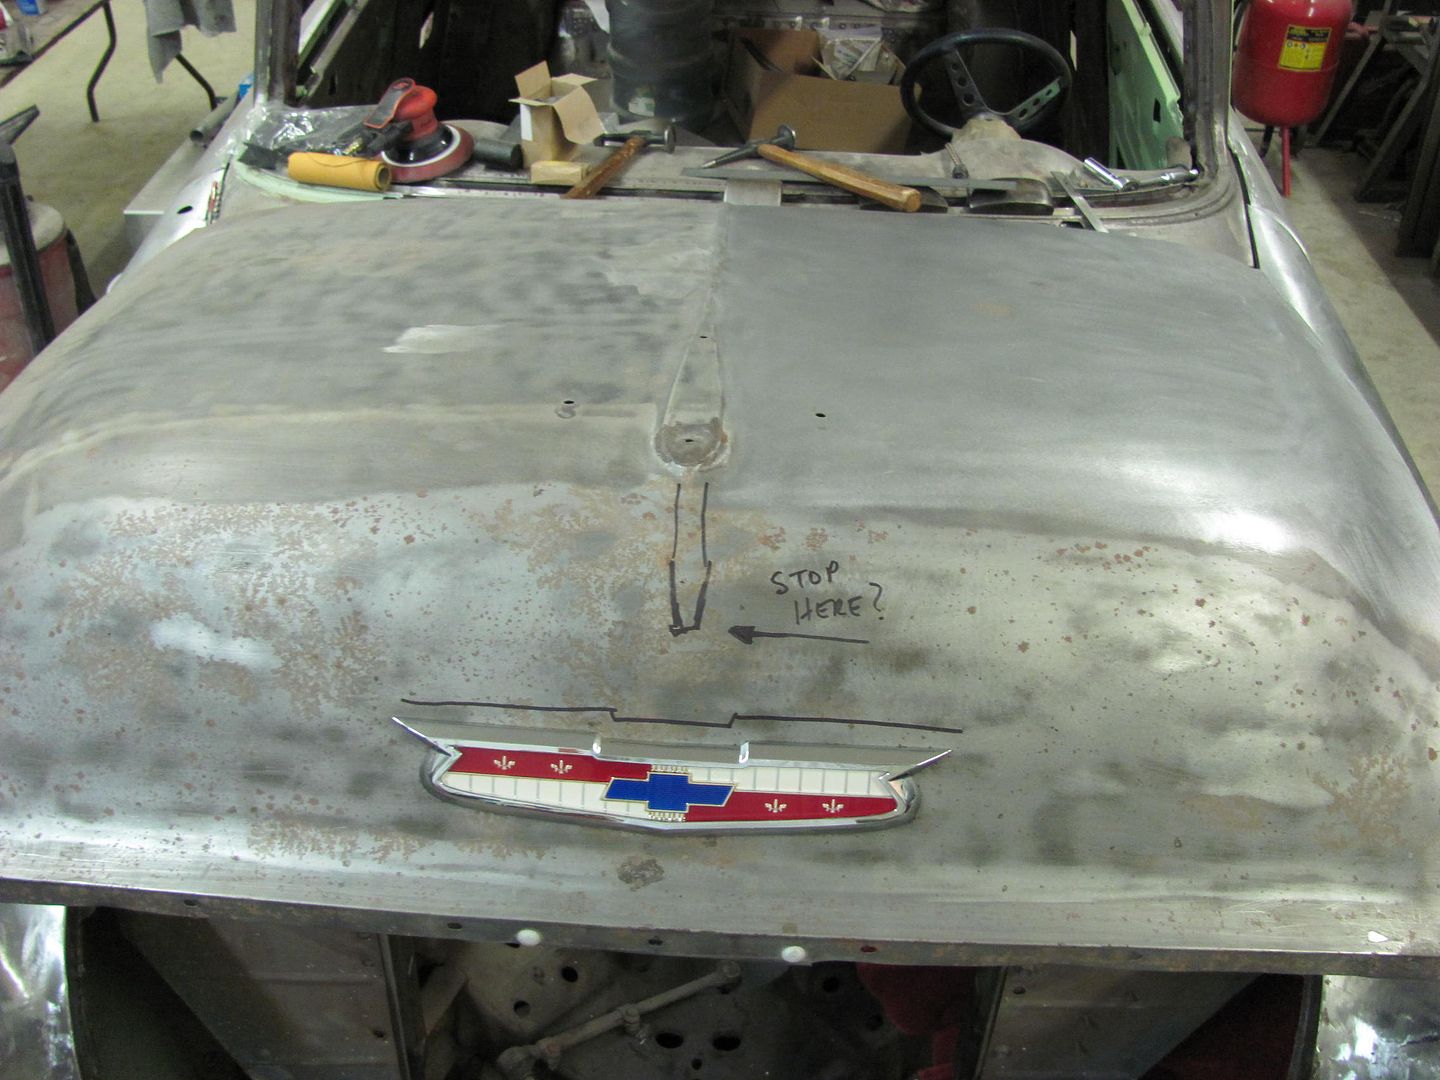
The lower front was added last

Fender 030.jpg

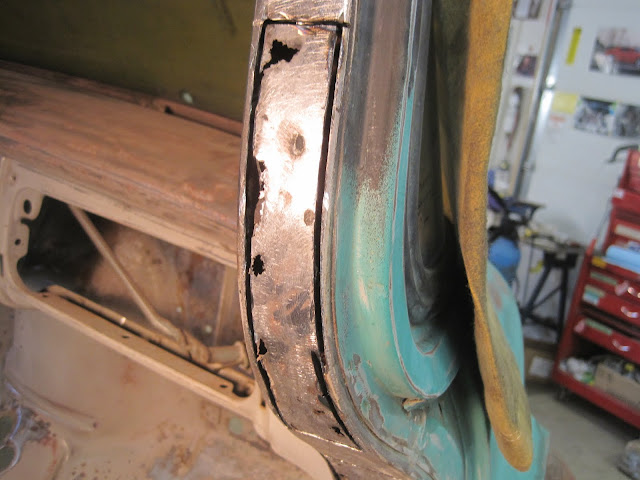
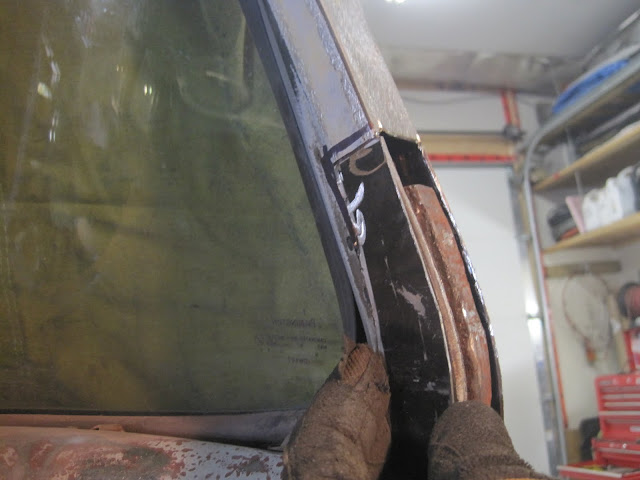
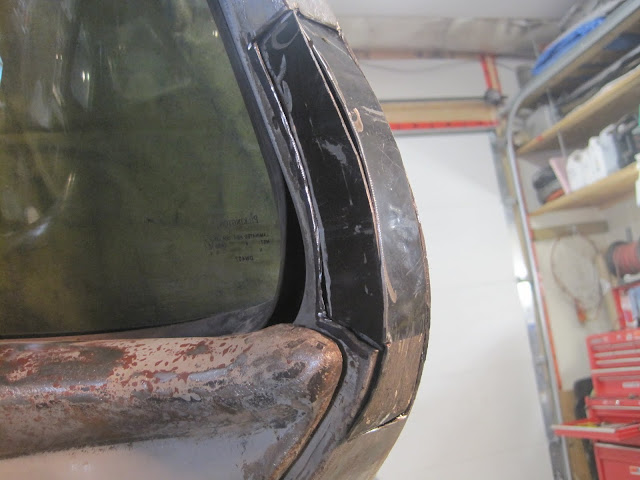
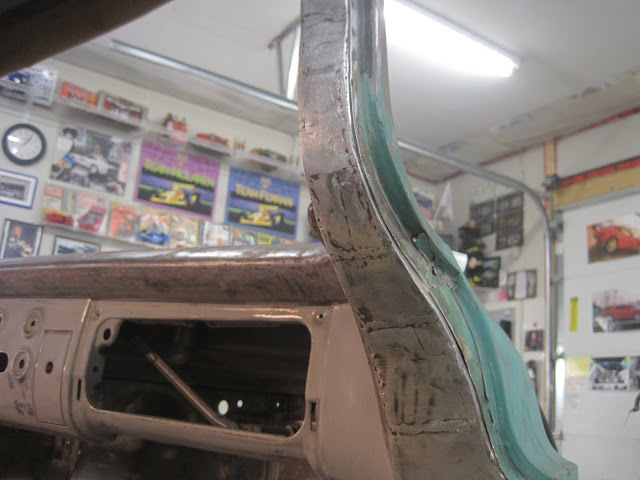
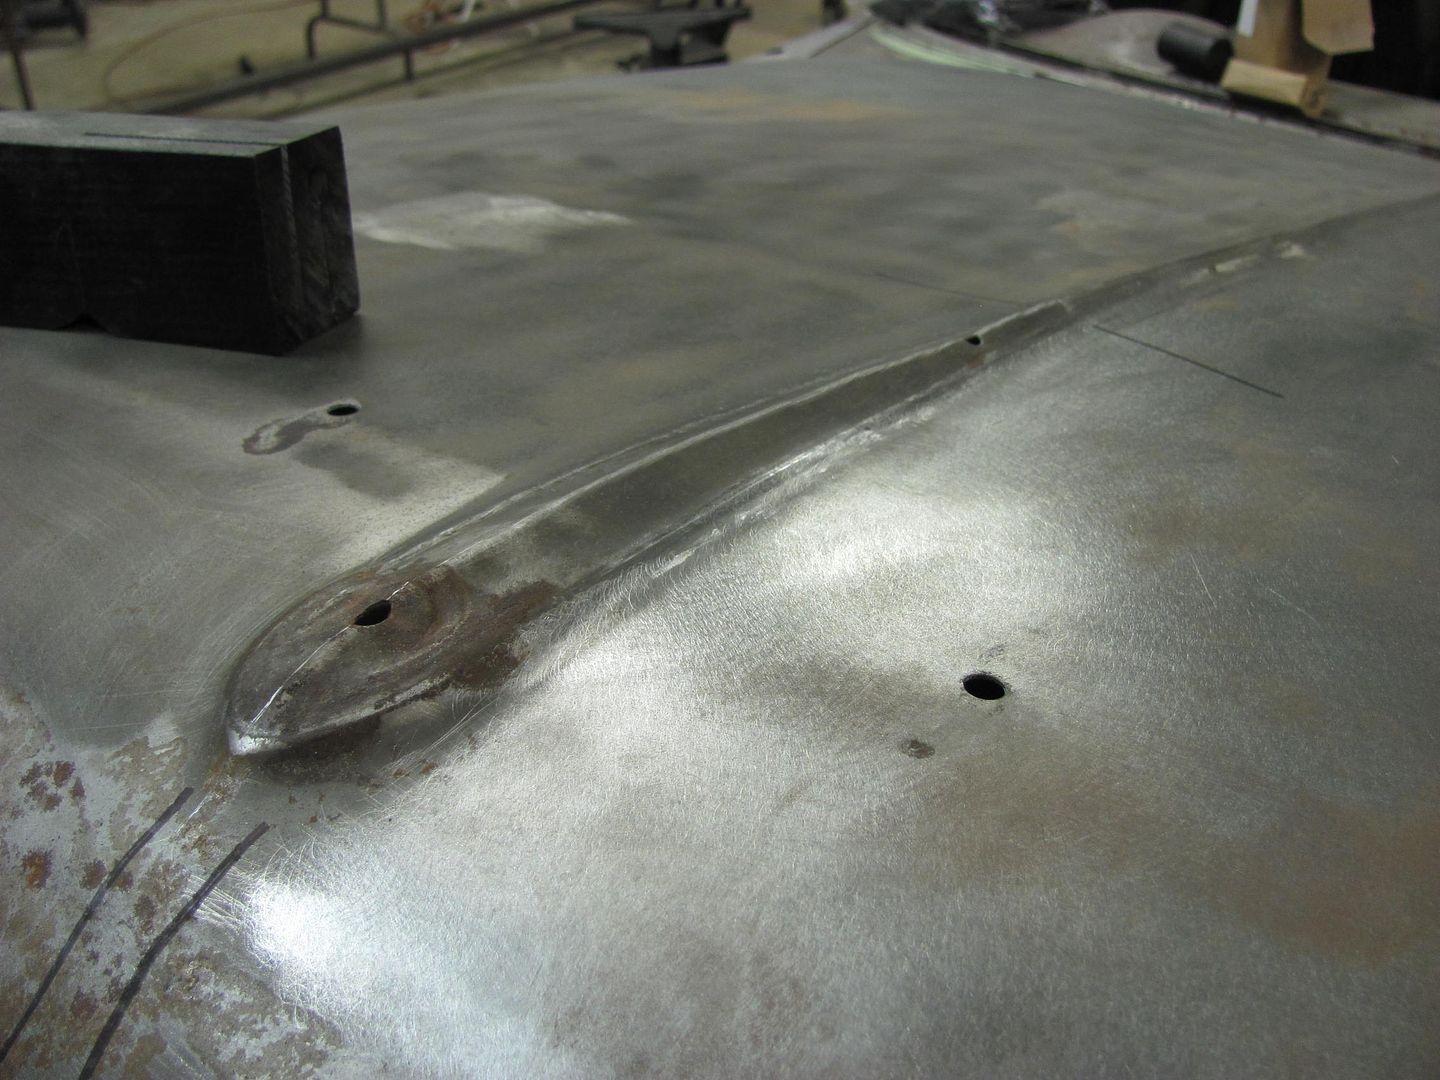
The flare was extended into the door to make the lines flow properly.

Fender 055.jpg

Fender 057.jpg
 
Last edited:
To avoid these ads, REGISTER NOW!

Mario428

Well-known member
Joined
Dec 4, 2009
Messages
156
Location
PEI, Canada
The floor in progress

T-birdDStunnel.jpg


Tubs installed

T-Birdtubsfromfrontint.jpg


****** tunnel

T-Birdtrannytunint.jpg
 

MP&C

Well-known member
Joined
Oct 21, 2009
Messages
4,396
Location
Leonardtown, MD
The rear quarters look good Jim, rear tires tucked nicely :thumbup:


Some rust repair for a 1951 Triumph Saloon. The gas tank is suspended from the trunk floor, with the top of the tank forming part of the floor.


Picture033.jpg


Picture024.jpg


Rusty support panel removed......


Picture007-1.jpg


The long sections were simple bends in the brake, the corners were hammer formed and welded together......


e57e7b52-1.jpg


3f0b9fee-1.jpg


Trimming the opening to fit...


Picture013-2.jpg


Picture014-2.jpg


Picture015-2.jpg


Installed....


Picture020-2.jpg
 
Last edited:

jsaw

Well-known member
Joined
Oct 11, 2008
Messages
1,777
Location
Geneva, N.Y.
built a gas tank for My bike
 

Attachments

  • 3012.jpg
    3012.jpg
    41.5 KB · Views: 846
  • 3009.jpg
    3009.jpg
    34.7 KB · Views: 645
  • 3006.jpg
    3006.jpg
    63.5 KB · Views: 670
  • 3004.jpg
    3004.jpg
    65.2 KB · Views: 734
  • 2157.jpg
    2157.jpg
    36.9 KB · Views: 778
  • 2154.jpg
    2154.jpg
    16.1 KB · Views: 604

MP&C

Well-known member
Joined
Oct 21, 2009
Messages
4,396
Location
Leonardtown, MD
Here's a repair on an infamous rust area of the 55 Chevy...


Picture402.jpg


Picture403.jpg


Picture404.jpg


We'll start with the inner grill opening rust issue by drilling out the spot welds...


Picture408.jpg


Original, pattern, and new....


Picture409.jpg


Now this fancy hammer I used is sometimes hard to find in the store, but they are on ebay on occasion. :rolleyes: 2" dia steel used as an anvil to form the sweep


Picture410.jpg


trimmed and test fit......


Picture411.jpg


Now for the front piece.....


Picture414.jpg


....and the official template....


Picture415.jpg


The start of the replacement....


Picture416.jpg


Now in this next picture I used a mower blade that I'd thrown under the welding table about three years ago as an anvil, so you never know what will come in handy. (....but don't use me as an excuse for your hoarding issues, I'll deny everything...:D..)


Picture417.jpg


Picture418.jpg


Picture419.jpg


And for a test fit...and a comparison.....


Picture420.jpg


Picture421.jpg


Cut out the rust to make room for trimming the patch....


Picture422.jpg


Picture423.jpg


Picture425.jpg


Picture426.jpg


Folded the inner flange, which required quite a bit of stretching to maintain the curve.....


Picture427.jpg


Picture428.jpg


Picture430.jpg


With all the metal being forced into the "valley" while forming the patch, the outer flange had a tendency to bulge outwards. Used the shrinking tip on the dent puller to help take care of that, as well as better form the radius.


Picture431.jpg


Picture432.jpg


...comparing to opposite fender.....


Picture433.jpg


Inner grille opening......


Picture436.jpg


Picture437.jpg


Picture438.jpg


Picture439.jpg


Welding outside seam


Picture441.jpg


Picture442.jpg


Picture443.jpg


Welds dressed.....


Picture449.jpg


Picture446.jpg


Picture450.jpg


Some fresh metal to last a few more years. :bounce:
 

supermerle

Active member
Joined
Aug 25, 2010
Messages
44
Location
Arkansas
So much talent or maybe just some good old horse sence MP&C! You can work some magic with that hammer. Everybody keep these pictures coming.
 

Kma4444

Active member
Joined
Oct 27, 2010
Messages
42
Few more

600_Rear_valance_fit_check.jpg


600_Rear_valance_license_cutout.jpg


600_Rear_valance_done_outside.jpg


600_Tailgate_before.jpg


600_Tailgate_disassembly1.jpg


600_Tailgate_disassembly4.jpg


600_Tailgate_skin2.jpg


600_Tailgate_skin4.jpg


600_Tailgate_final_fit_outside.jpg


And that's about where it is right now. Need to get back on it one day.
 

Kma4444

Active member
Joined
Oct 27, 2010
Messages
42
Thanks Bruce, I'm sure I will get it done some day. First I am moving and losing this shop, only good news is I will be building a new one 32 x 40, so that's a good thing.
 

e-tek

Well-known member
Joined
Dec 19, 2007
Messages
10,690
Location
Saskatoon, SK
Can I play?
a W/S pillar -

IMG_2963.JPG


IMG_2964.JPG


IMG_2985.JPG


IMG_2986.JPG


IMG_2988.JPG


IMG_2992.JPG


IMG_2999.JPG


IMG_3004.JPG


I brushed POR15 into the inners as far as the brush would go, but now I've found Eastwoods Internal Frame Coating, whcih has both Zinc and oils and an 18inch long apllicator nozzle that spraysout at 360 degrees! I'll be able to apply it now from under the dash, but it would have been nice to use it here!

IMG_3007.JPG


IMG_3015.JPG


IMG_3014.JPG


IMG_3020.JPG


IMG_3023.JPG


IMG_3027.JPG
 

PCO6

Well-known member
Joined
Dec 25, 2008
Messages
4,573
Location
Newmarket, Ontario
I don't have any sheet metal projects currently on the go but here's a small project I did years ago in a night school panel beating course I took. It started out as a single peice of sheet metal and a wire rod. I cut the sheet metal into 2 peices, formed the shapes and hammer welded (fused) them together with a torch and about an inch of filler rod. I've formed panels and patched up many fenders, doors, etc. ... but they've all been painted!
 

Attachments

  • DSC_0285.jpg
    DSC_0285.jpg
    142 KB · Views: 209
  • DSC_0284.jpg
    DSC_0284.jpg
    139.6 KB · Views: 215
  • DSC_0289.jpg
    DSC_0289.jpg
    134.6 KB · Views: 199
  • DSC_0292.jpg
    DSC_0292.jpg
    135.2 KB · Views: 178
To avoid these ads, REGISTER NOW!

MP&C

Well-known member
Joined
Oct 21, 2009
Messages
4,396
Location
Leonardtown, MD
One of the tasks on this 55 is to de-bird the hood and bring the peak forward.

Picture482.jpg


Picture480.jpg


Picture481.jpg


I know I can cut a strip out of the middle and duplicate a replacement with this little jewel...

Picture056.jpg


.....but this hood is relatively straight and rust free, so I'd like to keep it intact (without all that welding) if at all possible. I tried my hand at some manual "punch and die" tooling to see how well it might work, and all in all, it wasn't too bad although it will take some clean up afterwards:

Picture484.jpg


Picture485.jpg


Picture487.jpg


Picture488.jpg


Results from the "start line"

Picture489.jpg


The pad, or "plateau" where the bird rested seems to have a nice crease around the perimeter.

Picture493.jpg


We started with using the crowned body hammer off dolly to knock the sharpness down a bit.

Picture494.jpg


After that we needed something that more closely matched the inside radius. This would work if it weren't for that flat spot on the bottom of the hammer....

Picture495.jpg


...but after about 5 minutes with the grinder it had a more conforming radius..

Picture496.jpg


Kept working and working (and more use of the "Punch and Die" as well).....

Picture497.jpg


Picture498.jpg


and this is what we ended up with....

Picture499.jpg


Picture500.jpg


Picture501.jpg


Picture503.jpg


It still has some fine tuning to go, holes to fill, some shrinking in the "valley" down both sides towards the front and some tweaking here and there to make the peak more uniform front to back. But overall I'm real pleased with how it turned out.
 

e-tek

Well-known member
Joined
Dec 19, 2007
Messages
10,690
Location
Saskatoon, SK
One of the tasks on this 55 is to de-bird the hood and bring the peak forward.


It still has some fine tuning to go, holes to fill, some shrinking in the "valley" down both sides towards the front and some tweaking here and there to make the peak more uniform front to back. But overall I'm real pleased with how it turned out.

Interesting task! How long do you estimate you or your guys will work on the hood to get it paintable? Is that a custom job for a customer? If it is, do you mind if I ask - is he paying by the hour, or did you give him a set price to cutomize it?
Thanks man - always learning!
 

MP&C

Well-known member
Joined
Oct 21, 2009
Messages
4,396
Location
Leonardtown, MD
The holes in top of the hood are filled, the front ones are under discussion; a peaked hood looks better without the emblem on the front (IMHO). The hood bird was rather pitted so to have it refinished and rechromed would have been about the same as the cost for peaking......dare to be different. To get the hood ready for paint also includes fitment and gapping to the fenders and cowl, so it's kinda hard to lay a number on the total, but to get the peaking part ready for paint would probably be another hour or so. She is paying time and materials, which includes quite a bit of rust repair and fabrication. As you've seen in your last couple projects, the layers of rust keep getting deeper the more you dig. T&M IMO is the only way to go on these type projects. Especially when you get into customer or vehicle conditional (rust and or damage) driven changes....
 

e-tek

Well-known member
Joined
Dec 19, 2007
Messages
10,690
Location
Saskatoon, SK
T&M IMO is the only way to go on these type projects. Especially when you get into customer or vehicle conditional (rust and or damage) driven changes....

I charge for every hour I put in, plus "major" materials (filler or mig wire, no, but a Quart of POR15, a Gallon of HighBuild, Yes) - where do you draw the line?
 

fireguy

Well-known member
Joined
May 25, 2008
Messages
530
I would post some pictures of my welding ability. Except, my camera will not take pictures of holes that big!

I am amazed at the skill shown here
 

NASTYZEN

Well-known member
Joined
Jun 11, 2010
Messages
2,823
Location
St-Colomban,Que. Canada
what does it catch - everything??!:headscrat:thumbup:

The tank is on it's side so the 2 top tubes with flares and bent 90 deg. are a visible level indicator gauge once a transparent tube is added to it.The male fitting is the drain plug.
On the side,the 2 dash -10 fittings are for the valve covers breathers(boxer engine= 2 separate heads)the dash-8 2 are for the engine crank case and gearbox breathers and the small tube is for a breather so that no pressure can build up in the tank.:beer:
Thems are the rules!
 

NASTYZEN

Well-known member
Joined
Jun 11, 2010
Messages
2,823
Location
St-Colomban,Que. Canada
This is my friend Brian MacEachern's Lotus 11 at Watkins glen after I fixed his crash damage.He really drives the wheels of of it.
 

Attachments

  • Brian mc's Lotus eleven.jpg
    Brian mc's Lotus eleven.jpg
    27 KB · Views: 447
  • Brian'sLotus eleven.jpg
    Brian'sLotus eleven.jpg
    26.1 KB · Views: 365

NASTYZEN

Well-known member
Joined
Jun 11, 2010
Messages
2,823
Location
St-Colomban,Que. Canada
This is a pit cart I custom built for the Porschehaus Racing team a few years ago.Not me in the picture.
 

Attachments

  • Andre Godet&Toolbox.jpg
    Andre Godet&Toolbox.jpg
    25.3 KB · Views: 544
  • Andre Godet's toolbox.jpg
    Andre Godet's toolbox.jpg
    25.3 KB · Views: 491
Last edited:

beee85

Active member
Joined
Jul 1, 2010
Messages
44
Location
boca raton florida
Got a question for you fabrication guys, What does it take to get an apprenticeship in fabrication shop that does classic cars or anything close to it?
Or a restoration shop.There is fabrication shops all over south florida, but very few for classic cars.
:fingersx:
 

Ray-CA

Well-known member
Joined
Jan 6, 2007
Messages
3,451
Location
San Diego CA
I built these to recover some space under the trunk of our FFR Roadster:

Ray
 

Attachments

  • trunk box1.jpg
    trunk box1.jpg
    139.5 KB · Views: 229
  • trunk box2.jpg
    trunk box2.jpg
    129.8 KB · Views: 207
To avoid these ads, REGISTER NOW!
Top Bottom