
akjason
Active member
Like the title says, I'm in the middle of insulating my garage door. I've got a standard one-car attached garage with a sectional steel door. It's adjacent to the living room and kitchen, and the finished attic is above it. It's original to the 26 year old house, along with, I assume, the Stanley 1/3hp chain drive opener. This door has many issues that I'm taking care of, and insulating is just one part of my "garage door restoration" so that I can begin actually using the garage for parking  This is also practice for my 25x23 detached out back.
Insulation order:
1) Exterior door surface
2) 3/4" air space
3) 1/2" extruded polystyrene board
4) 1/2" air space
5) Aluminum flashing
I used expanding foam around each of the foam panels, and also all the holes in the frame of the door, then taped everything up with aluminum foil HVAC tape. The aluminum flashing is for fire protection since the foam is flammable and I like to throw sparks once in a while. A side benefit is that it brightens up the garage and looks pretty bad ***
The foam and 3/4" air space creates an R-value of 3.3+2.8=6.1 total. I'm guessing with the aluminum flashing and additional air space, I've got a total of somewhere around R8.
On to the pictures!
Obligatory reference pic from when I moved in last summer. Yes, those are purple walls This was the previous owners' granddaughter's play room apparently, and I haven't gotten around to painting yet.

Cutting foam after using liquid nails to hang wood spacers in each of the panels. I guess I don't have any pics of the foil backing, but you can sort of see it on the panels at the bottom left of this pic.

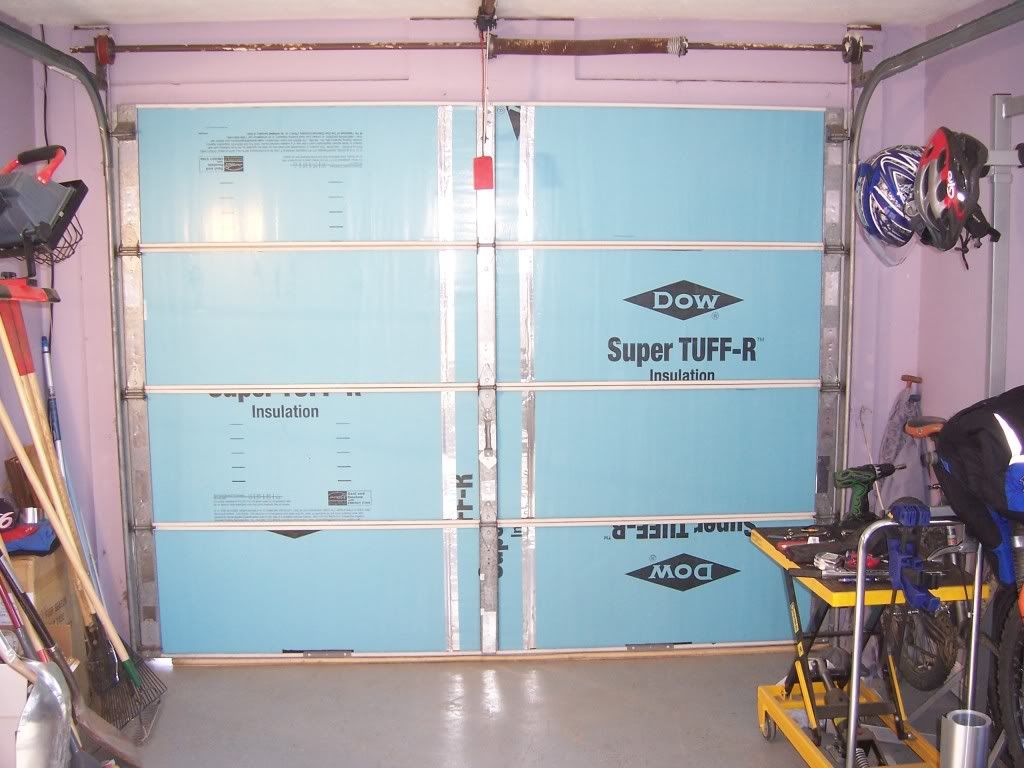
Making progress! The left panels took a full board (48") plus 7.25", and the right side took a full board plus 4.5". I took my time and removed all the hinge screws so I could slide each of the foam board all the way behind the framing.

All the foam boards in place. You can see where I taped over all the holes in the frame too. I could've stopped there and called my insulation job complete, but nooooooooo I need to take it way overboard.
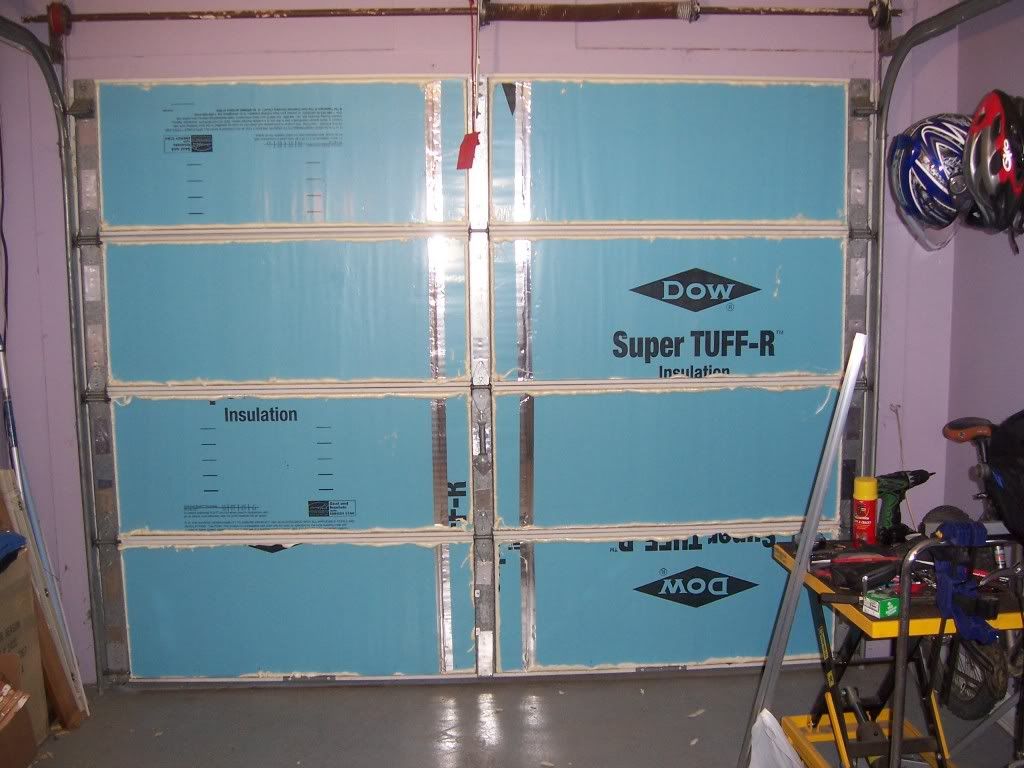
Spray foam in all gaps, including the holes in the sides. 2.5 cans total. This held the foam boards in nice and tight, no sliding around at all.
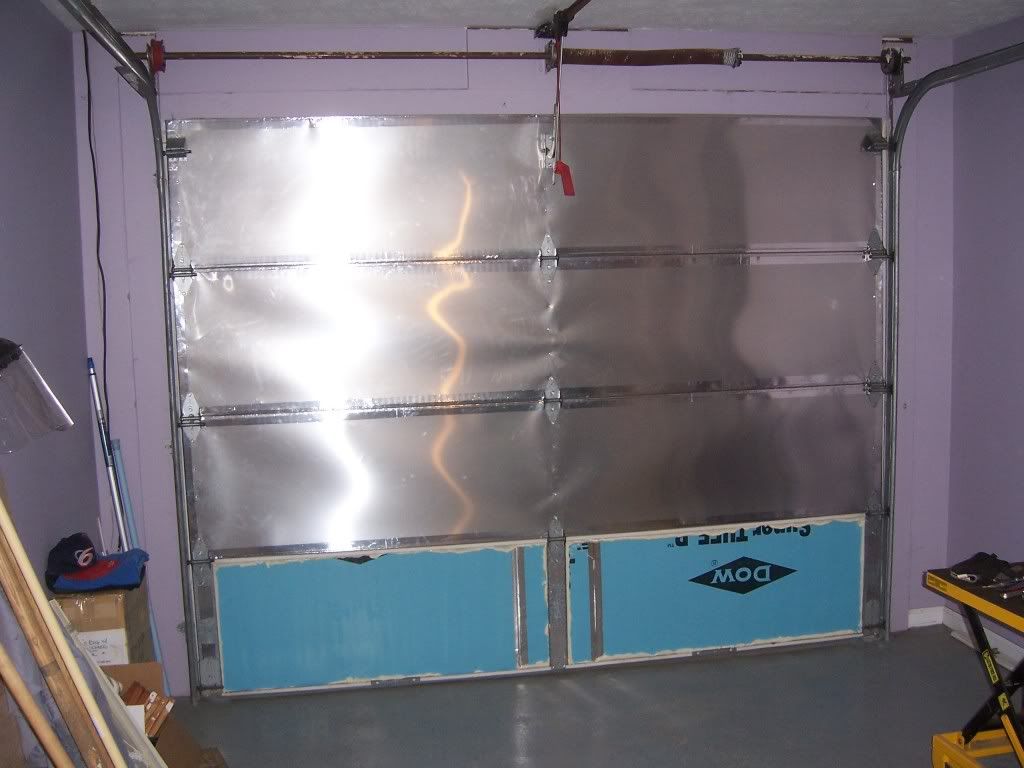
First section fully faced and taped. Each section of flashing is 20"x108".

And this is where I stand tonight. In addition to the foil tape, the flashing is held in place by the hinge hardware and sheetmetal screws on the right, left, and middle (the flashing isn't quite tall enough to screw the top and bottom edges like I wanted to).
I've already leveled the door (it was 1/2" off across the width of the door), but I'll need to rebalance it after I'm done. Gonna finish it up tomorrow evening, just in time for my parents coming in for Thanksgiving. While they're here I'm going to put my dad to work helping me replace the opener with a Chamberlain belt drive unit.
This is also practice for my 25x23 detached out back.Insulation order:
1) Exterior door surface
2) 3/4" air space
3) 1/2" extruded polystyrene board
4) 1/2" air space
5) Aluminum flashing
I used expanding foam around each of the foam panels, and also all the holes in the frame of the door, then taped everything up with aluminum foil HVAC tape. The aluminum flashing is for fire protection since the foam is flammable and I like to throw sparks once in a while. A side benefit is that it brightens up the garage and looks pretty bad ***
The foam and 3/4" air space creates an R-value of 3.3+2.8=6.1 total. I'm guessing with the aluminum flashing and additional air space, I've got a total of somewhere around R8.
On to the pictures!
Obligatory reference pic from when I moved in last summer. Yes, those are purple walls
This was the previous owners' granddaughter's play room apparently, and I haven't gotten around to painting yet.
Cutting foam after using liquid nails to hang wood spacers in each of the panels. I guess I don't have any pics of the foil backing, but you can sort of see it on the panels at the bottom left of this pic.
Making progress! The left panels took a full board (48") plus 7.25", and the right side took a full board plus 4.5". I took my time and removed all the hinge screws so I could slide each of the foam board all the way behind the framing.
All the foam boards in place. You can see where I taped over all the holes in the frame too. I could've stopped there and called my insulation job complete, but nooooooooo I need to take it way overboard.
Spray foam in all gaps, including the holes in the sides. 2.5 cans total. This held the foam boards in nice and tight, no sliding around at all.
First section fully faced and taped. Each section of flashing is 20"x108".
And this is where I stand tonight. In addition to the foil tape, the flashing is held in place by the hinge hardware and sheetmetal screws on the right, left, and middle (the flashing isn't quite tall enough to screw the top and bottom edges like I wanted to).
I've already leveled the door (it was 1/2" off across the width of the door), but I'll need to rebalance it after I'm done. Gonna finish it up tomorrow evening, just in time for my parents coming in for Thanksgiving. While they're here I'm going to put my dad to work helping me replace the opener with a Chamberlain belt drive unit.
Last edited:

 Mostly kidding. I understand the dangers and respect the forces involved, but I'm a safe and methodical person when it comes to these types of things, so it should be pretty uneventful. Unfortunately, I didn't test the balance until after I added the foam panels, so I don't actually know if the door was balanced beforehand. Since it wasn't level to begin with, the door was sort of hanging up in the tracks and it wouldn't have been a good baseline anyway.


