To avoid these ads, REGISTER NOW!

Re-Doing my shop (Lots of pics...)

MN4x4

Well-known member
Joined
Sep 5, 2010
Messages
1,443
Location
Minnesnowta
I have been scouring this site ever since I joined up a few months back. I have posted a few comments, but not much about my shop and not many pictures. I think this thread will MORE than make up for that.

When I built my shop over 20 years ago I did a lot of things right, like:

• 2x6 stick built construction
• 10' side walls
• Custom vaulted trusses that rise to a height of 16' down the center of the shop. (Don't give me too much credit - I never thought of having a lift at the time. I just wanted the height.)
• Separate 200 Amp Electrical Service
• Electrical boxes every 12 feet with individual 10/3 runs back to the breaker panel. That way any box can have either two separate 20 Amp 120 Volt receptacles (each on its own breaker) or one 30 Amp 240 Volt receptacle (on its own breaker) just by changing out the receptacle(s) and breaker(s) in the panel.
• Buried TV, Internet, Telephone, and extra low voltage circuits from the shop to the house
• Stubbed in for a future bathroom
• 12' x 12' overhead door.
• Floor drain (more on this later)

However, since it was built that long ago, several things have changed. For instance, at the time nobody built insulated foundations. Obviously I didn't want to hammer up my slab just to put insulation under it, so I did some research and found a system called a Frost Protected Shallow Footing.

Essentially you insulate the slab down about 12 inches and out to a distance of about 4 feet. This keeps the ground from freezing under your slab. It's not all that difficult to do when you're building, but it takes a lot of labor to do a retrofit. Since I had more time than money ( i got laid off in August ) I decided to tackle it. This is the story.
 
Last edited:
To avoid these ads, REGISTER NOW!

Mr.N

Well-known member
Joined
Jul 13, 2005
Messages
2,222
Location
Mpls, MN
Essentially you insulate the slab down about 12 inches and out to a distance of about 4 feet. This keeps the ground from freezing under your slab.
Interesting... Never heard about going out first...

I'll see if I can find another article that talked about just going straight down with the 2" hard foam insulating to the frost line. 42-48" inches is common in the twin cities.
I think it was done by the UofM
 
OP
M

MN4x4

Well-known member
Joined
Sep 5, 2010
Messages
1,443
Location
Minnesnowta
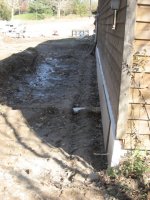
This is what the back of the shop looked like when I started:

IMG_2607.jpg

IMG_2609.jpg


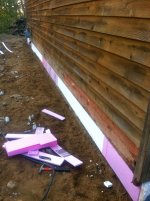
I had requested a 12" thick slab at the edge when I had it poured. What I didn't realize was that the concrete guy used 2x12 forms (only 11-1/4" actual) and allowed the concrete to run under the edge to make up the last 3/4 inch. That left me a 'ledge' - which needed to be removed - that varied from nothing to an inch and a half wide, and from about a half inch to an inch or more thick. The line I need to cut/break looks white in the first picture:

IMG_0127.jpg
IMG_0129.jpg

I tried smacking it off using a hammer and a cold chisel. That didn't work too well nor go very quickly. Time for plan 'B'.

I already owned a cheap Campbell Hausfeld air powered hammer. I put a chisel bit in it, parked my **** on the ground in front of a footing, and started heading down the footing knocking off the ledge as I went. It took the better part of a day, but was infinitely better than the hammer and chisel. I'm not positive, but I think some of the nerves in my hand are STILL numb from that. Here's what one side looked like with the 'slag' chipped off the footing:

IMG_0128.jpg

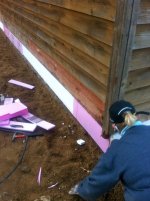
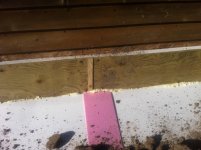
The next problem was that the edge of the footing wasn't straight, and didn't match up with the exterior walls. It ranged from 1/4" to almost an inch and a half recessed. What I did to solve that problem was to cut and glue various thicknesses of foam to the edge of the footing to build it out roughly even with the exterior walls.

IMG_0130.jpg

IMG_0131.jpg

The pink stuff you see comes in 1/4" thickness. The white foam is 1" or 1.5". Using various combinations got me to about where I needed to be.
 
Last edited:
OP
M

MN4x4

Well-known member
Joined
Sep 5, 2010
Messages
1,443
Location
Minnesnowta
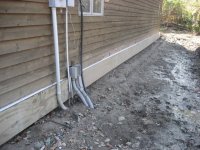
Once I had a more-or-less even place to start, I special ordered some 4x8 sheets of High-Density 2-inch foam. I cut it 16" wide, and placed it against the footing and up 1.5" on the side of the building. This allowed me to cover the joint where the bottom plate sits on the slab, eliminating one more place for cold air to enter. Once the foam was (temporarily) in place, I covered it with 5/8" treated plywood - also cut to 16" - and screwed it through the 2" foam and into the bottom plate with some BIG honkin' screws.

IMG_2612.jpg
IMG_2611.jpg

I carefully cut the end pieces so one piece of plywood overlapped the other, then I nailed the corner together with 15 gauge stainless steel nails.

IMG_2602.jpg

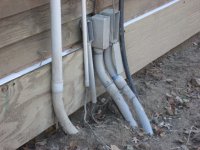
There were some interesting spots, like around all my wires. I hand-dug around them and the gas line, and carefully slid both foam and green ply in behind them.
IMG_2603.jpg
IMG_2606.jpg
IMG_2605.jpg
 
OP
M

MN4x4

Well-known member
Joined
Sep 5, 2010
Messages
1,443
Location
Minnesnowta
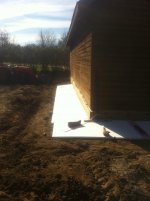
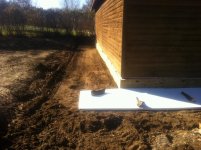
Once all the foam and plywood was in place, I back-filled around the building and graded it perfectly flat with a slight slope away from the building so any moisture would drain away. Once I was satisfied with the grade, I began placing 4x8 sheets of 2" foam against the plywood. The dark things you see laying on the foam are logs to keep them from becoming airborne or blowing away.

IMG_0142.jpg

IMG_0146.jpg

IMG_0147.jpg

IMG_0143.jpg

Once the foam was down I went back and nailed a thin piece of green 2x over each of the plywood joints. I also used a piece of the thin (1/4") pink foam to cover the joints in the horizontal foam. Then I used a bunch of cans of expanding foam to seal the gap between the horizontal sheets of foam and the plywood/foam sandwich attached to the building before I began to backfill.

IMG_0167.jpg
IMG_0152.jpg
IMG_0150.jpg

No dirt is gonna get where it doesn't belong!
 
OP
M

MN4x4

Well-known member
Joined
Sep 5, 2010
Messages
1,443
Location
Minnesnowta
All the work I posted above took about 3 weeks - and that included a LOT of help from my wife and daughter.

There were also various breaks; trips to get materials; honey-do's; and miscellaneous interruptions. Back filling is now complete, but I still need to install some flashing to keep rain/snow/dirt from landing on top of the foam. That may have to wait, since we have around a foot of snow on the ground and more coming. Time to move INSIDE the shop.

Next up - what dirty-rotten-so-and-so built this drain...?

Hint - it wasn't me.
 

reddog289

Well-known member
Joined
Jul 30, 2010
Messages
229
Location
Detroit
I wonder if this would keep my garage a little warmer.The backside of mine has a 2 to 3 foot exposed foundation. I was planning on backfilling and doing raised beds for my tomatos next year, Glad I saw this.
 
OP
M

MN4x4

Well-known member
Joined
Sep 5, 2010
Messages
1,443
Location
Minnesnowta
I'll bet it would help your garage a bunch.

My furnace quit working because the filter got plugged with concrete dust from grinding. I didn't realize that it was out for a couple of days. Outside temps were only in the 20's. Inside my shop, though, it was a balmy 47 degrees!

I am very pleased that I did this, and winter is only starting. I suspect that my payback will be less than 2 years.
 
OP
M

MN4x4

Well-known member
Joined
Sep 5, 2010
Messages
1,443
Location
Minnesnowta
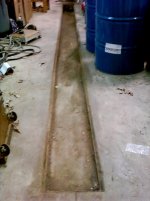
About that floor drain...

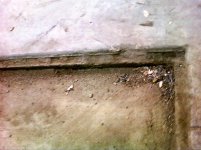
The guy who poured the concrete also made up a wooden form to define the floor drain. I certainly didn't know exactly what a floor drain should be like, but apparently neither did he. Where the grate/cover should go he only made it 3/4 of an inch deep. Over the years I've put plywood and other materials over it (so my carts/creepers don't fall into it or I step down and bust an ankle) but because they are so thin they never last.

He also didn't stake or place his form very well, so the edges of the drain wandered like Moses in the desert. And the corners looked like **** as well:

SSPX0068.jpg

SSPX0066.jpg

SSPX0067.jpg

I got quotes ranging from $600 to a couple grand to fix it. Like I said, I have more time than money so I decided to tackle it myself.

A buddy had rented a concrete saw and didn't need it for the whole time he had it, so I borrowed it one night and started the project by cutting new outside edges. I then went back and cut multiple kerfs parallel to the first line and closing in to the center. This left me with 1/4" to 1/2" wide ridges of concrete that I could knock out with a hammer. After doing all that, the edge of the drain looked like this:

IMG_0198.jpg

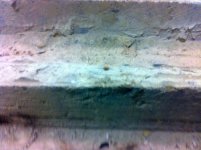
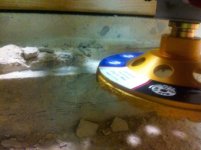
Much better. The sides are perfectly smooth, but the 'ledge' that my grate will sit on is still too rough. I thought long and hard about how I was going to smooth it out. I researched this forum and found that many people had suggested using a diamond 'cup' wheel on a grinder. So, off to harbor freight I went. Picked up a diamond wheel and handed it to my wife so she could use a 20% off coupon. Then I grabbed their 'best' 4 1/2" grinder which was on sale for $19.99 and used my own 20% off coupon to bring it down to $15.99. I can't believe it - a 4 1/2" grinder for less than $16!!!

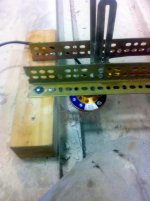
Heading back to the shop I knew I wouldn't be happy with the results if I tried to free-hand the cut, so I set about building a 'sled for it to sit in and ride on the floor. I dug around a bit for materials, took about 2 hours fiddling, and came up with this:

IMG_0195.jpg

IMG_0196.jpg

The back end looks just like the front, with a 2x4 used as a plate to run along on top of the floor. The vertical pieces allow me to adjust it up and down. Two bolts go into the threaded portions of the grinder where the handle normally installs. In practice I simply set it down on the ledge, then push it along while it does its thing. Here I have started down one side:

IMG_0199.jpg
 
OP
M

MN4x4

Well-known member
Joined
Sep 5, 2010
Messages
1,443
Location
Minnesnowta
I'm glad I didn't try to use my good Milwaukee grinder for this. The diamond blade throws a TON of concrete dust EVERYWHERE. I had two air cleaners running the whole time, and I even tried wetting it down. Nothing helped all that much.

Grinding went fine for about 10 feet or so. The grinder was making more and more noise, and finally it just stopped! Well, it is in warranty so back to HF I go. Got home with the second grinder, and got ALMOST one whole side done before this one died. Back to HF again. Fortunately my jig makes it pretty easy to swap grinders. Did I mention that I'm REALLY glad I didn't use my nice Milwaukee for this job?

HF is almost an hour drive from my house, so this time I got a new one under warranty AND bought a second one - my third and fourth respectively. Headed back home. Being gone for 2 hours allowed most of the dust to settle out so I could see what I was grinding.

The third grinder lasted about the same amount of time as the other two, then died. The fourth one finally allowed me to finish up. Here's what it looked like as I completed the grinding:

IMG_0197.jpg

IMG_0204.jpg

Note the nice straight lines? Now THIS I can live with!

Once the drain was done, I cut some pieces of 2x10 to cover it until I have enough money to buy the grate that I want. I cut them all at a smidgeon under 16", and they all fit like a charm. I love it when a plan comes together!

Although it took me FOUR HF grinders to finish this, I want to point out that I have since used that same grinder for several hours of grinding metal with great results. I think the concrete dust was just too fine and the tool simply couldn't take it.

Time to go take a shower and clean about 5 pounds of concrete dust out of my mouth and nose. Yuck!
 
Last edited:

Shott8283

Member
Joined
Nov 30, 2010
Messages
16
looks great. so does that drain , drain into a piped drain into your sewer/septic/leach? or does it just sit in the gally and evaporate as it sits.
 

LSVLance

Well-known member
Joined
Jul 17, 2010
Messages
298
Location
Peoria, AZ
Concrete dust is about as bad as it gets...I hate that burning feeling you get in your sinus's after ingesting a bunch of it.

Your insulated foundation is cool. I bet that does help a lot.
 
OP
M

MN4x4

Well-known member
Joined
Sep 5, 2010
Messages
1,443
Location
Minnesnowta
looks great. so does that drain , drain into a piped drain into your sewer/septic/leach? or does it just sit in the gally and evaporate as it sits.

Currently just empties into a basin and evaporates. When we eventually get sewer run where we live I plan to hook it up.
 

tcianci

Well-known member
Joined
Feb 7, 2009
Messages
4,242
Location
Walpole, Ma
What did you do about the detail where the foam covered with plywood sticks out beyond your siding? And what is the purpose of the foam and plywood again? It's doubtful that once you factor in your time plus materials plus the fact that the plywood is going to deteriorate and form a perfect conduit for critters, you will ever see any kind of payback in the form of fuel savings for heating the space.
 
OP
M

MN4x4

Well-known member
Joined
Sep 5, 2010
Messages
1,443
Location
Minnesnowta
What did you do about the detail where the foam covered with plywood sticks out beyond your siding? And what is the purpose of the foam and plywood again? It's doubtful that once you factor in your time plus materials plus the fact that the plywood is going to deteriorate and form a perfect conduit for critters, you will ever see any kind of payback in the form of fuel savings for heating the space.

I don't have it up yet, but I have metal flashing that nails to the sides of the shop under the bottom piece of siding and slopes down at 45 degrees to cover the top of the foam and treated plywood.

And I respectfully disagree with your stated 'fact' that the plywood will deteriorate. My home sits on a permanent wood foundation, and when I recently built our master bedroom addition I unburied a wall that had been in the ground for 20 years. After I brushed off the last of the dirt, the treated plywood on that wall looked EXACTLY like it had when I buried it 20 years earlier. That is why I chose to use treated plywood to protect the foam, instead of another material.

BTW, I *love* the old pickup in your avatar. I'd love to have one someday.
 
Last edited:
onewaydave

Well-known member
Joined
Sep 28, 2009
Messages
961
Location
Down the road from Dorothy and Toto
I am interested but have some reservations. At my place I have had less success with ply and foam. Ply rots (treated or not) and mice and other critters chew up the/any insulation for bedding (or just to pi$$ me off). But, I can see putting a concrete apron (sidewalk) around the east,south and west sides of the shop to absorb sunlight and act as a heat sink for the evening/night.

I put foam under a dog kennel a few years back and the mice have totally destroyed it, the foam.

Great work on the drain. Man I agree about concrete dust.

Dave.
 
OP
M

MN4x4

Well-known member
Joined
Sep 5, 2010
Messages
1,443
Location
Minnesnowta
I can't believe nobody has commented on my grinding sled? Certainly not the nicest/most professional looking contraption ever invented, but it sure did the job for me!

Looks kinda ghetto though, doesn't it?
 
Last edited:

tcianci

Well-known member
Joined
Feb 7, 2009
Messages
4,242
Location
Walpole, Ma
I should have mentioned that! The grinding sled is the cats pajamas! There aren't too many places where you will see concrete "machined" in place. You did a great job with that.

20 Years ago, most treated wood was saturated with a chemical called CCA (chromium copper arsenate) or somthing along those lines and in many instances there were treatment saturation levels that yielded the wood servicable for ground contact. Unless you specified your current materials to be suitable for ground contact, they most likely are not. The success of your current foundation is most likely a combination of the correct treatment of the wood and good drainage. Unfortunately I have taken apart many, many treated wood structures and the areas where they are in contact with the ground fared no better over time than common kiln dried lumber. They obviously do last longer than KD but end up in the same condition eventually.

Thanks for your comment on the truck. I'm doubtful as to whether it will ever be finished or be done correctly because it is being built in a garage that has an uninsulated slab, (without rebar) an epoxy floor that didn't require the sacrificial slaying of my first born to appease the gods of epoxy adhesion, plastered walls and God forbid, a kraft paper vapor barrier. Some of us can't get anything right. :)
 
Last edited:
To avoid these ads, REGISTER NOW!
OP
M

MN4x4

Well-known member
Joined
Sep 5, 2010
Messages
1,443
Location
Minnesnowta
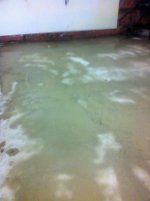
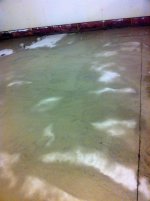
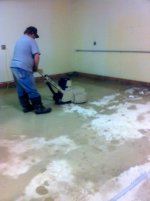
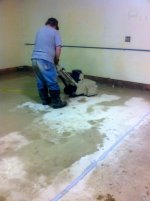
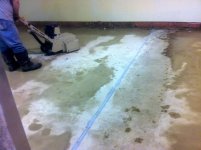
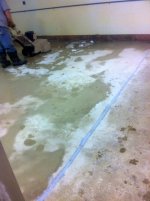
Over the weekend I rented a concrete grinder (Edco dual-head, if anybody cares) and got busy stripping the old sealer off the concrete in the back of my shop while also smoothing out some imperfections in the surface - like trowel marks and boot prints. I wish I was kidding, but I'm not!

I was hoping to get to this earlier this summer so I could roll stuff outside and do the whole floor all at once, but the season got away from me. So now I need to do it in sections. I'm doing the back of the shop first.

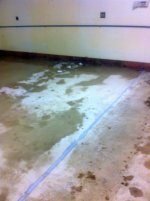
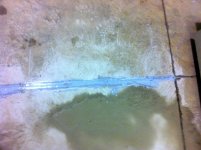
I started by washing the floor, then cleaning out the expansion joints in preparation for filling them with epoxy crack-filler.


IMG_0208.jpg

IMG_0212.jpg

IMG_0213.jpg

I mixed up the epoxy crack filler and set about getting just the right amount in the joints. Too little and it will show through the finished floor, but too much and I will waste time and material just grinding it down. Plus I needed to work fast as this stuff only has about a 30 minute pot life!

IMG_0215.jpg
IMG_0217.jpg
IMG_0219.jpg
IMG_0220.jpg

Now where'd I leave that grinder...?
 
OP
M

MN4x4

Well-known member
Joined
Sep 5, 2010
Messages
1,443
Location
Minnesnowta
Unloading this beast of a grinder from my trailer was fun - not! Barely managed it with two people. Plugged it in and got right to work.

IMG_0207.jpg
IMG_0210.jpg
IMG_0214.jpg
IMG_0216.jpg
IMG_0218.jpg

Sure glad I have those dedicated 20-amp circuits! This thing used every bit of power they supplied. I even tripped breakers a couple of times by lifting the handle and putting a little too much pressure on the grinding head.

The machine did not remove nearly as much material as I expected it would. It had what supposedly were the coarsest diamond blocks offered, but it took for-flippin-ever! The area I did was less than 600 square feet, and I'll bet I spent 30 hours on it! Even then it wasn't perfect, but I only had the machine for the weekend and I didn't want to pay for any more rental time. Plus my back was killing me as the handle was fixed and - I think - designed for someone about 3 inches shorter than I am.

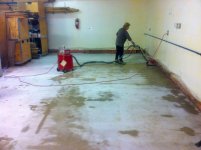
Once I had returned the grinder I vacuumed the entire floor with my new $28.88 'Black Friday' Ridgid vac from Home Despot. It did a good job, but I had to stop and clean/swap the filter every 100 s.f or so.

With the vacuuming done it was time to get the floor REALLY clean. We own a Rug Doctor carpet and tile cleaner, so I dragged that out to the shop and got it ready for SWMBO. It's her machine, so she did the actual cleaning which both I and my back REALLY appreciated.

IMG_0223.jpg
IMG_0227.jpg

I ran back and forth providing clean water and getting rid of the dirty concrete-dust water. That's some nasty stuff.

I suspect the floor is probably clean enough to eat off of now - but I think I'll pass. In any case it needs to dry overnight and then tomorrow - finally! - I can put down epoxy. I can't wait!
 

Cougar67

Well-known member
Joined
Nov 19, 2009
Messages
868
Location
Virginia
What did she mix with the water as a cleaner? I would not have thought to use the Rug Doctor but it extracts the water so it's a great idea.
 
OP
M

MN4x4

Well-known member
Joined
Sep 5, 2010
Messages
1,443
Location
Minnesnowta
Didn't need to clean it, since we just used the grinder on it. Used the water to release the concrete dust and the Rug Doctor to pick it up.
 
OP
M

MN4x4

Well-known member
Joined
Sep 5, 2010
Messages
1,443
Location
Minnesnowta
I have been busy with the holidays and other stuff, so haven't spent much time in the shop recently. I finally got to spend some 'quality' time out there this week. Mostly I have been trying to clean up the concrete dust from working on the drain and the floor. I'm willing to bet that a hundred years from now they'll STILL be finding concrete dust in the strangest places out there. That stuff gets EVERYWHERE!

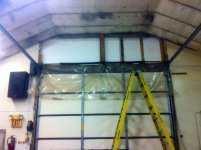
One of the 'little' projects I decided to tackle turned out to have an interesting twist. Above my overhead door I had insulated with fiberglass batts. The area is 12 feet wide by just under 4 feet tall. I used the pink stuff, and when it went up it was all neat and pretty. After several years and a squirrel infestation, here's what two of the cavities look like now, with all the insulation lying at the bottom.

IMG_0266.jpg
IMG_0267.jpg

We solved the squirrel problem last summer, but I hadn't gotten around to dealing with this area. Once I pulled back the poly and cleared out all the dead insulation, acorns, splinters, and squirrel droppings, look what I found:

IMG_0271.jpg
IMG_0272.jpg

Yep, those little buggers scratched or chewed completely through the OSB sheathing and got to the back of the siding. Nothing I can or want to do about the sheathing right now - that will have to wait until warmer weather. What's a real bummer is that once I finish THIS project and go to cross it off my list, I will have to add at least one more. Net progress as measured by number of projects = zero. Sigh...

I decided to use rigid foam insulation. Or perhaps I should write RIDGID foam insulation, since I bought it from Home Depot? :thumbup: I started with 1-1/2 inch stuff in between the studs defining the cavities. Here's the first (outermost) layer almost done.


IMG_0273.jpg

Then I added a second layer, this time using 2" rigid foam.

IMG_0276.jpg

And here is the second layer all done.

IMG_0278.jpg

Third and final layer will have to wait for another day. I think I'll go squirrel hunting tomorrow...

:)
 

Stuart in MN

Well-known member
Joined
Sep 8, 2005
Messages
23,157
Location
Minneapolis
Have fun squirrel hunting! Those little buggers got into the soffits of my house and it was a real pain getting rid of them...they have a one track mind, once they've set their minds on chewing a hole into a space they won't stop.
 

TheNerd

Well-known member
Joined
Mar 15, 2009
Messages
144
Location
The Mitten State
The shop looks great, keep us posted. I am interested to hear how the slab insulation helps out with floor temps.

There are many homes in this area (Michigan) built on treated wood foundations and I have never heard of any problems. As far as the mice go, keep all the gaps sealed up and buy some Decon, its pretty simple. Squirrels are another story though, they can be a real pest.
 
Last edited:
OP
M

MN4x4

Well-known member
Joined
Sep 5, 2010
Messages
1,443
Location
Minnesnowta
Thanks for the comments guys. Nice to know that others have an interest in this as well.

As I posted in another thread, my seat-of-the-pants impression is extremely favorable. No hard numbers on heating costs yet, but I had an "Ah-Ha" moment when I realized that I have yet to walk in there and find the furnace running before I open the door. It seems like in the past it was running at least every other time that I went in. Actually, it seemed like it was ALWAYS running, but I'm sure my stress over the amount of the gas bill might have contributed to that perception.

I also noticed that when it does run, it only runs for about 5 minutes and then doesn't run again for 20-30 minutes. This is with the temp set to 62 degrees.

I need to get an entire heating season recorded before I'll know for sure, but it sure seems like I am on track to to get a payback in less than two years!
 
Last edited:
z28snksknr

Well-known member
Joined
Jul 8, 2009
Messages
1,827
Location
Turnersville, NJ
Man, I really appreciate the level of effort you're putting into your place there. That's certainly a lot of labor and time put in for benefits that only someone on GJ could really appreciate. Thanks for sharing!!
 
OP
M

MN4x4

Well-known member
Joined
Sep 5, 2010
Messages
1,443
Location
Minnesnowta
To the guy that rented the floor grinder, how much dust did it make?

The thing that really put the dust in the air was the hand grinder while I was working on the drain. It got so dense you couldn't see to the back of the shop!

The floor grinder wasn't too bad about putting dust into the air, but it left a LOT on the floor. You could track it on your shoes, but mostly it just 'sat' there. We had to vacuum it up frequently so that I could see if I had done a good enough job in a spot, or if I needed to go over it again.

The floor grinder also has the ability to use water with it, to help keep the dust down. I wasn't able to use that feature because I don't have water to the shop and it was too cold out to stretch a hose across the yard.
 

bchee

Well-known member
Joined
Aug 20, 2007
Messages
6,148
Location
Texas
I'm impressed by how much you are able to do by yourself.

I love the grinder sled. I wish I had seen it about 2 weeks ago.
I just used the hand grinder with the diamond wheel to remove tile adhesive. I left some gouges in the underlying cement which I wasn't too happy about.
It wasn't always easy to keep the diamond wheel completely flat.

Can you give more details about the HF grinder you used? I'm surprised you went through 4. That would be a definite fail for that tool. Which model # was it?
 
OP
M

MN4x4

Well-known member
Joined
Sep 5, 2010
Messages
1,443
Location
Minnesnowta
Man, I really appreciate the level of effort you're putting into your place there. That's certainly a lot of labor and time put in for benefits that only someone on GJ could really appreciate. Thanks for sharing!!

Thank YOU, and everyone else who commented.

I have finally realize that I just can't be happy unless I do a job right. It will bug me forever if I don't. It doesn't have to be expensive, but I generally find that there is at least one way that gives a superior result. If I can't figure out what that is right off, I usually leave the job until I *do* figure it out. For instance, the 2" foam I am using is left over from the Frost-Protected Shallow Footing retrofit that started this thread. Yes, 5-1/2 inches of foam probably IS overkill. So is overlapping all the seams, and sealing all the edges with spray-in foam. I don't really know what the final R value is, but I know it's a boatload better than 5-1/2" of old matted fiberglass and squirrel droppings.

However, a little ADD or OCD there doesn't mean I don't fall into the 'can't keep the shop organized' trap. If you could see the rest of my shop right now you'd find tools not put away and every horizontal surface covered with '****' of one ilk or another. Including concrete dust. But I'm working on it.

It is INCREDIBLY important to know that you guys appreciate the planning, effort, and attention to detail that go into a project like this. While it would be wasted on the 'average' person, I believe the people here are far from average. And it's more than a little rewarding to get a 'pat on the back' when I post updates here. It keeps me wanting to tackle the next stage, and start planning for the one after that.

Thanks for reading, and keep the comments coming!
 
OP
M

MN4x4

Well-known member
Joined
Sep 5, 2010
Messages
1,443
Location
Minnesnowta
I forgot to post pictures of my new squirrel deterrent:
Dani.jpg

Her name is Dani ('danny') and she joined us right before Christmas. She was a rescue.

She has settled in to her new home quickly. She loves to climb, and although I haven't 'caught her in the act' I am pretty sure she is hunting rodents.
Dani-Close.jpg
 

nissan_crawler

Well-known member
Joined
Jan 12, 2008
Messages
9,638
Location
Wichita, KS
Not only do they hunt, but they're a great deterrent. I found out that two of my neighbors have had huge problems with mice. Me with the three cats? One, and it was dead and delivered to the front door. One neighbor said he's CAUGHT over 25 in traps, god only knows how many were running around.
 
OP
M

MN4x4

Well-known member
Joined
Sep 5, 2010
Messages
1,443
Location
Minnesnowta
Can you give more details about the HF grinder you used? I'm surprised you went through 4. That would be a definite fail for that tool. Which model # was it?

The grinder is model 91223. But, I'm not so sure I would give it a fail.

While it's true that I did go through four of them in order to finish the concrete grinding job, I have no reason to suspect that any other brand or model would have survived the concrete dust either. That stuff just eats bearings up.

Also, the first one I used AFTER the concrete job has now been used hard for over a month doing metal cutting and grinding, and is running strong with no signs of impending failure. And I still have another one - also replaced under warranty - that I haven't even taken out of the box!

In short, does it deserve high marks as a concrete grinder? No. Does it deserve condemnation as a metal grinder? No. Does it deserve a place of honor among my shop tools as a good vaiue and solid performer? Too early to tell...
 

dodge610

Well-known member
Joined
Aug 22, 2010
Messages
5,467
Location
North Canton Ohio
I forgot to post pictures of my new squirrel deterrent:

Dani.jpg

Her name is Dani ('danny') and she joined us right before Christmas. She was a rescue.

She has settled in to her new home quickly. She loves to climb, and although I haven't 'caught her in the act' I am pretty sure she is hunting rodents.
Dani-Close.jpg

I also have three cats 2 girls and a boy they have taken very good care of the mice and other rodent population in my shop i have 12 acres of woods behind my shop mice and other rodents were a broblem not anymore.:beer:
 

e-tek

Well-known member
Joined
Dec 19, 2007
Messages
10,690
Location
Saskatoon, SK
Ya - looks deadly!!:bounce::lol_hitti

attachment.php
 
To avoid these ads, REGISTER NOW!
Top Bottom