To avoid these ads, REGISTER NOW!

Above 1200 Sq/FT Restored 1930's Auto Shop

Wokspaces above 1200 squarefeet.

Scuderia-F1

Well-known member
Joined
Feb 9, 2011
Messages
1,198
Location
Stockholm, Sweden
Oh, that Walker is going to be so nice.
On top of this Thomas, you have gotten me to be "addicted" to powder coat.
This MUST be THE best technique to paint shop items.

Looking forward to see that jack when finished, & then the next project.....

Anders
 
To avoid these ads, REGISTER NOW!
OP
B

BB767

Well-known member
Joined
Dec 24, 2009
Messages
3,724
Location
Philo, IL
Thomas, a question... did you ever remove the data plate from the powder-coated jack? I know you were waiting until you had rivets in hand to do so, and you showed us the donated rivets, and I saw the post about painting it and cleaning off the letters. But it looks like the original rivets. Did I miss a post about removing and reinstalling the plate? Say it ain't so, cauz I stayed up late wayyyyyy too many nights reading this "cover-to-cover", and I don't want to find out I was reading with my eyes closed!:confused:

Also, I noticed on the other jack (unrestored), that the data plate states "Factory Rebuilt" So, even though it is older than the one with the handle cracks, it could have had cracks in an original handle that was replaced during the factory rebuild. Not that it matters, just a thought.

And I agree,about taking care of those jacks, and it applies to all tools, new or old, "use 'em, but don't abuse 'em".
John

John, I'm a little late getting back to you, flying and all, but you can rest easy about missing a post...you didn't! The data plate is thin aluminum and very easily damaged so removing it was my last option. I wanted the replacement rivets in case I did have to remove it. Don and I decided to try powder coating the yoke first since I had nothing to lose by trying it. If it didn't look correct I could then remove the plate and re-powder coat and reinstall it. Before the yoke was powder coated I buffed the plate and rivets with 0000 steel wool to clean and brighten them up. Then with careful prep work and the nature of powder coating, the powder when heated, seeped under the edge of the plate so there is a clean edge between the plate and yoke. When done it was spot on so I was gratefully relieved of the task of removing and reinstalling the data plate. I didn't want it to look "taped off" and it doesn't.

The other jack was factory rebuilt at some time in it's past, I don't know when. Since it's all original paint on the jack, no evidence of any repaint anywhere, you can easily see that the handle still retains it's original paint as it matches the other paint on the jack perfectly which it couldn't, had it been repaired or replaced some time in the past. From the factory when first manufactured, these jacks were assembled and then painted. Any replacement parts or repaint would jump right out at you.

Now if we could just get people to "use and not abuse" the world would be a better place wouldn't it? Thanks John for your inquiry. If you wondered I'm sure others did too.

Thomas
 
OP
B

BB767

Well-known member
Joined
Dec 24, 2009
Messages
3,724
Location
Philo, IL
Thomas something to help you put the wheel-caps back on. If you can freeze the wheel with the bearings in place heat the caps and you can put them on by hand ,then when they reach the same temperature the wheel expands and the cap shrinks and you have a tight hold.I use outboard motor needle-bearing assembly lube to hold the needle's in place.

Good suggestions, thank you. The freezing and heating works remarkably well with many items that have close tolerances.

It's very helpful that the needles on the front wheels are relatively large in size which makes handling them somewhat easier. Check back to see them installed.

Thomas
 
OP
B

BB767

Well-known member
Joined
Dec 24, 2009
Messages
3,724
Location
Philo, IL
whoa!
i'm at the end?
just stumbled across this thread somewhere this morning, now it is almost 3 in the morning here in the netherlands (that's about 15-20 hours of almost non-stop reading) and my eyes are sore and my head is allmost exploding, what a great job you did on the shop and the tools... just awesome
the part about the Y-manifold gave me a lump in my throat...
keep up the good work, i'll be following from now on,
danny

danny, you're only at a "temporary" lull. The end is a long way out yet. Non-stop reading is pretty tough but it seems you were up to the challenge. Now about your retention level from doing it in one reading.....good luck on the test! :D Welcome to the thread.

Thomas
 
OP
B

BB767

Well-known member
Joined
Dec 24, 2009
Messages
3,724
Location
Philo, IL
Lou Bingham's gift

I know you all are tool nutz..
Well Lou Bingham sent me a 50 year old tool today
It is a Proto tool company DZUS 1/4 turn fastener tool... I know that doesn't sound like much. BUT this tool was give to my Uncle Chuck Chenowth in 1961 when he had his Indy Roadster at Indianapolis motor speedway. Chuck gave it to Lou many years ago & Lou just gave it to me.

190376_1911554589522_1261594482_2293132_6091866_s.jpg


On one side it says PROTO PROFESIONAL QUALITY , on the other side is says INDY 500 SAFETY FIRST.

THANK YOU LOU

Thanks Charles for the note. I'm in Brazil at the moment so I can't easy do this, but if someone would post a picture of a DZUS fastener that would help those who don't know what it is and would help them see why that little tool Lou gave you is so handy. Those fasteners were very common with aircraft and race cars years ago but you don't see them as often anymore.

I need to do a post on Lou and how he figures in with a buddy of mine who races Formula Fords, your uncle and the Indy car back in 1961, yourself, myself, Jacob etc. He's at the center of it all amazingly enough. That 6 degree of separation thing.

Thomas
 

3bay

Well-known member
Joined
Dec 29, 2007
Messages
157
Location
Indiana
I think these are close, I have seen different ones.
 

Attachments

  • dzus.jpg
    dzus.jpg
    51.9 KB · Views: 84
  • al-leake-monoposto-tonneau.jpg
    al-leake-monoposto-tonneau.jpg
    109.8 KB · Views: 98
OP
B

BB767

Well-known member
Joined
Dec 24, 2009
Messages
3,724
Location
Philo, IL
I've been following this thread since my friend showed me, just never registered. The transformation is amazing and the mass of old stuff is just awesome. :rocker:

One main thing I just need to ask (Even though I can pretty much guess the answer), what ever happened to the lil' old Allis Chalmers garden tractor? I might be a bit of a goof but I collect the old stuff. I have a 1975 Allis Chalmers like the one pictures, completely restored it.

6101.jpg

Mark you say you collect old stuff.....boy have you come to the right place!! Very nice Allis there, good job! I resisted for the longest time doing anything with mine since it was in nice condition. Not running mind you, but I was hoping to find someone such as yourself to restore it as I didn't have time to. Sadly, this before I learned of Craigs list and the like and it eventually.........well, it eventually (brace yourself)....went to a higher purpose.:eek: I can't save them all and this was one I couldn't. I know, I feel badly about it too. Next time perhaps.

BTW, welcome.

Thomas
 

creativedust

Member
Joined
Jan 27, 2011
Messages
16
Thanks Charles for the note. I'm in Brazil at the moment so I can't easy do this, but if someone would post a picture of a DZUS fastener that would help those who don't know what it is and would help them see why that little tool Lou gave you is so handy. Those fasteners were very common with aircraft and race cars years ago but you don't see them as often anymore.

I need to do a post on Lou and how he figures in with a buddy of mine who races Formula Fords, your uncle and the Indy car back in 1961, yourself, myself, Jacob etc. He's at the center of it all amazingly enough. That 6 degree of separation thing.

Thomas

Say hello to the president if you see him I think hes over there too
 

maxwedge

Active member
Joined
Feb 28, 2010
Messages
36
Location
Bloomington IL
Uh 3bay....does that there cheapo, dime a dozen little Alfa you posted up, by chance belong to you? and do you have more pictures of it?:D
 
OP
B

BB767

Well-known member
Joined
Dec 24, 2009
Messages
3,724
Location
Philo, IL
Lou Bingham's gift

I know you all are tool nutz..
Well Lou Bingham sent me a 50 year old tool today
It is a Proto tool company DZUS 1/4 turn fastener tool... I know that doesn't sound like much. BUT this tool was give to my Uncle Chuck Chenowth in 1961 when he had his Indy Roadster at Indianapolis motor speedway. Chuck gave it to Lou many years ago & Lou just gave it to me.

190376_1911554589522_1261594482_2293132_6091866_s.jpg


On one side it says PROTO PROFESIONAL QUALITY , on the other side is says INDY 500 SAFETY FIRST.

THANK YOU LOU

Thanks 3bay, the slot on a DZUS is not flat across, but dished, deeper in the center of the slot, tapering up at the ends. A normal, straight screw driver would not get full engagement down into the slot. The tool as pictured, is held on the left side and the right side of it, the rounded part, is what is placed in the DZUS slot. This provides full engagement in the curved slot and additionally the thickness of the tool fits the width of the DZUS slot perfectly, preventing it from being "chewed up" from a too narrow tool. It only takes a 1/4 turn of the fastener to loosen or tighten it plus the fastener is captive preventing it from being lost when loosened up. Very clever, older technology. It's probably expensive to manufacture which I'm guessing has lead to a decline in it's use.

Thomas
 
OP
B

BB767

Well-known member
Joined
Dec 24, 2009
Messages
3,724
Location
Philo, IL
Continuing with the Walker project. I'm going into greater detail than would normally be necessary, but this can serve as a guide in the future to others who may want to take on a similar project with their own jack. I hope this isn't too dry and boring.

IMG_4201.jpg


With the front wheels removed I turned to the rears. They are held in place by a screw as seen. It really helps to have had penetrating oil working on them. These screws are staked in place as a means to keep them from loosing up and backing out. Look at the 4:00 and 7:00 positions on either side of the screw slot and you can see a dimple in the screw head. This displaces metal on the screw head slightly which helps hold the screw in. Very important to use a correct fitting screw driver or hand impact to loosen the screw or the slot will get chewed up and make removal quite difficult.

IMG_4204.jpg


The screw removed. Note the bottom left side and how it tapers. They aren't perfectly round on the bottom.

IMG_4206.jpg


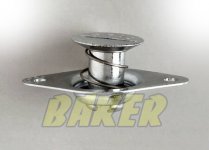
The rear wheel or caster removed. Before you loosen the screw all the way, position something under the caster to catch all the ball bearings that are about to fall out. An old bath towel works well. It will keep the little balls from rolling all over the place and losing some of them! :sad:

IMG_4205.jpg


This is what is about to cascade from the rear caster as it's removed. I believe there are 21 balls, my notes are in the shop. The washer like item (there are two of them) are retainers that sit above and below the balls.

IMG_4291-1.jpg


Once the casters were removed I found an excessive amount of play in the wheel axles. To correct that, the old axles needed to be removed and inspected.

IMG_4303.jpg


That inspection showed why there was so much play in the rear wheels. Note the wear on the axle shafts. Riding on these steel shafts were bronze bushings (portions of what is left of the bushings seen on left), press fit into the wheels themselves. Bronze is generally soften than steel and yet they still wore the harder steel shafts. Hard to believe but true. :eek:

IMG_4304.jpg


Here's a look at what is left of the bushings. They were worn onion skin thin. New axles and bushings were fabricated and installed.

IMG_4306.jpg


Here are the rears rebuilt.

IMG_4308.jpg


To install the rear axles, they were staked to prevent them from coming out of the casting and to keep them from turning.

IMG_4307.jpg


The "treads" if you will of the wheels, were polished up as best I could. The pitting is from the jack sitting in water or mud. There wasn't enough material on the wheel to turn them down to good metal all the way across.

IMG_4424.jpg


IMG_4423.jpg


Here are the rears all done, new axles and bushings installed and powder coated.

IMG_4429.jpg


And these are the fronts powder coated.

IMG_4430.jpg


The "treads" of the fronts still need to be polished.

IMG_4432.jpg


And these are the front wheels all done along with their hub caps.

Of course there is more coming, please check back. ;)

Thomas
 
Last edited:
OP
B

BB767

Well-known member
Joined
Dec 24, 2009
Messages
3,724
Location
Philo, IL
Oh, that Walker is going to be so nice.
On top of this Thomas, you have gotten me to be "addicted" to powder coat.
This MUST be THE best technique to paint shop items.

Looking forward to see that jack when finished, & then the next project.....

Anders

Anders, powder coating really does have it's place, especially in a shop environment. It is much more durable than paint. When using it, because it's thicker and harder than paint, care must be taken to keep clearances intact. Powder coat an area that has a tight clearance and you'll be saying not nice words trying to remove the coating and bring back that clearance, say where a shaft goes through a hole.

The Walker is coming along very well. In many ways it's turned out better than I'd hoped, which is always a good thing. :thumbup:

Thomas
 

Scuderia-F1

Well-known member
Joined
Feb 9, 2011
Messages
1,198
Location
Stockholm, Sweden
Anders, powder coating really does have it's place, especially in a shop environment. It is much more durable than paint. When using it, because it's thicker and harder than paint, care must be taken to keep clearances intact. Powder coat an area that has a tight clearance and you'll be saying not nice words trying to remove the coating and bring back that clearance, say where a shaft goes through a hole.

The Walker is coming along very well. In many ways it's turned out better than I'd hoped, which is always a good thing. :thumbup:

Thomas

Thomas!
I can only insist that the Walker indeed looks better than I ever could imagine!:rocker:

Anders
 

soj

Well-known member
Joined
Dec 3, 2007
Messages
729
Location
North Georgia
Thomas, thanks for the reply on the rivets. You certainly succeeded in not getting the data plate to look "taped off". The only clue that it hasn't been removed is the original rivets. It looks like they have a few battle scars to match the plate, which is perfect. Your powder coat guy is a gem!
John
 
OP
B

BB767

Well-known member
Joined
Dec 24, 2009
Messages
3,724
Location
Philo, IL
Here is a quick Walker update. The saddle of the original jack

JackSaddleSm1.jpg


... had 2 holes placed in it sometime in it's history...

NewNoseSm3.jpg


...which were repaired, (with apologies to Elroy)

IMG_4425.jpg


After powder coating...

IMG_4426.jpg


...it looks as good as new. The saga continues...

Thomas
 
To avoid these ads, REGISTER NOW!
OP
B

BB767

Well-known member
Joined
Dec 24, 2009
Messages
3,724
Location
Philo, IL
Thomas, thanks for the reply on the rivets. You certainly succeeded in not getting the data plate to look "taped off". The only clue that it hasn't been removed is the original rivets. It looks like they have a few battle scars to match the plate, which is perfect. Your powder coat guy is a gem!
John

John I agree the rivets retain the "patina" of the rest of the jack, but still polished up nicely.

Don is indeed a gem. He has been amazingly tolerant of my "requests" on various powder coat projects. For example...

IMG_4273.jpg


...note the long pin second from the right. I needed it coated on the very end and then down about 1/4" from the end.

IMG_4295.jpg


That way when the pin is moved in place it doesn't interfere with the hole it slides into and yet everything that is exposed is coated. He didn't raise a single objection to this fussy work and made sure it was evenly spaced all around the pin. A nice touch I thought. :thumbup:

Thomas
 

Elroy

Banned
Joined
Oct 15, 2005
Messages
3,467
Location
kentucky
Here is a quick Walker update. The saddle of the original jack

... had 2 holes placed in it sometime in it's history...

...which were repaired, (with apologies to Elroy)

No apology necessary. Proceed as you will. Your rebuild / restoration is more than acceptable to Elroy.

Elroy can appreciate the worn axle pin.

Here is a shot of the axle pin from the rear caster. How many trips across the shop floor does it take to wear a pin this bad ?

Picture028.jpg
 

CRTDI

Well-known member
Joined
Jan 11, 2010
Messages
1,533
Thomas,

I've been following along with your jack rebuild and I must say the attention you give to the small details is quite amazing. Very nice work!!!
 
OP
B

BB767

Well-known member
Joined
Dec 24, 2009
Messages
3,724
Location
Philo, IL
No apology necessary. Proceed as you will. Your rebuild / restoration is more than acceptable to Elroy.

Elroy can appreciate the worn axle pin.

Elroy, isn't it interesting how similar the wear on your axle looks like the one on mine?

Thomas
 
OP
B

BB767

Well-known member
Joined
Dec 24, 2009
Messages
3,724
Location
Philo, IL
And yet, more Walker updates...

IMG_4213.jpg


The front axel is held in place by these two pins.

IMG_4215.jpg


When they are removed the axel will slide out. You shouldn't have to "beat it out". File any high spots and it will just tap out.

IMG_4218.jpg


With the wheels and the front axle removed all that remains is to remove the nuts on the sides. I included this photo because it shows the wrenches I used. They belonged to my grandfather with his name engraved on them. I have several of them but they are all quite large in size and I don't get to use them very often. He was a steam turbine engineer with Allis Chalmers Corp., building power plants all over the world from the 1920's - 1952. He was still working for them when he passed away which was before I was born. As related to me by Mom, he absolutely loved his work and said he never had to work a day in his life because he didn't consider it work he loved it so much. When I hold them I feel the wrenches provide a time bridge between us. He never knew me nor I him, but his wrenches still are doing work by a family member and are well cared for. Did he ever think about what would become of them......I wonder?

IMG_4279.jpg


With the nuts removed the sides can then be tapped off. I used a soft faced hammer and a block of wood and lot's of WD 40. I would advise to avoid the temptation to pry the sides apart.

IMG_4282.jpg


IMG_4284.jpg


IMG_4299.jpg


With the jack apart I cleaned as much old grease off as possible. Then I took the larger pieces to a self service carwash and used engine degreaser and high pressure hot water to clean them up before grit blasting them.

Thomas
 

Scuderia-F1

Well-known member
Joined
Feb 9, 2011
Messages
1,198
Location
Stockholm, Sweden
Great pics of that walker coming apart Thomas, I also enjoyed the little story about your grandfathers wrenches, what a great way to let the memory of him live.

Anders
 

Elroy

Banned
Joined
Oct 15, 2005
Messages
3,467
Location
kentucky
Are you going to be able to replicate the decal on the ram? I think it ends up being hidden from view when the jack is assembled, so it may not be an issue.

Something tells Elroy that out of sight, out of mind doesn't apply in this case. If Elroy was going to this much trouble, time and expense he'd have the decal.
 

realvc

Well-known member
Joined
Jan 7, 2011
Messages
394
Location
Lake Norrell, AR
Hello Thomas

Your Walker jacks sure bring back some memories. We had a similar style jack at the wrecking yard where I used to hang out. It seems it was orange though. Must not have been a Walker. It did have that kind of handle and release knob. This was way back in the late 60s and early 70s.

I have two old floor jacks and a motorcycle lift that have leaking cylinders that I was going to trash but now I'm thinking they may just need rebuilding. I picked up a NAPA low profile for my vette.

Thanks for the sermon illustrations with pictures too. I will have get a power point set up to get the full meaning across.

Vince
 
OP
B

BB767

Well-known member
Joined
Dec 24, 2009
Messages
3,724
Location
Philo, IL
Are you going to be able to replicate the decal on the ram? I think it ends up being hidden from view when the jack is assembled, so it may not be an issue.

Something tells Elroy that out of sight, out of mind doesn't apply in this case. If Elroy was going to this much trouble, time and expense he'd have the decal.

Two issues are at play here. Originally I was hoping that under all the grease and grit I would be able to just clean this jack up and use it as is like the other Walker. I really like originality where possible. However after clean up it was apparent that there wasn't enough paint remaining to make that viable. The power cylinder is a different matter. The original paint on it is excellent but the original decal is not so great, but it is original and somewhat readable. Also Stuart, yes it's completely hidden so that diminishes the need to do anything other than clean it up.

Elroy, if an accurate replacement decal were available I would certainly consider it. Do you know of a source or a means to reproduce it? I like options.

Thomas
 

tinbender 66

Well-known member
Joined
Mar 23, 2011
Messages
2,294
Location
Western Washington State
Hey Tom & Chris..............I ended up here via the Car Craft article. I thought I would take a "peek" at what was here and now here I am 132 pages later. What an incredible journey! It's like a treasure hunt. Since I'm here, I thought I might as will hitch a ride to the end (If there is one). My garage is done on the outside and all utilities are in and now it's time for the interior. You've inspired me to rethink that part and do a little more as far as ambiance goes. Thanks for the beating my bank account is going to take lol. Thankfully, I have a wife (30 years) that's similar to your girl. I just retired after 30+ years in the sheet metal biz so now I have time to play. Once I'm done with the building I've got one of those '66 Chevy II 100 series 2dr post that's gonna get some lovin'!! I want that Catalina. I'm a fool for "post" cars. Sorry for the longwindedness. I gotta go out now and check if I clocked the screws correctly.

Thanks for everything you've done,

Paul P from the evergreen state
 
OP
B

BB767

Well-known member
Joined
Dec 24, 2009
Messages
3,724
Location
Philo, IL
I didn't have these last three pictures loaded in my laptop so I couldn't post them while I was on the "road" so to speak.They really belong at the end of post #2626 above.

ReSizeWalkerClean-1.jpg


This is the inside of the frame after my de-grease clean up. You can see why I was hopeful that the outside paint would cleanup and be presentable. Not too surprising that it wasn't, but if it had looked this good, Don would have had 1 less powder coat project from me.

ReSizeWalkerClean-2.jpg


And this is the front end of the frame. You're seeing just some flash rust here that happened after it was de-greased, not damaging at all and cleaned right up in the blast cabinet. If you just put greasy material in your blast cabinet it quickly contaminates the media you're using. I spent about an hour pre-cleaning 4 large pieces up in the car wash. I brought 2X4's to lay them on while de-greasing so they wouldn't get scuffed up by the concrete floor in the wash bay.


IMG_4421.jpg


Fresh from the oven, we're hanging them outside to cool here. There is a lot of mass there and it takes a while to cool them down. The similarity to slabs of beef hanging is inescapable, don't you think? :dunno:

Thomas
 
OP
B

BB767

Well-known member
Joined
Dec 24, 2009
Messages
3,724
Location
Philo, IL
A replacement decal is a piece of cake. Reproducible art work is the problem.

Well shoot Elroy, I was kinda hoping you had an inside track on that. :sad: If I could get the correct art work for the Rotary Lift control cabinet I'd commission that one also. The good news is that if I find suitable art work later I can fairly easily retro fit the new decal to the cylinder. Mean time the cover plate covers it (if I can get those WALKER letters done correctly) :wtf:

Thomas
 

smrflng

Member
Joined
Mar 24, 2011
Messages
13
Location
Virginia Beach, Virginia
It has taken me quite some time to read the entire post. The restoration of the lift was incredible. It brought back alot of memories of my dad's auto repair shop. He had a 2 post lift of similar vintage, which I believe is still in use to this day. You have inspired me to finally get out and straighten up my own garage. Keep up the great work.

Russ.
 

Chetter

Well-known member
Joined
Nov 30, 2008
Messages
243
Location
Northern Ohio
I have been reading this thread for some time and saw the story in Car Craft magazine about your restoration and I had to chime in and say very nice job for sure. Makes me think of my grandfathers garage back when I was a kid visiting them in PA back in the 60's. His garage had the pit instead of the lift and just like the previous owner of your garage, kept everything, since like you said, those who lived during the great depression, didn't throw anything away. There was always someone who may be able to use it. My fathers garage though built during the 70's ended up the same way, my dad would not get rid of anything from all the old cars he worked on. His garage looks much like your pics, stuff everywhere, in the rafters, on the walls, in every nook and cranny. My dad died back in 1992 and was only 57 at the time but your post and pics have taken me back in time to my grandfathers and fathers garages during my childhood. Thanks for bringing back some cool memories. :thumbup:
 

ToyMeKaNeK

Well-known member
Joined
Apr 16, 2008
Messages
72
Location
NC
Thomas, right behind the "slabs of beef", I see another shop you might ought to tackle on another resto.
We might as well call it "Re: Restored 19XX's Auto Shop" part 2
Seriously, excellent work on the Walker. Looks great!

John
 
OP
B

BB767

Well-known member
Joined
Dec 24, 2009
Messages
3,724
Location
Philo, IL
Hey Tom & Chris..............I ended up here via the Car Craft article. I thought I would take a "peek" at what was here and now here I am 132 pages later. What an incredible journey! It's like a treasure hunt. Since I'm here, I thought I might as will hitch a ride to the end (If there is one). My garage is done on the outside and all utilities are in and now it's time for the interior. You've inspired me to rethink that part and do a little more as far as ambiance goes. Thanks for the beating my bank account is going to take lol. Thankfully, I have a wife (30 years) that's similar to your girl. I just retired after 30+ years in the sheet metal biz so now I have time to play. Once I'm done with the building I've got one of those '66 Chevy II 100 series 2dr post that's gonna get some lovin'!! I want that Catalina. I'm a fool for "post" cars. Sorry for the longwindedness. I gotta go out now and check if I clocked the screws correctly.

Thanks for everything you've done,

Paul P from the evergreen state

A warm welcome here Paul and congratulations on making it to retirement. Ambiance may not be important to everyone but it is to me as you can tell. I guess you could say it adds an intangible quality that enhances my time in the shop. All the small details that are present I just find silently very satisfying. No question the shop reflects me as I'm sure yours will you. I consider them an investment in me and I have absolutely no regrets expending the effort that I did out there and I bet you won't either (but don't let your wife hear about that, it's just between us guys, right? ;) ) Thanks for taking a moment to check in and for your kind comments.

BTW, post cars rule don't they? :rocker:

Thomas
 
To avoid these ads, REGISTER NOW!
Top Bottom