To avoid these ads, REGISTER NOW!

Virginia Retirement Garage/Shop Build

OP
J

John in OH

Well-known member
Joined
Jun 2, 2007
Messages
2,444
Location
SE Ohio & Eastern Virginia
Day 34:

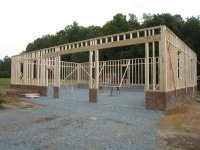
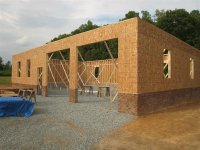
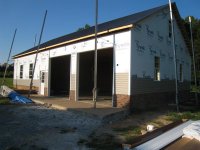
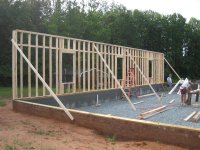
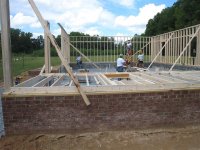
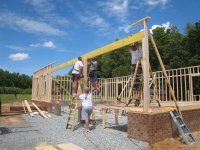
Four framers worked throughout the day. First thing in the morning was raising the east wall into its upright position. Then assembly of north and south walls and lifting of the north.
IMG_5191 (Medium).jpg IMG_5194 (Medium).jpg

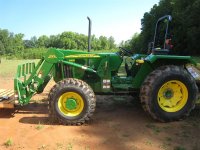
Most difficult task of the day was lifting the three LVL beams into position. Even with 5 guys and a fine JD 5403 tractor with forks (which I covet … another tractor … I’m afraid that I need some serious professional help) it was a dicey job as those beams were long and heavy. Once the beams were up, the west wall was tied in to the beams and the south wall was raised to standing. Final task of the day was squaring of the east wall in preparation for installation of OSB tomorrow.

IMG_5208 (Medium).jpg IMG_5206 (Medium).jpg IMG_5223 (Medium).jpg IMG_5238 (Medium).jpg
 
To avoid these ads, REGISTER NOW!

Mr. Welsh

Well-known member
Joined
May 21, 2007
Messages
1,425
The Deere needs a hook attachment with some extension to it. Something along the lines of this:

ce60.jpg


...with some proper rigging would have made that job much easier.

The building is looking great!
 
OP
J

John in OH

Well-known member
Joined
Jun 2, 2007
Messages
2,444
Location
SE Ohio & Eastern Virginia
The Deere needs a hook attachment with some extension to it. Something along the lines of this:

ce60.jpg


...with some proper rigging would have made that job much easier.

The building is looking great!

Yeah! That looks like a good attachment for the attachment! I'll make sure it goes on the wish list too along with the JD tractor .... and the old Oliver OC3 crawler!!
 
OP
J

John in OH

Well-known member
Joined
Jun 2, 2007
Messages
2,444
Location
SE Ohio & Eastern Virginia
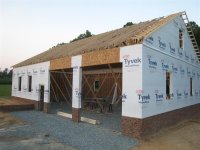
Day 35:

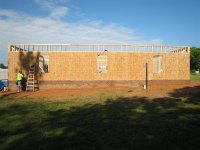
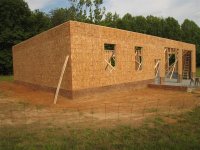
Four framers here again with the goal of completing the OSB sheathing. They hit it hard and fast by starting on the east wall.

IMG_5236 (Medium).jpg IMG_5237 (Medium).jpg

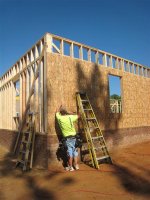
Each wall was squared in turn before installation of OSB and by early Friday afternoon they had all the sheathing on. They did a great job cleaning up the site before they took an early quit on Friday. The framers put in a good week and deserve a good weekend. Now that all the walls are up and sheathed, those 12 ft. walls don’t look quite as high as they did on Wednesday!

IMG_5240 (Medium).jpg IMG_5241 (Medium).jpg IMG_5254 (Medium).jpg

I’ve got to compliment the builder and his framing crew … they keep a tidy site and they sure don’t spare the nails!!
 

zeug

Well-known member
Joined
Nov 29, 2009
Messages
191
Location
Colorado Springs
Great build. Thanks for sharing.

Sorry if I missed it, but can you give some basic dimensions on your build? Looks to be about 30X60'? Any second story?

Thanks again,

Kent
 
OP
J

John in OH

Well-known member
Joined
Jun 2, 2007
Messages
2,444
Location
SE Ohio & Eastern Virginia
"Looking good. Almost as good as one of our Habitat houses."

Dave in Bath ... I'm sure the "good" produced by one Habitat house will far outweigh any "good" that ever comes from this garage.

"Sorry if I missed it, but can you give some basic dimensions on your build? Looks to be about 30X60'? Any second story?"

zeug ... You're close, outside dimensions are 34 ft. x 54 ft. Trusses will be attic style yielding a second floor room 12 ft wide x 8 ft. high x 54 ft long. Maybe I can install a bowling alley??
 
OP
J

John in OH

Well-known member
Joined
Jun 2, 2007
Messages
2,444
Location
SE Ohio & Eastern Virginia
Days 38 & 39

No work on Day 38 as framers were awaiting delivery of trusses scheduled for the following day.

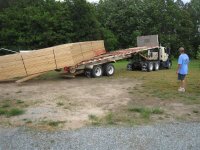
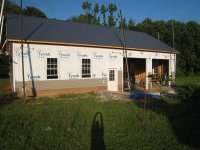
The framers all showed up on Day 39 and installed the Tyvek and putzed around doing a few odd jobs while waiting for truss delivery. An unhappy boss sent them home at about 2:30pm when it became apparent that even if the trusses were delivered they wouldn’t be able to get much done. Finally, with only the PO’d boss on site, the trusses arrived at about 4pm.

IMG_5281 (Medium).jpg

An entire day lost waiting for a 15 minute delivery.
 
OP
J

John in OH

Well-known member
Joined
Jun 2, 2007
Messages
2,444
Location
SE Ohio & Eastern Virginia
Days 40 & 41

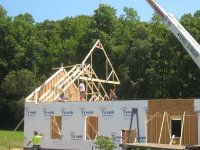
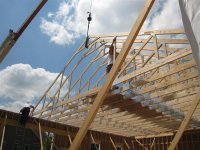
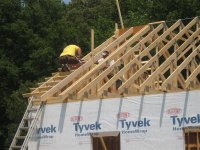
Two tough days of setting trusses, tying in, bracing and trimming out.

IMG_5290 (Medium).jpg IMG_5315 (Medium).jpg IMG_5323 (Medium).jpg

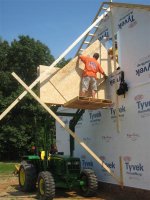
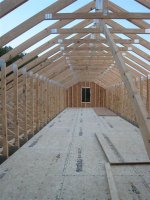
Cut and fit the gable end extensions, stick built the rafters over the stairs and installed the second floor sub-floor.

IMG_5347 (Medium).jpg IMG_5350 (Medium).jpg IMG_5355 (Medium).jpg IMG_5353 (Medium).jpg

Both days were hot, sunny, and humid … the framers really broiled under the Virginia sun as temp on Day 41 hit mid-90s.
 

zeug

Well-known member
Joined
Nov 29, 2009
Messages
191
Location
Colorado Springs
Well, I was pretty close on the sq footage. :)

I actually like the 34 depth better. Can squeeze two smaller cars in 34 feet when needed.

keep up the good work!
 
OP
J

John in OH

Well-known member
Joined
Jun 2, 2007
Messages
2,444
Location
SE Ohio & Eastern Virginia
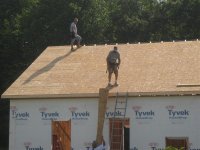
Day 42

The four framers installed facia boards on the east and west sides then began installation of roof sheathing. By 1pm the roof sheathing was completed and the framers cleaned up site and left for the holiday weekend.

IMG_5366 (Medium).jpg IMG_5368 (Medium).jpg

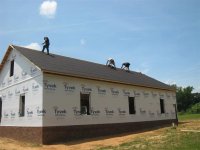
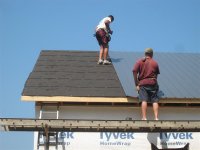
About the same time that the framers left, three roofers arrived to install felt over the sheathing. In less than two hours, felt installation was complete and they also left for the holiday weekend.

IMG_5369 (Medium).jpg IMG_5372 (Medium).jpg IMG_5375 (Medium).jpg IMG_5376 (Medium).jpg

It’s definitely looking like a building now!
 

ejm1961Tbird

Well-known member
Joined
Oct 1, 2010
Messages
356
Location
Knoxville, TN
Congratulations John, it sure is looking beautiful. Would you mind sharing with us what you think the final total cost for the build will be? Regards, Ed
 

ct71rr

Well-known member
Joined
May 19, 2009
Messages
478
Location
Massachusetts
Wow, very nice. It's really coming along now. The brick really sets it off nicely. I can't wait to see the finished product.
 
OP
J

John in OH

Well-known member
Joined
Jun 2, 2007
Messages
2,444
Location
SE Ohio & Eastern Virginia
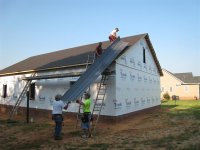
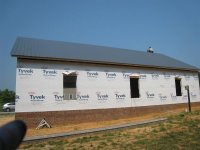
Days 46 & 47 were scorching hot … and, of course, those were the days during which the steel roofing was installed. These guys fried on that roof … steep pitch, hot felt paper, hot steel roofing sheets, high ambient temperature and high humidity. Geezz, what a miserable job!! But I think the end product looks great!!

IMG_5461 (Medium).jpg IMG_5466 (Medium).jpg IMG_5469 (Medium).jpg

Only down side was the very last sheet of steel was damaged sometime prior to delivery so the job couldn’t be finished. A replacement sheet is on order but won’t he here for about a week.

IMG_5470 (Medium).jpg IMG_5475 (Medium).jpg

Day 48 was laid back with only window installation being accomplished (mostly in the shade!) Concrete contractor will not be available until later next week so we have another period of down-time of six or eight days.
 

RaysnCayne

Well-known member
Joined
Apr 12, 2011
Messages
194
Location
Richmond, VA
Howdy fellow Ohio-turned-Virginian,

I'm two walls into my own middle-VA 28 x 28. (Not moving nearly as fast when I'm doing it myself and am not a professional carpenter.)

Just curious, what's the size of the LVLs that you used? 14", 16", 18"?

I have to do the same thing on my garage and the Hanover County plan reviewer said I had to use an 18" (!!!) LVL to span two 9' wide garage doors (21' total with a 2' stem wall in between). Seems like a good bit of overkill to me.

Can you post a detail pic or two of your stem wall? I'm not real sure how to frame mine so I could use the inspiration. Also, how many jack studs did they use on the ends of those LVLs? I can't seem to get a straight answer on that for my 21' span. I've heard anywhere from 3 to 6.
 
To avoid these ads, REGISTER NOW!
OP
J

John in OH

Well-known member
Joined
Jun 2, 2007
Messages
2,444
Location
SE Ohio & Eastern Virginia
Howdy fellow Ohio-turned-Virginian,

I'm two walls into my own middle-VA 28 x 28. (Not moving nearly as fast when I'm doing it myself and am not a professional carpenter.)

Just curious, what's the size of the LVLs that you used? 14", 16", 18"?

There are 3 LVLs, each 11-1/4" high x 1-5/8" thick x about 32'-34' long. I'll try to get some more specific dimensions for you tomorrow. They extend from the south wall to 2' beyond the mandoor. If I recall correctly, the county required only 2, but either the builder or the LVL supplier decided that 3 would be better. Definitely makes for a stout header!!
I have to do the same thing on my garage and the Hanover County plan reviewer said I had to use an 18" (!!!) LVL to span two 9' wide garage doors (21' total with a 2' stem wall in between). Seems like a good bit of overkill to me.

Can you post a detail pic or two of your stem wall? I'm not real sure how to frame mine so I could use the inspiration. Also, how many jack studs did they use on the ends of those LVLs? I can't seem to get a straight answer on that for my 21' span. I've heard anywhere from 3 to 6.

I'll get some photos and more details of the stem walls and studs for you tomorrow.
 
OP
J

John in OH

Well-known member
Joined
Jun 2, 2007
Messages
2,444
Location
SE Ohio & Eastern Virginia
Day 49 -51 … No Work. Waiting for concrete contractor.

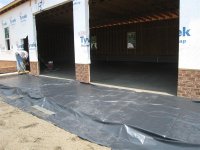
Day 52 … Concrete contractor compacted gravel for slab and apron and installed vapor barrier … all in preparation for the slab pre-pour inspection.

Day 53 … No one on site today as the day was spent waiting for inspector who signed off on the pre-slab work in late afternoon.

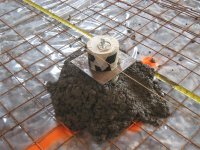
Day 54 … Exterminator sprayed termite pre-treatment around foundation in early afternoon. Later, the concrete contractor arrived and installed the welded wire reinforcement, expansion joint material around the perimeter and set the four Champ floor anchors that I supplied for the job. After tossing around several ideas on how best to set the anchors, the contractor decided the best approach was to pre-set the anchors on small pads of mixed Sakcrete. This plan worked well.

IMG_5483a (Medium).jpg IMG_5484 (Medium).jpg

The photos show the anchors being installed with the covers taped onto the sleeves up-side down per the manufacture’s recommendation. However, this isn’t really necessary and after the Sakcrete cured, I flipped the covers over into their normal position so the tabs on the underside of the covers would not interfere with the concrete finishing.
 
OP
J

John in OH

Well-known member
Joined
Jun 2, 2007
Messages
2,444
Location
SE Ohio & Eastern Virginia
Day 55

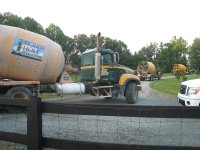
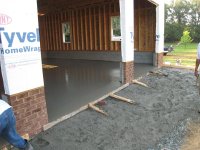
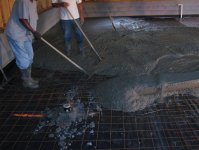
Another scorching hot day forecast with high of 100F and humid. About 5:30am the concrete contractor and three assistants arrived to begin concrete floor. First truck arrived at 5:48am and pour began at 5:52am. By 8:25am, the 40 yds. of floor concrete was in place, initial wet float completed and the outer forms for the apron were set.

IMG_5510a (Medium).jpg IMG_5539 (Medium).jpg IMG_5555 (Medium).jpg IMG_5571 (Medium).jpg

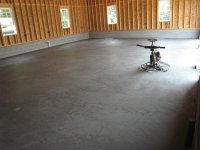
By 9:30, the pour was firm enough to begin initial hand floating around the edge and by 2pm, the slab was finished and the apron poured and covered.

IMG_5594 (Medium).jpg IMG_5596 (Medium).jpg
 
OP
J

John in OH

Well-known member
Joined
Jun 2, 2007
Messages
2,444
Location
SE Ohio & Eastern Virginia
Day 55 Continued ...

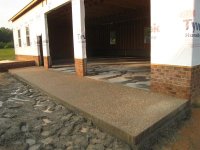
Last steps for the day were to put the exposed aggregate surface finish on the apron and make all the saw cuts. Initially, I wasn’t sold on the idea of the exposed aggregate finish, but that’s how the apron is finished on the house garage and the wife insisted that they should be the same. Now that I see it complete, it does look pretty sharp!

IMG_5604a (Medium).jpg IMG_5605a (Medium).jpg IMG_5609 (Medium).jpg IMG_5607 (Medium).jpg

Total of 43.5 yds poured during another day of hot, high humidity and bright sun. We tried to keep the cold drinks (mostly water with a few sodas) in good supply for these guys. I have to again compliment the work ethic of the guys that have worked on this job. The pace of the work may seem to drag from day to day, but when the masons, framers, roofers and concrete crews were actually on site, they busted their butts!
 

-Brent-

Well-known member
Joined
Dec 23, 2009
Messages
4,709
Location
Utah
I really like this build and how you've written it up. You've got a great piece of property. I love all that open space....
 
Last edited:
OP
J

John in OH

Well-known member
Joined
Jun 2, 2007
Messages
2,444
Location
SE Ohio & Eastern Virginia
Howdy fellow Ohio-turned-Virginian,

I'm two walls into my own middle-VA 28 x 28. (Not moving nearly as fast when I'm doing it myself and am not a professional carpenter.)

Just curious, what's the size of the LVLs that you used? 14", 16", 18"?

I have to do the same thing on my garage and the Hanover County plan reviewer said I had to use an 18" (!!!) LVL to span two 9' wide garage doors (21' total with a 2' stem wall in between). Seems like a good bit of overkill to me.

Can you post a detail pic or two of your stem wall? I'm not real sure how to frame mine so I could use the inspiration. Also, how many jack studs did they use on the ends of those LVLs? I can't seem to get a straight answer on that for my 21' span. I've heard anywhere from 3 to 6.

RaysnCayne ... Finally got around to taking the photos I promised you and getting some specific measurements of the LVLs. First of all, my original LVL dimensions in the above posting were wrong (that’s what comes from relying on memory!). The actual dimensions of the three LVLs: Height = 12”; Thickness = two at 1-3/4” & one at 2” (for a total thickness of 5-1/2”); Length = 32’-1-1/2”.

What thickness of 18" high LVLs does Hanover Co. want?

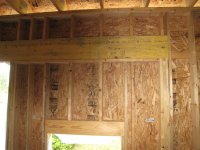
Jack studs: From the following photos you can see that there are 3 studs at the south end, 5 between the two overhead doors, 3 between the north O/H door and the mandoor (depending on what you want to count as a jack stud), and 3 at the north end. These studs are 2x6s.

IMG_5632 (Medium).jpg IMG_5636 (Medium).jpg IMG_5612 (Medium).jpg IMG_5614 (Medium).jpg

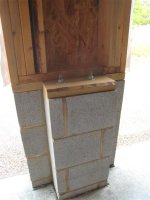
The stem walls are a bit confusing and I’m not totally sure what the builder has in mind, but he was pretty confident that this was the way the block and brick should be laid to accommodate the O/H door frames. This may all become more obvious as the frames are installed. The “notches” in the stem walls are 5-1/2” deep in the dimension parallel to the face of the stem wall and 5-3/4” deep in the dimension perpendicular to the stem wall. The body thickness of each stem wall is 12”.

IMG_5619 (Medium).jpg IMG_5634 (Medium).jpg IMG_5635 (Medium).jpg

You can also see the top ends of the 5/8” threaded rods that are epoxied into the footer at each stem wall.
 
OP
J

John in OH

Well-known member
Joined
Jun 2, 2007
Messages
2,444
Location
SE Ohio & Eastern Virginia
Day 56 - 74

Well … due to vacations, weather, and miscellaneous other commitments by both me and the contractor, very little progress was made for over two weeks. The damaged roof panel replacement was received and installed, a mandoor hung, and the overhead garage doors were framed.

BUT….!!!! Along comes Day 75 …

Day 75

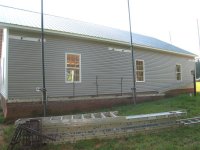
About mid-morning the siding contractor shows up and begins the siding installation! They had some material delivery problems so their progress was somewhat slow, but by end of day the east and north walls were almost done

IMG_5662 (Medium).jpg IMG_5664 (Medium).jpg

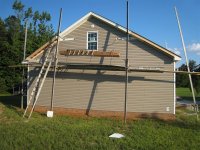
and the south and west walls started

IMG_5661 (Medium).jpg IMG_5665 (Medium).jpg

Also, the Rappahannock Electric representative showed up to mark the location of the underground lines to the house.

IMG_5648 (Medium).jpg
 
OP
J

John in OH

Well-known member
Joined
Jun 2, 2007
Messages
2,444
Location
SE Ohio & Eastern Virginia
Day 76 - 89

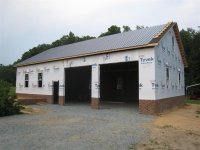
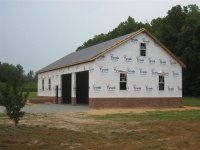
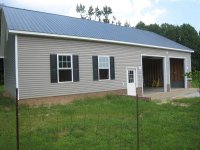
Over the past two weeks miscellaneous jobs got completed … siding was finished, overhead garage doors installed and the stairs to the second floor were completed.

IMG_5739 (Medium).jpg IMG_5740 (Medium).jpg

IMG_5737 (Medium).jpg IMG_5743 (Medium).jpg

Photo of partial stair progress with enclosure for air compressor, phase converter and some general storage.

IMG_5756 (Medium).jpg
 
OP
J

John in OH

Well-known member
Joined
Jun 2, 2007
Messages
2,444
Location
SE Ohio & Eastern Virginia
Guess that it may be time for some updates since I last posted progress photos from July 2011 ! I’ll start slow and bring things up-to-date as of September.

First, an answer for Doug ….

John, Any updates? We live in Lancaster, Ohio. Spent a few days last week in Winchester, VA. Are you close to there?
Doug

Lancaster ... oh, yeah. Know it fairly well as I went to OU in Athens. But no, not near Winchester ... live about half way between Richmond and Tappahannock.

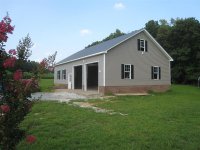
The contractor completed the building structure to the extent that we had agreed upon in early August and finished his final step when he had one of his subs complete installation of the gutters and downspouts the DAY BEFORE hurricane Irene rolled into eastern Virginia!!

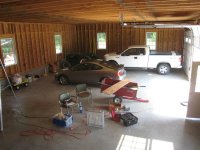
Completed stairs and general view from stairs as I began to bring in stuff. I’ll have to continually move and stumble over this stuff for the next few months, but I can’t justify spending the money on this building just to have everything sit outside ….

IMG_5827 (Custom).jpg IMG_5859 (Custom).jpg

From this point on, I planned on doing most of the remaining work myself with the exception of the steel ceiling installation. To aid in working on and around the 12’ ceiling I got two lifts of used scaffold with casters off Craig’s List. Wow! What a big help!

IMG_5949 (Custom).jpg

Highly recommend scaffold for anyone planning to do ceiling-related work!
 
OP
J

John in OH

Well-known member
Joined
Jun 2, 2007
Messages
2,444
Location
SE Ohio & Eastern Virginia
Slow progress since September! Too much time spent traveling, enjoying the holidays and trying to keep up with the honey-do list.

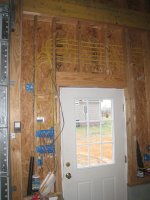
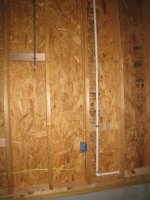
First effort was to get the electrical boxes installed, holes drilled, and all the cable pulls made. Even though I had this pretty well planned out, doing all of the work alone took a lot of time. Included with this was the alarm system wiring and some cat5 cable. I bought most of my cable … awg 14, 12, 10 and 6, plus the cat5 …. off ebay at a considerable savings from the box store pricing.

IMG_7470 (Custom).jpg IMG_7480 (Custom).jpg

With most of the cable pulled, it was time to run the water and compressed air headers. There are several hose bibs installed now and a connection for future use. This was all run with ¾” PVC. Since this garage will be unheated for the near future, the plan will be to drain and blow out the water lines each Fall.

I had a lot of salvaged ½” and ¾” copper pipe so used that for the air headers. Three air drops for now with allowances for one or two more in the future. I know there is much discussion regarding material for air lines, but I used copper in an earlier garage with no problems. Sure glad I had all the salvaged copper because new copper pipe is super expensive!

IMG_7472 (Custom).jpg IMG_7474 (Custom).jpg

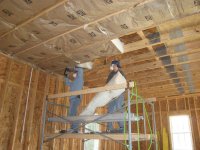
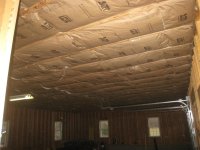
After getting all the cable and headers up, my two sons and son-in-law graciously helped getting the R30 ceiling insulation installed. That is one miserable job so I sure appreciated the help!

IMG_6534 (Custom).jpg IMG_7475 (Custom).jpg
 
OP
J

John in OH

Well-known member
Joined
Jun 2, 2007
Messages
2,444
Location
SE Ohio & Eastern Virginia
Finished up the rough interior wiring, air and water lines. Next step was to get a 72’ trench dug between the new garage and the house for the underground lines.

My youngest son came home for a week vacation so we rented a mini-excavator and played in the dirt for a couple of days. What a fun toy!!

Of course we had to keep wife happy so first step was to dig up and transplant a rose bush and small redbud tree … it proved to be a pretty simple task with the excavator’s bucket thumb.

IMG_2291640x480.jpg


With her work done we were ready to roll, but nothing ever seems to go as smoothly as expected … we knew that this new trench would pass over the existing water line from the well to the house, but after doing a little exploratory hand digging, we were POSITIVE that we would miss it … NOT! About 12’ out from the garage we snagged the 240v line to the well pump and neatly snapped it in half. Fortunately, the bucket just cleared the water line itself so no damage to the PE pipe … dodged a bullet there!! But wife definitely not happy about having to make a 50 mile round-trip to buy an underground splice kit.

IMG_2310640x480.jpg


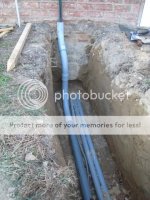
Got a 36” deep trench dug from garage to house pretty easily with the excavator, but digging under the house footer and up into the crawl space under the house for the water line and two small conduits became quite a struggle! First line in the bottom of the trench was the 1” water line, then added about 6” of dirt and placed the electrical feed lines, a 3-conductor #12 wire for a 3-way switch and two 1-1/2” conduits for future low voltage wiring.

IMG_2294640x480.jpg


IMG_2297640x480.jpg


IMG_2312480x640.jpg


IMG_2334640x480.jpg


IMG_2358480x640.jpg


With the electrical feed lines in the trench it was time for the rough electrical inspection …. all passed OK! Getting closer to powering up the new garage!
 
Last edited:
OP
J

John in OH

Well-known member
Joined
Jun 2, 2007
Messages
2,444
Location
SE Ohio & Eastern Virginia
With the rough electrical inspection complete, we had to do some fancy final conduit work to route the electrical feed around the house footer.

IMG_2360480x640.jpg

Then the trench was filled and compacted. Of course, after the fun part of playing with the excavator was finished, we had the grunt work of raking out the backfill, planting grass seed and spreading straw.

IMG_7510480x640.jpg

The local electric co-op (Rappahannock Electric) was responsible for making the double-tap termination to their meter, but I was to run the conduit to the meter box, cut the hole in the box and pull the cable into the box. I figured I could do this myself when the co-op showed up but, as it turned out, this was a lot more work than I expected. Fortunately, the co-op field representative was a great guy, took pity on me, and gave a hand with the work that was my responsibility. The final installation turned out pretty good … it’s actually a lot straighter and more plumb than it appears in the photo.
IMG_7492640x480.jpg

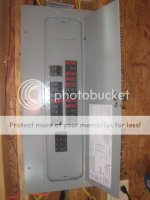
With the meter back in, there was now permanent power in the garage! A significant milestone! Next few days were spent terminating wiring and turning on circuits. Some circuits aren’t ready for their breaker to be turned on yet (such as overhead lighting) so I implemented my “red tag” system (red tape over the “off” breaker) … not exactly a rigorous LOTO process but it serves my purpose.

IMG_7512480x640.jpg

IMG_7516480x640.jpg

Next step … the steel ceiling.
 
To avoid these ads, REGISTER NOW!
Top Bottom