chrommagman
Well-known member
great photo's Red Leader!

") .
.

 ) The guy did a service on the whole door and talked us into going with nylon rollers for the door. It really does make the door operate more smoothly and much quieter. I'm glad we changed them. The ones we got were self contained and no grease is needed. Just a friend's thought to help blow your budget.


 ). I was shocked at how easy it is to install them, so you could easily tackle it yourself.


Great note on garage door maintenance. We ignore and abuse them until they don't go up, usually with the car on the wrong side of the door...
Progress looks great on the door. The need for taping really depends on the steadiness of your hand for cutting in edges. If using a brush, you may not need to tape. Spraying is a yes!
Day after Thanksgiving 2 years ago, we had a spring break. We got it fixed on Saturday.(Holiday weekend repair rate!
A thought on repairing the wood. I had the same type door on our house in Miami years ago. It had wood rot in the corners and around hinges. I was like you with extra time and no extra funds. So, where possible, I used Minwax Wood Hardener to solidify the rot and I replaced the damaged wood the best that I could. (Bad wood at bolts was replaced.) This may be an option to help on your damaged fiberboard. There are other brands available as well.
Red Leader - I second Wingnut's recommendation of the nylon rollers for the garage door. I had a repair done on my door opener and the guy talked me into the rollers. I could barely hear it open once he did. He told me I would have to find another way to know if my son was getting home after curfew (he is 12 so no issue there yet
Nice job RL
Just to give a little more safety advice on garage door, especialy the ones that have the springs on the top side of the doors, make sure you have a CABLE that goes thru the inside of the spring. I had one to break in the middle of the nite and it went flying over my 56 Chevy show car, and embedded itself into the sheetrock about 20 feet away in the front of the garage.
Needless to say it sounded like a gun shot, and a crash. Scarred the hell out of me, (most of it) at 3am.
But now I'm sure most garages use the torsion spring, which is kindda scarry when fist setting the tension on it.
OK, back to our schedule program.

Amazing garage!! Love it!!
I agree with Wingnut. I used to install garage doors for a living and I highly suggest the nylon rollers. Will totally quiet down the door, and they're less maintenance that normal rollers.
THANK YOU! Thank you for the pictures, as I have driven Sante Fe most every day for the past two years wanting to do the same, just pull off and snap some photos of the old metal....Always so busy, driving to work, driving home to see the family, alwyas something else better to do, no time to stop...and now you have done it for me. I will think of these shots tomorrow as I drive by it again and have lunch at the Sedalia Bar & Grille....Thanks again.
. I have not seen many hardtops and think they look really good .RL, Nice pics man! I too love old metal like that, the pics are inspiring to say the least. I have also had a run in with gun shots in the garage late at night, those springs are crazy loud when they break. I have the springs on the sides and the wire to go through them just for that reason. Anyway, nice updates, and I am doing the nylon roller thing this weekend, man this place is addictive!
BK
I am doing the nylon roller thing this weekend, man this place is addictive!
BK

Bobcat,
We can help with that addiction. We have a 12 step program...
Step 1 = Toolbox
Step 2 = Cabinets
Step 3 = Workbench
Step 4 = Flooring...
Truse me, we can make it 12 steps!


 If you find it lacking, might as well just move up to a Unisaw since now you've got the Delta thing going
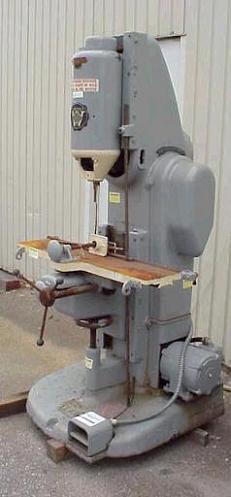
Okay, I went back and got the table saw/joiner today. I mocked up all the pieces for this pic. I think everything is there including the stand and the "made for delta" Marathon 1 hp motor. It has the shaft on both ends to run both machines. I plugged it in and it ran nice and smooth and quiet. It's amazing to me how much effort they put into the design on these old things. BTW, I believe the bandsaw is a 14".
Hijack over. I'll post the rest of the pics on my thread.
...
WOW, tinbender. That is a fabulous score. Someone a long time ago made a big investment in those tools. I am not a Delta guy, but 1 post over at the OWWM forums outta net you a lot of information about those tools, and a big giant 'you ****'
I would say the band saw and jointer are FOR SURE keepers as they are heavy, industrial quality. I don't know how big that table saw is, but it might prove to be a little small for some projects. I'd say use it and find out first, though
One word of strong warning - you've gotten a dangerous taste of 'the slope'. Basically, you started at the top and someone kicked you in the pants and you fell about 100ft. At this point its better not to try and fight it. Just give in, and soon you'll realize how great your shop with look with a vintage Delta drill press, Delta wood lathe, Delta radial saw, Delta shaper, Delta planer, Delta scroll saw and all the little goodies that come with them
. AND it's mostly your fault Oh yeah, I forgot to mention that he also gave me an unopened roll of R-19.
I think that I have your table saw's brother/cousin. Let me guess the blade is stationary, the top raises and lowers, and the top tilts.
...I don't have the jointer though....
Good find.
Man, if that is the recovery program, I am in serious need of help. Especially considering I haven't even attempted steps 1, 3, or 4...
Oh man! I just saw a pic at vintage machinery of a guys Unisaw that is the oldest known one. AWESOME! Help me I'm falling!!!
7. 'Before' and 'After' is so good...you won't even need a diet shake.

The other 5 to come soon...
. Cool post


A 'Top 10' reasons why old tools are better...
So when is this philosophy going to carry over to the motorcycle? Not that I have anything against Kawasaki (I'm a long-time fan of the H1 triples), but I could see you restoring and riding an old Triumph, BSA, or Norton someday and really enjoying it. Perhaps reliability was the deciding factor for the new steel?
)