To avoid these ads, REGISTER NOW!

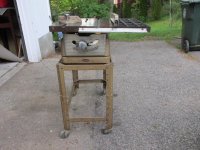
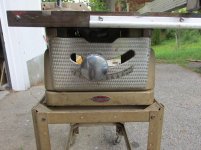
'56 Craftsman table saw rebuild

kngkong

Well-known member
Joined
Oct 25, 2009
Messages
368
Location
Wellington, New Zealand
Man that looks awesome all polished up!

My Dad has the same saw in need of some tlc. Are those the table extensions on the left side?

P9130408.jpg
 
To avoid these ads, REGISTER NOW!

onewaydave

Well-known member
Joined
Sep 28, 2009
Messages
961
Location
Down the road from Dorothy and Toto
These are nice saws. I have a 103.22170 that I am about at the same stage as you are. The x161, x160, and x170 are almost the same. There is a x160 manual on vintage machinery (but not the x170) and the parts diagram looks exactly like the x170. The x170s were gold and the x160s were the blue-gray seen in post #41. The wings that I found to fit (20" table IIRC) are the waffle style.

Careful cleaning the machining on the face. Many of those are plastic overlays on plain aluminum plate.

kngkong's pic shows the wing, I got 2 like that for mine.

I just used Rustoleum metalic gold with clear coat. No wet sanding.

Then, I can't read the reflection on mine either. Nice job.

Dave.
 

muibubbles

Well-known member
Joined
Apr 24, 2009
Messages
685
Location
nj
It definitely has a better finish than cars and such from the era, but that's cool. Garage art. :lol:

Face plate is looking better
247118_1395441703356_1751610005_644818_7601537_n.jpg

Dude this resto is kickass!! excuse me if this has been said before, but how did you do that texture/pattern on the face plate?

EDIT: nvm saw it came like that. anyone know how to reproduce that look?
 

Max Headroom

Member
Joined
Jun 1, 2011
Messages
5
Dude this resto is kickass!! excuse me if this has been said before, but how did you do that texture/pattern on the face plate?

EDIT: nvm saw it came like that. anyone know how to reproduce that look?

It looks like it is Metal Jeweling, but I'm not positive from the picture. I haven't had a chance to try it out on anything yet so I don't know how easy this process is, but several years ago, probably 2005 or 2006, Shop Notes magazine published an article on making your own shoulder plane. The technique they used in that issue was to cut a length of wooden dowel, glue a bit of leather to the end, chuck it in your drill press, and use a touch of oil and some medium grit silicon carbide power. A quick press with light pressure will create a single swirl, and you just overlap them and repeat.

Don't know how easy that method is or what alternatives exist, but I'll let you know in a few years once I get around to making one :)
 

pirana

Well-known member
Joined
Jan 22, 2008
Messages
314
Location
Wild Peach, Texas
That is just too cool! It's so pretty i'd almost be afraid to use it & get it all dusty. Wonder what it cost brand new back in the day?
 
OP
9

98TJ

Well-known member
Joined
May 31, 2011
Messages
1,034
Location
Honolulu, HI
Dude this resto is kickass!! excuse me if this has been said before, but how did you do that texture/pattern on the face plate?

EDIT: nvm saw it came like that. anyone know how to reproduce that look?

Here ya go: http://www.practicalmachinist.com/vb/general-archive/jeweling-engine-turning-how-do-149583/

I still haven't made a cabinet for the saw - too much other stuff going on. Wife and I have been using it quite a bit. I never used paste wax on the table after the initial cleaning so I need to go over it once more and hit it with paste wax to keep corrosion at bay.

I'll have to get some updated pics.

mrbreezeet1, I didn't need to wet sand the base - until I accidentally hit the piece with the tip of the spray gun while moving around the saw cabinet. I let it dry, knocked down the raised portion of the mistake, and re-sprayed.

To clean that engine turned panel I used aluminum cleaner for truck bed toolboxes. Worked great. Prior to that I tried Nevr-Dull, WD40 and 0000 steel wool, and a bunch of other stuff to get the years of grime out of the surface texture. The truck box polish worked best.
 

Neodogg

Active member
Joined
Jan 11, 2012
Messages
31
I like the redo job! I've got my grandfathers also, not as good as yours. You can always check out lumberjocks.com for more redos and others
 

ckadams00

Well-known member
Joined
Sep 12, 2011
Messages
1,273
Location
Seattle, WA
Hey 98TJ - if you have the time and patience, I would watch Craigslist or eBay(locally) for another of the same model type that has the extensions - you can probably pick it up a used one cheaper than you will be able to buy table extensions from someone parting them out.

Just a thought - but I see a lot of these saws for $50 and the wings are usually $40+each.

Incredible job on the restoration BTW!
 
OP
9

98TJ

Well-known member
Joined
May 31, 2011
Messages
1,034
Location
Honolulu, HI
Thanks guys. This was the only tool I left on the mainland when we moved to Hawaii.

I should've brought it with me.
 
To avoid these ads, REGISTER NOW!
OP
9

98TJ

Well-known member
Joined
May 31, 2011
Messages
1,034
Location
Honolulu, HI
How did you get your scale plate to look so good? what did you do to clean it up? Looks Awsome.

1000 grit if I remember correctly. Maybe 2000.

I just place a fresh sheet on a nice, flat surface and flipped the scale face down and got to work.

The scale is recessed in the plate, so it was simple and worry-free.
 

doggo

New member
Joined
Nov 11, 2013
Messages
1
where did 98TJ's pics go on the restore of this T/S? They dont show for me, and my profile has the option to view attached pics in threads checked.
 

mutsei

New member
Joined
Sep 1, 2014
Messages
4
why can't i view ur pix of table saw? i just got a 103-22170. i'm looking for the yr of mine
 

beltdrive

Well-known member
Joined
Jan 17, 2015
Messages
111
Location
Smithfield, RI
Just picked up one of the craftsman king sealey saws in gold..model 103.22161. Man what great quality!
 

Attachments

  • IMG_1918.jpg
    IMG_1918.jpg
    147.3 KB · Views: 25
  • IMG_1919.jpg
    IMG_1919.jpg
    144.5 KB · Views: 21
To avoid these ads, REGISTER NOW!
Top Bottom