To avoid these ads, REGISTER NOW!

My 30x45 Morton Building build thread

HD FLHX

Well-known member
Joined
Jul 10, 2011
Messages
1,100
Location
Central Iowa
New guy around here, been lurking for a few months and have gotten a lot good ideas from this site. A little about me, I was a collision repair tech at a GM dealership for a little over 8yrs when I grew tired of dealing with insurance company estimates, parts issues, and just the lack of job benefits, so I made a drastic change and went to work in a factory as a production painter, painting big GREEN Ag Equipment. Been doing it for all most 8yrs now. I now primarily do automotive restoration projects in my free time out of my 24x24 garage. It gets the job done, but continually having to jockey projects around to get them inside and not having a dedicated paint space finally made me bite the bullet and build a new shop.

I settled on a 30x45 Morton Pole Building. It will have a 12x24 paint room, 2 stalls to work out of and a 12x15 workshop area for my tool boxes and motorcycle lift table.
2011-07-22_19-42-55_616.jpg

Heres what its going to look like
2011-07-09_01-24-48_360.jpg

And the floor plan
100_0123.jpg

After the dirt work was completed in August
100_0128.jpg

The Building material was finally delivered Sept 28th (only 4weeks late)
100_0130-1.jpg

The way Morton uses the Semi as a fork lift to unload the trailers is pretty cool. Was very impressed by the driver, he would back up using only his mirrors grab a load and take off.
100_0228.jpg

End of the first day, lower posts set
100_0233.jpg

By the end of the second day its about 90% framed and really starting to take shape.
100_0234.jpg

100_0236.jpg

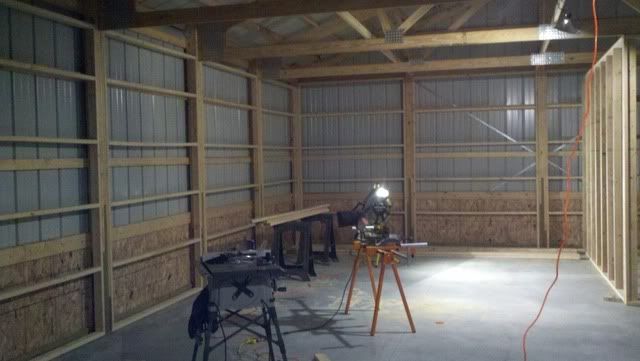
As the building progresses I'll post more pics. They are working on as I type this thread.
 
To avoid these ads, REGISTER NOW!

Dickey

Well-known member
Joined
Oct 28, 2011
Messages
930
Location
Chapin, SC
Looks like it will be a fine shop. May I ask why you chose 30x45 for your dimensions?
 

Kevin54

MEMBER EMERITUS
Joined
Jan 12, 2005
Messages
29,341
Location
Urbana, Ohio
Can you snap a closeup of the post? It looks like they are three piece post. Correct? Then post a pic of the post they put on top of the shorter post please.
 
OP
H

HD FLHX

Well-known member
Joined
Jul 10, 2011
Messages
1,100
Location
Central Iowa
Can you snap a closeup of the post? It looks like they are three piece post. Correct? Then post a pic of the post they put on top of the shorter post please.

They are 3 2x6's laminated together, the lower part that goes into the ground is pressure treated. Another benefit from this type of post is at the top it creates a pocket for the truss to slide into.

2011-11-06_08-24-46_519.jpg

2011-11-06_08-24-59_908.jpg
 
OP
H

HD FLHX

Well-known member
Joined
Jul 10, 2011
Messages
1,100
Location
Central Iowa
2011-11-09_15-01-04_228.jpg

They finished getting the metal on this morning. The concrete guy was able to get the floor prep'd this afternoon and will be pouring it first thing in the morning.
 

yucholian

Well-known member
Joined
Jul 7, 2009
Messages
240
Location
Monroe, WA
How much of an offset is there between each layer of 2x6 on the lower post? 1 foot?
Also, how did they know how tall to place that center notch for the trusses? Did they laminate the 3 layers on the ground and stood them up? I like the concept just not sure how they got each layer to fit perfectly with the bottom post and also the height of the notch. Thanks in advance.
 
OP
H

HD FLHX

Well-known member
Joined
Jul 10, 2011
Messages
1,100
Location
Central Iowa
How much of an offset is there between each layer of 2x6 on the lower post? 1 foot?
Also, how did they know how tall to place that center notch for the trusses? Did they laminate the 3 layers on the ground and stood them up? I like the concept just not sure how they got each layer to fit perfectly with the bottom post and also the height of the notch. Thanks in advance.

The posts come pre-made from their factory, it looked to me like they must have been matching sets cause they lay'd them all out and were picking and choosing which upper post went where. They actually cut them at the joint to get the correct height for each post. When they were done every one of joints were as tight as the one pictured. There is about 12-14 inches of stagger between each joint.
 

mytimeyet

Well-known member
Joined
Apr 27, 2010
Messages
128
Location
Micanopy, FL
From what I've seen with Morton they use a 8'+10'+12' 2x6s for the posts. To come out even at the top they go 12+10+8 (cut to wall height as needed, makes a 20ft post w/4ft in the ground)
 

JC23

Well-known member
Joined
Dec 31, 2009
Messages
11,718
Location
Northcoast
I don't think I ever saw an answer to the question, 'Do they build partial so the owner can finish it?' Or does it have to be a turnkey?

BTW, nice place. We all pretty much know on here that their stuff is top notch!
 
OP
H

HD FLHX

Well-known member
Joined
Jul 10, 2011
Messages
1,100
Location
Central Iowa
I don't think I ever saw an answer to the question, 'Do they build partial so the owner can finish it?' Or does it have to be a turnkey?

BTW, nice place. We all pretty much know on here that their stuff is top notch!

Yes, they will build just a shell. I hired the dirtwork and concrete and will be finishing the inside myself.
 
OP
H

HD FLHX

Well-known member
Joined
Jul 10, 2011
Messages
1,100
Location
Central Iowa
2011-11-14_14-56-21_219.jpg

Insulated overhead doors installed
2011-11-14_19-19-28_247.jpg

2011-11-14_19-19-56_96.jpg

Started framing out the inside. I'm going to be putting R19 in the walls and R30 in the ceiling. The walls will be OSB and white Pro-Rib liner on the ceiling.
 
To avoid these ads, REGISTER NOW!

Shadowdog500

Well-known member
Joined
Dec 7, 2009
Messages
9,862
Location
Down the shore
That is a great looking building!!!!


How much of an offset is there between each layer of 2x6 on the lower post? 1 foot?
Also, how did they know how tall to place that center notch for the trusses? Did they laminate the 3 layers on the ground and stood them up? I like the concept just not sure how they got each layer to fit perfectly with the bottom post and also the height of the notch. Thanks in advance.

I watched as they laid out the lower sections of my
building. They come stagger cut but were set a little high to begin with. After the bottom part of the columns were set the forman used the transit and had the workers mark the center of each post so that the marks were all the exact same height. Then they got out a special guide that was pre set for all three cuts and slid it around and attached to each pole and lined it up to the mark and secured it to the pole. The guy got out the circula saw and followed the guide for three quick cuts which probably took about a minute in total for each pole.

[UPDATE] I just noticed that there are two photos of the guide in the original post. It is the aluminum thing that is attached to the left arm of the tractors front end loader in the sixth and seventh pictures of the first post.

Morton seems to have a system or special tool for everything. That tractor is really tricked out for doing buildings.

Once again, congrats on your new building!!!

Chris
 
Last edited:
OP
H

HD FLHX

Well-known member
Joined
Jul 10, 2011
Messages
1,100
Location
Central Iowa
Some new pics of the progress thats been made in the last few weeks. The paint room is starting to take shape, all the wiring has been ran and the r19 insulation in the walls with a 6 mil vapor barrier is done. I just started putting up the osb.

2011-11-17_16-31-43_304.jpg

Inside the paint room. The door opening to the right will have a sliding door on it that I can close up whenever I'm painting. I wanted to make this stall to be multi-use not just for painting.

2011-11-27_10-47-25_986.jpg

2011-11-27_12-30-45_128.jpg

Insulation and vapor barrier up
2011-11-27_20-55-01_647.jpg
2011-11-27_20-55-17_842.jpg

And the osb starting to go up
 

Easterlake

Well-known member
Joined
Oct 16, 2011
Messages
89
Location
Des Moines, iowa
Sometimes my dog sits and watches me eat. When I'm done there is often a pool of slobber under her. That's how I feel when I see 30x45. Looking forward to watching your progress. Looks awesome so far.
 

smkngta

New member
Joined
Nov 7, 2009
Messages
1
Great looking building. How much did Morton charge for materials and assembly? Not including concrete work or anything you are doing on your own.
 
OP
H

HD FLHX

Well-known member
Joined
Jul 10, 2011
Messages
1,100
Location
Central Iowa
Great looking building. How much did Morton charge for materials and assembly? Not including concrete work or anything you are doing on your own.

Morton Buildings are highly optioned, so none of their buildings are truly the same. The options on my building included the wainscot, 1ft overhangs, snow dampers inside the soffit, the protective liner (3ft osb around bottom), upgraded insulated entry door, and I went with bigger 10ft wide x 8ft tall insulated overhead doors.

I ordered my building while they were still offering preseason pricing and as an Iowa Farm Bureau member I received an additional $500 discount which put the building at $23,600. The dirt work cost me $1775 and the concrete was $7100, so I'm right at $32,500 for the empty shell. My budget for the entire project including me finishing the inside is 40k.
 

tdkkart

Well-known member
Joined
Jun 17, 2006
Messages
6,887
Location
Eastern Iowa
Been watching this build from the beginning and just realized you're a fellow Iwegian!!

Nice build, disappointed you didn't go with radiant floor heat, but otherwise it looks great. Doors on the long side is a good choice with a 30ft building, wish mine was done that way.
I've been seeing the Morton posts for almost my whole life, standard procedure as far as I was concerned, but they sure confuse alot of people.
 

jlckmj

Well-known member
Joined
Dec 7, 2009
Messages
732
Location
SE Wiscosin
Nice building!

What impresses me the most is that according to the date of your posts, it only took 10 days from start to a totally sealed building. That is some nice work.

Jim
 
OP
H

HD FLHX

Well-known member
Joined
Jul 10, 2011
Messages
1,100
Location
Central Iowa
Been watching this build from the beginning and just realized you're a fellow Iwegian!!

Nice build, disappointed you didn't go with radiant floor heat, but otherwise it looks great. Doors on the long side is a good choice with a 30ft building, wish mine was done that way.
I've been seeing the Morton posts for almost my whole life, standard procedure as far as I was concerned, but they sure confuse alot of people.

I did seriously consider floor heat, but I was concerned it wouldn't be able to keep it warm enough when the exhaust fan is running inside the paint room. I ended up buying a 100k Modine Hot Dawg heater.
2011-08-22_12-48-21_137.jpg
 
OP
H

HD FLHX

Well-known member
Joined
Jul 10, 2011
Messages
1,100
Location
Central Iowa
Nice building!

What impresses me the most is that according to the date of your posts, it only took 10 days from start to a totally sealed building. That is some nice work.

Jim

I was very impressed with the crew also, they were here everyday at 7am and worked basically till it was dark and were even here on a Saturday for 8hrs. It took them 3 1/2 days to get the shell complete. My concrete guy also did an excellent job checking in on the building progress so as soon as the shell was done he was here prepping for the floor.
 
OP
H

HD FLHX

Well-known member
Joined
Jul 10, 2011
Messages
1,100
Location
Central Iowa
A few new pics
2011-11-30_13-34-10_40.jpg

2011-11-30_13-34-40_743.jpg

The bigger opening will have a sliding door on it
2011-11-30_14-24-21_109.jpg

Picked up one of these 70w security lights at Menards, I was really surprised at how much light it puts out
2011-12-01_15-04-43_113.jpg

2011-12-17_16-29-55_413.jpg

The paint room starting to take shape
2011-12-17_16-35-08_700.jpg
 

ejm1961Tbird

Well-known member
Joined
Oct 1, 2010
Messages
356
Location
Knoxville, TN
Your garage looks great, congrats!

I am interested in building a separate paint room in my garage too.

I know that many of us would be very interested in getting as much detail as possible on your paint room -- how you built it, lighting, exhaust, filters, everything. Given that you are professional painter, I am very interested in learning how a pro sets up a home paint room! Details, please! Thanks.
 

geologist

Well-known member
Joined
Dec 14, 2011
Messages
5,326
Looks fantastic. So much so that I'm chomping at the bit and wanting to build my own. Just gotta talk the wifey-to-be into more land and make some more scratch. =)
 
OP
H

HD FLHX

Well-known member
Joined
Jul 10, 2011
Messages
1,100
Location
Central Iowa
Looks great!

How expensive is the ceiling, and what is it made of? Easy to install?

Jim :cool:

Its metal interior liner from Menards. I believe the brand name is Pro-Rib. It runs about $1 per sqft with the j-channel and screws. They stock it in lengths from 8ft-16ft. Each panel is 3ft wide.
 
OP
H

HD FLHX

Well-known member
Joined
Jul 10, 2011
Messages
1,100
Location
Central Iowa
Your garage looks great, congrats!

I am interested in building a separate paint room in my garage too.

I know that many of us would be very interested in getting as much detail as possible on your paint room -- how you built it, lighting, exhaust, filters, everything. Given that you are professional painter, I am very interested in learning how a pro sets up a home paint room! Details, please! Thanks.

I will when I make some more progress on it.
 
To avoid these ads, REGISTER NOW!
Top Bottom