To avoid these ads, REGISTER NOW!

Snap on Chest Restoration Ideas and Input needed

HolladayMTM

Active member
Joined
Jan 16, 2012
Messages
26
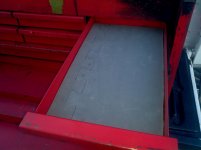
I have been restoring and old chest and cabinet tool box set that was my great grand fathers. I thought were both Cornwell but recently another member told me to check the serial number and the chest is a Snap On made in 75 i think. I bought some cool 1/2 inch foam i am lining the drawers with. The foam is water proof and closed cell foam foam with smooth and rough textured sides. I got 4 24"x24" squares that can be connected from harbor freight for 7.49 cheaper than the drawer liners they sell. I have to replace the locks and need touch up paint on it and fix the handles.
 
To avoid these ads, REGISTER NOW!

Jeeprz!

Well-known member
Joined
Aug 6, 2011
Messages
169
I think that floor pad you bought (which I have myself) would work better as a pad in front of your box rather than draw liner. It's just a guess on my part because you haven't posted pics of your grandfathers box - yet, but I think you will find that pad to be too thick for a good drawer liner especially in the shallower drawers if it has them.
If you need some cheap drawer liner I would just go to like walmart or the like and get the thin foam shelf liner.
Now on the otherhand, you could use that pad to make profile cut outs for your tools, or the foam "wrench holders" like sears and others sell.
And before someone else here posts it, and there are alot of peeps on GJ that are into restoring old boxes among other things, and I would highly recommend that you post some pics BEFORE you do anything to that box.
 
OP
H

HolladayMTM

Active member
Joined
Jan 16, 2012
Messages
26
Server is been down around here it keeps reading an error message I will post them as soon it is up...That made me laugh thanks...
 
OP
H

HolladayMTM

Active member
Joined
Jan 16, 2012
Messages
26
Here is the Snap on tool chest when i started,,,

The drawer liner from the foam mats i made....

THe cleaned out tool chest with the most greased removed and cleaned out...
 

Attachments

  • 2012-01-16_16-06-19_856.jpg
    2012-01-16_16-06-19_856.jpg
    141.4 KB · Views: 172
  • 2012-01-24_17-08-59_62.jpg
    2012-01-24_17-08-59_62.jpg
    136.5 KB · Views: 154
  • 2012-01-18_13-34-04_473.jpg
    2012-01-18_13-34-04_473.jpg
    134.3 KB · Views: 156
OP
H

HolladayMTM

Active member
Joined
Jan 16, 2012
Messages
26
:needpics:

Had to be done!


<a href="http://s1150.photobucket.com/albums/o604/HolladayMTM2011/?action=view&current=2012-01-24_17-22-17_293.jpg" target="_blank"><img src="http://i1150.photobucket.com/albums/o604/HolladayMTM2011/2012-01-24_17-22-17_293.jpg" border="0" alt="Photobucket"></a>

<a href="http://s1150.photobucket.com/albums/o604/HolladayMTM2011/?action=view&current=2012-01-24_17-21-50_871.jpg" target="_blank"><img src="http://i1150.photobucket.com/albums/o604/HolladayMTM2011/2012-01-24_17-21-50_871.jpg" border="0" alt="Photobucket"></a>


<a href="http://s1150.photobucket.com/albums/o604/HolladayMTM2011/?action=view&current=2012-01-18_13-34-04_473.jpg" target="_blank"><img src="http://i1150.photobucket.com/albums/o604/HolladayMTM2011/2012-01-18_13-34-04_473.jpg" border="0" alt="Photobucket"></a>


<a href="http://s1150.photobucket.com/albums/o604/HolladayMTM2011/?action=view&current=2012-01-24_17-08-59_62.jpg" target="_blank"><img src="http://i1150.photobucket.com/albums/o604/HolladayMTM2011/2012-01-24_17-08-59_62.jpg" border="0" alt="Photobucket"></a>
 
OP
H

HolladayMTM

Active member
Joined
Jan 16, 2012
Messages
26
I think that floor pad you bought (which I have myself) would work better as a pad in front of your box rather than draw liner. It's just a guess on my part because you haven't posted pics of your grandfathers box - yet, but I think you will find that pad to be too thick for a good drawer liner especially in the shallower drawers if it has them.
If you need some cheap drawer liner I would just go to like walmart or the like and get the thin foam shelf liner.
Now on the otherhand, you could use that pad to make profile cut outs for your tools, or the foam "wrench holders" like sears and others sell.
And before someone else here posts it, and there are alot of peeps on GJ that are into restoring old boxes among other things, and I would highly recommend that you post some pics BEFORE you do anything to that box.

Heres a few before pictures

<a href="http://s1150.photobucket.com/albums/o604/HolladayMTM2011/?action=view&current=2012-01-16_16-07-31_640.jpg" target="_blank"><img src="http://i1150.photobucket.com/albums/o604/HolladayMTM2011/2012-01-16_16-07-31_640.jpg" border="0" alt="Photobucket"></a>

<a href="http://s1150.photobucket.com/albums/o604/HolladayMTM2011/?action=view&current=2012-01-16_16-06-19_856.jpg" target="_blank"><img src="http://i1150.photobucket.com/albums/o604/HolladayMTM2011/2012-01-16_16-06-19_856.jpg" border="0" alt="Photobucket"></a>


THats why i wanted sum closed cell foam to be able to take a razor blade and make cutouts for my Sockets and other hand tools.... But i am somewhat cheap and took forever to find affordable foam but I am true DIY person who hates paying people for something I can do on my own..
 
OP
H

HolladayMTM

Active member
Joined
Jan 16, 2012
Messages
26
BUMP PROGRESS MADE TODAY


<a href="http://s1150.photobucket.com/albums/o604/HolladayMTM2011/?action=view&current=2012-01-25_17-06-28_585.jpg" target="_blank"><img src="http://i1150.photobucket.com/albums/o604/HolladayMTM2011/2012-01-25_17-06-28_585.jpg" border="0" alt="Photobucket"></a>


<a href="http://s1150.photobucket.com/albums/o604/HolladayMTM2011/?action=view&current=2012-01-25_17-06-46_473.jpg" target="_blank"><img src="http://i1150.photobucket.com/albums/o604/HolladayMTM2011/2012-01-25_17-06-46_473.jpg" border="0" alt="Photobucket"></a>


<a href="http://s1150.photobucket.com/albums/o604/HolladayMTM2011/?action=view&current=2012-01-25_17-31-59_537.jpg" target="_blank"><img src="http://i1150.photobucket.com/albums/o604/HolladayMTM2011/2012-01-25_17-31-59_537.jpg" border="0" alt="Photobucket"></a>


Here is my toolbox this is the junker toolbox


<a href="http://s1150.photobucket.com/albums/o604/HolladayMTM2011/?action=view&current=2012-01-25_17-33-52_751.jpg" target="_blank"><img src="http://i1150.photobucket.com/albums/o604/HolladayMTM2011/2012-01-25_17-33-52_751.jpg" border="0" alt="Photobucket"></a>
 

Kurn

Well-known member
Joined
Aug 15, 2007
Messages
1,066
Location
Ravenna, Oh
If the rounded drawer front handle is original,you have an early KRA59B.Great box in all its many versions.
 

Kurn

Well-known member
Joined
Aug 15, 2007
Messages
1,066
Location
Ravenna, Oh
Yes it is how do you figure out the year of the box...

I would say 1972,as the one I bought new that year had the rounded handle and square drawer pulls,like yours.A friend bought one at the same time and his had the squared handle.
 

W650Mike

Well-known member
Joined
Dec 17, 2010
Messages
1,093
Location
North Central Texas
Sweet box! Could be as early as '60? I'm not an expert, but I think Snap-on went back and forth between the handle styles.

Here's some reading info and link:

196020KR-58B.jpg


1960-Catalog-X-p004.jpg


http://www.collectingsnapon.com/catalogs/catalogs.php?loggedin=0&catalog=24

Spend a little time trying to find the missing emblem - they're not easy to come by.

Keep us posted!:)
 
OP
H

HolladayMTM

Active member
Joined
Jan 16, 2012
Messages
26
And a later model on Seattle CL; all polished up and ready for the Prom:

http://garagejournal.com/forum/showthread.php?t=135453


S-OboxonCL.jpg


------------------------------------

<a href="http://s1150.photobucket.com/albums/o604/HolladayMTM2011/?action=view&current=2012-01-26_15-47-15_868.jpg" target="_blank"><img src="http://i1150.photobucket.com/albums/o604/HolladayMTM2011/2012-01-26_15-47-15_868.jpg" border="0" alt="Uploaded from the Photobucket Android App"></a>


Here is mine freshly painted today still have to sand and touch up the outside.
 
OP
H

HolladayMTM

Active member
Joined
Jan 16, 2012
Messages
26
To avoid these ads, REGISTER NOW!
OP
H

HolladayMTM

Active member
Joined
Jan 16, 2012
Messages
26
After bout four coats still have to resand and touch up...

<a href="http://s1150.photobucket.com/albums/o604/HolladayMTM2011/?action=view&current=2012-01-26_15-47-15_868.jpg" target="_blank"><img src="http://i1150.photobucket.com/albums/o604/HolladayMTM2011/2012-01-26_15-47-15_868.jpg" border="0" alt="Uploaded from the Photobucket Android App"></a>


<a href="http://s1150.photobucket.com/albums/o604/HolladayMTM2011/?action=view&current=2012-01-26_15-47-27_54.jpg" target="_blank"><img src="http://i1150.photobucket.com/albums/o604/HolladayMTM2011/2012-01-26_15-47-27_54.jpg" border="0" alt="Uploaded from the Photobucket Android App"></a>


A picture from far off


<a href="http://s1150.photobucket.com/albums/o604/HolladayMTM2011/?action=view&current=2012-01-26_16-08-25_763.jpg" target="_blank"><img src="http://i1150.photobucket.com/albums/o604/HolladayMTM2011/2012-01-26_16-08-25_763.jpg" border="0" alt="Uploaded from the Photobucket Android App"></a>


Here is the lock I bought to replace the original along with the original


<a href="http://s1150.photobucket.com/albums/o604/HolladayMTM2011/?action=view&current=2012-01-26_21-59-36_608.jpg" target="_blank"><img src="http://i1150.photobucket.com/albums/o604/HolladayMTM2011/2012-01-26_21-59-36_608.jpg" border="0" alt="Uploaded from the Photobucket Android App"></a>
 
OP
H

HolladayMTM

Active member
Joined
Jan 16, 2012
Messages
26
Looking good! I like your shop in the woods.

I appreciate it..I have another big steel shop and another small metal shop that I am fixing up now and I have garage. It was all my great grand fathers we have 6 acres in the city most homes in a city don't look like that..
 
OP
H

HolladayMTM

Active member
Joined
Jan 16, 2012
Messages
26
BOUGHT THIS CABINET TODAY

<a href=http://s1150.photobucket.com/albums/o604/HolladayMTM2011/?action=view&current=2012-01-31_12-35-04_923.jpg target=_blank><img src=http://i1150.photobucket.com/albums/o604/HolladayMTM2011/2012-01-31_12-35-04_923.jpg border=0 alt=></a>

GOT THESE CRAFTSMAN TOOLS FREE GONNA SWAP EM

<a href=http://s1150.photobucket.com/albums/o604/HolladayMTM2011/?action=view&current=2012-01-31_12-36-58_113.jpg target=_blank><img src=http://i1150.photobucket.com/albums/o604/HolladayMTM2011/2012-01-31_12-36-58_113.jpg border=0 alt=></a>


HERE IS THE TOOLBOX AFTER SANDING AND PAINTING


<a href=http://s1150.photobucket.com/albums/o604/HolladayMTM2011/?action=view&current=2012-01-31_15-24-49_940.jpg target=_blank><img src=http://i1150.photobucket.com/albums/o604/HolladayMTM2011/2012-01-31_15-24-49_940.jpg border=0 alt=></a>


Here's the SNAP ON STILL GOT SOME TOUCH UP WORK TO DO AND WAITING ON THE SNAP ON TOOL TO REMOVE THE DRAWERS


<a href=http://s1150.photobucket.com/albums/o604/HolladayMTM2011/?action=view&current=2012-01-31_15-31-49_922.jpg target=_blank><img src=http://i1150.photobucket.com/albums/o604/HolladayMTM2011/2012-01-31_15-31-49_922.jpg border=0 alt=></a>

GIVE ME SUM FEEDBACK


THE BLACK CABINET WAS 20 BUCKS COULDNT TURN THAT DOWN...
 
OP
H

HolladayMTM

Active member
Joined
Jan 16, 2012
Messages
26
I got the same box and mines in a little worse shape than yours but for now I'm leaving it like that. If you document your restoration well it will give me some inspiration to restore
Mine.


What I did
1. CLEAN THE BOX OUT WITH VACUUM
2. TAKE BRILLO PAD AND HOT WATER AND CLEAN DRAWERS AND BOX FREE OF GREASE AND GRIME AND DRY WITH SEPERATE TERRY RAG.
3. I CUT FOAM INSERTS FOR THE DRAWERS FROM ANTI FATIGUE FOAM MATS
4. SAND THE OUTSIDE WITH 220 GRIT
5. REMOVE THE HANDLE AND CAM LOCK W/ LOCKING MECHANISM
6. USE A DREMEL WIRE BRUSH TO POLISH HANDLE N LOCK PARTS
7. BUY NEW CAM LOCK MIX N MATCH OLD MOUNTS WITH NEW LOCK.
8. PAINTED WITH KRYLON PAINT AND PRIMER IN ONE BANNER RED COLOR
9. I AM WAITING ON THE SNAP ON TOOL TO REMOVE THE DRAWERS AND START ON THE INSIDE NOW AND RESAND AND FINISH PAINTING OUTSIDE.
 

Lookin4'67Galaxieconv

Well-known member
Joined
Jul 2, 2008
Messages
16,578
Location
Atlanta, GA
Yes it is how do you figure out the year of the box...

Find the stamping on the back of the box. The two digit number will give you the year. This one is pretty faded, but you can make out the '73' on the right side of the picture

SnapOnidentificationstamp.jpg


All you need to remove the drawers is an old hacksaw blade. If it's too wide, you can trim the width with tin snips.
 
OP
H

HolladayMTM

Active member
Joined
Jan 16, 2012
Messages
26
Find the stamping on the back of the box. The two digit number will give you the year. This one is pretty faded, but you can make out the '73' on the right side of the picture

SnapOnidentificationstamp.jpg


All you need to remove the drawers is an old hacksaw blade. If it's too wide, you can trim the width with tin snips.

Yeah I tried it several ways n broke a piece off in there and finally got it out at 1.67 a tool n free shipping I will just wait especially after the money I'm end up sinking in this bad boy...about the year that's what I figured mines a 1975 k59b.. what kind grease you use on your slides...
 

machine_punk

Well-known member
Joined
May 14, 2011
Messages
2,540
Location
Napa Valley, California
I'm not really one who likes the big tool boxes, since I like to have everything out in the open, where I can see it--BUT I REALLY like the look of that old Snap On top chest.

Cool

M_P
 
OP
H

HolladayMTM

Active member
Joined
Jan 16, 2012
Messages
26
I'm not really one who likes the big tool boxes, since I like to have everything out in the open, where I can see it--BUT I REALLY like the look of that old Snap On top chest.

Cool

M_P

I sure appreciate that...I am the same way but I having to protect my tools BC one every body wants to steal and my backseat of my truck is useless lol.. I spent 30 bucks so far on the snap on box getting it redone in I still have to paint inside and touch up outside but I have those materials already..That other box for 20 dollar bill was a steal and I have the paint left over so maybe 5 bucks in material on it..I still have my bottom box to do and vintage snap on socket tote to do..
 
OP
H

HolladayMTM

Active member
Joined
Jan 16, 2012
Messages
26
HERE IS WHERE IM AT AFTER GREASING THE SLIDES TOUCHING UP THE DRAWERS AND PAINTING HANDLES BLACK AND FIRST STAGE OF CLEAR COAT


<a href=http://s1150.photobucket.com/albums/o604/HolladayMTM2011/?action=view&current=2012-02-06_17-24-18_206.jpg target=_blank><img src=http://i1150.photobucket.com/albums/o604/HolladayMTM2011/2012-02-06_17-24-18_206.jpg border=0 alt=></a>

<a href=http://s1150.photobucket.com/albums/o604/HolladayMTM2011/?action=view&current=2012-02-06_17-25-18_629.jpg target=_blank><img src=http://i1150.photobucket.com/albums/o604/HolladayMTM2011/2012-02-06_17-25-18_629.jpg border=0 alt=></a>

----
 

Tim Cowan

Well-known member
Joined
Feb 24, 2009
Messages
295
Location
Piedmont,Alabama 36272
Great box and you got it looking good. Put it into the better shop with a concrete floor. I live in the woods on 160 acres(family hand-me-down) but I keep all my tools out of the dirt. Keep that box to pass to your kids. I also have one that model. Had one at work in the late 60's(telephone co. garage) and bought on myself in 86 for home use......
 
OP
H

HolladayMTM

Active member
Joined
Jan 16, 2012
Messages
26
Great box and you got it looking good. Put it into the better shop with a concrete floor. I live in the woods on 160 acres(family hand-me-down) but I keep all my tools out of the dirt. Keep that box to pass to your kids. I also have one that model. Had one at work in the late 60's(telephone co. garage) and bought on myself in 86 for home use......

Yeah I got 8x12 metal shop I got to get moved beside my big shop and I'm store my tools in it but eventually I want be able put a concrete floor in that old shed..But in due time I guess...I appreciate the appreciation its taken a lil longer than I figured but I'm getting close to finish got touch up one drawer and put couple coats of clear install my new lock and Polish any old parts up and wrap the handles with a rubber material and start putting tool organization together and finish my other rolling cabinet and start ons my other rolling cabinet and my socket tray.
 
OP
H

HolladayMTM

Active member
Joined
Jan 16, 2012
Messages
26
Harbor Freight the $.79 cents socket organizers are awesome because you can put any size and mix match them together for all deep well and short well sockets. I am going to buy some more this week for future sockets I buy and any others I have in other boxes. I am going to start cutting out the spots for my tools in the foam. I still have to clear coat the box and touch up fix the other drawer. Then clear coat the black rolling box and get foam cut in it or do liners I have not made up my mind yet.
 

e30bradley

Well-known member
Joined
Aug 3, 2011
Messages
2,725
Location
Don’t have a garage in Arizona USA
What I did
1. CLEAN THE BOX OUT WITH VACUUM
2. TAKE BRILLO PAD AND HOT WATER AND CLEAN DRAWERS AND BOX FREE OF GREASE AND GRIME AND DRY WITH SEPERATE TERRY RAG.
3. I CUT FOAM INSERTS FOR THE DRAWERS FROM ANTI FATIGUE FOAM MATS
4. SAND THE OUTSIDE WITH 220 GRIT
5. REMOVE THE HANDLE AND CAM LOCK W/ LOCKING MECHANISM
6. USE A DREMEL WIRE BRUSH TO POLISH HANDLE N LOCK PARTS
7. BUY NEW CAM LOCK MIX N MATCH OLD MOUNTS WITH NEW LOCK.
8. PAINTED WITH KRYLON PAINT AND PRIMER IN ONE BANNER RED COLOR
9. I AM WAITING ON THE SNAP ON TOOL TO REMOVE THE DRAWERS AND START ON THE INSIDE NOW AND RESAND AND FINISH PAINTING OUTSIDE.

my box had some bad dents and bends in it. and it seems like someone drilled a bunch of holes in it :headscrat but I got it for $65 so I think I'll just leave it as is and fix up the next old box that comes along. I just don't want deal with straightening metal.. Especially since I have no bodywork experience.
 
To avoid these ads, REGISTER NOW!
Top Bottom