To avoid these ads, REGISTER NOW!

Above 1200 Sq/FT OldCarGuy’s New Toy Shop

Wokspaces above 1200 squarefeet.

Uncle Buck

Banned
Joined
Mar 7, 2005
Messages
9,120
Location
Kansas
OK I just joined and this is one of the first threads I saw....I am on AWE. I had a nice shop up north and moved to southern Illinois and am still coveting an adition to my 2 car garage. Its packed FULL. But MAN I would give my left arm for that garage...:drool:

Only you and every other swingin D_ _ K at the GJ! :bounce:
 
To avoid these ads, REGISTER NOW!
OP
O

OldCarGuy

Well-known member
Joined
Nov 29, 2005
Messages
2,005
Location
Ohio
Upon returning from my escape to Mexico, I’m back at the make-over to accommodate my new BendPak lift of one of my four-car garages. This garage will transformed into my antique restoration and car repair shop. Besides the new lift, I’m installing a bridge crane, tire changer, wheel balancer, work benched, storage cabinets, roller tool boxes, and ultimately a full size paint booth.

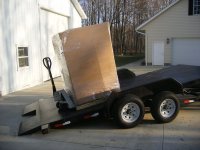
Unloading the components of my bridge crane off my flatbed trailer that I recovered from my old house.

DSCF1592.jpg

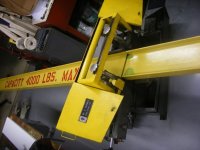
I first bolted the four columns to the cement floor. Since the ceiling is higher than the old garage, I added a piece of wide flanged 6” I-beam to the top of each column to increase the hook height. The two runway beams are then placed on top of the columns and braced to the garage walls. The magnet drill press was used to drill holes in the runway beams so that they can be bolted to the columns.
DSCF1717-1.jpg
DSCF1720-1.jpg

The garage restraints necessitated that I shorten the 12” bridge beam by five feet. My cut-off saw cut made short work of it.
DSCF1724.jpg


I drilled new holes to attach the end truck back onto the bridge beam. My trusty old cherry picker placed it on top of my scissors truck. Then lifted the bridge assembly in place over the two runway beams. Then install the trolley and 4,000 pound electric chain fall. It’s 120 Volt so I won’t need too add a rotary phase converter. Though I plan on installing a series of cables and pulleys like my main garage shop to keep the wires out out the way.
DSCF1729.jpg

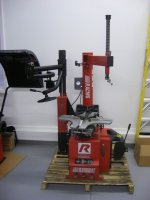
Ranger tire changer and wheel balancer on my tilt bed trailer.
DSCF1730.jpg

Simply tilt the trailer bed, and roll off the equipment using my newly acquired pallet truck.
DSCF1734.jpg
DSCF1735.jpg

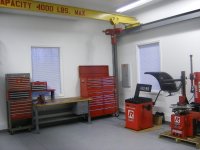
Here a picture of the Ranger tire changer, wheel balancer, and an over view of the bridge crane, work bench, and roller tool boxes. Now to install air lines and wiring to the new equipment...
DSCF1747.jpg
DSCF1750.jpg
DSCF1743.jpg
 

bmwpower

Super Moderator
Staff member
Joined
Apr 24, 2005
Messages
12,578
Location
NJ
Hey get those things hooked up. I need some snow tires mounted. :)

As always....:drool:
 

boiler7904

Well-known member
Joined
Apr 4, 2006
Messages
3,414
Location
NW IN
Amazing!

Has OldCarGuy ever said what he did prior to retirement?

Looks like a career change might be in order for me.
 

Holedgr

Well-known member
Joined
Jun 21, 2006
Messages
358
He said he was an electrician in the beginning of this thread..... Must have been a GOOD one !!! And kept his finances in order as well. Very nice facility you have there, Sir.


-T
 

Jononon

Well-known member
Joined
Nov 28, 2006
Messages
1,636
Very nice :thumbup:

Is the tyre changer with a view to changing those on your old cars, or for winter tyres for your daily drivers ?

I first bolted the four columns to the cement floor. Since the ceiling is higher than the old garage, I added a piece of wide flanged 6” I-beam to the top of each column to increase the hook height. The two runway beams are then placed on top of the columns and braced to the garage walls. The magnet drill press was used to drill holes in the runway beams so that they can be bolted to the columns.
DSCF1717-1.jpg

Shouldn't those I-beam spacers have their flanges resisting the cross beam's load ? ie. 90 degrees to their current position :headscrat
 

FFPL

Well-known member
Joined
Oct 12, 2007
Messages
157
Location
Massachusetts
We chatted for a few minutes and I explained that my intention is to send him our new two-post model expected to arrive by years end. No sense in going through the trouble to critique a lift that will be discontinued soon - the significant changes being the lifting carriage and arm components.

I'm looking forward to seeing information and review on this new model as I was considering a bendpak. What is the model number ? I didn't see anything on their website regarding new models, although I could have missed it.
 
OP
O

OldCarGuy

Well-known member
Joined
Nov 29, 2005
Messages
2,005
Location
Ohio
He said he was an electrician in the beginning of this thread..... Must have been a GOOD one !!! And kept his finances in order as well. Very nice facility you have there, Sir.


-T

No I’m not an electrician by trade. Though I have been doing major electrical work for 40 plus years. And I’m not officially retired yet. However when my first Social Security check arrives next month I will be!

The following post in my garage build thread summarizes my career..
http://www.garagejournal.com/forum/showthread.php?p=24926&highlight=NAFTA#post24926
 
OP
O

OldCarGuy

Well-known member
Joined
Nov 29, 2005
Messages
2,005
Location
Ohio
Very nice :thumbup:

Is the tyre changer with a view to changing those on your old cars, or for winter tyres for your daily drivers ?

The tire changer and wheel balancer will be used for my antique cars as well as my daily drivers. I would never trust just any tire monkey on any of my priceless chrome plated wires wheels. It will be interesting to see how the equipment will perform on my 1914 38" X 5" tires mounted on Kelsey Hayes 27" rims.. In the past I’d break the beads using my hydraulic press and removed and install tires on all my antique cars using taped-up spoons.

With my past experienced at the tire store, I made up my mind to get what ever equipment necessary to install tires myself... http://www.garagejournal.com/forum/showthread.php?t=12260

Shouldn't those I-beam spacers have their flanges resisting the cross beam's load ? ie. 90 degrees to their current position :headscrat

I’m not a Structural Engineer and to be honest with you I never gave it any thought about the placement direction of the I-Beam spacers. I was only interested in getting an additional 6" of hook height from my crane. And since the bridge and trolley are manual movement, I don’t think there will be any significant side thrust in any direction. However the runway beams are secured to the garage walls. And I’ll keep an eye on any stress that may be transfered to the runway beams..
 
OP
O

OldCarGuy

Well-known member
Joined
Nov 29, 2005
Messages
2,005
Location
Ohio
I'm looking forward to seeing information and review on this new model as I was considering a bendpak. What is the model number ? I didn't see anything on their website regarding new models, although I could have missed it.


BendPak’s Website doesn’t have any information about the new models they are introducing this month. I’ll have the honor of receiving one of the first one out of their doors.

You'll see it first on Garage Journal...
 

RattytatTom

Well-known member
Joined
Dec 10, 2007
Messages
83
Sorry for the question, but didn't you have that crane up for sale at one point? with a trailer?
 

M. MYERS

Well-known member
Joined
Nov 29, 2005
Messages
84
Location
BATON ROUGE, LOUSIANA
If you don,t mind me asking, what size and weight is your runway beams and the same on your bridge beam. How far are you spanding on the bridge?
I am close to starting mine.

Melvin Myers
 
OP
O

OldCarGuy

Well-known member
Joined
Nov 29, 2005
Messages
2,005
Location
Ohio
Sorry for the question, but didn't you have that crane up for sale at one point? with a trailer?

I did post the bridge crane for sale in the classified section. Received four serious inquires. But wasn’t able to close a deal. Shipping distance was always a problem. I did go as far as packaging my old flatbed trailer to make the sell. That way the buyer need only travel one way towing the crane. Still no sale...

In any event while the bridge crane didn’t sell,, someone came along and made me an offer I couldn’t refuse on the trailer alone. Bingo,, I sold the trailer, replaced it with a new tilt-bed as shown. And when the evaluation BendPak lift arose, I decided to incorporated it into my garage make-over as you can see...

Things have a way of working out for the best...
 
OP
O

OldCarGuy

Well-known member
Joined
Nov 29, 2005
Messages
2,005
Location
Ohio
If you don,t mind me asking, what size and weight is your runway beams and the same on your bridge beam. How far are you spanding on the bridge?
I am close to starting mine.

Melvin Myers

The bridge beam alone weighs 950 pounds and made of a S12x35 (standard 12" I-beam that weighs 35 pounds per foot) that is 27’ long. Each runways is 45 long and consists of one S10x25.4 beam 25’ long and another 20’ long. The columns are made from 4" H-beams with a cross section of 3/8", theses babies are heavy! I built the end trucks with some discarded angle 3/8” thick 4x6” angle that I saved. The eight wheels came from two 4,000 pound trolleys that I had laying around.

Below is a Webpage of an industrial bridge crane supplier. Along with beam capacity chart.

http://www.lkgoodwin.com/more_info/...es/series_300_manual_medium_duty_cranes.shtml

http://www.shopfloortalk.com/forums/attachment.php?attachmentid=2831
 

M. MYERS

Well-known member
Joined
Nov 29, 2005
Messages
84
Location
BATON ROUGE, LOUSIANA
Thanks for the information. It is a lot of work to design and install one as you know but I have a friend close to me that built one and it is the tops when working in his shop. Again thanks a lot. Excelent job in all areas.

Melvin Myers
 

Jononon

Well-known member
Joined
Nov 28, 2006
Messages
1,636
The tire changer and wheel balancer will be used for my antique cars as well as my daily drivers. I would never trust just any tire monkey on any of my priceless chrome plated wires wheels.

I take your point, especially given the 'quality' of service from your tyre monkeys ! :shocking:

I’m not a Structural Engineer and to be honest with you I never gave it any thought about the placement direction of the I-Beam spacers. I was only interested in getting an additional 6" of hook height from my crane. And since the bridge and trolley are manual movement, I don’t think there will be any significant side thrust in any direction. However the runway beams are secured to the garage walls. And I’ll keep an eye on any stress that may be transfered to the runway beams..

I'm not a structural engineer either (I was an EEng in a former life), so I tend to go for 'by the book +10%', especially on anything that's going to be over my head. The only thing that worried me was the possibility of side thrust, but that doesn't sound like it's going to be an issue, particularly with the rails restrained by the walls :thumbup:
 
OP
O

OldCarGuy

Well-known member
Joined
Nov 29, 2005
Messages
2,005
Location
Ohio
Hey get those things hooked up. I need some snow tires mounted. :)

As always....:drool:

Okay Bmwpower bring your snows over!

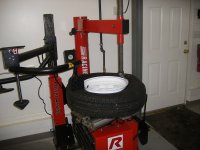
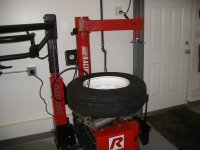
I completed setting up my new Ranger RX-950AT tire changer and DTS-1000 wheel balancer this past weekend. After figuring the best location for them in my garage make-over I level both units and lagged them to the floor. Going along with the company’s recommendations for their tire changer, I changed the power to 240 Volt from 120 and wired it to a 30 Amp dedicated circuit. Giving the machine and edge on stubborn tires. I also extended the air supply to the changer using 3/ 4” diameter black pipe.

Like any new toy, it takes experience to get the hang of running them. Their first task was installing a slightly used 15” tire on a rim for a spare on my new tilt bed trailer. First the rim is set onto the mounting table and a new valve stem is installed. With a light push of a foot petal, the rim is quickly clamped.
DSCF1773.jpg

The tire is manually placed over the rim and with the supplied tire iron the first tire lip is put in place. While the assist arm steadies one side of the tire the duckhead is placed under the opposite side tire bead. With the light push of another pedal the tire is rotated and is put into place.
DSCF1775.jpg

The air hose is attached on the stem. With the push of the side pedal the air jet is energized and seats the tire beads and air fills the tire at the same time. At 20 pounds on the gage, the tire pops and is completely in place. Then finish filling tire with air…
DSCF1776.jpg


After calibrating the tire balancer. The tire is then fastened on the shaft with the correct cone adapter and speed nut, and the correct rim parameters are imputed into the balancer‘s computer. Lower the hood starts the procedure then stops a few seconds. The reading indicated a one ounce weight on the inside and a two ounce weight to the outside are needed. The weights are placed top dead center when the lights are fully lit on the panel.
DSCF1778.jpg

After installing the correct weights, I ran the balancer again. And for the fun if it four more times. The reading was always “0” and “0” indicates the tire was balanced correctly…and the tire is removed.
DSCF1784.jpg
 
To avoid these ads, REGISTER NOW!

Fueler

Well-known member
Joined
Jun 22, 2006
Messages
1,620
Location
Urbana, IL
Just curious how tight the tolerance is on these machines. The 000 indicates done. Somewhere in the instructions and setup there should be a Oz/in measurement that the 000 is set for. Is it 0.25 oz/in or some other number?
Thanks
Dave
 
OP
O

OldCarGuy

Well-known member
Joined
Nov 29, 2005
Messages
2,005
Location
Ohio
Just curious how tight the tolerance is on these machines. The 000 indicates done. Somewhere in the instructions and setup there should be a Oz/in measurement that the 000 is set for. Is it 0.25 oz/in or some other number?
Thanks
Dave


The machine will either read in ounces or grams. I have mine set for ounces. And the accuracy is within .01 ounce. After I had the wheel balanced, it could easily detect a piece of duct tape I had put on the tire. And when removed, it was zeroed out again. That’s mighty impressive I‘d say
 

joeychgo

New member
Joined
May 13, 2007
Messages
1
wow - I think the only car guy that wouldnt be jealous of you is Jay Leno. I think it would be cheaper and easier for me to just buy a car dealership somewhere.

What tool / equipment DONT you have? Christ.
 

jonny01blaze

Well-known member
Joined
Nov 23, 2007
Messages
156
Location
Pittsburgh, PA
This is just completely incredible. The amount of space available at hand is just amazing, Not only is your home georgous but the amount of land and placement of your 3 other massive garages are perfect. Great job man, well deserved.
 

KenBaker

Active member
Joined
Nov 9, 2006
Messages
42
You have an incredibly nice shop. I think the key for you to have all this is where you said that you were nailing in nails behind your Father at the age of four. Hand-digging foundations and manual concrete mixing are concepts that are lost today. Hard-work, Brains, Guts and a little luck thrown in have brought you what you have. I hope God provides you with the health to enjoy your hobbies for a long time.

I do not think that the Caddy that you rescued will buff out, either..
 

R1chy

Well-known member
Joined
Sep 3, 2007
Messages
232
Location
Fairfax, VA
OCG - Can you provide some info on your RV Barn? Did you install 30 (or 50) amp service in it; plumb in H2O and/or install a drain?

This is my second time reading through your thread and you've given me multiple ideas for my 56 X 85 barn extreme make-over.

Like others before me, I too would like to express my appreciation for the time you have taken to share the details of your project and educating us on the choices you have made. You have more than inspired many of us, you have provided the confidence that we too can work toward our goals and dreams – Thank You.

R1chy
 
Last edited:
OP
O

OldCarGuy

Well-known member
Joined
Nov 29, 2005
Messages
2,005
Location
Ohio
OCG - Can you provide some info on your RV Barn? Did you install 30 (or 50) amp service in it; plumb in H2O and/or install a drain?
R1chy

The 30'x50' “RV Barn” as you called it, existed when I purchased the property. The entire inside of the Barn has 2” thick polyurethane foam insulation that I painted white with my airless sprayer. I installed a 2' x 4' acoustical tile drop ceiling along with R-19 glass insulation. The 8' deep by 30' loft also existed; but was poorly constructed. The I floor joists were on 24" center with 1/ 2" plywood decking. I placed another joist between them making the spacing 12"and added a layer 5/8" plywood to the decking. Eliminated the precarious pull down steps. And added 42” wide wood stairs that I purchased for $40.00. I replaced the 10' X 10' overhead door with a 14' x 12.5' door along with an opener to accommodate my 40' motor home.

The electricity to the barn was supplied by three separate stands of direct burial aluminum wire. That shorted out by construction equipment running above it. I buried 2" PVC conduit and pulled four strands of 1/0 copper THHN wire. To a 100 AMP 240 Volt single phase load center.

A floor drain existed; but was clogged. I dug it up and tied it into a 10" storm drain line that I ran 350' to the front of the property. The Barn floor leaked badly anytime during a rain storm. I dug up and placed drain tile around the entire perimeter. Including under any concrete that I later poured. She’s dry as a bone now...
 
OP
O

OldCarGuy

Well-known member
Joined
Nov 29, 2005
Messages
2,005
Location
Ohio
Since my build thread was brought up, I thought that I would add my two new toys to it.
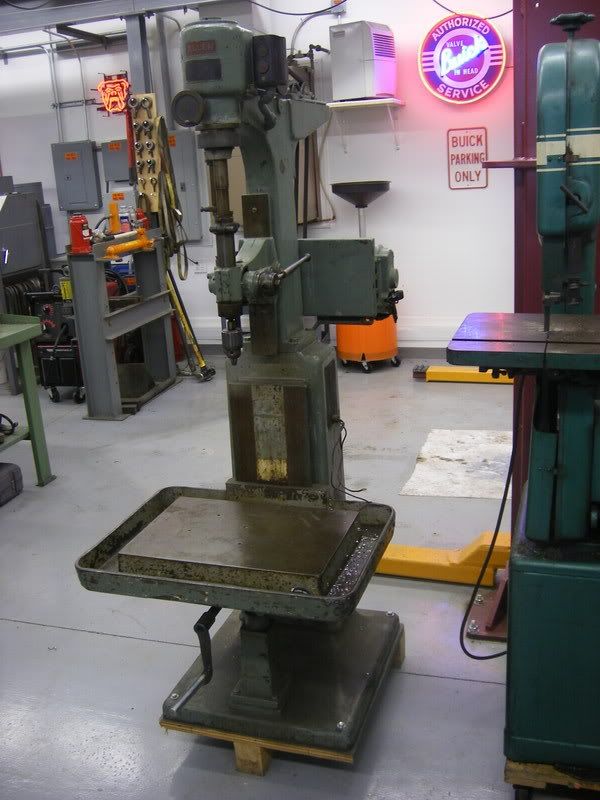
An Allen power Tapper/Drill Press.
DSCF1925.jpg


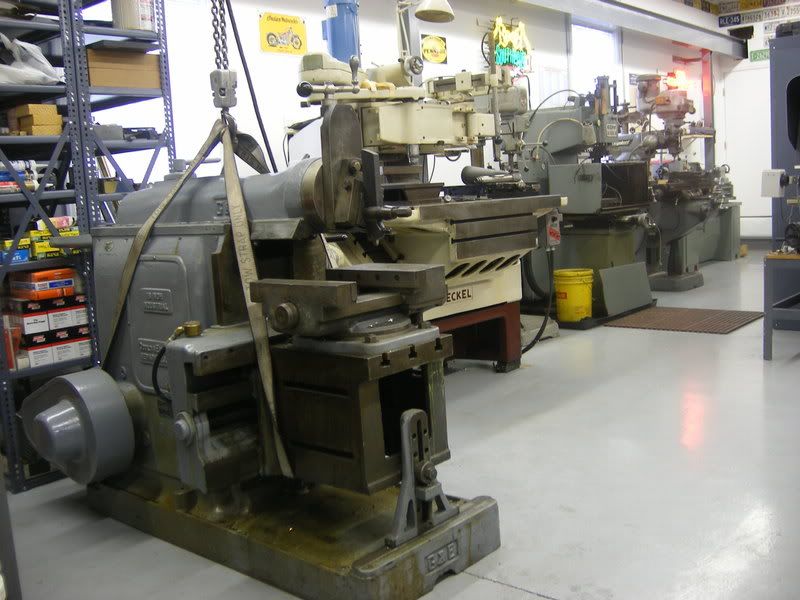
An old 1950 Gould & Eberhardt Metal 16" Shaper. Made in Newark New jersey... That has very little wear and tear. Nylon strap and my bridge crane lifts her off the trailer. And sets her in her place on honor next to my Deckel Copy Mill.

DSCF1914.jpg


DSCF1920.jpg


The metal shaper was one of the first metal working machines that I learned how to run when I was 12 years old. It operates somewhat like a lathe using a inexpensive single point tool bit. Rather than revolving the workpiece, the rams travels over the workpiece that is held tightly in a vice. Cutting only on the forward stroke. On the return stroke the clapper lifts the tool bit off the workpiece as the workpiece is advanced for the next cut. It may be slow going to remove steel; but it can run by itself, freeing yourself to do something else. Additionally a single $5.00 tool bit can literally remove a ton of steel.
.

The sound level of the shaper running is not much louder than a sewing machine. Here’s a link to my shaper in action... The block is a 1 1/ 2" thick X 6" X 12" piece of 4140 steel that is 30 RC hardness. I am taking a 1/16" deep cut and advancing .020". The entire surface will take about 15 minutes to finish.

http://s28.photobucket.com/albums/c239/OldCarGuy_1955/?action=view&current=DSCF1939.flv
.
.
 

R1chy

Well-known member
Joined
Sep 3, 2007
Messages
232
Location
Fairfax, VA
The 30'x50' “RV Barn” as you called it, existed when I purchased the property. The entire inside of the Barn has 2” thick polyurethane foam insulation that I painted white with my airless sprayer. I installed a 2' x 4' acoustical tile drop ceiling along with R-19 glass insulation. The 8' deep by 30' loft also existed; but was poorly constructed. The I floor joists were on 24" center with 1/ 2" plywood decking. I placed another joist between them making the spacing 12"and added a layer 5/8" plywood to the decking. Eliminated the precarious pull down steps. And added 42” wide wood stairs that I purchased for $40.00. I replaced the 10' X 10' overhead door with a 14' x 12.5' door along with an opener to accommodate my 40' motor home.

The electricity to the barn was supplied by three separate stands of direct burial aluminum wire. That shorted out by construction equipment running above it. I buried 2" PVC conduit and pulled four strands of 1/0 copper THHN wire. To a 100 AMP 240 Volt single phase load center.

A floor drain existed; but was clogged. I dug it up and tied it into a 10" storm drain line that I ran 350' to the front of the property. The Barn floor leaked badly anytime during a rain storm. I dug up and placed drain tile around the entire perimeter. Including under any concrete that I later poured. She’s dry as a bone now...

OCG - Thanks for your reply and details. Guess I should have been more specific on the drain question, what I should have asked is if you put in a septic drain to dump your RV after an trip. Although I did appreciate your drain answer too since that is another feature I'd like to build into the barn.

In addition to preparing my RV and cleaning up after trips (i.e., water fill up and dump), I'd like to occasionally use the RV in and near the barn (albeit mindful of the hazards of operating combustible appliances inside). As such I'm thinking of installing a "full hookup" inside as-well-as next to the barn. Would appreciate your thoughts and I can take your answer in a PM if you think this is too far off topic for this thread (I wouldn't want to hijack a great thread).

Thanks again, R1chy
 
OP
O

OldCarGuy

Well-known member
Joined
Nov 29, 2005
Messages
2,005
Location
Ohio
OCG - Thanks for your reply and details. Guess I should have been more specific on the drain question, what I should have asked is if you put in a septic drain to dump your RV after an trip. Although I did appreciate your drain answer too since that is another feature I'd like to build into the barn.

In addition to preparing my RV and cleaning up after trips (i.e., water fill up and dump), I'd like to occasionally use the RV in and near the barn (albeit mindful of the hazards of operating combustible appliances inside). As such I'm thinking of installing a "full hookup" inside as-well-as next to the barn. Would appreciate your thoughts and I can take your answer in a PM if you think this is too far off topic for this thread (I wouldn't want to hijack a great thread).

Thanks again, R1chy


I do have a 50 Amp 240 Volt receptacle inside. Along with one on the outside for the few times I leave it out for extra living quarters of guests. My motor home has both a diesel engine and generator set. That’s less of a hazard than gasoline. However it does have a 100 pound propane tank onboard that I have to be concerned about.

The RV has a 100 gallon fresh water tank that is enough for a weeks stay. That I always fill from the attached garage. It comes from a deeper well and on a RO system that I put in. The water near my barn is unfiltered and comes from a shallower well and high mineral content.

When I purchased my property it had a septic system and no storm sewers. I tied the house and five garages drain tile and downspouts into a 10" line that I ran 350' to the cities storm system. That was a trip in itself. I looked into tying a sanitary RV dump station into my septic system somewhere on my property. But decided against it because of all the hoops I would have to jump through for the county. I have since contemplated just doing it without going through the permits.

I own a storage building about five miles from my home that has a RV dump station and city water. So it’s no problem to make a pit stop on return trips. That’s the main reason why it hasn’t been a priority to install one on my property.
 

SnyperBob

Active member
Joined
Apr 29, 2008
Messages
33
Location
Illinois, USA
Wow, just came across this thread and I just wanted to say nice job! It's great seeing years worth of work come together like this!
 
OP
O

OldCarGuy

Well-known member
Joined
Nov 29, 2005
Messages
2,005
Location
Ohio
What happened to the Bendpak ?

It has arrived!

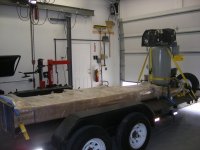
It started to rain. So I quickly backed my trailer inside the garage, and about to unload my new Bendpak Lift.

Now what’s that tall thing in the front end of the trailer that came along for the ride? Wouldn’t you know? It’s a new air compressor! Well you know it’s hard for me to pass up a good deal. After the lift is up and running, I’ll wire and plumb it up and post my evaluation. So far I’m impressed and cannot wait to put it through the paces and report back...

DSCF2168.jpg

DSCF2162.jpg

DSCF2163.jpg

DSCF2165.jpg
 

e-tek

Well-known member
Joined
Dec 19, 2007
Messages
10,690
Location
Saskatoon, SK
I just purchased a BendPak lift as well - the HD9-XWT. I'm eagerly awaiting shipment, so I'll be watching your set up with great interest!
 
OP
O

OldCarGuy

Well-known member
Joined
Nov 29, 2005
Messages
2,005
Location
Ohio
C'mon...with the overhead crane, you should've already had it setup and pics taken to post for us. j/k.

Akin to my main workshop garage, it was time well spend installing a bridge crane in this garage. Sure takes the work out of unloading and moving equipment.

DSCF2172.jpg


DSCF2177.jpg


I didn’t get too far other than unloading my new toys. The word’s out that I own a tire changing and balancing equipment. One of my antique car touring buddies brought over four tires to be mounted and balanced for his daily driver. Let me tell you, these new low profile tires are tough to work on. Thank goodness I have the assist arms on my Ranger changer.

Actually BenPak is having the lift installed for me, Wednesday of next week. I’ve installed a dozen lifts myself. And I’m going to find it enjoyable to stand around and watch. Taking pictures and documenting the process.
 
To avoid these ads, REGISTER NOW!
Top Bottom