To avoid these ads, REGISTER NOW!

Las Vegas Garage Do-Over

admranger

Well-known member
Joined
Feb 16, 2012
Messages
482
Location
Las Vegas, NV
I've lived in the house since it was built 11+ years ago. I thought I had it pretty sweet when my lift was installed soon after we moved in, and they didn't even scratch the floor!

However, it has become a cluttered mess as I've inherited my late father's penchant for never throwing anything away.

Recently, my wife decided that I needed an incentive to "organize this mess". Clutter is something she tolerates, but doesn't like at all as she's extremely organized. Then she said those magical words that reminded me why I married her nearly 27 years ago: "You can get whatever you need in order to make this more organized!" Sweet.

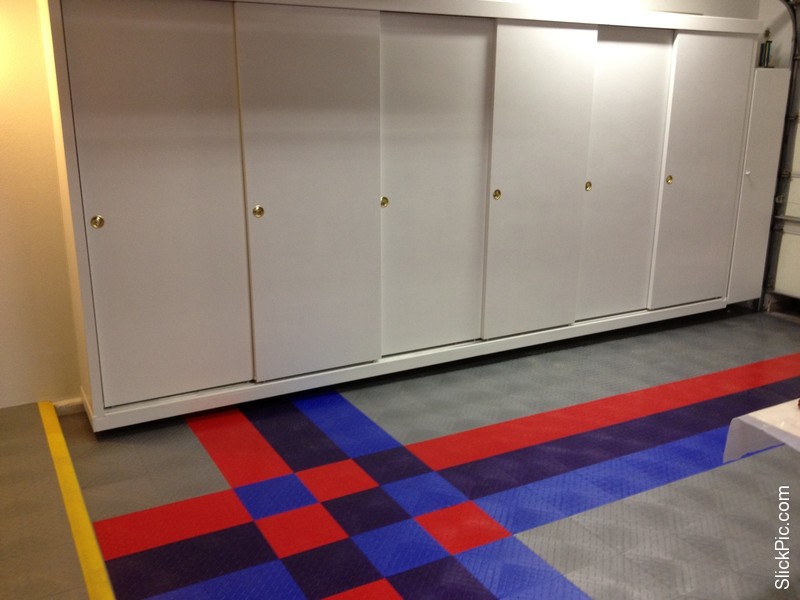
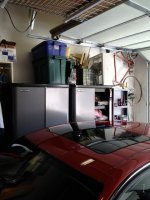
Here are some before shots of how crowded the garage is/was:
 

Attachments

  • IMG_0365.jpg
    IMG_0365.jpg
    102.1 KB · Views: 1,485
  • IMG_0385.jpg
    IMG_0385.jpg
    71.7 KB · Views: 981
  • IMG_0382.jpg
    IMG_0382.jpg
    89.9 KB · Views: 1,071
  • IMG_0372.jpg
    IMG_0372.jpg
    82.2 KB · Views: 1,142
  • IMG_0371.jpg
    IMG_0371.jpg
    90.7 KB · Views: 1,360
  • IMG_0370.jpg
    IMG_0370.jpg
    96.6 KB · Views: 1,260
  • IMG_0376.jpg
    IMG_0376.jpg
    96.2 KB · Views: 1,296
To avoid these ads, REGISTER NOW!
OP
A

admranger

Well-known member
Joined
Feb 16, 2012
Messages
482
Location
Las Vegas, NV
So one of my problems besides lack of organization was a chipping epoxy floor. The epoxy was coming off of the concrete with no concrete sticking to the epoxy. This from some floor jack use over the years. Yes, I know I have a lift but sometimes it is just easier to jack the car up and do a quick tire change, etc.

In time I pulled all the **** off the long wall, and had it repainted in a satin bright white. For some reason the pic is upside down, but you get the idea...:p

The plan is to build cabinets with sliding doors along the entire length of the wall up to the step area. Cabinets will be suspended off the wall and go from the cement edge of the garage to the ceiling or to the garage door track. I'm using 3/4 MDO as the body of the cabinets and hollow core interior doors (6 of them) as the doors for the lower units. Uppers will have standard euro hinged doors. I'm also building two cabinets to go over the Lista cabinets with euro hinged doors. All of the cabinets are going to be built April 7-10 when I fly in a good friend from NC who is a furniture maker (semi-retired) to help. By "help" I mean he's going to be the craftsman and I'm going to be the cash provider and the go-fer/helper. Cabinets will be painted bright white semi-gloss inside and out. Hefele aluminum shelf stiffeners will provide needed support to the 31" wide shelves. I might try to color match the satin finish on the Lista's and paint the cabinets above them in a Lista-like Bright Blue hue.

Three big boxes arrived the other day from NJ. Yes! :rocker: 
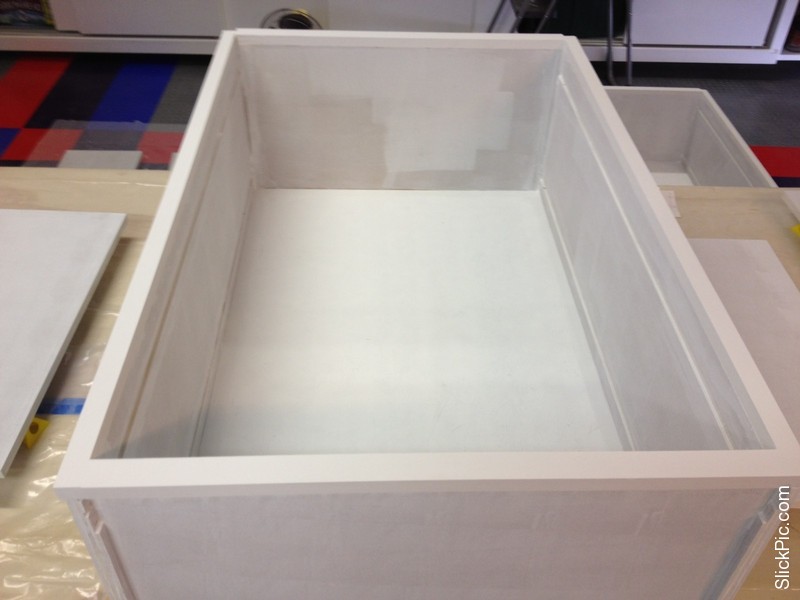
Thanks to Joe Germann at Motorhead Extraordinaire, my three Lista boxes are here! I think I found one small scratch on one drawer. So much for "junkyard dogs!"

I bought two SC-900's (9-drawers each) and one SC-1350 (12-drawer). These things together weighed a ton (nearly!) so I hired a guy to help me get them moved around. The drawers are 2' x 2' interior dimensions, full extension so they hold a cubic ****-ton of stuff. They have swallowed up my entire tool collection with room to spare (guess I'll need to buy more tools!). In addition, the SC-1350 has all my small parts bins in it and I have 6+ drawers still available. Excellent! I have not finished installing the toe-kicks in the pic, but you get the idea. Also, the stainless steel top has not arrived yet. I'll have to figure out where to mount my vise once the top does arrive. Of course I still need a worthy vise to install here and replace my pitiful Chinese POS vise (hint, hint vise peddlers/hoarders -- PM me w/your non-fixed base vises, restored or not).

I've also done the Race Deck install on the upper portion of the garage area. It is about 3 inches off the parking area so I added a yellow border to highlight the transition and hopefully limit any possibility of a fall by a visitor. Lower area will be done once the cabinets are built and painted. No sense tempting fate with the paint and woodworking...

By the way, any locals or those traveling through Las Vegas who would like to purchase my older cabinets/tool boxes, PM me and we'll discuss.
 

Attachments

  • no cabinets.JPG
    no cabinets.JPG
    81.9 KB · Views: 561
  • chipped epoxy floor.JPG
    chipped epoxy floor.JPG
    85.5 KB · Views: 558
  • Lista Cabinets low res.jpg
    Lista Cabinets low res.jpg
    146.9 KB · Views: 7,991
  • Start of Race Deck Floor.JPG
    Start of Race Deck Floor.JPG
    91.3 KB · Views: 620
Last edited:
OP
A

admranger

Well-known member
Joined
Feb 16, 2012
Messages
482
Location
Las Vegas, NV
Looks like your off to a good start, and the Lista Cabinets are making me a bit envious.

Thanks! I still have a hard time believing that I have Lista cabinets!

I should mention that the left most cabinet's front base is hanging off the edge of the 'step' area a bit. I have ordered a leveling leg for the cabinet so I'll have that fully supported in the very near future.

I wish I would have just bought one Lista cabinet at a time over the years instead of buying the other tool boxes that I have. But then again, I didn't know about Motorhead Extraordinaire until a few years ago.
 
Last edited:

dare23

Well-known member
Joined
Jun 15, 2011
Messages
199
Location
Oakville
You are envious of his lista cabinets?... He's got a M3 parked in his garage!!! Very nice piece of equipment there.
 
OP
A

admranger

Well-known member
Joined
Feb 16, 2012
Messages
482
Location
Las Vegas, NV
You are envious of his lista cabinets?... He's got a M3 parked in his garage!!! Very nice piece of equipment there.

It's a tool I use to carve up traffic on my morning commute. :thumbup:

BTW: I see other threads with larger, clearer pics that aren't thumbs. How is that done? I'd like to make a better looking thread if possible...thanks!
 
Last edited:

Stick Figure

Well-known member
Joined
Aug 3, 2009
Messages
1,395
Location
Omaha, Ne
It's a tool I use to carve up traffic on my morning commute. :thumbup:

BTW: I see other threads with larger, clearer pics that aren't thumbs. How is that done? I'd like to make a better looking thread if possible...thanks!

I'm happy with my cars, and German engineering and myself are not always best buds, so I'm just fine with my cars. The M3 is one that has tempted me a few times over they years though.


As far as the larger pics, you need to find a way to host your own pictures. I host mine on my own website which only costs me a few dollars a year, but requires a bit more knowledge for up load etc. There are quite a few free/cheap picture hosting options out there, but I don't have any first hand experience with them to recommend one over the other.
 

Jack Olsen

Super Moderator
Staff member
Joined
Mar 22, 2009
Messages
6,678
Location
Los Angeles
Or you can host them on a service like imageshack or photobucket. But you'll have to learn to type
after.

The garage is looking great. I'm jealous of the M3. But I'm more jealous of the Listas. :)
 

STIBuilder

Well-known member
Joined
Oct 26, 2008
Messages
93
Location
Washington State
I'm happy with my cars, and German engineering and myself are not always best buds, so I'm just fine with my cars. The M3 is one that has tempted me a few times over they years though.


As far as the larger pics, you need to find a way to host your own pictures. I host mine on my own website which only costs me a few dollars a year, but requires a bit more knowledge for up load etc. There are quite a few free/cheap picture hosting options out there, but I don't have any first hand experience with them to recommend one over the other.


www.photobucket.com
 

UN4GTBL

Well-known member
Joined
Oct 26, 2007
Messages
434
It's a tool I use to carve up traffic on my morning commute. :thumbup:

BTW: I see other threads with larger, clearer pics that aren't thumbs. How is that done? I'd like to make a better looking thread if possible...thanks!

Just do this:

attachment.php


(Right click on the thumbnail, and get the link address. Then put the
tags around it. Quote this post so you can see what I did.
 
OP
A

admranger

Well-known member
Joined
Feb 16, 2012
Messages
482
Location
Las Vegas, NV
Or you can host them on a service like imageshack or photobucket. But you'll have to learn to type
after.

The garage is looking great. I'm jealous of the M3. But I'm more jealous of the Listas. :)

Both the Lista cabinets and the M3 are nice. My wife and I have had one of each series of M3 over the years. I should have never sold the 1988 M3 (red over tan, of course...) in 2000, but it funded my first race car. My wife's daily driver is a 2002 M3 (6-speed manual, no flappy paddles for her!).

Here's an idea of the cabinets that will be built along the wall.
 

Attachments

  • Kirks Garage r3-4.jpg
    Kirks Garage r3-4.jpg
    119.3 KB · Views: 214
  • Kirks Garage r3-4 - no doors.jpg
    Kirks Garage r3-4 - no doors.jpg
    67.5 KB · Views: 213
Last edited:
OP
A

admranger

Well-known member
Joined
Feb 16, 2012
Messages
482
Location
Las Vegas, NV
Ok, finally have something to add here...

First set of pics is the cutting operation my friend and I set up. I ended up renting a Rigid R4510 heavy duty portable table saw from Home Depot. The saw retails for $499 and rents for $41/24 hour period. Due to inefficiencies on my part, we rented it for a full three days to cut all the stock into piece parts. We didn't work like dogs, but we were both out there for a while. I tossed (figuratively) the stock blade and used my friend's Forrest River crosscut blade, Freud 80 tooth sheet goods blade, and his father's ancient, but very good, dado set. You can see our outfeed table setup which is 3/4 plywood on two plastic sawhorses. These two sawhorses broke later on and were replaced by beefier models from Lowes.

You can also see the stacks of cut products up against the 22' long wall. We labelled each part with painters tape to keep things straight for assembly later.

779338.jpg


Dust control, such as it was, was accomplished with my whole house vacuum and frequent checks to ensure the 1 gallon reservoir wasn't full already! We were cutting medium density overlay (MDO) in both primed (1/2 inch thick) and unprimed (3/4 inch thick -- no primed MDO available in 3/4...) so we wore respirators w/HEPA filters (MDO dust is toxic). Two cases of drinks helped anchor the saw.

This saw was simply amazing for what it is. My friend has an old Powermatic cabinet saw (US made cast iron one), but it wouldn't fit in the airline overhead compartment so we had to resort to this one. My friend was impressed by the saw's power and precision. With the Forrest River blade, we could slice paper thin cuts in sheet goods, dimensional lumber, or hardwood (poplar) with no tearing. I remember one 16' long 1/16" thick piece of waste that came off the saw. Pretty nice for such an inexpensive saw. I'm sure the fact that the blade cost about 1/3 of the saw's price had something to do with it too though...

Here's the scrap pile two days into cutting operations...

779340.jpg
 
OP
A

admranger

Well-known member
Joined
Feb 16, 2012
Messages
482
Location
Las Vegas, NV
So what did some of this material end up becoming? Stressed panels for 16' long x 8' high x 15 1/2 inch deep cabinets. The panels are screwed and glued together and then connected with the ripped dimensional lumber with Kreg pocket joints/screws. Here's the pre-primed frame on the wall.

779343.jpg


For the shelves, I used the same 3/4 MDO with the corners notched out for shelves that rest on shelf brackets that are screwed into the dado'd slots cut in the MDO walls. The slots were offset from each other to avoid thinning out the MDO too much as the slots are 3/16" deep. Each shelf bracket is held in place with 13 (yes, 13) 1/2 inch #8 screws. Thank goodness for rechargeable screwdrivers!

The edges of the shelves are stiffened with Heffle shelf stiffener which is essentially extruded aluminum. This not only stiffens the shelves, but gives them a nice finished edge so we won't have any splinters from reaching into the cabinets.

Here's a close up of the shelf stiffener on a shelf:

779350.jpg


The semi-finished product looks like this:

779344.jpg


779346.jpg


779347.jpg


I still have more shelves to notch, prime, and paint.

Also, why this is semi finished is because I ordered the wrong hanging track for the sliding doors. Fortunately the good folks at Johnson Hardware were more than willing to do an exchange and not charge me their normal restocking fee! :thumbup: The new track arrived today.

If you look closely, you can see the dado'd grooves in the bottom piece of poplar. Those grooves now have aluminum 'u' channel in them which will guide the bottom pins on the doors to keep the wind blowing them all over (and into my car! :shocking:).

The rest of the cut pieces will go into a coat cabinet at the far right, a top cabinet that goes to the left of the garage rail to the end of this big set of cabinets. I also have two cabinets for over the Lista base units. Still lots of assembly, priming, and painting to go.

This project cost over $1k in lumber, another $1k in materials and supplies (and tools), and a whole lot of labor. However, my wife is very happy with how things are turning out so all is good!

I'll add more as I get things further along in the following weeks.
 
OP
A

admranger

Well-known member
Joined
Feb 16, 2012
Messages
482
Location
Las Vegas, NV
I almost forgot to add that the hanging cabinets are held up by 3/8" x 3" lag bolts in the 2x4's and 1/4 x 3" lags in the 1-by materials. Lots and lots of lags into irregularly spaced studs. Good thing I had pics of the walls pre-sheet rock or I'd have really wondered about the accuracy of my stud finder!
 
OP
A

admranger

Well-known member
Joined
Feb 16, 2012
Messages
482
Location
Las Vegas, NV
In for updates!

Finished enough shelves for the large cabinet and filled it up with stuff.

Painted and hung the sliding doors...well, I have one side of two doors left to paint as I sold the two small rolling tool cabinets that were holding the 4x8 sheet of plywood I was using as my painting table!

I built the coat cabinet that goes to the extreme left of everything, right next to the garage door track. Need to add the shelf and notch it for a closer fit to the main cabinet, then mount it to the wall.

No new pics, but I'll get some next weekend...busy all week.

Major accomplishment was getting two cars back into the garage last night!
 
To avoid these ads, REGISTER NOW!
OP
A

admranger

Well-known member
Joined
Feb 16, 2012
Messages
482
Location
Las Vegas, NV
Update since my last post. I have installed the coat cabinet. It is to the far right in this pic showing all my **** on the shelves of the main cabinet... There is blue tape on the aluminum shelf edge as I was still painting the cabinet when I took the pic.

839155.jpg


I also built the top cabinet that sits to the left of the garage door track on top of the main cabinets. Here's a pic of it along with my stuff on the shelves... You have to look through some of my overhead storage to see, but there are four essentially 24" x 24" x 13" openings. I have doors that will be on european hinges, but they were being painted so no pic with the doors installed yet...

839144.jpg


It's slow progress, but progress nevertheless.

Two more cabinets to build, but those go over the Lista cabinets so I have to tear stuff off the walls before those get installed.
 

Duck72

Well-known member
Joined
Mar 16, 2012
Messages
89
Location
Missouri
I can see how sliding doors would be of use in the garage. No doors to swing out and hit the cars if space is tight. I hadn't ever thought about it before. I like the way you built this out. Looks great.
 
OP
A

admranger

Well-known member
Joined
Feb 16, 2012
Messages
482
Location
Las Vegas, NV
so are those sliding doors?

Yes. I have six 32" x 80" hollow core interior doors hung off heavy duty track (3 roller wheels on each hanger so 6 wheels per door -- I'll have to get a close up photo!).

I still need to put the round inset handles on the doors, but the 2 1/8" Forstner bit just arrived this week (I thought I had one, but I only had a 2" one...doh!).

They slide very easily and are held in place at the bottom by two pins so the wind can't blow them out into the car.
 

Omphaloskeptic

Well-known member
Joined
Oct 11, 2008
Messages
2,346
Location
Ultima Ratio, Wa.
Very well thought out wall storage; looks great!

Were your garage door tracks the limiting factor in deciding the depth of the cabinets, or was there some other consideration like best cut list dimensions?

I still choke a bit when I see what your material cost was; I guess it does add up quickly.
 
OP
A

admranger

Well-known member
Joined
Feb 16, 2012
Messages
482
Location
Las Vegas, NV
Very well thought out wall storage; looks great!

Were your garage door tracks the limiting factor in deciding the depth of the cabinets, or was there some other consideration like best cut list dimensions?

I still choke a bit when I see what your material cost was; I guess it does add up quickly.

Everything lines up with the edge of the garage track so I didn't really lose any width for parking. Best way would have been to have everything about 2' deep by 8' high, but that would have taken too much of my garage width away.

Cut list certainly wasn't the best. 70-ish percent utilization (see earlier pic with scrap heap!).

The material costs could have been less, but I used some nice stuff.

MDO instead of plywood is a big difference in cost. MDO takes paint better and requires no sanding (big plus) but costs about $20/sheet more than regular plywood. 14 sheets of 3/4 and 4 sheets of 1/2 and there is about 1/3 of your wood costs. Shelf stiffener adds $250-ish but I didn't have to sister hardwood to the front of the shelves to stiffen them up -- saved a bunch of time when you think about how many shelves I have. Good sliding door hardware is not cheap. Not cheap at all...even though Johnson Hardware keeps their prices pretty fair (excellent customer service). A cheaper way to do the sliding doors is to just buy closet doors, but I wanted something taller and narrower than standard closet door sets.

However, putting these things up has resulted in a ton of storage, all hidden behind doors, and it is up off my floor allowing no hiding spots for scorpions or other nasty critters. I *hate* scorpions! Had one crawl out of a drink holder onto my hand as I picked it up and I went :willy_nil Big tough guy I'm not! :sad:
 
OP
A

admranger

Well-known member
Joined
Feb 16, 2012
Messages
482
Location
Las Vegas, NV
Ok, I was out of town this weekend so I took some time tonight to put down 2/3 of the main floor! The RaceDeck goes down super easy and this only took 2 hours of my time.

The pattern will make some sense to BMW fans...

Starting to lay down the floor:

900369.jpg


Done for the night...

900358.jpg


900365.jpg
 

bimmerZ5

Well-known member
Joined
Aug 16, 2008
Messages
1,790
Ok, I was out of town this weekend so I took some time tonight to put down 2/3 of the main floor! The RaceDeck goes down super easy and this only took 2 hours of my time.

The pattern will make some sense to BMW fans...

Starting to lay down the floor:

900369.jpg


Done for the night...

900358.jpg


900365.jpg

very nice! the M3 will feel right at home! LOL

how do you like the race deck so far? i'm debating whether to do it or not... do the race deck snap together tightly without gaps?
 
OP
A

admranger

Well-known member
Joined
Feb 16, 2012
Messages
482
Location
Las Vegas, NV
very nice! the M3 will feel right at home! LOL

how do you like the race deck so far? i'm debating whether to do it or not... do the race deck snap together tightly without gaps?

I like the floor. It will show dusty footprints, which doesn't bother me too much as they sweep or wipe right up.

I really don't notice gaps between the tiles. I'm sure there are some, but I don't really notice them being more than a few sheets of paper thick.

I've had the upper section on for over a month and the gaps have not changed to my eyes.
 
OP
A

admranger

Well-known member
Joined
Feb 16, 2012
Messages
482
Location
Las Vegas, NV
Another boring update as I wait for primer to dry...

I installed the door pulls on the sliding doors last night.

914400.jpg


I also built and primed the large and small cabinets that will go over my Lista cabinets. They will have euro hinged doors just like the cabinets above the long wall of cabinets. I am getting pretty good at freehanding the euro hinges as they are take off from a long ago set of particle board cabinets that went into the dumpster...

914403.jpg


914407.jpg

Hope you all aren't bored yet with my slow, unsteady progress...
 
OP
A

admranger

Well-known member
Joined
Feb 16, 2012
Messages
482
Location
Las Vegas, NV
Did some clean up and got the rest of the floor laid down with the exception of the cut tiles. That's on the list this weekend, but I need to move some stuff via craigslist so we'll see what happens.

I did get the large upper cabinet mounted, two of the Lista cabinets bolted together, and the stainless steel top up and mounted. Clearly there is a lot of cable management, etc. to do yet, but it is coming together...

953674.jpg
 

Willymutt

Member
Joined
Jan 7, 2009
Messages
6
This is turning out awesome. It will look really good with the 2 red cars in there when done!
 

ODIS

Well-known member
Joined
Apr 30, 2012
Messages
2,110
Location
Pacific Northwest
Ok, I was out of town this weekend so I took some time tonight to put down 2/3 of the main floor! The RaceDeck goes down super easy and this only took 2 hours of my time.

The pattern will make some sense to BMW fans...

Starting to lay down the floor:

900369.jpg


Done for the night...

900358.jpg


900365.jpg

Floor looks fantastic! The space is has been transformed into a great place to spend your down time and, perhaps, your up time as well. To the left of your garage, there is a large (and looks like it is bolted to the floor) structure. Is this a single post lift or are my tired (and getting older) eyes just seeing something else and my mind "wants to see" a lift at that location? Again, great build out and all looks to be very well executed.


Ody.

PS: Wife and I have consumed many a good bottle of wine in our shop spaces and have had numerous small & large get-togethers that center on the shop/garage. Your space is so nicely done, that I hope you too get to "entertain" a little bit in your garage.
 
OP
A

admranger

Well-known member
Joined
Feb 16, 2012
Messages
482
Location
Las Vegas, NV
Floor looks fantastic! The space is has been transformed into a great place to spend your down time and, perhaps, your up time as well. To the left of your garage, there is a large (and looks like it is bolted to the floor) structure. Is this a single post lift or are my tired (and getting older) eyes just seeing something else and my mind "wants to see" a lift at that location? Again, great build out and all looks to be very well executed.


Ody.

PS: Wife and I have consumed many a good bottle of wine in our shop spaces and have had numerous small & large get-togethers that center on the shop/garage. Your space is so nicely done, that I hope you too get to "entertain" a little bit in your garage.

Ody,

I have a twin post, 9000lb lift in the garage. It is one where the cables are on the floor as my ceiling is only 10'3" high. It has been with me for over 11 years now and I use it regularly. It had three different vehicles on it this past weekend (2 of which were mine). Having a track day with the local Porsche club on Saturday required some time to change the brake pads back to street compound pads. :3gears:

The garage has been used for many "get-togethers" with the local BMW club. The garage has hosted a number of "tech sessions", usually associated with SEMA week in Las Vegas. Will Turner of Turner Motorsports fame is probably the most famous person who has been in the garage -- he gave a nice presentation on how he started his business from the trunk of his car and has turned it into the professional race team shop and BMW maintenance shop. Amazing story (and a really nice guy).

Thanks for your comments and for spending time looking at my garage transformation.

I spent some time this weekend putting in more Race Deck flooring. I have still have a number of tiles to cut and fit. I don't enjoy this part of the job all the much so I'm procrastinating...:rolleyes:
 
Last edited:
To avoid these ads, REGISTER NOW!
Top Bottom