
evintho
Well-known member
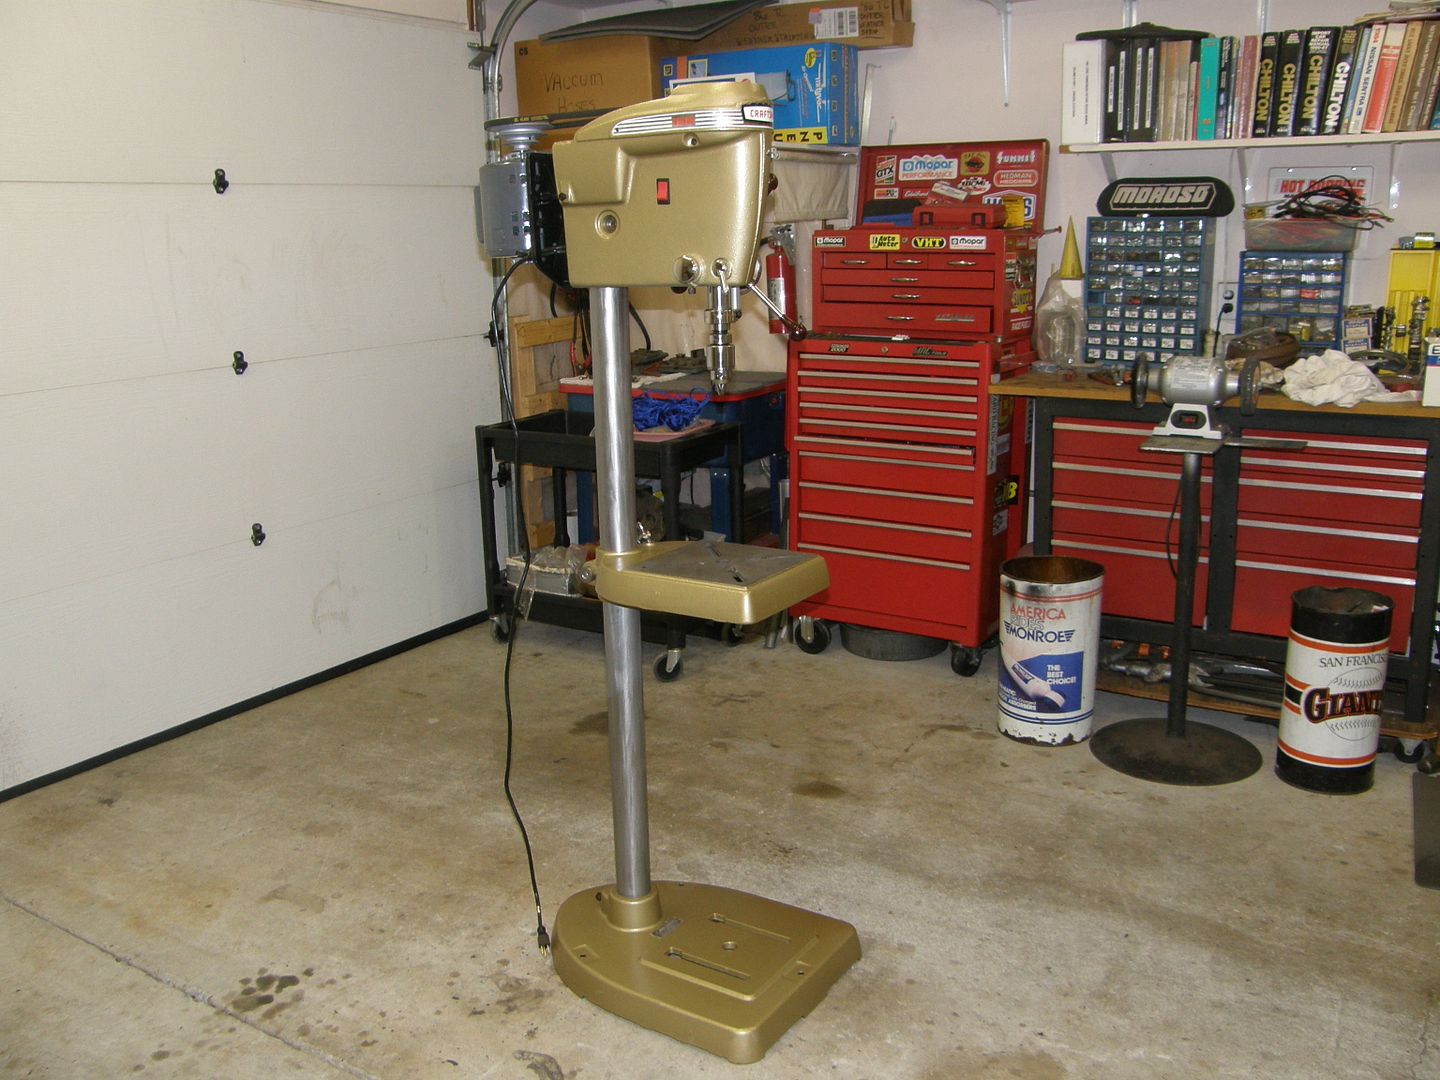
I've been meaning to do this for awhile. Finally found the time today. It's amazing how simple this is to put together! Most have seen my DP before. Bought it off of CL for cheap and gave it a light restoration. It didn't come with the optional low-speed conversion. I decided to fab my own low-speed conversion 'cause most of my work is with metal.


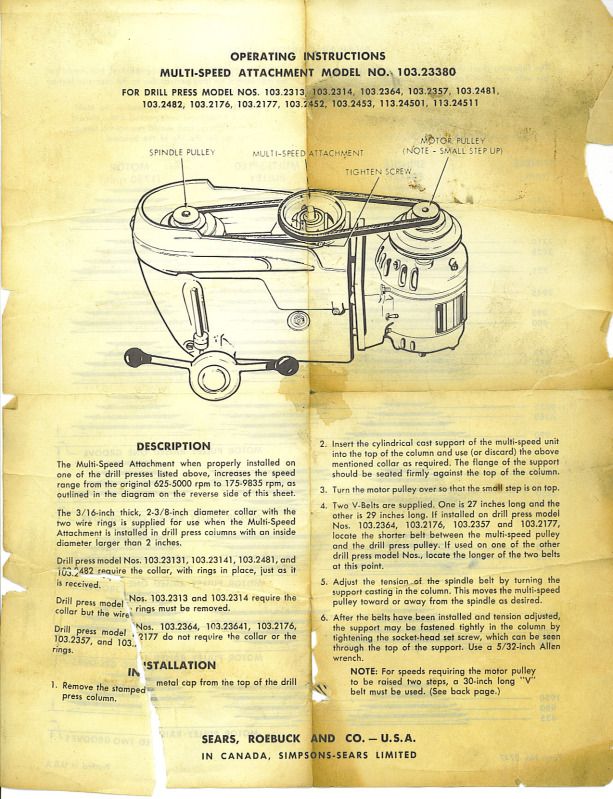
Here's a chart from an original Craftsman w/low-speed conversion. I don't know how fast the direct drive is right off the motor but I know it's way too fast for my needs! I'm shooting for the 4th one down. 175 RPM.


If you can find an older Craftsman with the optional low-speed conversion, great! If not, these are the parts you'll need to convert it. In addition, you'll need access to a MIG welder. If you don't have a MIG, you probably know someone who can run a bead for you.

1 - 4 step, 3L pulley. Ordered mine through MSC. I think it was $20 w/corporate discount.
2- bronze flanged bushings. $1 each from Home Depot.
1 - 3" long 1/2" bolt.
1 - 1/2" flat washer (not shown).
1 - 1/2" Nylock nut.
1 - steel cap - homemade.
Closeup of the flanged bushings with dimensions and part #s.

You'll also need 2 belts (not shown). They need to be belts for fractional horsepower motors. The designation is 3L, to match the pulley. Any shop that repairs chainsaws, lawnmowers, etc. will have them. You'll need a 25" belt from the motor pulley to the intermediate pulley and a 29" belt from the intermediate pulley to the spindle pulley.
Now that you have all the parts, you need to cut a blank of 3/16" steel. I used a 2-1/2" holesaw to do the deed.

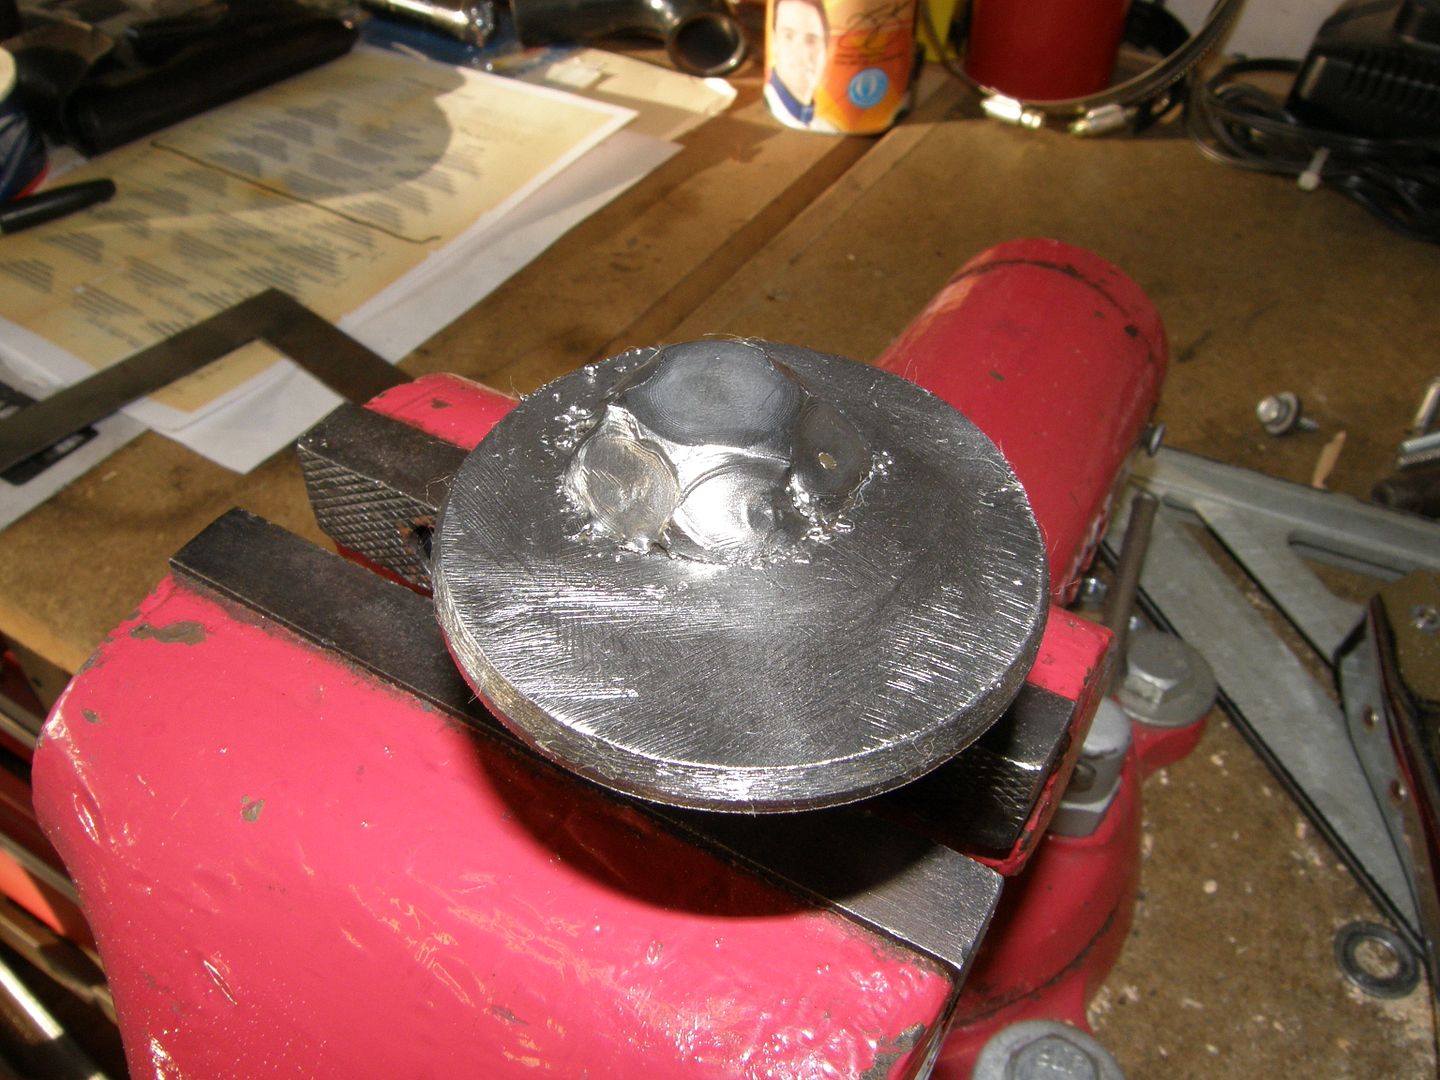
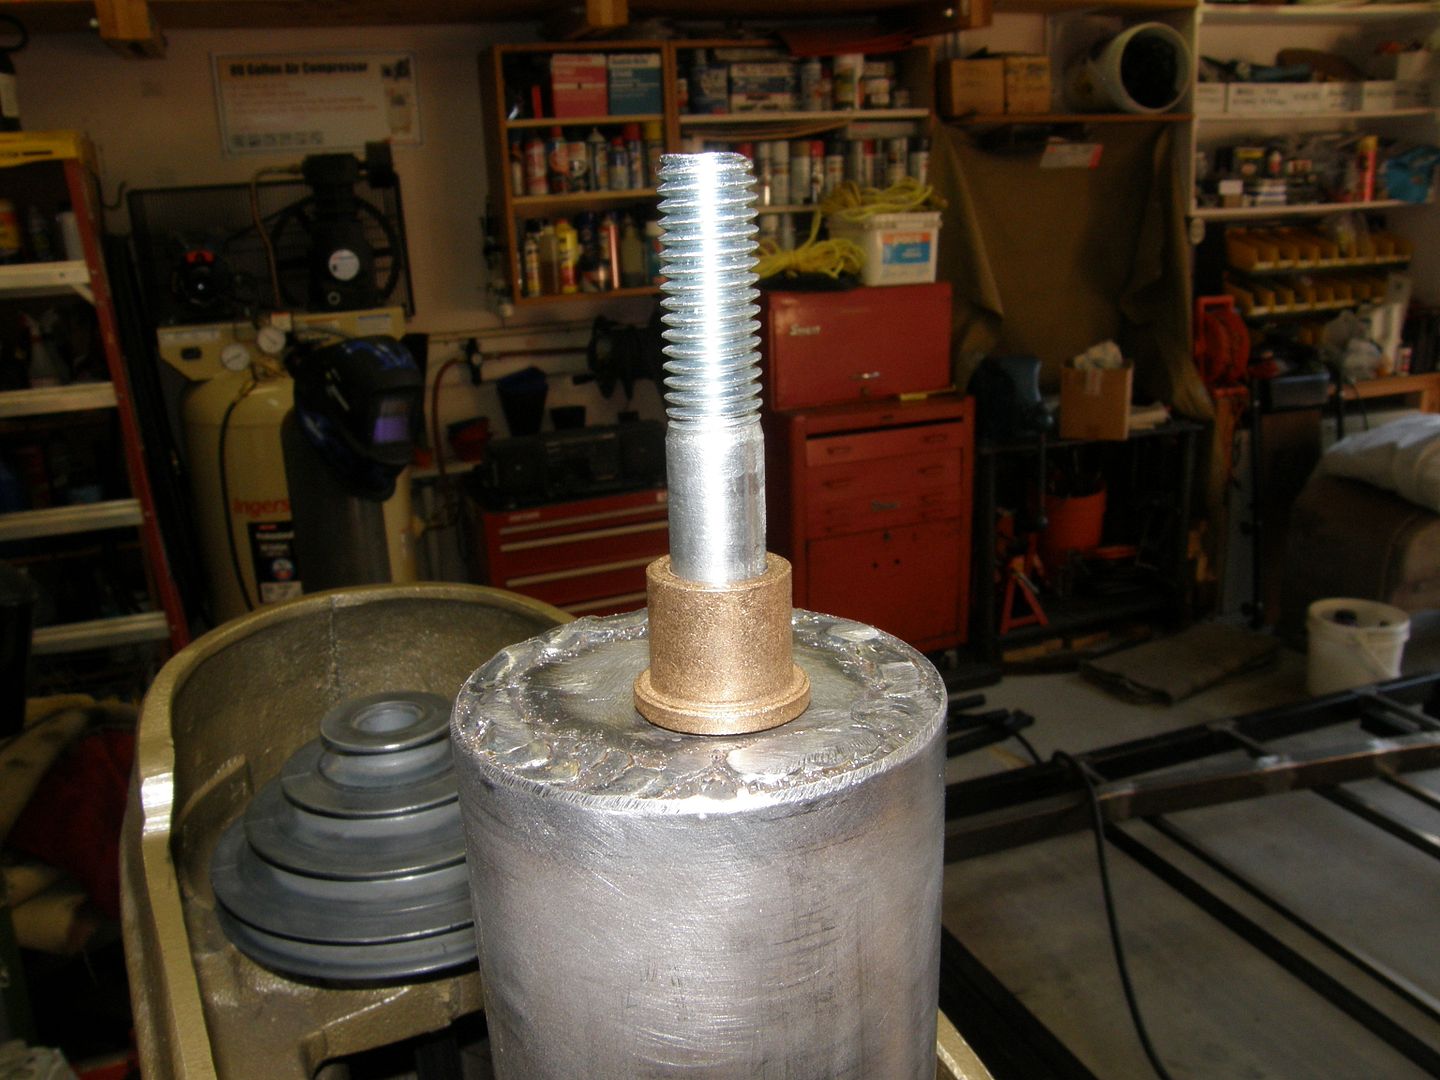
Next, measure about 3/8" back from the center of the pilot hole and centerpunch a mark. At this point, you'll need to weld up the pilot hole. Once it's welded and cleaned up, drill a 1/2" hole on your centerpunch mark. Insert the 1/2" bolt and weld it to the underside of the blank.

Now set the blank on top of the DP post. Line it up and tack it in. Check alignment and mock everything up to confirm all is good. You may have to jiggle the blank around or maybe even grind a bit off to get the proper tension on the belt. The spindle to intermediate pulley is not adjustable. So, once the blank is finished welded, that'll be your belt tension. If everything fits and the belts have good tension, de-mock it and finish weld the blank to the DP post.

Slip on a flanged bushing.......................

Slip on the pulley......................

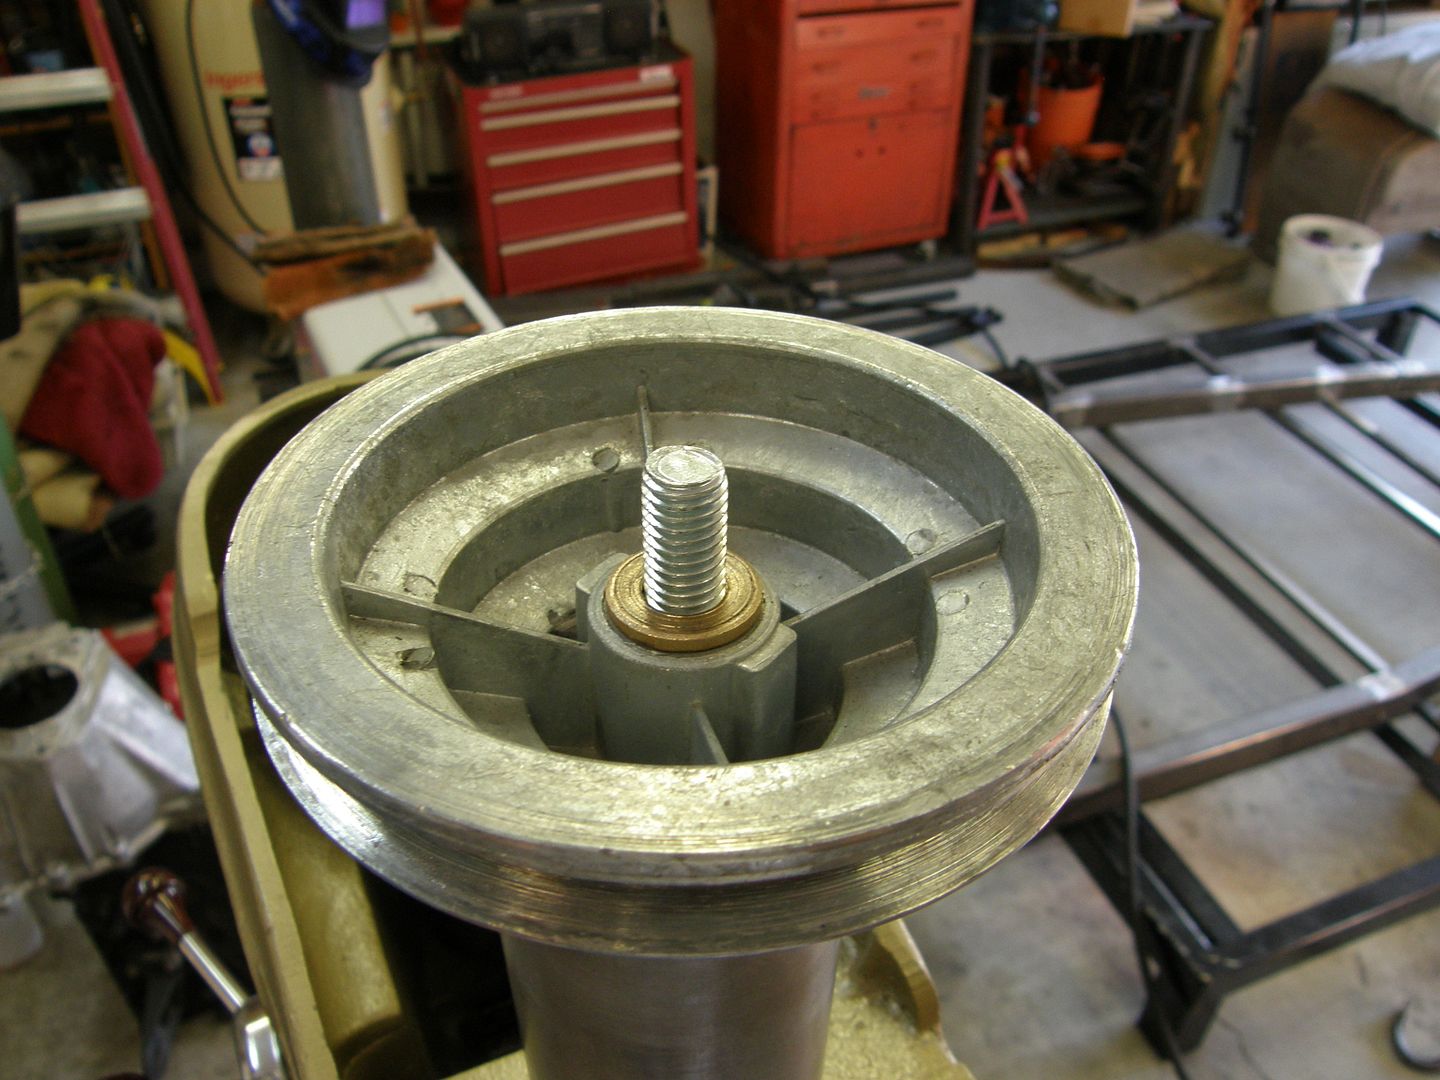
Insert the top flanged bushing...................

Remount the motor and all the belts then install the 1/2" flat washer and the 1/2" Nylock nut. DO NOT snug the nut to the washer. You want the washer loose. As little up/down movement of the pulley as possible but don't tighten the nut down! The plastic inner coating will keep the nut in position.

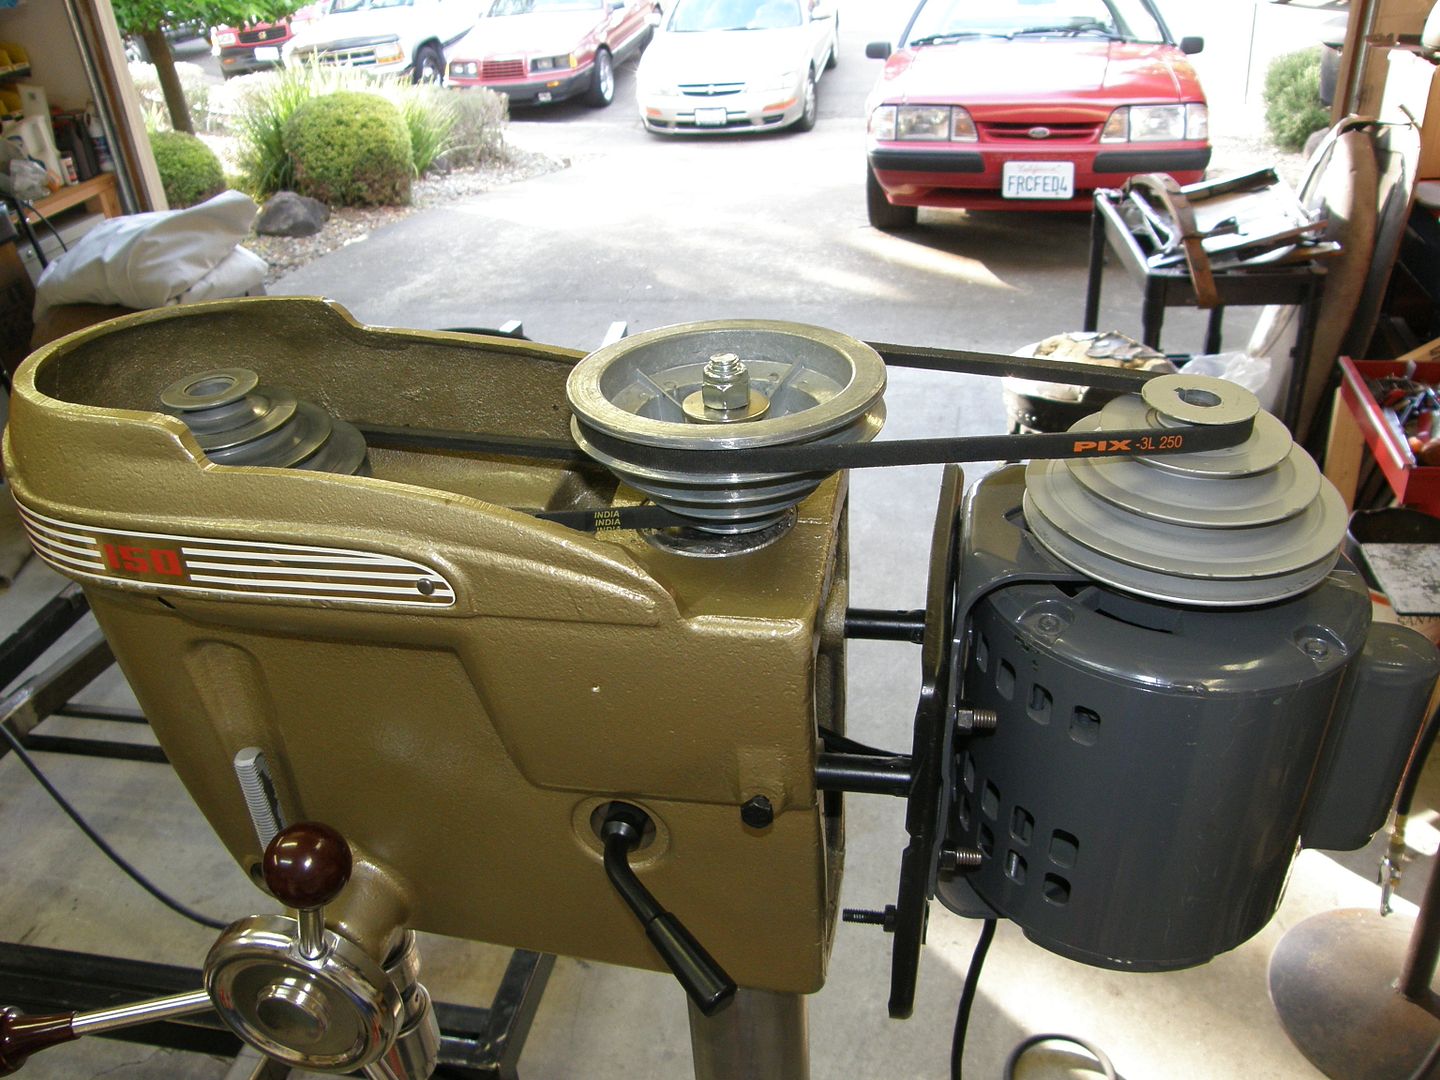
Plug it in and fire it up.............you're done! Now I have a 175 RPM spindle speed. In addition, it's a multi-speed attachment so I can change spindle RPM's simply by moving the belts up or down the pulleys. This thing works great!!


Here's a chart from an original Craftsman w/low-speed conversion. I don't know how fast the direct drive is right off the motor but I know it's way too fast for my needs! I'm shooting for the 4th one down. 175 RPM.
If you can find an older Craftsman with the optional low-speed conversion, great! If not, these are the parts you'll need to convert it. In addition, you'll need access to a MIG welder. If you don't have a MIG, you probably know someone who can run a bead for you.
1 - 4 step, 3L pulley. Ordered mine through MSC. I think it was $20 w/corporate discount.
2- bronze flanged bushings. $1 each from Home Depot.
1 - 3" long 1/2" bolt.
1 - 1/2" flat washer (not shown).
1 - 1/2" Nylock nut.
1 - steel cap - homemade.
Closeup of the flanged bushings with dimensions and part #s.
You'll also need 2 belts (not shown). They need to be belts for fractional horsepower motors. The designation is 3L, to match the pulley. Any shop that repairs chainsaws, lawnmowers, etc. will have them. You'll need a 25" belt from the motor pulley to the intermediate pulley and a 29" belt from the intermediate pulley to the spindle pulley.
Now that you have all the parts, you need to cut a blank of 3/16" steel. I used a 2-1/2" holesaw to do the deed.
Next, measure about 3/8" back from the center of the pilot hole and centerpunch a mark. At this point, you'll need to weld up the pilot hole. Once it's welded and cleaned up, drill a 1/2" hole on your centerpunch mark. Insert the 1/2" bolt and weld it to the underside of the blank.
Now set the blank on top of the DP post. Line it up and tack it in. Check alignment and mock everything up to confirm all is good. You may have to jiggle the blank around or maybe even grind a bit off to get the proper tension on the belt. The spindle to intermediate pulley is not adjustable. So, once the blank is finished welded, that'll be your belt tension. If everything fits and the belts have good tension, de-mock it and finish weld the blank to the DP post.
Slip on a flanged bushing.......................
Slip on the pulley......................
Insert the top flanged bushing...................
Remount the motor and all the belts then install the 1/2" flat washer and the 1/2" Nylock nut. DO NOT snug the nut to the washer. You want the washer loose. As little up/down movement of the pulley as possible but don't tighten the nut down! The plastic inner coating will keep the nut in position.
Plug it in and fire it up.............you're done! Now I have a 175 RPM spindle speed. In addition, it's a multi-speed attachment so I can change spindle RPM's simply by moving the belts up or down the pulleys. This thing works great!!
Last edited:


")


