ratman2, now that I'm back home, here's the information you requested about the floor tile.
I would advise keeping some spare tiles when you are done. You never know when you might need or want to replace some of them. Think years and years down the road. Especially since they are so easy to replace individually.
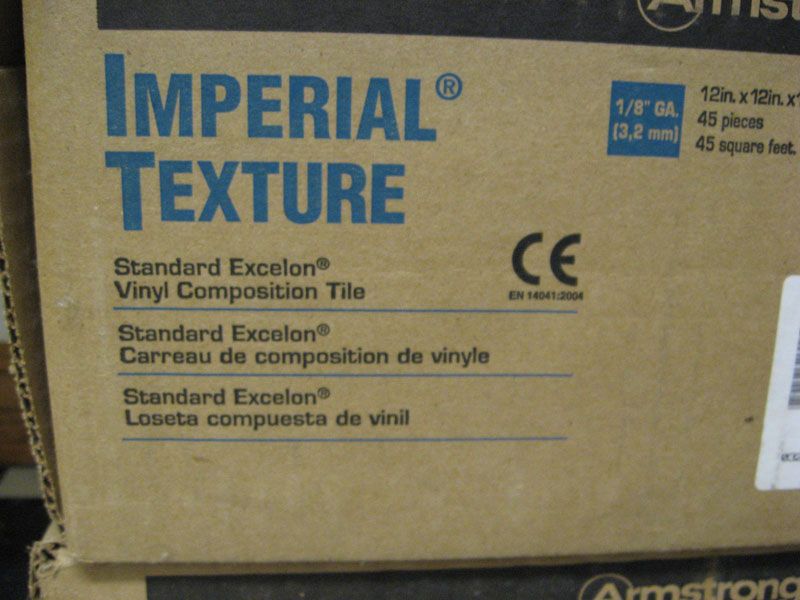
The black tiles were pattern # 51910 and my lot number was X097A but you shouldn't need the lot number.
The white tile was pattern # 51941, lot # X079A. The tiles are 12" X 12" X 1/8" thick or 305 X 305 X 3.2 mm for you metric fans out there.
They are Armstrong "Imperial Texture", Standard Excelon
Vinyl
Composition
Tile,
VCT.
Another thought would be to cut some extra small tile pieces for use...
... under shelving posts seen here or bench posts, different equipment that sort of thing. As long as you're renting the tile cutter it easy to have a few odd sized pieces cut up and on hand. I'd rather dent up these pieces than the a whole tile that's installed on the floor. Remember the tile has a "grain pattern" and you want to make sure you lay it with the grain running the same direction.
I hope all that's helpful to you. When you get done tiling your garage, post some pictures of your good work, OK?
")
Back in the USA-Thomas


 Stay tuned.
  Clearly you have put some thought and effort into this. Welcome to my world of acronyms at work.


 SOBDD and SAFU as well as FUBAR and SNAFUBAR.. Granted that these are military in origin but it's pretty much the same after all.


