To avoid these ads, REGISTER NOW!

Between 265 & 485 SQ/FT 1950s Craftsman Garage retro remodel

Workspaces sized between 265 and 485 squarefeet.
OP
R

Red Leader

Well-known member
Joined
May 15, 2011
Messages
2,689
Location
Denver, CO
I haven't checked in for awhile (too busy as always). The floor came out great! Tom and I (well, mostly Tom) have lots of crazy stories with the Restored 1930s Auto Shop over these past 7 years. Thanks for sharing your life story. Your "little escapade" just adds to the shop history (like Tom's digging up the in-ground Rotary!).

And, I don't think there is a "finish line" when it comes to our working shops. Every "mistake" adds character to the project. It's all a work in progress - not a bad thing when you're making history.

Chris

Thanks Chris. I have long stood in admiration of the 1930s auto shop, and is one of the shops I like to reference when I say that I am 'standing on the shoulders of giants'.

Lets keep making history together:)
 
To avoid these ads, REGISTER NOW!
OP
R

Red Leader

Well-known member
Joined
May 15, 2011
Messages
2,689
Location
Denver, CO
I totally agree with mr. Olsen, great eye for detail you have I like it :thumbup::thumbup::thumbup:


Sometimes that eye gives me a more sore back and hands:lol:, but I do appreciate the compliments. I'm going to try to get some dual outlet covers of the same vintage. I see them around, just need to snag a few.

Outlets and outlet covers are in that '2%' category, which is what I'll have fun with once the '98%' part is done. The main things left are the ceiling and workbench.

Some of the '2%' things are more lighting, swing down mini-shelves built into the curved shelving, getting up a first aid kit, fire extinguisher (both of those may move to the 98% category for safety), and wood and ladder storage.

Slowly...and more slowly...getting there:thumbup:
 
OP
R

Red Leader

Well-known member
Joined
May 15, 2011
Messages
2,689
Location
Denver, CO
Who knew cheap = funny?

Looks great and I enjoyed the story. I bet you'll be telling that one for years.


As long as people are laughing and smiling, I don't mind too much that it is at me:D

Thanks for your compliment. I'm just glad the stuff didn't expire or that I was left with a sticky floor!
 
OP
R

Red Leader

Well-known member
Joined
May 15, 2011
Messages
2,689
Location
Denver, CO
good to see ya jumped over a huge hurdle and finished up the epoxy!:thumbup: looks great you will love this no doubt.kinda laughed at all of those cool old tools and your using a pos. grinder way to small for the job at hand.don't feel bad though we have all done it. Now the shop reorganization begins. A couple of weeks you will be in shop heaven and it will all be worth the effort.Thanks for sharing!:beer:

It has been a HUGE hurdle man. Starting way back there in the summer time. I still don't feel like like I crossed the finish line on the floor yet because I still need to do the wood filler strips and stuff is still a mess out there. But I'll use the upcoming nights to take care of some of that.

I'll just need to bundle up soon! Maybe I should just finally put a heater out there?:flamethro


To be totally fair, that little grinder has put in dozens of hours worth of work, and is still going strong. Looking back now (hindsight being what it is), I'm not sure it was the best investment for the floor, but a good all-around investment nonetheless:D

Thanks for your thoughts Erodz:thumbup:
 
OP
R

Red Leader

Well-known member
Joined
May 15, 2011
Messages
2,689
Location
Denver, CO
I would try ACE, and Benjamin Moore. Two places that seem to always stock it. Stay away from the water base one. You really need the oil. Also, BM, carries the scratch resistant one. That one, is a ******* to even sand when it fully cures.

Project looks good. I was laughing my head off reading your post, and using your socks in such an effective way. I would have done the same. Next time, I suggest a video, you could be the next youtube sensation.

Looking good, almost there.

Almost! :) I'll check it out, I appreciate the suggestion, and you support and kind words:beer:


Why not mix a small batch of the clear and brush it on the wood? I would still use the crack sealer in the cracks where you will install the wood regardless of what you treat the strips with.

You know, that's actually a pretty good idea! I'll see how much I have left...there might just be a way. The finish suggestion above from Slickgt1 is good.

Free is also good:D
 
OP
R

Red Leader

Well-known member
Joined
May 15, 2011
Messages
2,689
Location
Denver, CO
It looks really classy, RL. Nice work.

So what you're saying is that in addition to an awesome looking floor, you have a great funny story to tell, seems like a win-win to me :) It would only be better if you'd been recording the whole thing for posterity :)


You guys are too kind. I don't deserve it (okay, maybe my back does:D)

In any case thank you for the compliments. I'm just glad it is over. I was seriously contemplating just waiting until spring...


...then I saw the expiration date...


...then I looked something like this --> :scared::eek::eyecrazy:


...then I realized I need to start doing this --> :willy_nil


That's about how it went:lol_hitti
 
OP
R

Red Leader

Well-known member
Joined
May 15, 2011
Messages
2,689
Location
Denver, CO
The Gloss Coast Hop! :thumbup: That would have been awesome to see, or at least have the Mrs. catch a shot of it. :lol:

Glad to hear the epoxy floor is behind you now. Or is it, beneath you now? Take the rest of the week off, Dave. You deserve it. :beer:

Oh, I definitely did take the rest of the week off - from the garage...


...and went right into building a paver walkway and completely redoing our entire front landscaping:lol_hitti

The wife has actually been a huge help.


Its actually pretty funny...I apparently like doing things the hard/old fashioned way. It gets my neighbor every time. He comes over to see me pumping up a trailer tire with a bike pump or aerating our front yard with the 2-hole foot bar aerator or packing in dirt underneath our washed out walkway slab with a stick...

I think the most common phrase I hear from him is..."You're killin' me man!"


I'm going to get one of those old fashioned push/reel lawnmowers and next time I see him come out I'm gonna whip out that sucker and bust his chops.

And hey, Craftsman made those old mowers in the 1950s!

reel-mower-whole.jpg


I know, I'm horrible:lol_hitti
 
Last edited:
OP
R

Red Leader

Well-known member
Joined
May 15, 2011
Messages
2,689
Location
Denver, CO
Dave, your crack-repair really looks great.
under my circumstances, i opted-out of doing that 6 months ago, but your ambition and results are so inspiring.
.


Either inspiring or depressing, right?

You are motivated and slickgt1 is taking pain meds lol:D:lol_hitti


I am glad I spent the $$ on the good stuff for the crack repair - I can't even tell where it was. That stuff ain't no $6 bottle of whatzit from HD, but man, it works. Integraflex 1921 gets my vote and Fred over at Alpha Garage was extremely nice to work with.
 
OP
R

Red Leader

Well-known member
Joined
May 15, 2011
Messages
2,689
Location
Denver, CO
Funny circus story Red Leader - what are you going to do for act two? :)

I'm amazed at how shiny it was even without the clearcoat on yet. Great job. I think floors are pretty stressful, especially when applying a time sensitive material, and I'm glad this job is almost behind you.


The urgency makes you go crazy - at first when I mixed up the very first base coat, I was gingerly taking my time, setting down the mixer, humming a little song it my head.

I poured a little here and there on the slab, next to the edge, ho humming my way along. Life sure was grand.


Then I tried to cut in the edges/corners.


OH MY FREAKIN ****...it was like it was hardening already. Have you ever tried dipping a paint brush in concrete and trying to paint with...concrete? It was like trying to paint with liquid duct tape.

That song disappeared out of my head and my world quickly...changed pace. Reality hit me like a bolt of lightening and the next thing I knew I was holding the paint brush like a knife, grinding it back and forth into the edging as fast as my knuckles could scrape along.

That was interesting:D


Act two will probably be the trapeze act - installing the suspended ceiling system.

Aw man...I can see it in my head now. I'm gonna need to be out there working in my motorcycle helmet:lol:
 

shopnut

Well-known member
Joined
Feb 22, 2006
Messages
4,237
Location
Florida
That song disappeared out of my head and my world quickly...changed pace. Reality hit me like a bolt of lightening and the next thing I knew I was holding the paint brush like a knife, grinding it back and forth into the edging as fast as my knuckles could scrape along.

That paints a perfect picture in my head (no pun intended :)).

It actually takes me back to that frantic day in July of 2005 when we rolled ours :eyecrazy:. Seven years later, that epoxy still looks great - and yours will too.
 

Ksullivan

Well-known member
Joined
Oct 4, 2012
Messages
291
Location
Campbell, NY 14821
I have been reading up on your garage build and I have to say I absolutely love the art deco styling of these cool old craftsman tools! Congratulations on how far you have come so far and good luck on your future endeavors.
 

TerpnGator

Member
Joined
Oct 26, 2012
Messages
22
Location
Florida
The urgency makes you go crazy - at first when I mixed up the very first base coat, I was gingerly taking my time, setting down the mixer, humming a little song it my head.

I poured a little here and there on the slab, next to the edge, ho humming my way along. Life sure was grand.


Then I tried to cut in the edges/corners.


OH MY FREAKIN ****...it was like it was hardening already. Have you ever tried dipping a paint brush in concrete and trying to paint with...concrete? It was like trying to paint with liquid duct tape.

That song disappeared out of my head and my world quickly...changed pace. Reality hit me like a bolt of lightening and the next thing I knew I was holding the paint brush like a knife, grinding it back and forth into the edging as fast as my knuckles could scrape along.

That was interesting:D


Act two will probably be the trapeze act - installing the suspended ceiling system.

Aw man...I can see it in my head now. I'm gonna need to be out there working in my motorcycle helmet:lol:

Dude---U got some seriously nice old equipment there. I've really enjoyed reading Ur thread, and I NEVER read an entire thread. I sold a couple of old machines this year. I sold an old Walker-Turner band saw, made in late 1940's and a Vega 170 spinning/turning lathe. The band saw needed referb, but I completely referbed the lathe.

BTW I still have my first motorcycle, bought it new in 1969. Now it sits on a shelf in my shop. Couldn't find the title if I wanted to. Thanks for the posts.
 

Attachments

  • OLD SAW.jpg
    OLD SAW.jpg
    20.7 KB · Views: 107
  • VEGA1.jpg
    VEGA1.jpg
    42 KB · Views: 134
  • put away.jpg
    put away.jpg
    41.4 KB · Views: 133
OP
R

Red Leader

Well-known member
Joined
May 15, 2011
Messages
2,689
Location
Denver, CO
Dude---U got some seriously nice old equipment there. I've really enjoyed reading Ur thread, and I NEVER read an entire thread. I sold a couple of old machines this year. I sold an old Walker-Turner band saw, made in late 1940's and a Vega 170 spinning/turning lathe. The band saw needed referb, but I completely referbed the lathe.

BTW I still have my first motorcycle, bought it new in 1969. Now it sits on a shelf in my shop. Couldn't find the title if I wanted to. Thanks for the posts.

Nice tools! Nice bike too! I'm glad you've enjoyed the thread. Thanks for your compliments. It has been a rollercoaster ride so far! She still has a few twists and turns left in her!
 
OP
R

Red Leader

Well-known member
Joined
May 15, 2011
Messages
2,689
Location
Denver, CO
I have been reading up on your garage build and I have to say I absolutely love the art deco styling of these cool old craftsman tools! Congratulations on how far you have come so far and good luck on your future endeavors.

Thanks man! I love the style too! A few things I have learned from doing this and researching...there are two styles of art deco. There is the original art deco, which formed a foundation in the 1920s and continued into the 1930s. The original form of art deco transitioned into Streamline styling, which is what a lot of people think of when they think of art deco. Really, it was 'Art Deco 2.0'.

The classic art deco primarily consisted of geometric shapes, symmetry, while paying homage to ancient Egyptian and Mayan/Aztec architecture. You also see a lot of color variations, such as yellow and jade.

The streamline style of art deco is what you see in the mid to late 1930s and played a big role in industrial design, such as cars and trains. This was the pinnacle of modernism, with steel, chrome, and polished aluminum representing the latest and greatest in advanced technology.

Some examples of classic art deco:

artdeco3.s600x600.jpg

downtown+art+deco+042.JPG

downtown+art+deco+027.JPG

downtown+art+deco+030.JPG

art-deco-bed3.jpg

art-deco-gold-wallpaper.jpg

81a.jpg


Examples of 'Streamline' art deco:

ocean-drive-art-deco-architecture%5B1%5D.jpg

bmr71.jpg

eletrolux-vacuum-cleaner-streamline-art-deco-design.jpg

tumblr_l1kah46VEY1qbhx32o1_500_large.jpg

oaktownart_20100308_2.jpg

20th+Century+Limited.jpg

1953_gm_futurliner.jpg

streamline-toaster.jpg

1937%20Firestone%20SS%20green%201.jpg


You can see from these examples how prevalent the classic art deco was among architectural designers of the day and how that later came to influence industrial design and engineering. The focus of art deco in the beginning was 'art as decoration', highly accentuated by geometric shapes and symmetry. The later streamline art deco is more flowing and captures the concept of 'speed in stillness', which was design to give the impression of quick, accelerated movement at rest, which also represented the forward movement of modernism.

From the garage, you would think that I would overwhelmingly favor the latter, which seems more common in contemporary approaches to art deco. However, if I was to be truthful, I would say that I more prefer the intricacy found in the early, more geometrically influenced art deco - I think it is more challenging to create and work with, but therefore more visually rewarding when complete.

I am hoping to incorporate more of this type of art deco into the garage, specifically into the work bench - it will have elements of both art deco and streamline.

But really, it is hard to pick favorites. I mean, just look at all the pictures above - they are all so beautiful!
 
Last edited:
OP
R

Red Leader

Well-known member
Joined
May 15, 2011
Messages
2,689
Location
Denver, CO
Well the work never stops. Got about 3 or so hours out there to tonight to rearrange and move stuff around. I got most of the tools into or near their final spots. I still have a few things to move around. I'll be taking some pictures and asking for everyone's thoughts on tool/stuff placement. This is going to be a 'pocket workshop', where the design is to have a fully functioning workshop in a two car garage with one car in the garage, so I won't depend on having to move the car out of the garage to get the work done.

It will be a challenge, but it should be fun.

Right now, although the floor is nearly done and tools are getting moved back into their places, it still looks like a mess, and still really dirty. With needing to vacuum and clean and dust and wipe down and rearrange again, it gets a little exasperating...but I am encouraged because hopefully the major, major shifting and cleaning will be behind me. And when I really think about it, it has been much, much worse.

Oh, other news. I put some clear coat on the filler wood strips. They look good:pimpflash

Will hopefully be able to install this weekend - I'll have some fresh pictures for you all! Stay tuned!
 
OP
R

Red Leader

Well-known member
Joined
May 15, 2011
Messages
2,689
Location
Denver, CO
:lol_hitti:thumbup:

I have finally caught up with this thread.
I now have this image of RL in my head 'doing the Epoxy Hop'.

Great work-keep it up :bowdown:

Hey thanks man! What I really need to do is get my **** out there and finish up the wood trim! Hopefully this weekend. Then I'll actually have a 'finished' shot of the floor!
 

gmault

Member
Joined
Oct 25, 2012
Messages
20
Location
Lakewood, CO
Okay, after more hours that I would like to admit too, I finally have reached the end of this thread. All I can say is WOW! That is one awesome collection of cool pictures and great progress updates. My wife and I recently moved from Cap Hill to a house in Lakewood this past May and I am looking to renovate the garage soon. Your story has certainly given me a lot of food for fodder. Maybe I can buy you a coffee or beer sometime in the near future so I can pick your brain. Thanks for sharing the progress and all the best.
 
Last edited:
To avoid these ads, REGISTER NOW!

bluebolt

Well-known member
Joined
Dec 28, 2008
Messages
5,447
Location
Benton LA
Bull,

Trust me...if I can do it, anyone or anything can haha.

By the way, if memory serves me correctly, I owe you some vintage Pontiac service cards.

I'm going to the post office tomorrow...maybe I'll finally get those things mailed:beer:

Hey Red Leader long time no hear, I have been busy with car projects lately.

Did you ever send Bull his Pontiac service cards LOL?
 
OP
R

Red Leader

Well-known member
Joined
May 15, 2011
Messages
2,689
Location
Denver, CO
Next weekend, you can have a couple extra days...


Yep, sure will! I have not done much out there...'cept to straighten up. It has been refreshing stepping away from it for a while. Some good time with family, and time with other projects.

However, something will be coming in Jan or early next year that will make me want to get my tail in gear and get back out there. That's all I can say right now:D
 
OP
R

Red Leader

Well-known member
Joined
May 15, 2011
Messages
2,689
Location
Denver, CO
Okay, after more hours that I would like to admit too, I finally have reached the end of this thread. All I can say is WOW! That is one awesome collection of cool pictures and great progress updates. My wife and I recently moved from Cap Hill to a house in Lakewood this past May and I am looking to renovate the garage soon. Your story has certainly given me a lot of food for fodder. Maybe I can buy you a coffee or beer sometime in the near future so I can pick your brain. Thanks for sharing the progress and all the best.

Awesome! I used to live in Lakewood - right near Yale/Kipling. It is such a nice area. You are right next to the foothills. 15 min one way, you are in the mountains. 15 min the other way, you are in the city. If you are a mountain biker, you'll really appreciate it.

I have learned a lot in the last two years, including plenty of 'how not to do it' moments. I'm absolutely, positively sure that I can save you pain and misery. The cliff note version is: rent a walk behind grinder:lol_hitti

Would love to have you over sometime for a beer.

Maybe you can help me get my '34 Frigidaire running:D
 

TitanTn

Member
Joined
Oct 7, 2012
Messages
9
There. I did it. 134 pages to date and I'm subscribed for more. You can't beat this kind of entertainment. Plus, you've inspired me to find and restore some old tools. I've always been needing a drill press and I've located an older Craftsman that I'm hopefully going to pick up this week. Thanks for your dedication to this forum and to sharing everything through all the pictures. I know it takes time, but please know that it's greatly appreciated.
 
OP
R

Red Leader

Well-known member
Joined
May 15, 2011
Messages
2,689
Location
Denver, CO
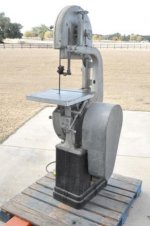
If anyone comes across the top wheel adjuster for that model bandsaw, I've needed one for around 5 years now and it would really make my Christmas dreams come true to be able to buy one. ;)

Have you posted an ad in the BOYD section of the OWWM forum? I bet someone has one lurking around in their 'rat hole' :)
 

Titaniumboy

Member
Joined
Jan 31, 2012
Messages
8
Red Leader,

Now that we all have the 3M Scotchbrite EXL deburring wheel, which is truly amazing by the way, mounted on our bench grinder or bench buffer I find myself yearning for a similar wheel that can be used with a hand grinder. Some objects are just too heavy or awkward to take over to the EXL wheel in the bench buffer, but these items deserve to be just as shiny and clean as the rest of the items in my shop.:lol_hitti

What are you using in your hand grinder to clean and polish Old Iron?

Titaniumboy

P.S. I've picked up a second and third wheel - one for my father for his birthday and one for a long-time friend. Strangely these two latter wheels came with the arbor adapter whereas the first one didn't. Thanks again for sending my one of your spare arbor adapters.
 

bluebolt

Well-known member
Joined
Dec 28, 2008
Messages
5,447
Location
Benton LA
Red Leader,

Now that we all have the 3M Scotchbrite EXL deburring wheel, which is truly amazing by the way, mounted on our bench grinder or bench buffer I find myself yearning for a similar wheel that can be used with a hand grinder. Some objects are just too heavy or awkward to take over to the EXL wheel in the bench buffer, but these items deserve to be just as shiny and clean as the rest of the items in my shop.:lol_hitti

What are you using in your hand grinder to clean and polish Old Iron?

Titaniumboy

P.S. I've picked up a second and third wheel - one for my father for his birthday and one for a long-time friend. Strangely these two latter wheels came with the arbor adapter whereas the first one didn't. Thanks again for sending my one of your spare arbor adapters.

LOL Red Leader just grabbed the 6" bench grinder and used it as a hand grinder.
 

Titaniumboy

Member
Joined
Jan 31, 2012
Messages
8
Using a bench grinder as a hand grinder? Well, if its good enough for Red Leader then I suppose its good enough for me...


On second thought - :scared:


Titaniumboy
 

Wingnut65

Well-known member
Joined
Apr 21, 2010
Messages
3,170
Location
Tampa Bay, FL
Red Leader,

Now that we all have the 3M Scotchbrite EXL deburring wheel, which is truly amazing by the way, mounted on our bench grinder or bench buffer I find myself yearning for a similar wheel that can be used with a hand grinder. Some objects are just too heavy or awkward to take over to the EXL wheel in the bench buffer, but these items deserve to be just as shiny and clean as the rest of the items in my shop.:lol_hitti

What are you using in your hand grinder to clean and polish Old Iron?

Titaniumboy

I had the same thought ehn cleaning up a lathe. I surfed a little and found 2" diameter wheels at Grainger.
4YJY7_AS01


They didn't have them in stock at our local store, but ordered them and had them within a week. I could have ordered and had shipped faster, but I wasn't in a hurry.

And, good thinkng on having those 'second thoughts'...
 
To avoid these ads, REGISTER NOW!
Top Bottom