To avoid these ads, REGISTER NOW!

Rated M's 26x36 Attached 3 Car

Rated ///M

Well-known member
Joined
Oct 12, 2010
Messages
589
Location
Great White North
I figured its about time to start a journal of my 26x36 attached garage interior build up since I bought this house in March of this year. This will eventually become simply a parking space once I start work on my backyard shop in the spring.

had a nicely insulated and sheetrocked garage but it wasn't taped or mudded.. so that was the first project.. (hate this damn dusty mess)

1.JPG


Next I painted all the walls a nice neutral color my woman picked out. While waiting for more paint to be mixed the next I found a crazy wicked deal on some wainscotting that I could not say no to... so low and behold a nice faux brick lower half for the garage and a nice thick black trim to set it off.

2.JPG


What garage is not complete without cabinets! I have nice 10 foot ceilings and in an effort to not waste any space (As well as be able to shut the doors on everything) I made my cabinets nice and tall. Yes, that cabinet stands 103" tall.

3.JPG


Working alone with 4x8 sheets of particle board was hard enough.. Trying to slide them across my tiny table saw was even harder.. So off to the store I went to buy some 2x4's and some material rollers to setup a nice table saw jig.

4.JPG


Cabinets are coming along nicely. The left most cabinet in the picture will hold my HF tool cabinet for a "hella flush" install :)

5.JPG


Fast Forward a bit and my lower cabinets are fully constructed and doors & drawers are almost fully installed.. They looks so nice bare wood, but not the style for my garage so I begin to paint them black

6.JPG


I like the black better :)

7.JPG


Now after lots of research on this form I determine the only way for me to have a nice epoxy floor is to completely grind off all the sealer on my floor. after about 8 hours of grinding I am getting there!

8.JPG


13 Hours after beginning grinding and a whole lot of vacuuming and cleaning I have a beautifully virgin concrete surface ready for some epoxy

9.JPG


I laid down one light base coat of just color, then one heavy coat of color and flake

10.JPG


Then I did two coats of clear coat over the top to really make it pop

11.JPG


See that awesome reflection!

12.JPG


So here is where I am at as of last weekend. I am working on my upper cabinets this week and am waiting for my beautiful stainless steel workbench top to be completed as well. I will continue to update this thread as things progress!
 
To avoid these ads, REGISTER NOW!

M-technik-3

Well-known member
Joined
Feb 16, 2008
Messages
1,789
Location
Western Mass
Sweet Z4 M coupe. That's a sharp ride, hope to purchase one in a couple of years, might sell one of my 88 M3's for one.
 

gpalmer77

Well-known member
Joined
Aug 15, 2012
Messages
515
Location
Mokena IL
Nice. Very nice. I have a 99 Z3 M Coupe in Imola Red. Plus an old E34 540i beater and a 2000 328Ci. The Z4 M Coupe is a great car, I've had the chance to drive one on a couple of occasions.
 
OP
R

Rated ///M

Well-known member
Joined
Oct 12, 2010
Messages
589
Location
Great White North
That looks great. Nicer cabinetry than most kitchens! The built-in look is killer. What's next?

Thank you!! with some good primer and paint you'll never know the majority of those cabinets are made from cheapo 3/4" Particleboard.

I went buck wild on the Zoro tools sale yesterday so I have lots a projects planned.. More cabinets included...
 
OP
R

Rated ///M

Well-known member
Joined
Oct 12, 2010
Messages
589
Location
Great White North
I also may add... The entire cabinet setup you see here with all hardware and materials only cost me $650... There is no way you could outfit a garage with pre-builts on that kind of coin.. My Stainless top is running me around $300... so figure a grand all said and done..
 
OP
R

Rated ///M

Well-known member
Joined
Oct 12, 2010
Messages
589
Location
Great White North
Rated ///M:

Seems like a good price for the stainless considering you have about 12-14 feet of bench? Will it have a backsplash and front lip?

16Ga stainless that will have one polished weld seam at 197" x 32-1/2"

I will have a folded over front lip on the front and left side of the bench and flat to the wall on the other. (The outlets and switches are too close to the bench to warrant a backsplash).
 

ODIS

Well-known member
Joined
Apr 30, 2012
Messages
2,110
Location
Pacific Northwest
Beautiful work! Looking forward to seeing the SS bench top installed.

BTW, did you build the doors for your cabinets as well?

I'm sure your other shop will be fun to see as well.

Best,

Ody.
 
To avoid these ads, REGISTER NOW!

nmanitou

Well-known member
Joined
Mar 17, 2009
Messages
221
Location
Michigan
Looks Great, You got skills! What are you doing for heat? Any experience with the epoxy in the wet or winter yet, I was always concerned about slipping on the wet spot :)
 
OP
R

Rated ///M

Well-known member
Joined
Oct 12, 2010
Messages
589
Location
Great White North
Beautiful work! Looking forward to seeing the SS bench top installed.

BTW, did you build the doors for your cabinets as well?

I'm sure your other shop will be fun to see as well.

Best,

Ody.

Yes sir... Those doors are simply 1x4 mortise and tenon construction with 1/4 ply in between.. Nothing special except they only cost about 5 dollars or so a door.
 
OP
R

Rated ///M

Well-known member
Joined
Oct 12, 2010
Messages
589
Location
Great White North
Looks Great, You got skills! What are you doing for heat? Any experience with the epoxy in the wet or winter yet, I was always concerned about slipping on the wet spot :)

I went heavy on the non-skid additive and can walk around barefoot with plenty of grip... I am not worried about the wet floors this winter..


I use a 60,000BTU gas forced air furnace for heat and a big fan on the ceiling to blow it all down... I can get it up to 95 in there without any problems (had to try it once :))
 

rev177

Well-known member
Joined
Jul 29, 2012
Messages
118
Location
Lino Lakes MN
Nothing special.. some 90's MTX 15's run by my Marantz 120W/Channel receiver.. I am usually listening to some Red Hot Chilipeppers or Sublime type music, EDM, or classic rock..

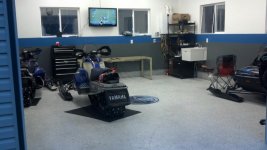
Looks great! here is my new home garage :) I use the 3 car attached to park the daily drivers and the third stall for bikes and snow blowers ext. The new detached is for working on the toys
 

Attachments

  • 523601_10151503467705299_2082189431_n.jpg
    523601_10151503467705299_2082189431_n.jpg
    87.1 KB · Views: 113
  • 175521_10151502777395299_42760026_o.jpg
    175521_10151502777395299_42760026_o.jpg
    142 KB · Views: 118
  • 52742_10151502238995299_802103142_o.jpg
    52742_10151502238995299_802103142_o.jpg
    140 KB · Views: 133
  • 476176_10150863696400299_161617248_o.jpg
    476176_10150863696400299_161617248_o.jpg
    140 KB · Views: 103
OP
R

Rated ///M

Well-known member
Joined
Oct 12, 2010
Messages
589
Location
Great White North
Looks great! here is my new home garage :) I use the 3 car attached to park the daily drivers and the third stall for bikes and snow blowers ext. The new detached is for working on the toys

Love the eight series!!! I have always wanted one but I've never come across one I couldn't say no too..
 

brawls43

Well-known member
Joined
Aug 29, 2012
Messages
133
Location
Minneapolis
Nice garage! I'm thinking about building some cabinets like this for my new garage. What's the racecar in your avatar?
 

NewShockerGuy

Well-known member
Joined
Oct 12, 2010
Messages
2,481
Location
Northern Virginia / DC
Looks great! I see in the first picture you have a single light bulb outlet on the ceiling... I have two of those in the ceiling. I ended up getting this:

http://www.amazon.com/gp/product/B004L8XC34/?tag=atomicindus08-20

Now I have 4 cfl bulbs in one socket on each side so it's SUPER bright... but I want to know what fixtures by the looks of it you replaced those with?

How hard was install as far as daisy chaning them together? Looks like you have more than on where the original single light bulb socket was..etc.

Thanks!
-Nigel
 

ShumanSS6.0

Well-known member
Joined
Nov 11, 2012
Messages
55
Location
Minnesota
Great idea on the cabinets, can't wait to see that stainless top in place! Is the wood thick enough to put peg holes on the inside for adjustable shelves or are they fixed? Nice ride by the way, that is definitely one of my favorite colors (but I would probably take a 5...need room for the car seat!)
 
OP
R

Rated ///M

Well-known member
Joined
Oct 12, 2010
Messages
589
Location
Great White North
Looks great! I see in the first picture you have a single light bulb outlet on the ceiling... I have two of those in the ceiling. I ended up getting this:

http://www.amazon.com/gp/product/B004L8XC34/?tag=atomicindus08-20

Now I have 4 cfl bulbs in one socket on each side so it's SUPER bright... but I want to know what fixtures by the looks of it you replaced those with?

How hard was install as far as daisy chaning them together? Looks like you have more than on where the original single light bulb socket was..etc.

Thanks!
-Nigel

I just took the light fixture down and hardwired in an 8 foot 4-lamp fixture.. that was big enough to cover the 4" socket..

Pretty simple stuff :)
 
OP
R

Rated ///M

Well-known member
Joined
Oct 12, 2010
Messages
589
Location
Great White North
Great idea on the cabinets, can't wait to see that stainless top in place! Is the wood thick enough to put peg holes on the inside for adjustable shelves or are they fixed? Nice ride by the way, that is definitely one of my favorite colors (but I would probably take a 5...need room for the car seat!)

everything is built from 3/4 Particle and would handle pegs yes..

But i didn't have the Kreg peg hole jig and really couldn't see myself adjusting the shelves more than a couple times in my life, so it wasn't really worth it to me.

So, they are fixed shelves :)
 
To avoid these ads, REGISTER NOW!
Top Bottom