To avoid these ads, REGISTER NOW!

Welding Cart Project

motorscot

Active member
Joined
May 30, 2012
Messages
43
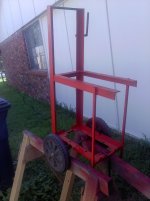
So, I had a metal trellis that was in bad shape. I decided to do some recycling and improve my welding skills at the same time. After a friend gave me a much abused Stack On brand 3 drawer tool chest, I decided that change was in order.
Using a Diablo 10" cutoff wheel on my miter saw....
IMG_20130104_141233_zpsa9a0be98.jpg

I cut the posts to the correct size and started mocking everything up.
IMG_20130104_144134-Copy_zpsbcb17afc.jpg

After some time (a lot of time) with the wire wheel...
IMG_20130113_202437_zps2fa2b571.jpg

There were also 3/8" rods that connected each trellis arch together
IMG_20130114_141052_zpsaa38131e.jpg
 
To avoid these ads, REGISTER NOW!
OP
M

motorscot

Active member
Joined
May 30, 2012
Messages
43
I had already replaced the old casters with new ones, then decided that they needed to be moved to new locations to support the plans for bottles and welder
IMG_20130114_141207_zps61228398.jpg

Next I got to use my drill press in anger and fabbed up the holes to fit the rods
IMG_20130114_141227_zpscaeb3ffd.jpg

IMG_20130114_141307_zpsbc9aa1a2.jpg

IMG_20130114_144653_zps055d91d2.jpg

Next came tacking and final welds for the bottle rack assembly
IMG_20130115_180116_zpsf38568cb.jpg
 
OP
M

motorscot

Active member
Joined
May 30, 2012
Messages
43
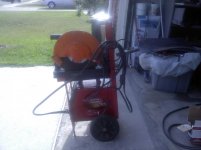
You can see my old welding cart in the background. It was almost brand new but only had room for the welder, 1 bottle, and some odds and ends. Not what I wanted....
The casters went back on, tacked in place to fit check before a final decision was made to through bolt them or weld them
IMG_20130115_180139_zps0d88ff16.jpg

IMG_20130115_180150_zps67f2c30f.jpg

IMG_20130116_172159_zps28ed5432.jpg
 
OP
M

motorscot

Active member
Joined
May 30, 2012
Messages
43
Due to the weight of the bottles, I wanted things to be flex free and solid. I added a more 1" square tubing on the end of the chassis tubes
IMG_20130116_172212_zpsfc3e3727.jpg

More tubing was added to create a surround for the bottles to sit in
IMG_20130116_172216_zps3273ff1b.jpg

I then stacked more 3/8" rod on the original rack, to stiffen it up and bring the mounting surface level for the bottles
IMG_20130119_201835_zps6480b212.jpg
 
OP
M

motorscot

Active member
Joined
May 30, 2012
Messages
43
I wanted my bottles to stay put, with no sway or possibility to bang against each other. After getting many ideas from the fab thread and from the 1930's Auto Shop I wanted this thing to be travel ready....
IMG_20130119_202529_zps1cad2e4e.jpg

The bracket tops are 12" from the bottle deck, I used 2" and 5" tubing.
IMG_20130119_202536_zpsf52aa13b.jpg

Mocking up the side brackets
IMG_20130119_202820_zps754215e5.jpg

Final welds
IMG_20130119_204458_zpsa4d63e0f.jpg

Three more shots of completed work (I will be adding two (2) chains by this weekend)
IMG_20130119_210410_zps24b30808.jpg

IMG_20130119_210424_zpsf668e607.jpg

IMG_20130119_210439_zps45825b1c.jpg


I haven't ground the welds or filled any holes when these pics were taken.
 
OP
M

motorscot

Active member
Joined
May 30, 2012
Messages
43
So, what good is a welding cart with storage if the drawers aren't deep enough for grinders you ask?
"Not diddly" I say.
After much mocking (some by my wife;)) and measuring, I settled on a plan.
IMG_20130119_211718_zps2f70b743.jpg

2" tubing for the standoffs
IMG_20130119_215031_zps7de51de0.jpg

And 24 1/2" long for the main mounts
IMG_20130120_173857_zps4adfab44.jpg

I decided to free float the hanger rods, so no welding there
IMG_20130120_175336_zps9d481f84.jpg

Sharp eyes will notice the nuts on the corners...Have patience young Padewans....
IMG_20130120_175342_zpsfcc2fa46.jpg
 
OP
M

motorscot

Active member
Joined
May 30, 2012
Messages
43
This cart has grown into one HEAVY MoFo...
I located some old nuts...
IMG_20130120_141718_zpsde1d4c61.jpg

I noticed that the DeWalt and HF grinders have interchangeable handles. So, I welded a pair of nuts on the front corners...
IMG_20130120_143238_zps6b43fe40.jpg

And another pair on the side
IMG_20130120_143225_zpsbc229d87.jpg

This allowed me some leeway when trying to maneuver it
IMG_20130120_143238_zps6b43fe40.jpg

The handles quickly spin off for use in front or side or the grinders themselves
IMG_20130120_144011_zpsf21bc823.jpg
 
Last edited:
OP
M

motorscot

Active member
Joined
May 30, 2012
Messages
43
To do list:
  1. Fab up brackets for negative cable
  2. Fab up brackets for wire feed cable
  3. mount small fire extinguisher
  4. Make some mounts for: apron, helmet, etc
  5. Final grind all welds
  6. Add some aluminum, wood, expanded metal, or 1/8" steel to top
  7. fab up some "custom" drawer pulls
  8. Get some plastic end plugs for tubing (thanks Jagmandave)
  9. Primer, paint, and clear
  10. ENJOY
 
Last edited:

Jagmandave

Well-known member
Joined
Nov 6, 2011
Messages
6,305
Location
Overland Park, Ks.
Pretty good, I especially like the bottle stays....

You can buy nice plastic plugs for the ends of the tubing either from Home Depot or your local Ace hardware store, it finishes those open ends nicely.
 
OP
M

motorscot

Active member
Joined
May 30, 2012
Messages
43
Pretty good, I especially like the bottle stays....

You can buy nice plastic plugs for the ends of the tubing either from Home Depot or your local Ace hardware store, it finishes those open ends nicely.

Thanks, my buddy told me about those. Need to add that to the "to do" list. The large welded rolling table in the background was his. He traded it to me for the original welding cart.
 

toddacimer

Well-known member
Joined
Sep 23, 2012
Messages
757
Location
Oshkosh, Wi
How heavy is that? I was a little concerned about the box wanting to roll away but it looks like the casters have brakes
 
OP
M

motorscot

Active member
Joined
May 30, 2012
Messages
43
Good idea on the welded nuts!

Cant wait to move up to a Hobart 140 Mig welder. Only flux core.......for now.

I love the Hobart. I picked it up last July for $600 from this kid in Georgia. It was barely used (just dusty), and came with the 80 cu ft C25 bottle, cart, Miller gloves, Miller Digital Elite helmet, and DeWalt grinder

I have a 2x3" chunk missing from the deck of my commercial Toro 21" that's 3/16" aluminum, thus the argon bottle
 
OP
M

motorscot

Active member
Joined
May 30, 2012
Messages
43
How heavy is that? I was a little concerned about the box wanting to roll away but it looks like the casters have brakes

Yes, the front casters have brakes and all 4 swivel. Makes it really easy to park. It is probably 150+ lbs. The chest was 30 or more, then whatever everything else weighs

A friend of mine commented on the welded casters: "but you missed the holes with the welds".....
I had to explain that if I wanted to upgrade or replace them, a 1/2" bead at each corner can be ground off in a couple of minutes, instead of beating hell out of the tubing to get to the holes...
 

bluebolt

Well-known member
Joined
Dec 28, 2008
Messages
5,447
Location
Benton LA
I like it! I have an old Craftsman box I was going to use for the same thing, you gave me lots of ideas.
 
OP
M

motorscot

Active member
Joined
May 30, 2012
Messages
43
I like it! I have an old Craftsman box I was going to use for the same thing, you gave me lots of ideas.

Thanks! I gleaned a lot from the other posters and their great work. I already fabbed up the brackets, just have to tack them up and see how everything lines up.

I am not looking forward to painting everything, but I have all the equipment to do the job so I might as well do it.
 

Journaler

Well-known member
Joined
Apr 25, 2012
Messages
572
How do you like the miter saw + diablo blade? I've thought about getting a cheap saw from Craigslist, and put a metal cutting blade on it, but was always worried about sparks/metal messing up the motor.

Do you know how fast that miter saw spins?
 
OP
M

motorscot

Active member
Joined
May 30, 2012
Messages
43
How do you like the miter saw + diablo blade? I've thought about getting a cheap saw from Craigslist, and put a metal cutting blade on it, but was always worried about sparks/metal messing up the motor.

Do you know how fast that miter saw spins?

http://www.homedepot.com/webapp/wcs...321&cj=true&srccode=cii_13736960#.UP-YKB3BGqk

According to the link: up to 5000 rpm. FYI, find some sheet metal and cover the deck, the red area is plastic and for some reason the literally red hot metal that you cut likes to melt into it :headscrat
 
To avoid these ads, REGISTER NOW!
OP
M

motorscot

Active member
Joined
May 30, 2012
Messages
43
I got a chance to do a little more to the setup. First I cut off a section of support material from the trellis and after cleaning it up, I heated it with a propane torch, bent it and chopped it
IMG_20130121_170336_zps37ae0600.jpg

After determining the correct spacing...
IMG_20130124_171920_zps9fc9a8bb.jpg

After some snap, crackle, and pop, everything worked out perfectly
IMG_20130124_172204_zps15e6786a.jpg
 
OP
M

motorscot

Active member
Joined
May 30, 2012
Messages
43
But wait, there's more. There are two cables off the front of that welder you say?
Silly rabbits....
I added more brackets
IMG_20130124_173559_zpsf4ccf441.jpg

Another angle showing more shots of my sloowwwly improving welds
IMG_20130124_173608_zps8fb40c55.jpg
 
OP
M

motorscot

Active member
Joined
May 30, 2012
Messages
43
I know what you're thinking, did I fire 6 shots or only 5? Wait, what?

My bad, wrong ending.

I know what you're thinking: What the heck is that square tubing for?
THIS:
IMG_20130124_173731_zpsac019a81.jpg

And the overall setup again:
IMG_20130124_175521_zpsa1011549.jpg
 

aka Larry

Well-known member
Joined
May 2, 2012
Messages
8,088
Location
Eastern, NC
Nice design on the cart. However, I guess nobody else is going to saying it, but IMO your welding needs more practice.
 

Journaler

Well-known member
Joined
Apr 25, 2012
Messages
572
These aren't structural welds, what's the worst that could happen?

The platform holding the tanks could fail, the regulator snaps off, turning the gas tank into a spiraling missile.

See, no worries.

:)

Seriously though, "it ain't pretty, but it'll hold" applies here.
 
OP
M

motorscot

Active member
Joined
May 30, 2012
Messages
43
Thanks for the replies and input (I'm not going to get ****-hurt about anything)

Yes, I need more practice.

Seriously, I DO need the practice. I am a DIY guy and have to start somewhere. Nothing in any of the pics have been ground or finished. I would like to get to the point where I can "stack dimes" but just not there yet.

Paint is coming, won't be until spring. I have more projects in the pipeline, just waiting on time, motivation, and $$$.
 

mark52621

Well-known member
Joined
Jun 13, 2010
Messages
116
Isn't the grinder for cutting apart poor wields and cleaning up the wields so you can try again?
 
OP
M

motorscot

Active member
Joined
May 30, 2012
Messages
43
I'm taking my welds and going home!:sad:

Just kidding. I will be fabbing a rolling Tanker desk over the next couple of weeks. If you aren't familiar with Tankers, google them. I have 3 in the garage right now.

Anyway, I will be using 1" square tubing again and 5-6" (total height) casters to make a rolling work station. The desk is 30x60", and while 29.5" tall, will increase to 36".

The rolling metal table you see in the background is waiting on a 1/4" steel top. It is 24x48" and will mount my vise and drill press (captured nuts for quick detachment).

I believe that the work to be performed on the desk will be vastly superior to my work shown thus far. (Yes, I will still be doing it) But, working while standing, with steadier supports (elbows) should help me produce better product. If not, then I'll work harder.
 

Strouty

Well-known member
Joined
Mar 21, 2010
Messages
38,224
Location
Southern Maine
I like the design and I am glad you see that you need practice, but doing a project is trial by fire. You should take some scrap ad really work on running beads, attach different pieces of scrap and when you get done, you have garden art. One thing I will mention is when you do the aluminum you need to get a dedicated stainless steel wire wheel to clean it up. Also you may want to change the liner and tips in your gun. All those things will contaminate your aluminum welds. Also I am no where near the caliber welder that some members are, so I am still practicing too.
 

gapfast

Well-known member
Joined
Jun 19, 2011
Messages
213
Cart looks great!! I'm about to purchase my first welder. I really like some of your ideas.
 

datsbooksleia

Well-known member
Joined
Nov 15, 2010
Messages
65
Here is mine. I used scrap metal and kept it simple
 

Attachments

  • 0608131103a.jpg
    0608131103a.jpg
    104 KB · Views: 42
  • 0608131741.jpg
    0608131741.jpg
    95.6 KB · Views: 47
  • 0608131741a.jpg
    0608131741a.jpg
    108.2 KB · Views: 40
  • 0608131741b.jpg
    0608131741b.jpg
    101.1 KB · Views: 38
To avoid these ads, REGISTER NOW!
Top Bottom