To avoid these ads, REGISTER NOW!

Scissor lift A to Z

Eddie's GTS

Active member
Joined
Dec 2, 2011
Messages
39
Location
Seattle, WA.
Scissor Lift A-Z
I would like to start off by thanking Jack Olson and Paul Bird for giving me the idea and inspiration for installing a scissor lift, and for their excellent post here on the Garage Forum.
I hope to answer all your questions on importing and installing a lift in your garage. I chose a scissor lift because I did not want a post in my garage or a hump that my lowered car would scrape on. Having a flush mounted lift is optimum for every day use as I drive my car over it when parking my car. I chose the Ever-Eternal EE-6503 http://www.ever-eternal.com/ . This company also makes post lifts.
Ever Eternal is a major manufacturer of lifts in China, and imports lifts to this country under names like BenPak and Danmar.
My contact at Ever Eternal was William Zhang [email protected]
Skype: wenzio520
TEL:+86-21-32500752
FAX:+86-21-32500785
CEL:+86-15900655435
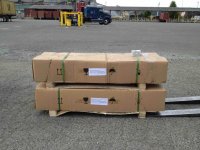
After selecting a lift and agreeing on a price with William, I was given wire transfer instructions that I took to my bank and wired the money to their bank in China. Sending money to China was scary, but it has worked for many forum members, and it worked for me. I received a confirmation in short order and my lift went into production.
Importing your lift will require certain documents required by our government:
1. ISF 10-2 import security filing is REQUIRED by the TSA and boarder patrol. This form must be filed by a bonded customs agent who has the computer program to talk to the TSA’s computers. I used US Import Bond in Los Angeles usimportbond.com and the cost was $95.00. See http://www.shapiro.com/html/isf.html for information on the ISF filing.
2. Customs, I did my own informal importing using customs form CBP 3461. This allowed me to not use a customs broker, or post a bond, thus saving those costs. All goods for personal use and those costing under $2,000.00 (net excluding shipping)can use this form. If your lift will be used commercially, you will need to file form #7501, and you will need a customs broker and post a bond.
3. Note: I live in Seattle and have ready access to the Port of Seattle. If you live in a non-port city you will need a customs broker to expedite the goods to your home or business.
4. I prepaid the shipping on the lift, but the release form and arrival notice required a $35.00 payment. DO NOT USE FCC Logistics in Los Angeles. Nasty people.
5. There is no customs duty on a lift.
6. You will also be paying a logistics company when picking up your new lift at their warehouse. Cost for this is $130.00. This covers warehousing, unloading from the ship and container, and paper work.
7. Total Cost :
Lift $1,900.00
Shipping, Shanghi to Seattle $ 150.00
ISF bond $ 95.00
Paperwork $ 35.00
Port logistics fee $ 130.00
 

Attachments

  • DSCN4916.jpg
    DSCN4916.jpg
    132.8 KB · Views: 368
To avoid these ads, REGISTER NOW!
OP
E

Eddie's GTS

Active member
Joined
Dec 2, 2011
Messages
39
Location
Seattle, WA.
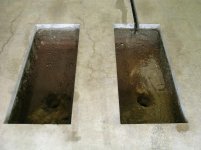
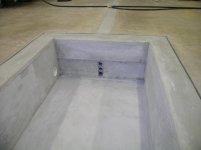
You will need 220 power and Pneumatic air pressure to run the safety up-locks, so plan accordingly. I was lucky and had both in one spot. I laid out the lift on the floor and measured three times before I cut the concrete. I decided to use a commercial guy to cut the concrete since mine was 6"inches thick. We made extra cuts and chunked it out. The digging was the hardest part, about 6 advils'.
 

Attachments

  • DSCN4865.jpg
    DSCN4865.jpg
    146.5 KB · Views: 158
  • IMG_0219:1.jpg
    IMG_0219:1.jpg
    144.9 KB · Views: 213
  • DSCN4871.jpg
    DSCN4871.jpg
    146.1 KB · Views: 239
OP
E

Eddie's GTS

Active member
Joined
Dec 2, 2011
Messages
39
Location
Seattle, WA.
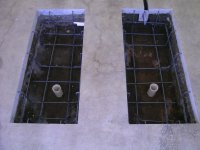
I planned for 9" inches of concrete in the base and used 1/2" rebar to enforce the floor and walls which are 5" inches. Drilled the rebar supports into the existing floor. I also planned for and dug a dry sump hole with a post hole digger about 3'ft. deep.
 

Attachments

  • DSCN4872.jpg
    DSCN4872.jpg
    143.5 KB · Views: 238
OP
E

Eddie's GTS

Active member
Joined
Dec 2, 2011
Messages
39
Location
Seattle, WA.
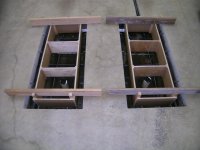
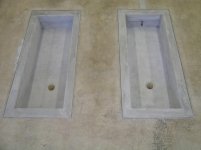
I used 3/4' MDO to make the forms. You will need a pass thru for hydraulic, pneumatic and electrical control lines plus the feed to the pits from the main controller. I allowed the center supports to move up and down so I could level the bottom when I poured the concrete. What would work best in hind sight would be to pour the concrete in two batches. level the floor and let it set before pouring the walls. This keeps the concrete from welling up in the center. I made blocks to lock in the corners so there was no movement during the pour.
 

Attachments

  • DSCN4873.jpg
    DSCN4873.jpg
    135.2 KB · Views: 206
  • DSCN4874.jpg
    DSCN4874.jpg
    137.2 KB · Views: 213
OP
E

Eddie's GTS

Active member
Joined
Dec 2, 2011
Messages
39
Location
Seattle, WA.
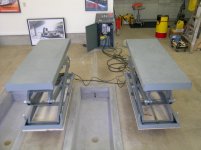
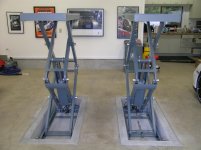
I set up the system on the garage floor before lowering the lifts down in the pits. After hooking up the Hydraulics and electrical I tested the lifts and raised them so I could hook on to them with the fork lift.
 

Attachments

  • DSCN4880.jpg
    DSCN4880.jpg
    127.7 KB · Views: 229
  • 0232.jpg
    0232.jpg
    137.8 KB · Views: 184
  • 0191.jpg
    0191.jpg
    146.3 KB · Views: 144
Last edited:
OP
E

Eddie's GTS

Active member
Joined
Dec 2, 2011
Messages
39
Location
Seattle, WA.
Lifts lowered into place and bolted down.
 

Attachments

  • DSCN4881.jpg
    DSCN4881.jpg
    133.3 KB · Views: 279
  • DSCN4882.jpg
    DSCN4882.jpg
    135.9 KB · Views: 237
  • DSCN4883.jpg
    DSCN4883.jpg
    134.9 KB · Views: 282
OP
E

Eddie's GTS

Active member
Joined
Dec 2, 2011
Messages
39
Location
Seattle, WA.
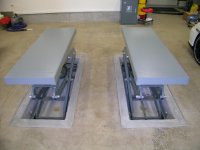
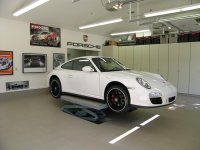
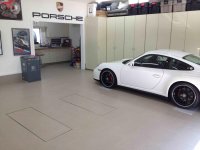
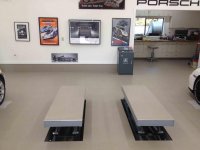
Not happy with the cracks in the garage floor I decided to tile the shop and main floor. After considering all types of covering I chose Porcelain Tile in 1'x2'. It took a couple of months before I found the right tile at the right price. I had no idea that it would take 7 or 8 days to lay a 1000sf. I couldn't be happier with the way it turned out. The garage looks more like a hospital now and the lift really does the job. I did a brake job on the Suburban the other day and the lift didn't even groan.
 

Attachments

  • DSCN4914.jpg
    DSCN4914.jpg
    133.3 KB · Views: 320
  • DSCN4916.jpg
    DSCN4916.jpg
    132.8 KB · Views: 303

HIRISC

Well-known member
Joined
Jun 9, 2006
Messages
828
Location
Minneapolis, MN
More Photos
289.jpg


Really nicely done.

Makes my place look frumpy. :bowdown:
 

akdiesel

Well-known member
Joined
Aug 8, 2008
Messages
2,617
Location
Wasilla, AK
I missed this thread. Great job on the information and work.
When you say you lifted your suburban what is the weight of yours. I would like to have this set up in addition but need to have at least 8000 lb capacity for a truck.
 
To avoid these ads, REGISTER NOW!
OP
E

Eddie's GTS

Active member
Joined
Dec 2, 2011
Messages
39
Location
Seattle, WA.
This lift is rated for 3000kg or 6600 pounds. You may need a higher weight capacity lift. Take a look at the Mohawk lift, they may have a higher capacity lift.
 

pumalex

Well-known member
Joined
Oct 20, 2010
Messages
132
Location
Quebec, Canada
missed this thread, really nice garage, i know you will love the lift, i certainly do. How did you fit the tiles on the lift and what are they, ceramic, porcelain? Aren't you afraid they will break? Are they glued on?
 
OP
E

Eddie's GTS

Active member
Joined
Dec 2, 2011
Messages
39
Location
Seattle, WA.
The lift is getting a workout and I love it. I used Laticrete # 125 Sound and Crack to bond the Porcelain tiles to the lift. This material stays flexible and I have had no problems yet. The edges I boarded with Schlulter stainless edging.
 

eastbaysubaru

Well-known member
Joined
Dec 6, 2009
Messages
340
Location
NorCal
Thanks for the excellent write-up. This is the lift that I plan on getting eventually. Your installation looks top notch!

-Brian
 

RSwannabe

Well-known member
Joined
Dec 17, 2009
Messages
403
Eddie,

Congratulations on the beautiful install and thank you for the excellent post. The information is very pertinant as I just got my permit to build a new garage in my backyard in Ballard. I will be installing an EE6503 as part of the initial construction. I have a few questions I hope you can answer:

1. Once you placed the order for the lift, how long did it take to arrive at the port in Seattle?

2. I have seen a few posts saying the dimensions of the lifts, and thus the required dimensions of the hole, have varied. Can you confirm the dimensions of the pits you put in place for the lifts?

3. Where did your soruce the tile from?

Thank you,
 

sfriesen

Well-known member
Joined
Nov 20, 2012
Messages
66
Location
Wichita Kansas
FYI... My wife is not happy with your purchase and thread detailing how nice it installs.


-if you know what I mean :lol:
 
OP
E

Eddie's GTS

Active member
Joined
Dec 2, 2011
Messages
39
Location
Seattle, WA.
RS Wannabe

Eddie,

Congratulations on the beautiful install and thank you for the excellent post. The information is very pertinant as I just got my permit to build a new garage in my backyard in Ballard. I will be installing an EE6503 as part of the initial construction. I have a few questions I hope you can answer:

1. Once you placed the order for the lift, how long did it take to arrive at the port in Seattle?
About 45 days from when you order it.
2. I have seen a few posts saying the dimensions of the lifts, and thus the required dimensions of the hole, have varied. Can you confirm the dimensions of the pits you put in place for the lifts?
Use the factory recommended measurements and add 1/8"gap spacing on 3 sides and at least a 1/4"to 3/8 on the expansion end. I chipped a tile when the expansion end moved when I was torquing my center lock hubs with a 4ft bar and I didn't catch it before lowering the lift "my bad...".As far as the depth goes make it a little deeper and bring the height up with thinset to level the base out.
3. Where did your soruce the tile from?
I bought my tile from Dal tile in 1ft x 2ft tiles. Light color tiles reflect more light but also require a little more maintenance to keep clean.
Thank you,
 

SteveCh

Well-known member
Joined
Dec 21, 2012
Messages
1,053
Just now ran across this thread. You simply did a beautiful job. Just beautiful.
 
OP
E

Eddie's GTS

Active member
Joined
Dec 2, 2011
Messages
39
Location
Seattle, WA.
The project turned out great and more importantly I am using the lift all the time. I even use the lift to wax the side of my car. I have been trading street and race brake pads between events. You want security leave the car up on the rack and let somebody try and steal it.
 

hookedontronics

Well-known member
Joined
Feb 15, 2013
Messages
83
thanks for making this easy, i was having an impossible time trying to order one of these within the US. You are my savior!
 
OP
E

Eddie's GTS

Active member
Joined
Dec 2, 2011
Messages
39
Location
Seattle, WA.
I believe it is Chinese New Years this week so you may not find anybody home at the factory. Try William next week. Also you may want to hook up with other forum members looking for a lift for a group buy. If you keep the price under 2k (minus shipping)you can do a informal customs entry and save yourself those cost.
 

R6 Racer

Well-known member
Joined
Feb 21, 2010
Messages
1,632
Location
Northern Ontario Canada
Eddie's GTS Do you think it's still possible to get them for under $2,000.00? I saw in another thread that they wont sell them to individuals any more.

Steve
 

tc-cad

Well-known member
Joined
Jan 15, 2012
Messages
270
Location
Mequon, WI
I love the scissor lift. I am in the process of Building my own scissor lift . I like how they are flush with the concrete floor when not in use. The tubing came in today and the lasered brackets that join the two arms have been formed. I will take/post pictures of the process as it develops. I have a complete design that I did on SolidWorks software.

TC-CAD
 
Last edited:

tc-cad

Well-known member
Joined
Jan 15, 2012
Messages
270
Location
Mequon, WI
I found a scissor lift looks very close to EE model. It is made by Snap-on and rated at 7000 lbs. So no need to build my own any more. Now I just need to cut concrete and get mine all set-up in my garage. I just picked it up today drove 700 miles in one day to pick it up and bring it home.

TC-CAD
 
To avoid these ads, REGISTER NOW!
Top Bottom