To avoid these ads, REGISTER NOW!

Scale Model Dozer Ride On For My Son

mustanginky

Well-known member
Joined
Jul 30, 2011
Messages
473
this is probably the coolest thing i've seen on the internet. and don't lie, you can't wait for a good snow after it's done to get out there and use it haha. it's as much for you as it is your kid!
 
To avoid these ads, REGISTER NOW!

Capstone

Well-known member
Joined
Aug 19, 2012
Messages
111
Location
Northern VA, DC Area
subscribed... I just finished catching up and as others have already said, this is one of the most ambitious fab projects I've ever witnessed. I really think the sheer scale of this project would overwhelm even the best Hobby-designers, -machinists, -welders, -mechanics or hobby-engineers and that's just for their piece of the project. Amazing to me and many others is that you're covering all FIVE areas single handedly! WOW! If our pep talks gives you just a little more motivation, then writing this reply was well worth my time to see your project completed and small thanks for you taking on three MORE roles; writer, photographer and producer to share this with all of us.
 
Last edited:
OP
D

dozerbuilder01

Well-known member
Joined
Jun 20, 2011
Messages
180
Location
Far Northwest Burbs of Chicago
I love this thread, my first post but I have been following a while. Can't wait for more!

Glad you enjoy.

From that I think we can look forward to some more great projects coming out of your workshop :thumbup: in the future. may I just add you must have alot of patience making parts work for your Dozer.

I got a few ideas for other projects up my sleeve. Don't want to get ahead of myself though. And I actually don't have a ton of patience. I've just learned to walk away when I get frustrated. Having a plan has helped a bunch too.

this is probably the coolest thing i've seen on the internet. and don't lie, you can't wait for a good snow after it's done to get out there and use it haha. it's as much for you as it is your kid!

Busted. I am a big kid. And I hate shoveling snow.

subscribed... I just finished catching up and as others have already said, this is one of the most ambitious fab projects I've ever witnessed. I really think the sheer scale of this project would overwhelm even the best Hobby-designers, -machinists, -welders, -mechanics or hobby-engineers and that's just for their piece of the project. Amazing to me and many others is that you're covering all FIVE areas single handedly! WOW! If our pep talks gives you just a little more motivation, then writing this reply was well worth my time to see your project completed and small thanks for you taking on three MORE roles; writer, photographer and producer to share this with all of us.

Thank you. I does help actually. I've followed other peoples projects for years and would get disappointed if a project just kind of stopped. And this project is sometimes overwhelming and sometimes I feel like I've bitten off more than I can chew so the motivation keeps me going. So now I can't let you guys down.

Well, gotta keep the updates going.

Finished a sweep cut on the front end of the frame.
BD0377.jpg


Started welding on pieces for the tensioner.
BD0382.jpg


One track frame is almost complete.
BD0384.jpg


BD0385.jpg


Started cutting the bevel on the wheels. Want to get those finished so I can press in the shafts.

BD0379.jpg


BD0380.jpg


That is all for now. Thanks for looking.
 

HOTFR8

Banned
Joined
Mar 2, 2007
Messages
24,498
Location
Castlemaine, Victoria. The Hot Rod Centre of Austr
I got a few ideas for other projects up my sleeve. Don't want to get ahead of myself though. And I actually don't have a ton of patience. I've just learned to walk away when I get frustrated. Having a plan has helped a bunch too.

Yes walking away usualy works for me as well. Often I find I come back with a better idea. I often find now not to rush something. I find I have more patience now than I did when I was younger.
 

Omphaloskeptic

Well-known member
Joined
Oct 11, 2008
Messages
2,346
Location
Ultima Ratio, Wa.
The ToolMaster is indeed a workhorse! The work it enables you to do is impressive. If you don't mind my asking - how much do you think you have invested in the machine and all the tooling for it (ballpark figure is fine)? I've never had any machine shop experience, but DANG, that looks like a ton of fun to use!

The whole process of taking an idea from a sketch, to a drawing, to a rendering, to a parts list, to an assembly, and finally to a finished working result by one man is something to be admired! We're all pulling for you; keep up the great work and the terrific documentation please. :bowdown:
 

IndyGarage

Well-known member
Joined
Apr 29, 2010
Messages
9,685
Location
Indy
I'm always amazed when I come here. This is the first time I've seen this thread.

Congratulations on the skills you have. Design/CAD, fabrication, toolmaking etc. and you are doing it all in a small garage.

I hope you can pass those skills on to your son - or even others. I know you are passing them on to folks like me.

Just a question I have had looking through the thread. Any thoughts of putting a blade on this sometime? Are those mounting holes for one on the side of the tracks?

Don't know if your hydraulic pump would have enough capacity - but if it did, you could probably do a simple single cylinder lift.
 

machine_punk

Well-known member
Joined
May 14, 2011
Messages
2,540
Location
Napa Valley, California
This thread just gets more amazing as it goes.

The cool thing to me, as I add a new process to my shop (welding--specifically oxy-acetylene welding) is that each new process you have available opens up new options. 3D CAD (I use Alibre 3D Design) teaches you to think new ways about the design process and can cut out the first prototype in some cases. Welding allows you to do additive fabrication (adding chunks of metal). The machine shop tools (lathe and mill) allow you to do subtractive fabrication (taking away chunks of metal). All of these force you to think in new ways. I know that as I add welding to my garage, I begin to seen new possibilities and new answers to the problems I have in my fabrication. I am enjoying seeing you 'think in new ways.'

Kev
 
OP
D

dozerbuilder01

Well-known member
Joined
Jun 20, 2011
Messages
180
Location
Far Northwest Burbs of Chicago
The ToolMaster is indeed a workhorse! The work it enables you to do is impressive. If you don't mind my asking - how much do you think you have invested in the machine and all the tooling for it (ballpark figure is fine)? I've never had any machine shop experience, but DANG, that looks like a ton of fun to use!

I bought it about 8 years ago for around $1,100. I think I got a pretty good deal. I looked for a while. Found it on eBay actually. Variable speed head, power quill feed, power feeds on x and y and a coolant system. The rest of the tooling, I don't know. I spend a lot of time at auctions and looking on craigslist and ebay. I try not to add it up because I don't want to know.

Just a question I have had looking through the thread. Any thoughts of putting a blade on this sometime? Are those mounting holes for one on the side of the tracks?

Don't know if your hydraulic pump would have enough capacity - but if it did, you could probably do a simple single cylinder lift.

Yes, I do plan on a blade. Right now, hydraulic up and down with manual turning. I'll have a separate single stage pump near the front of the engine. I already have a two groove pulley on the engine for it. I just started the design recently to take a break from the garage. I've been putting it off for a while. It still will be the last thing I do.

This thread just gets more amazing as it goes.

The cool thing to me, as I add a new process to my shop (welding--specifically oxy-acetylene welding) is that each new process you have available opens up new options. 3D CAD (I use Alibre 3D Design) teaches you to think new ways about the design process and can cut out the first prototype in some cases. Welding allows you to do additive fabrication (adding chunks of metal). The machine shop tools (lathe and mill) allow you to do subtractive fabrication (taking away chunks of metal). All of these force you to think in new ways. I know that as I add welding to my garage, I begin to seen new possibilities and new answers to the problems I have in my fabrication. I am enjoying seeing you 'think in new ways.'

Kev

I still make a lot of mistakes but I learn every time.

I'm as amazed as others. Any idea when the fire-up date will be? And I hope you make a video of that day :thumbup:

I'd like to have it on tracks by March. Maybe running and moving by summer. I was hoping to get it done by fall so I could take it to some local shows but I'm not sure if I'll make it. And that's fine because my son still won't be able to ride it since he'll still be too young.

Been doing a little more work but nothing exciting. Have some days off for Christmas so I'll be back at it soon.

I'm glad everyone enjoys the project.
 

rvr6000

Well-known member
Joined
Oct 3, 2010
Messages
1,072
Location
St. Paul, MN
This is by far the coolest damn thread I've ever seen on GJ.

Any guesses what it'll weigh when all said and done? It's beefy.
 
OP
D

dozerbuilder01

Well-known member
Joined
Jun 20, 2011
Messages
180
Location
Far Northwest Burbs of Chicago
This is by far the coolest damn thread I've ever seen on GJ.

Any guesses what it'll weigh when all said and done? It's beefy.

The cad model has it around 700lbs as shown in the last screenshot shown a few posts ago. The steel is calculated automatically. The engine, tracks and pumps were all weighed and then the density adjusted to get the weight right in the model. I still have to add control linkage, front blade and the hydraulics for it. Hoses, foot well area, fuel and oil and I think that's about it. My goal is to keep it under 1,000lbs.

Haven't gotten as much done during my break as I'd like. I've been helping my Dad make some cabinets.

And not too many pictures because it isn't very exciting work. Just making shafts, spacers and truing up the idler wheels. And putting some things together.

SAM_0992_zpsf3921701.jpg


SAM_0993_zps61abb872.jpg


Still waiting on the new sprockets. I don't want to admit that I made a mistake and need to get new ones made. Once I know everything fits, I'll move on to the other side.

SAM_1026_zpsd65086eb.jpg


Got some pieces from a friend with a CNC plasma table. I had him cut out a lot of the gussets and plates I'll need for the frame. It saves me a ton of time.

SAM_1030_zps88604ece.jpg
 
OP
D

dozerbuilder01

Well-known member
Joined
Jun 20, 2011
Messages
180
Location
Far Northwest Burbs of Chicago
Nothing really exciting going on. I switched over to getting the pumps mounted. Just making parts. Didn't take a ton of pictures.

Used a hole saw to drill the hole then got it up to 3.25" with a boring bar for the pump pilot diameter.
SAM_1042a_zps1b454d05.jpg


Then I bent the edges in my homemade brake.
SAM_1042_zpsdaa7ff74.jpg


Then I made some random parts for the jackshaft assembly. I plan to drop down the belt from the engine to the pumps.

SAM_1045_zps567076f0.jpg


SAM_1048_zps2f58333a.jpg


Then I tack welded it to the frame.

SAM_1049_zps42a68de5.jpg


Then mounted the pumps to check it out.

SAM_1051_zpsa6845db8.jpg


I still have to order the pulleys.

SAM_1052_zps134b85d7.jpg


That is all for now.
 

p912s

Well-known member
Joined
Oct 19, 2008
Messages
74
Location
SW Michigan
What a cool project! Love everything about it; concept, design, your craftsmanship.

What kid doesn't like a good crawler? Growing up my dad had a John Deere 430 crawler with a front end loader, it was fun to have around.

Looking forward to updates.
 
OP
D

dozerbuilder01

Well-known member
Joined
Jun 20, 2011
Messages
180
Location
Far Northwest Burbs of Chicago
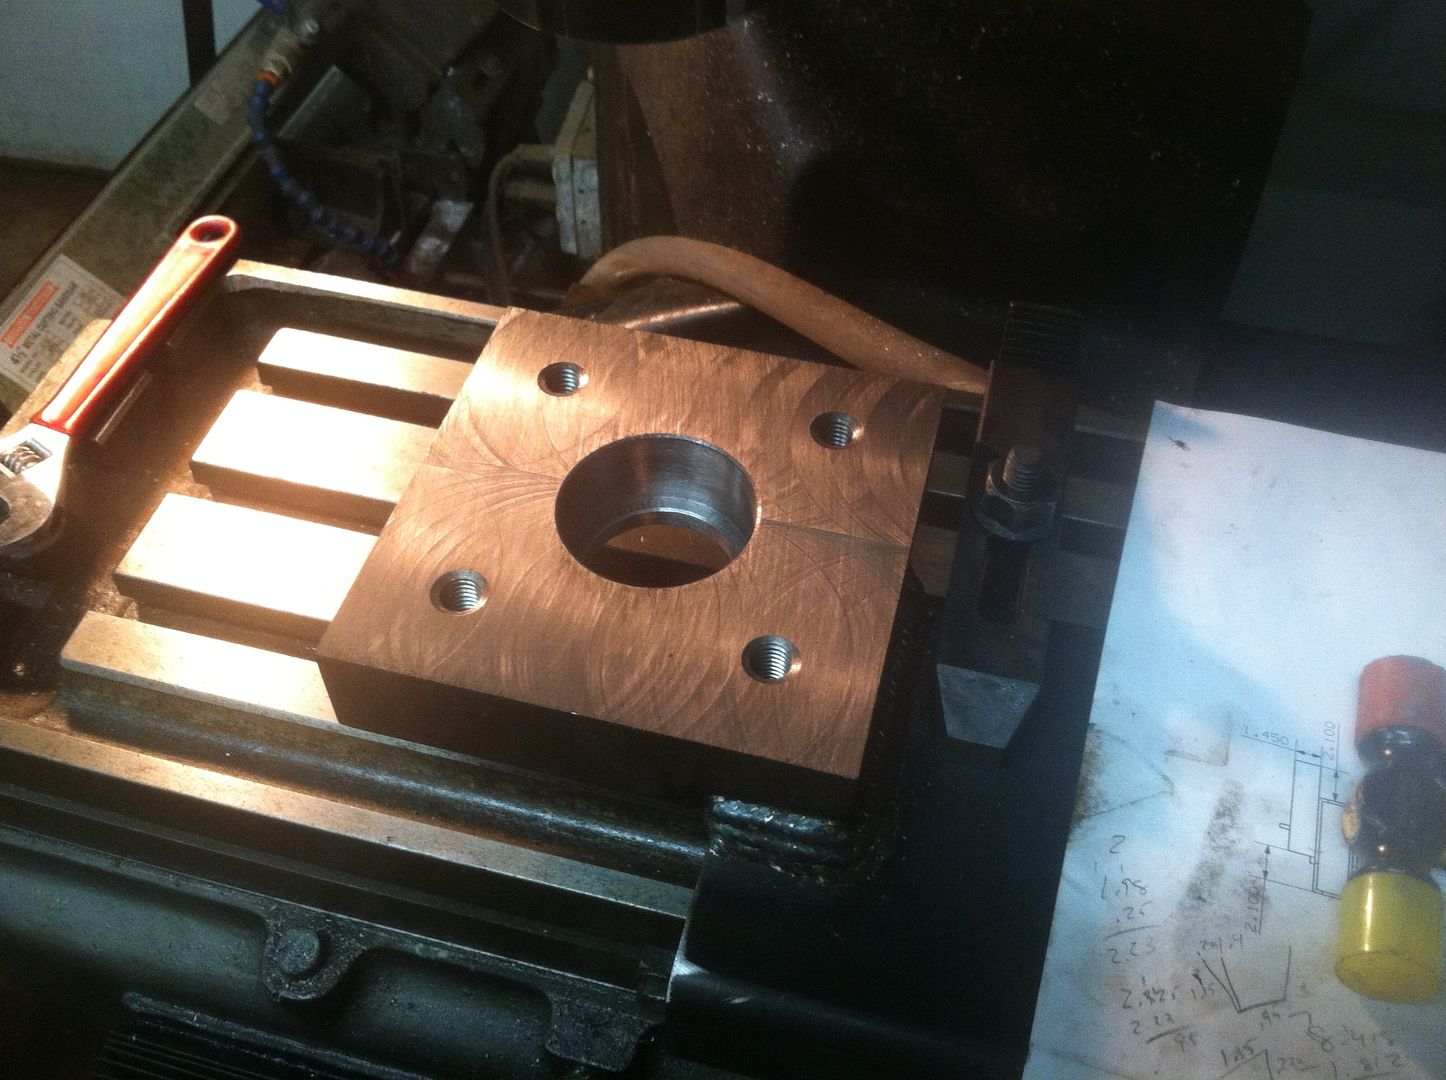
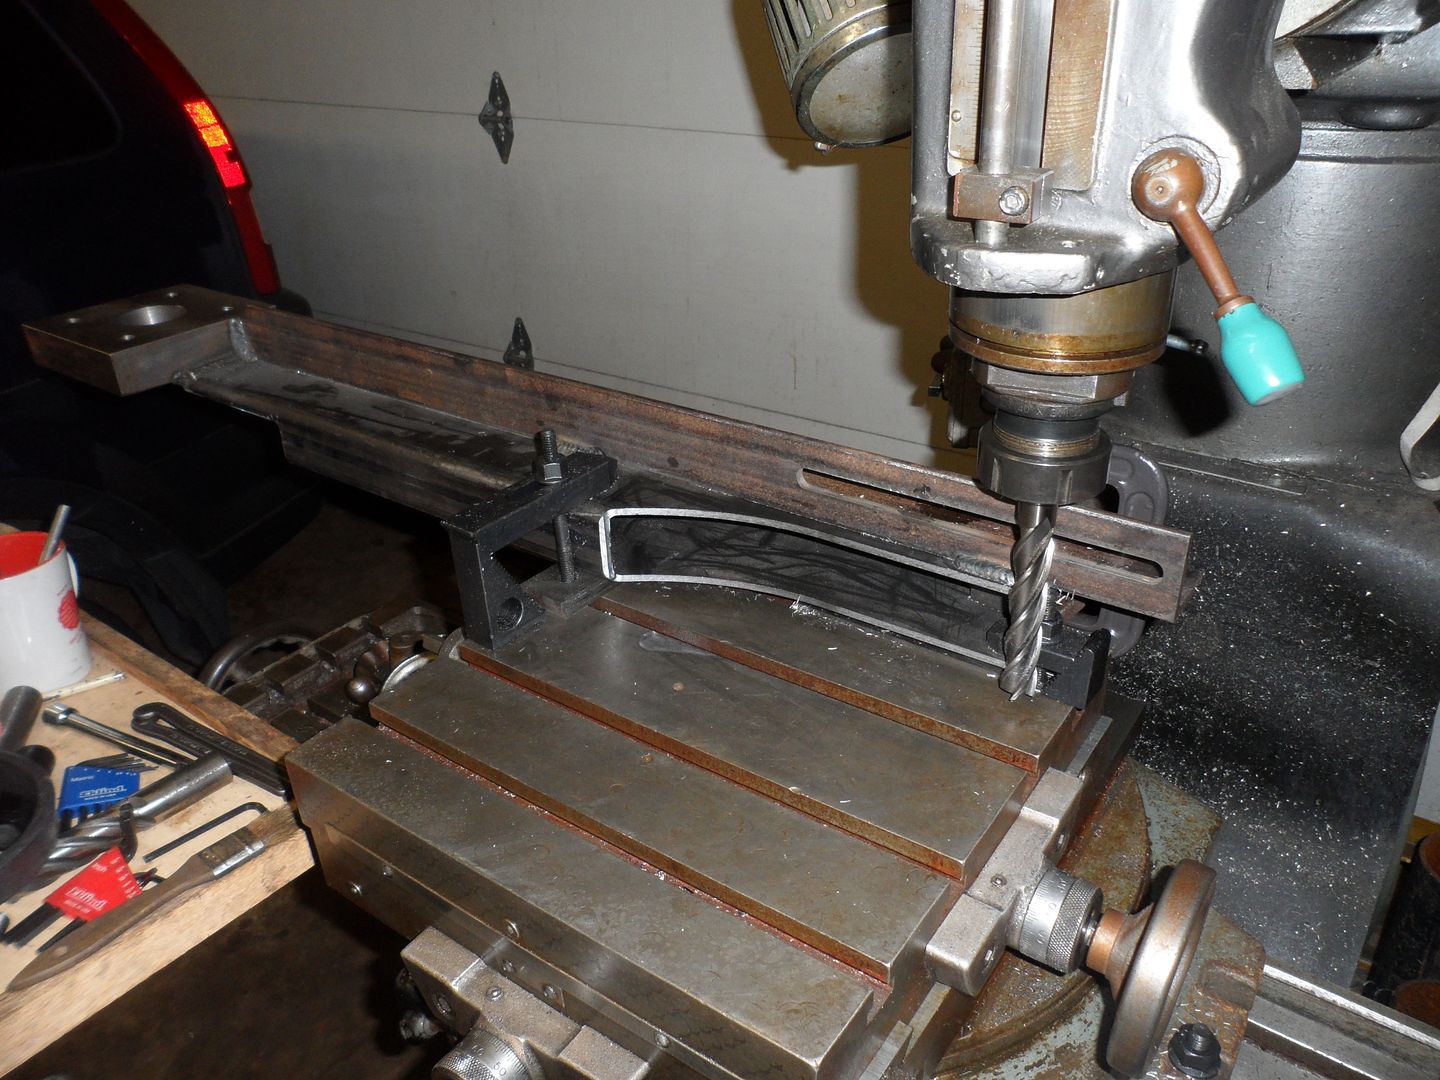
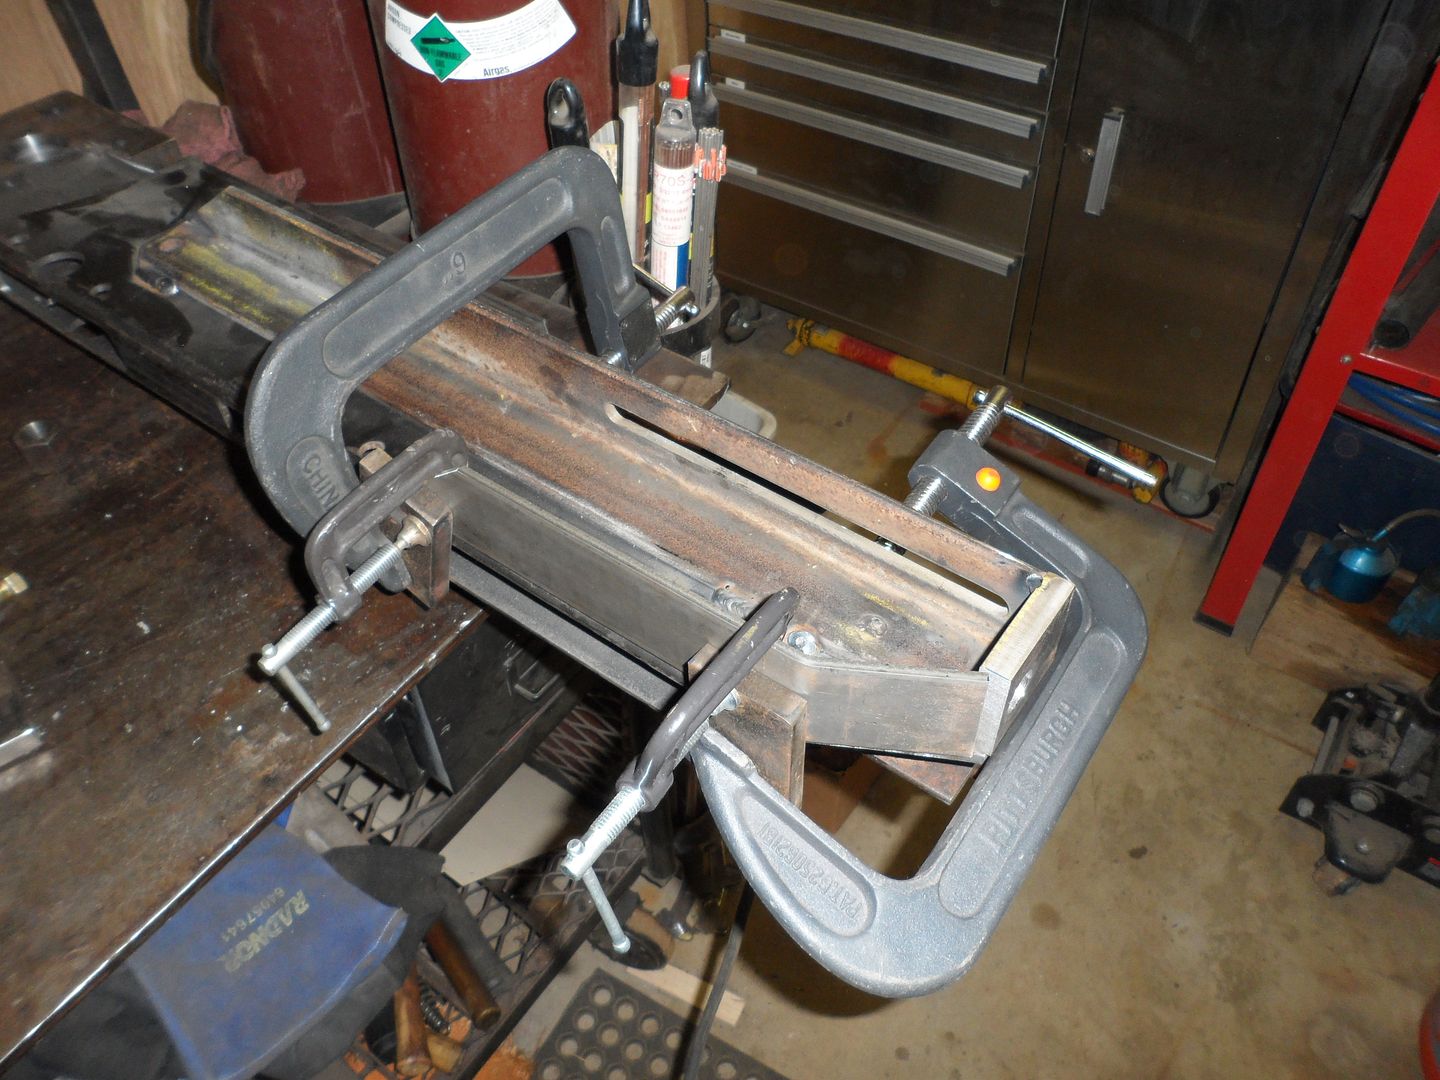
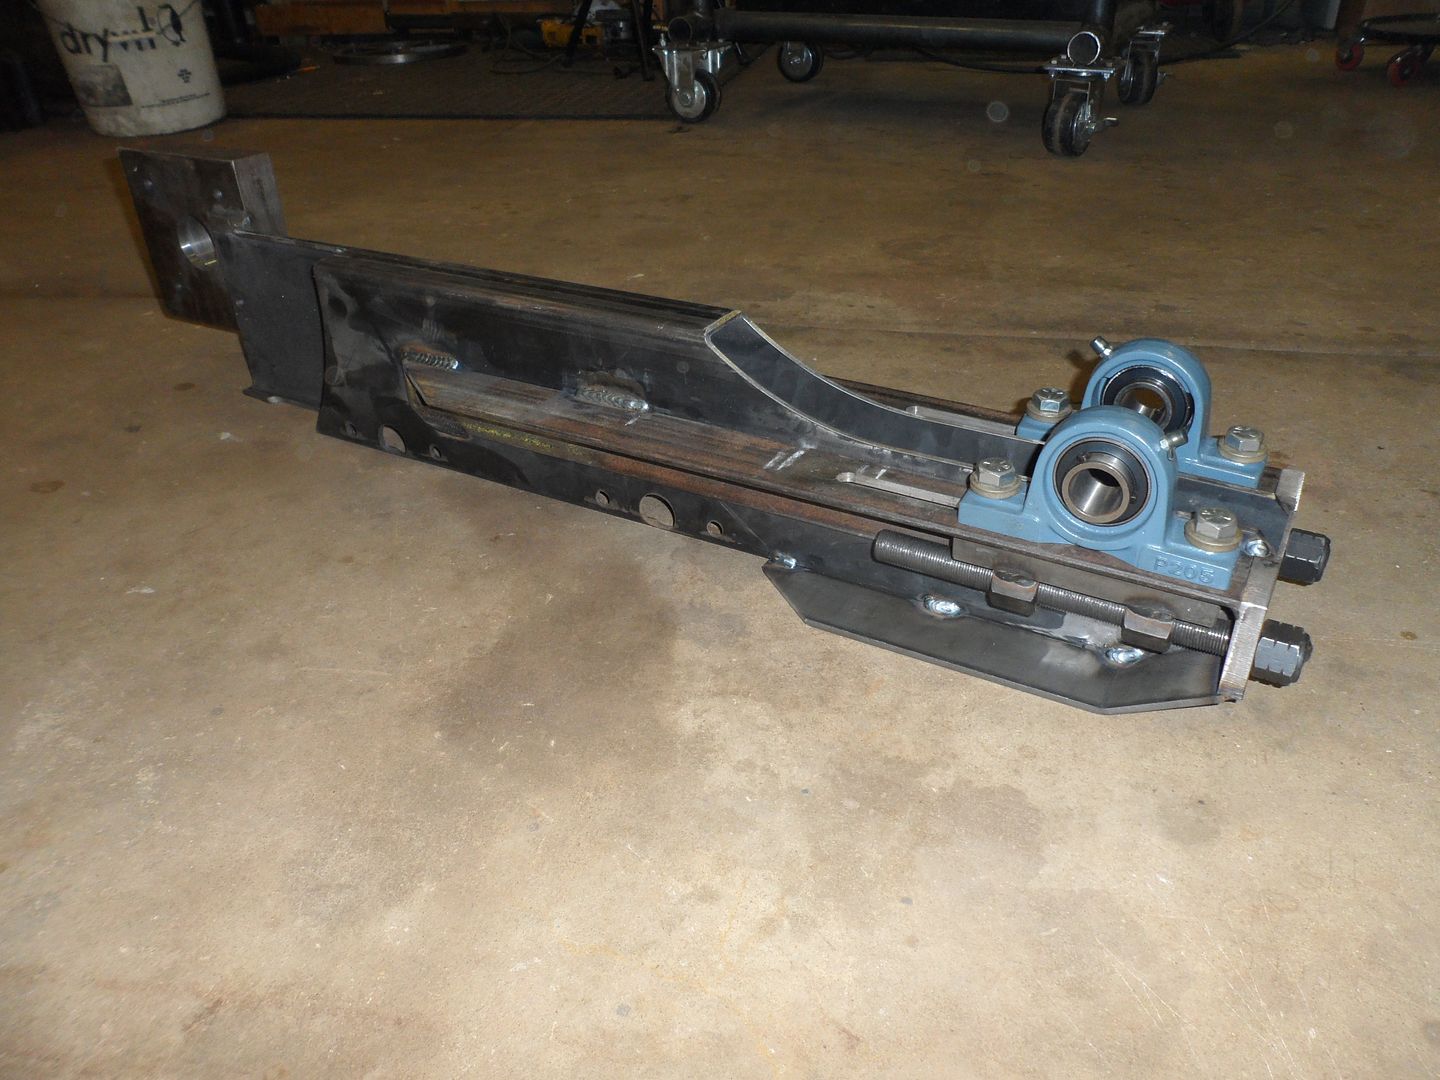
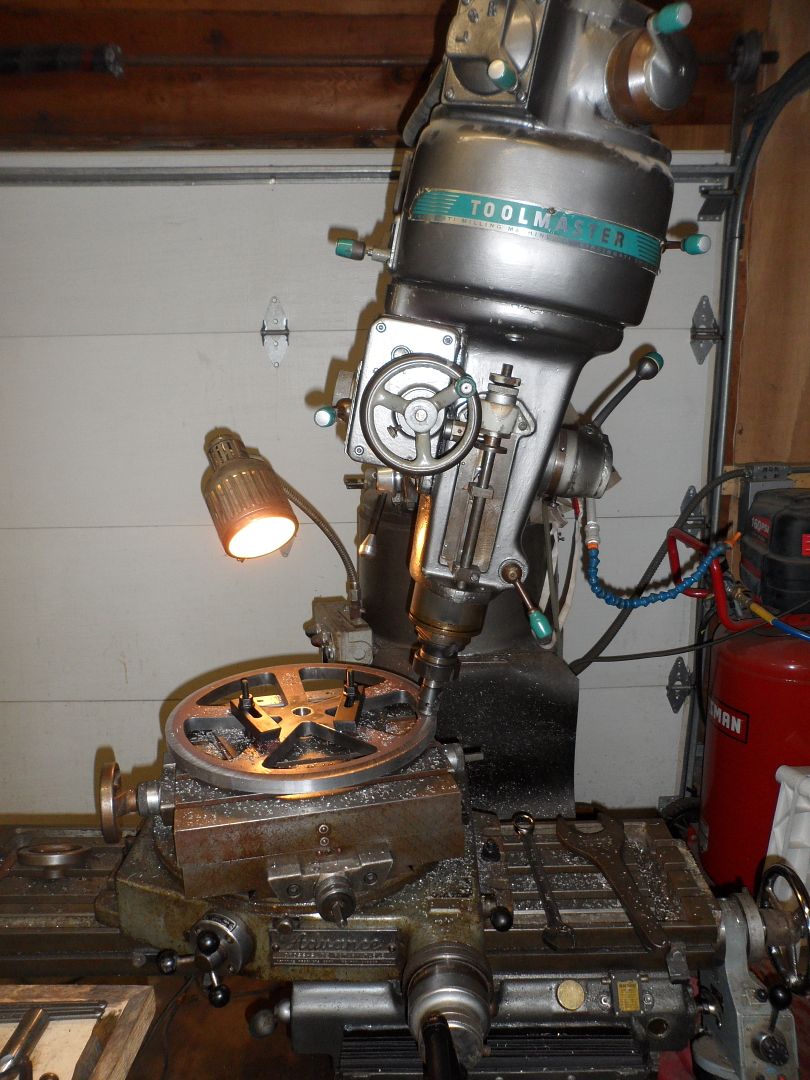
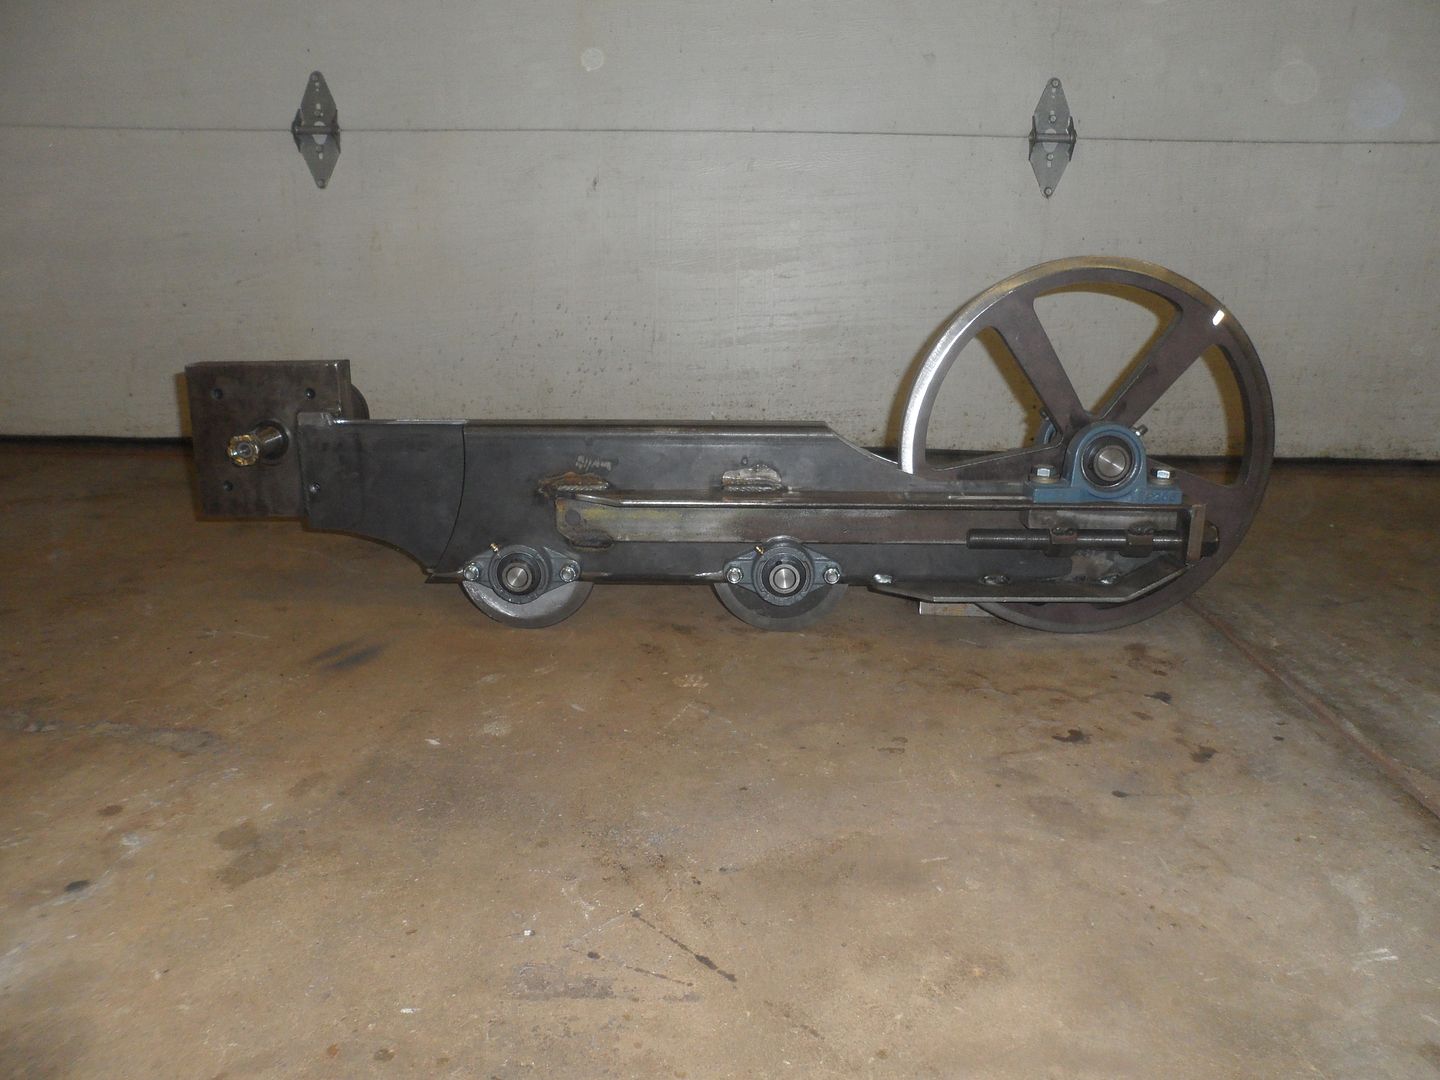
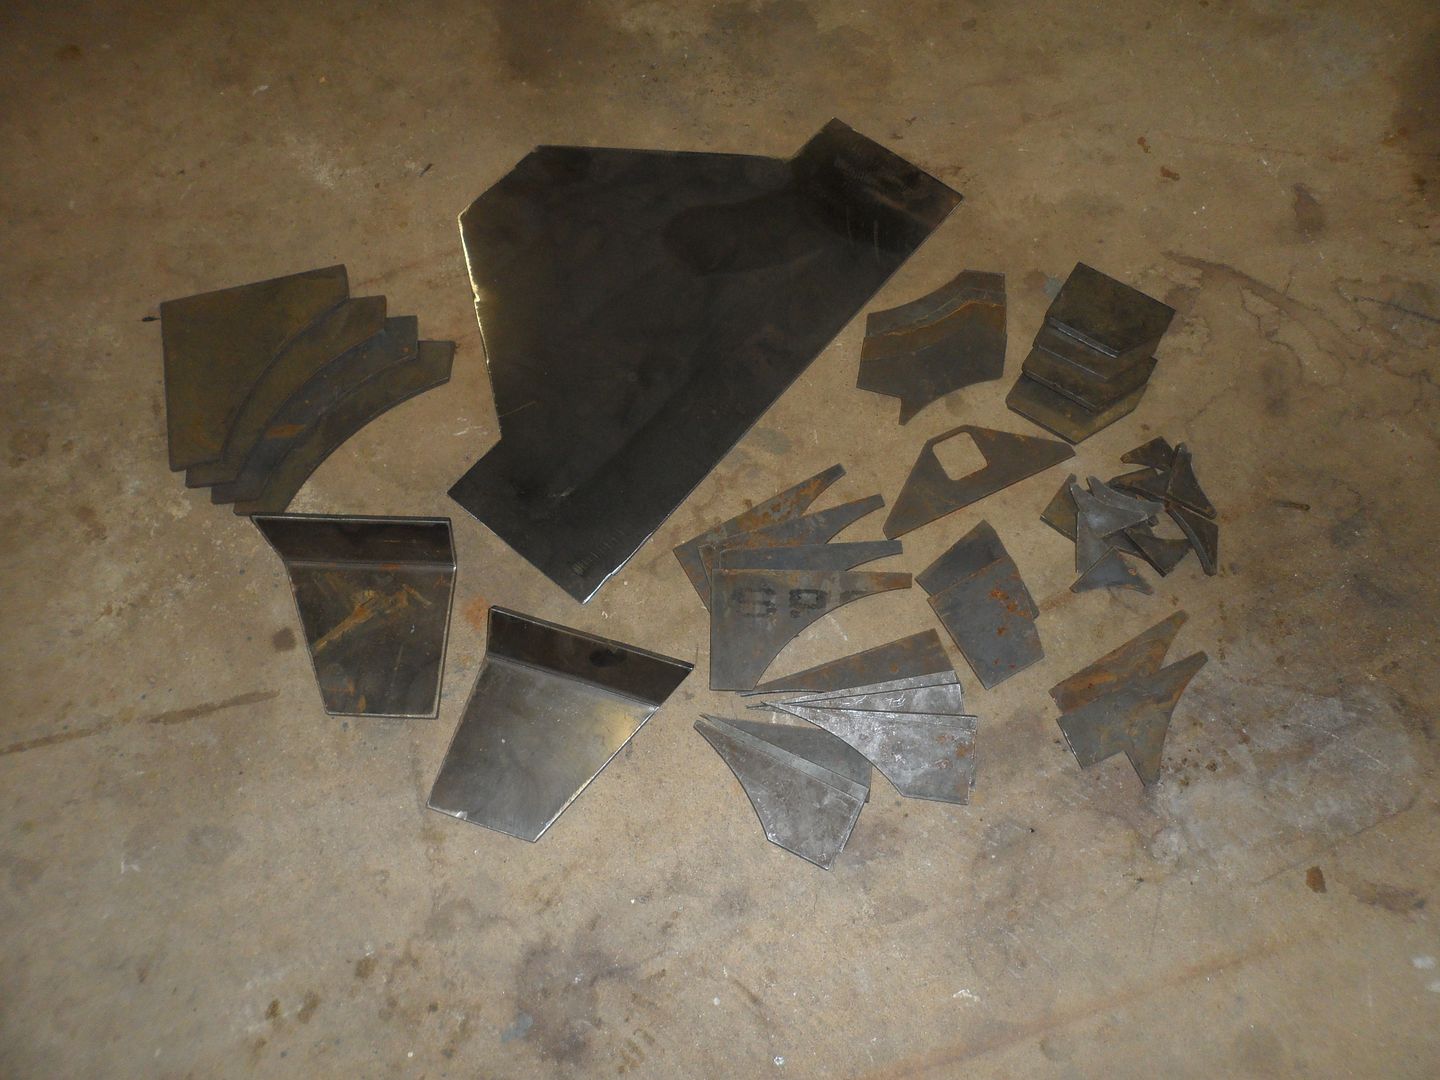
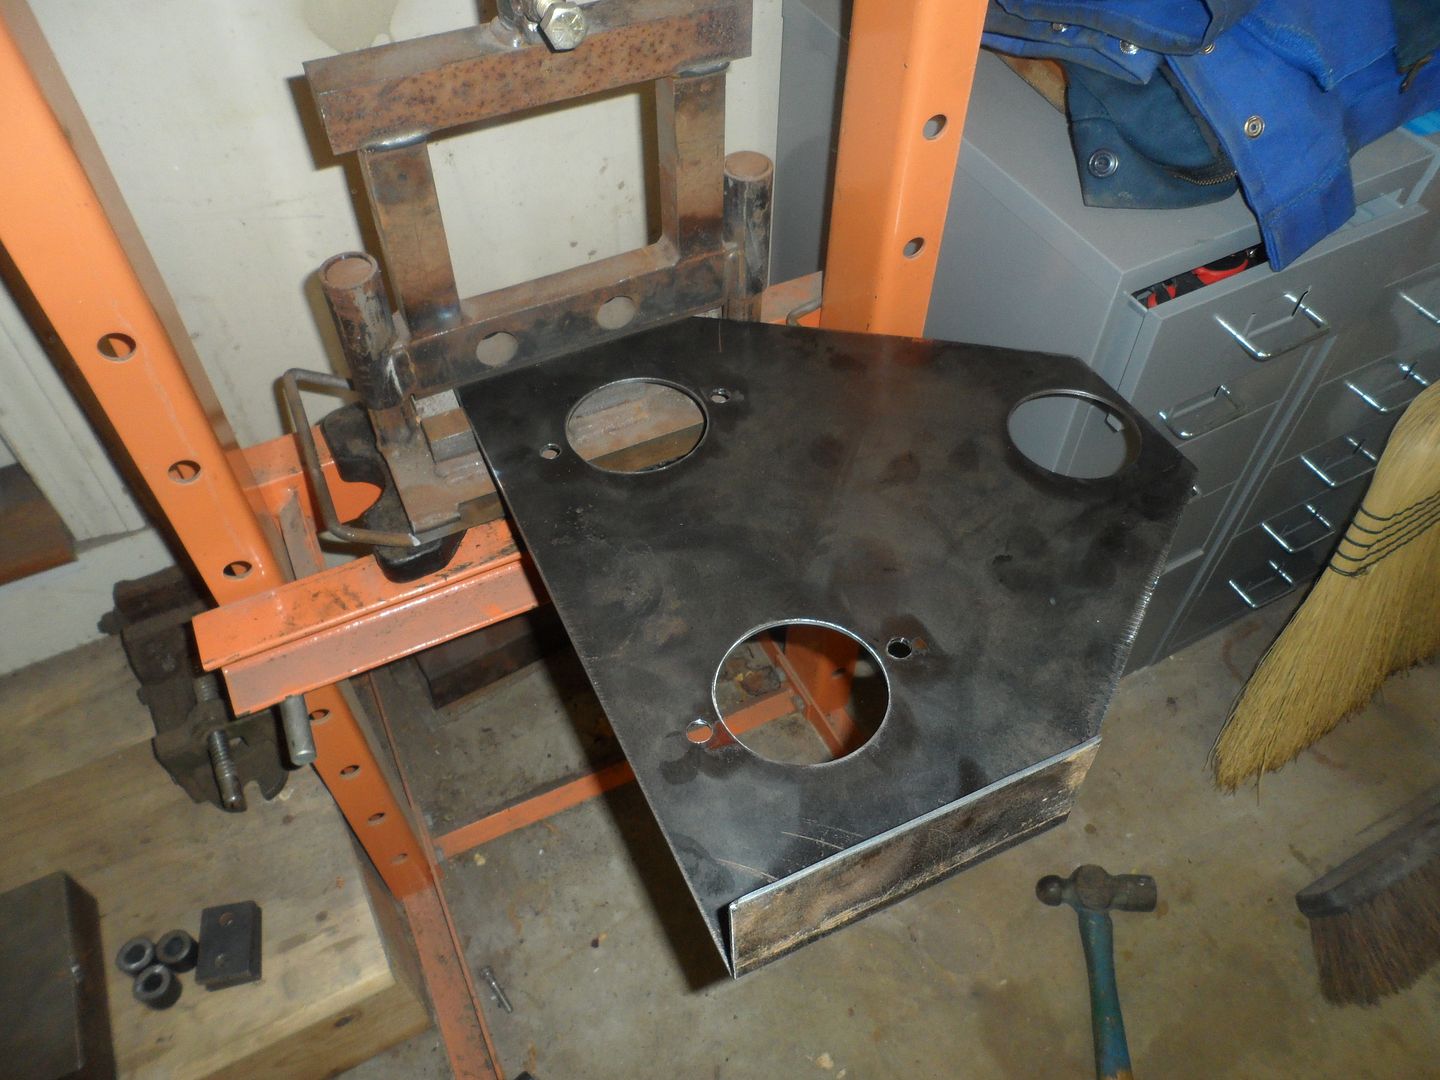
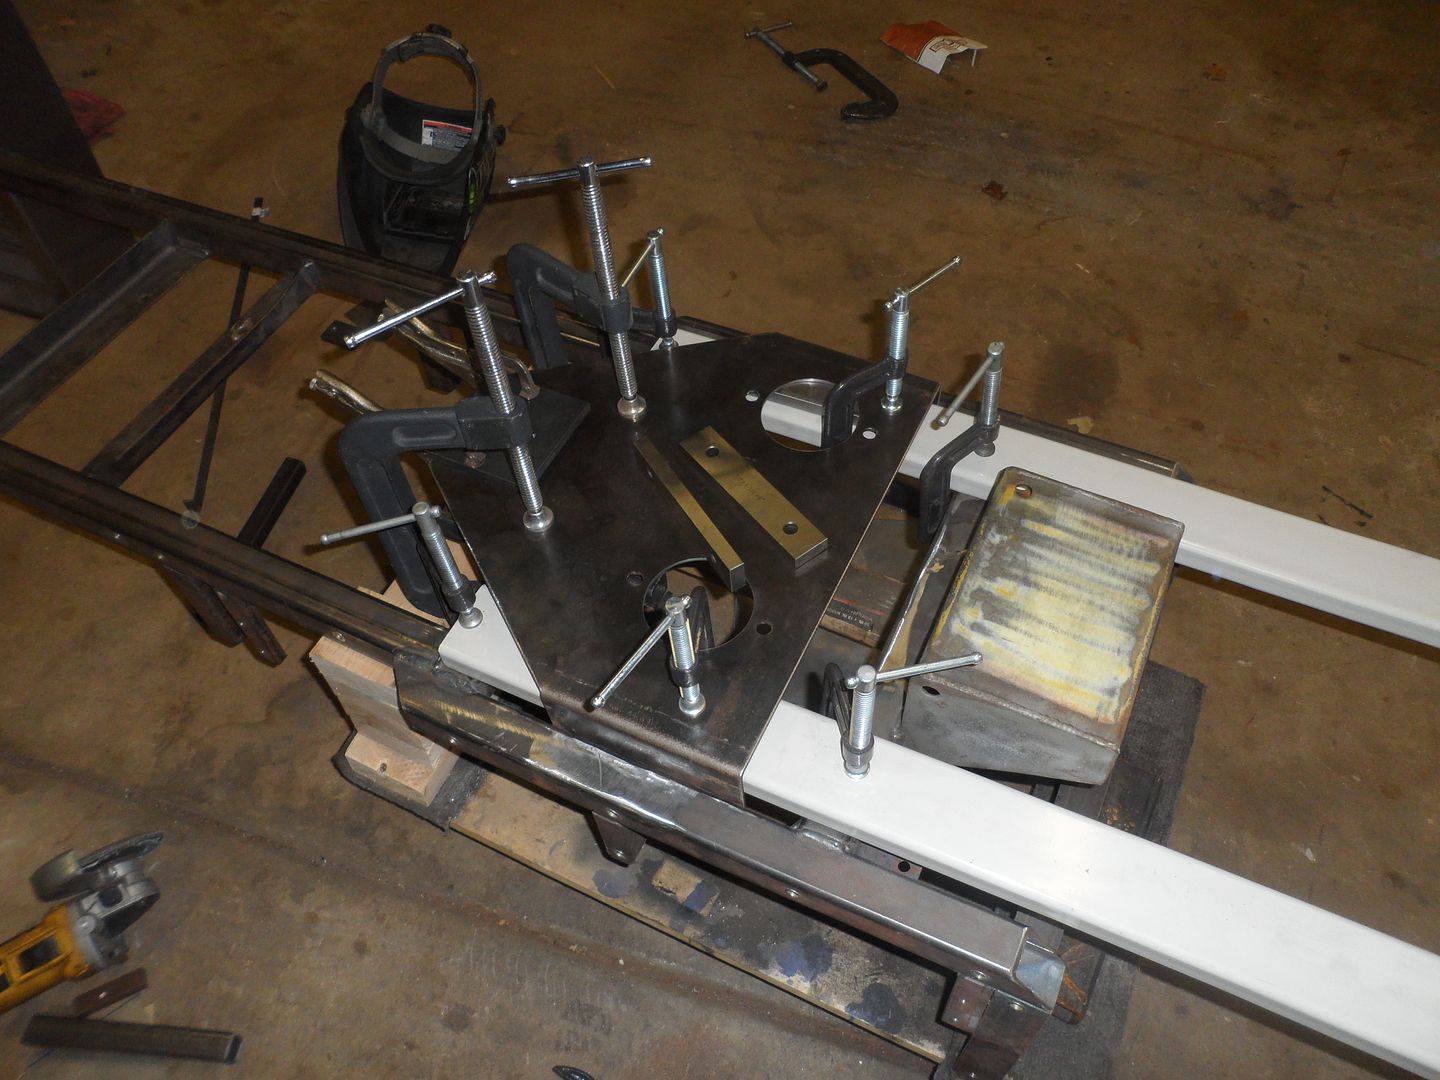
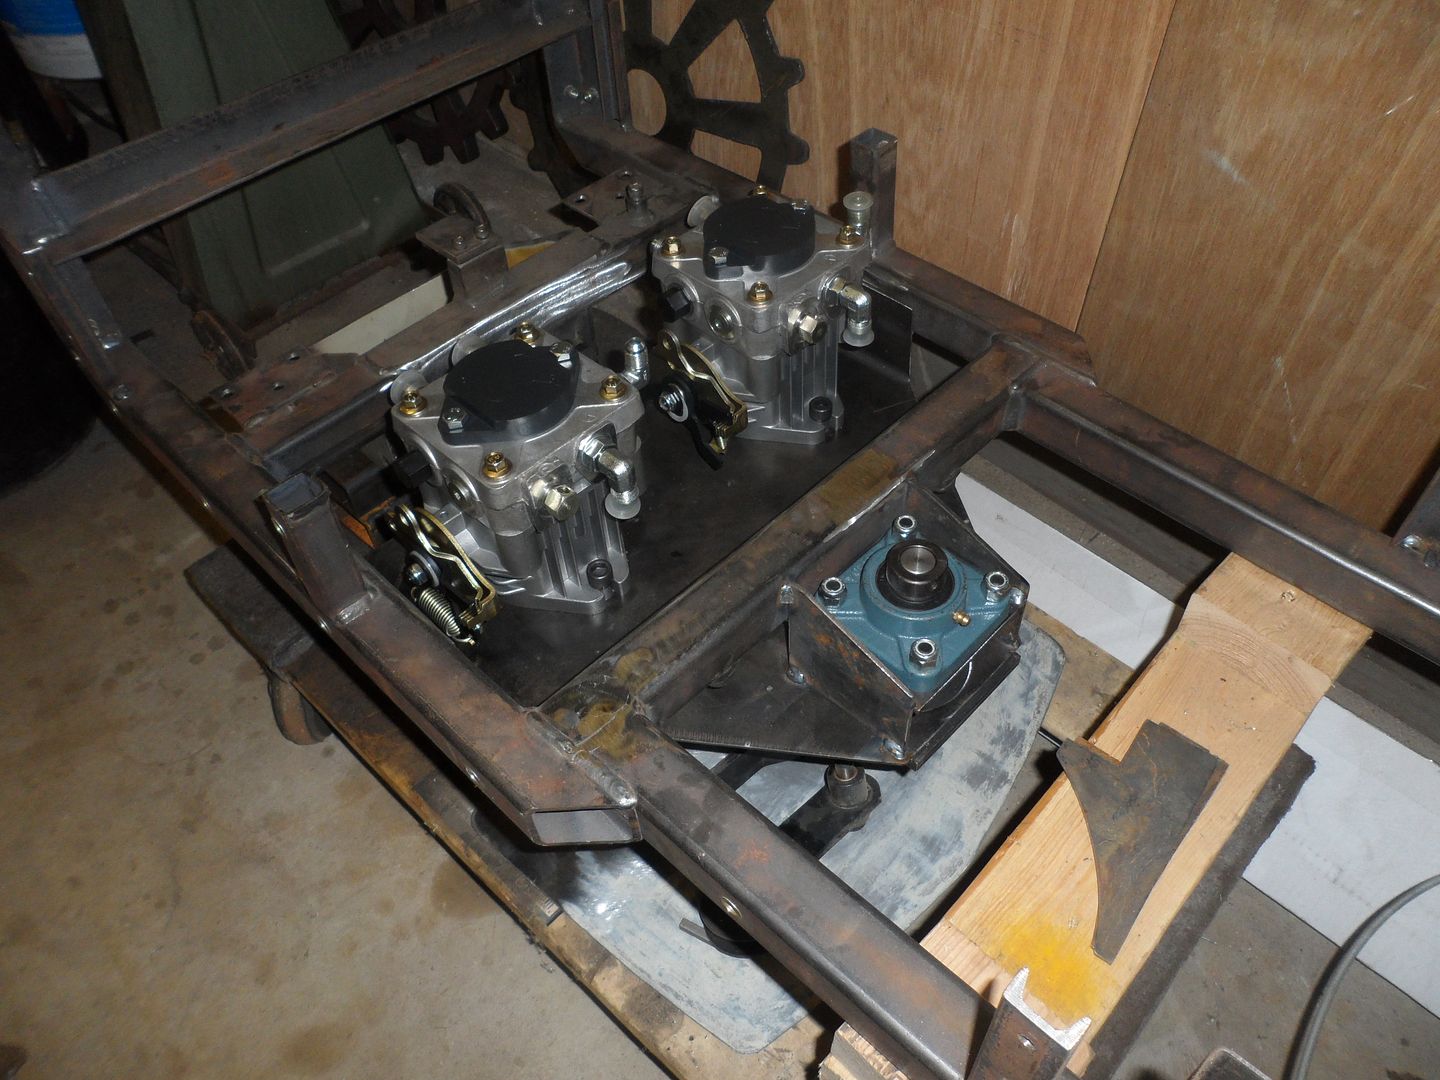
Been working on stuff but nothing exciting. Got a few things from Surplus Center the other day. Pulleys, belts, some fittings etc. Still waiting on the corrected sprockets. My plasma guy has a been a little busy. I want to know one side of the track frame all fits before I build the other.

So I felt like taking a little break.

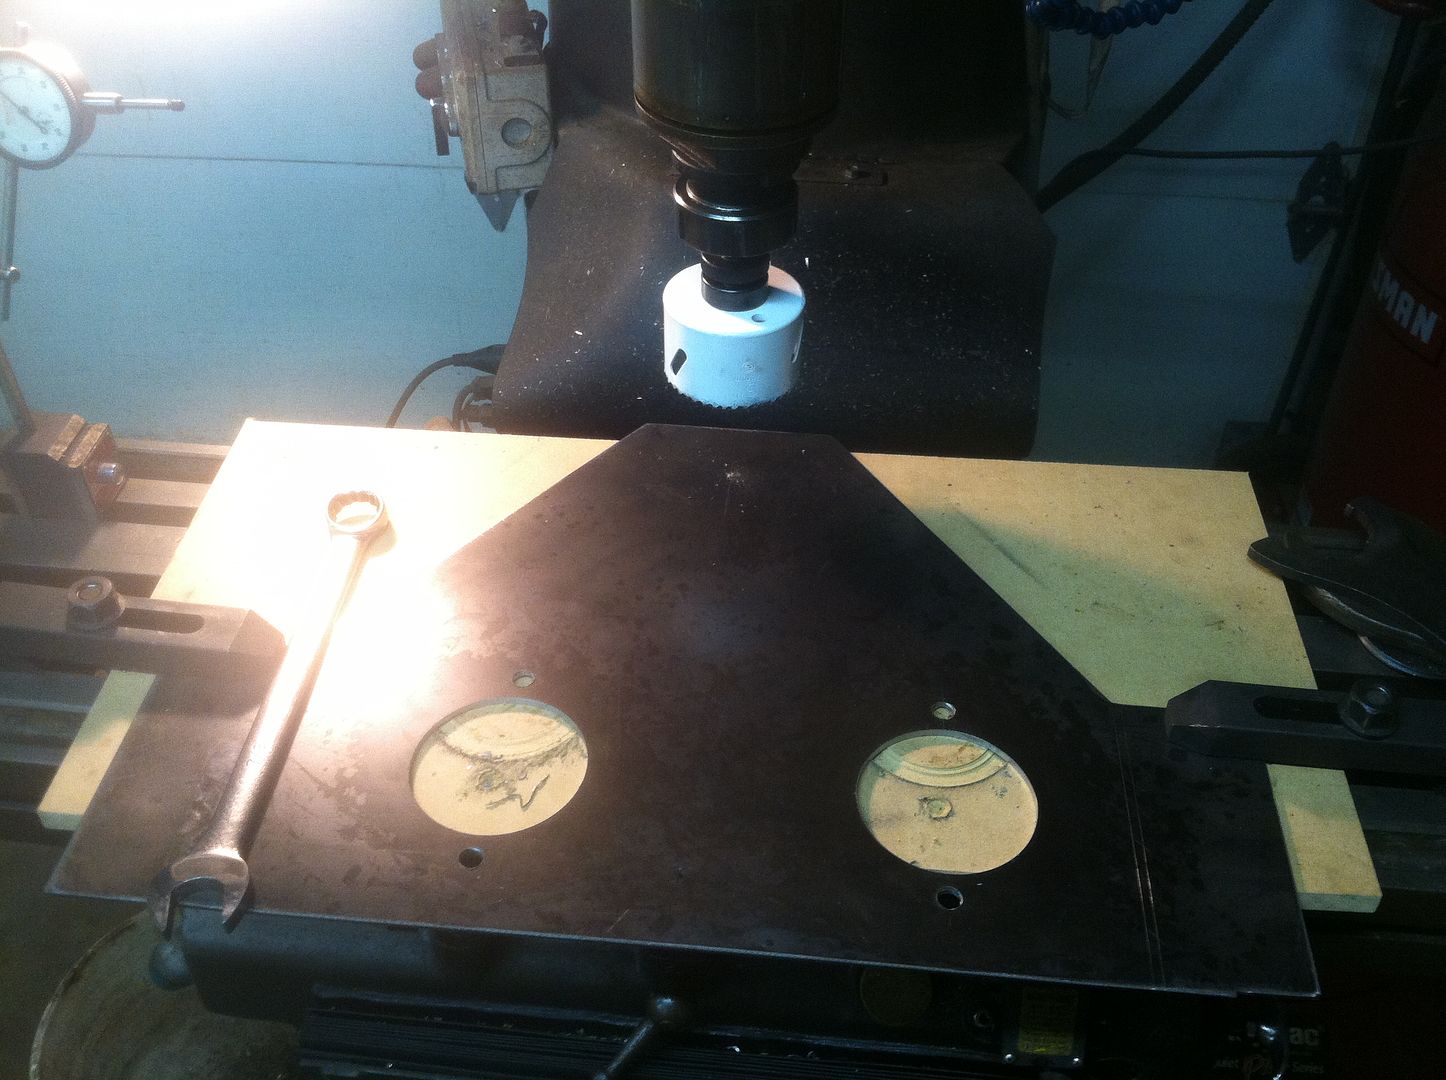
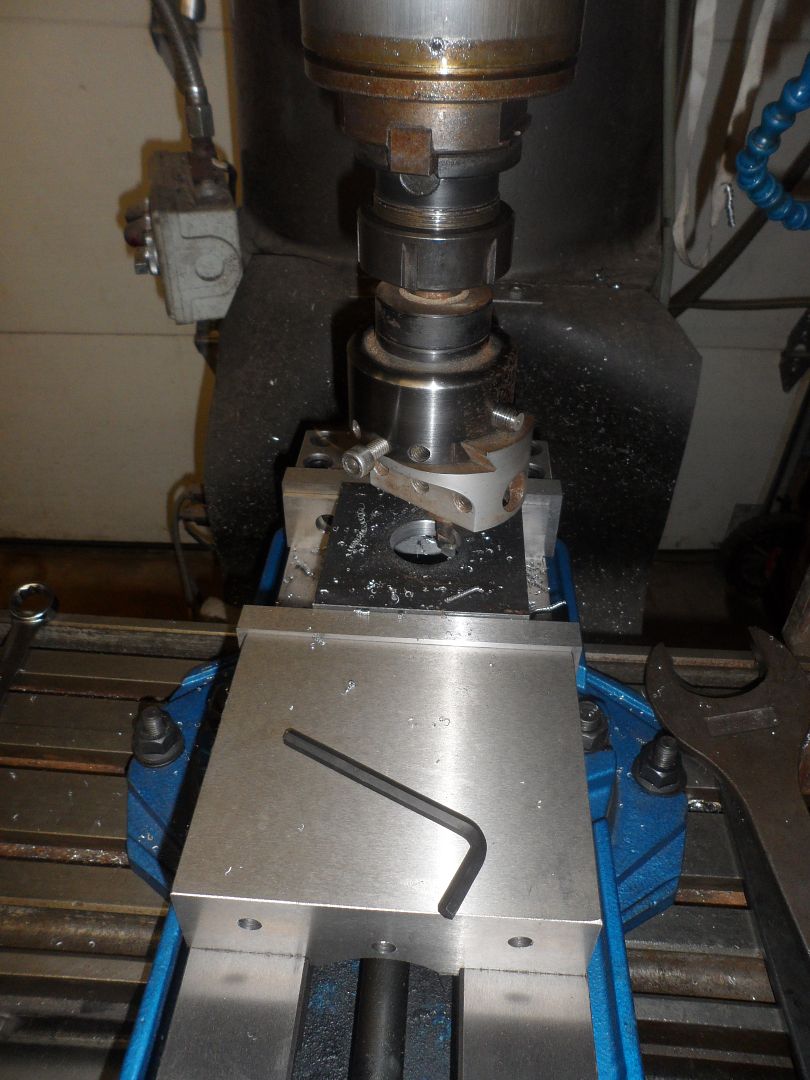
My plasma guys have trouble opening my .dxf files. I don't know why because they look fine in my CAD software. So I decided to try and learn a little more about CNC. And the wife wants a few things for the house so I figured if I have a CNC router, I can make what she wants.

So I built one.

SAM_1054_zpsdec84d0e.jpg


It's a desktop kit but I upscaled it a bit and made a few mods. Maybe I'll make a separate post in the fab forum

So far, I've only done tests with a Sharpie. So far, it works well. And I built it in the basement because I don't have anymore room in the garage. Just need to clean up the wiring, mount the router and move it out to the garage. .

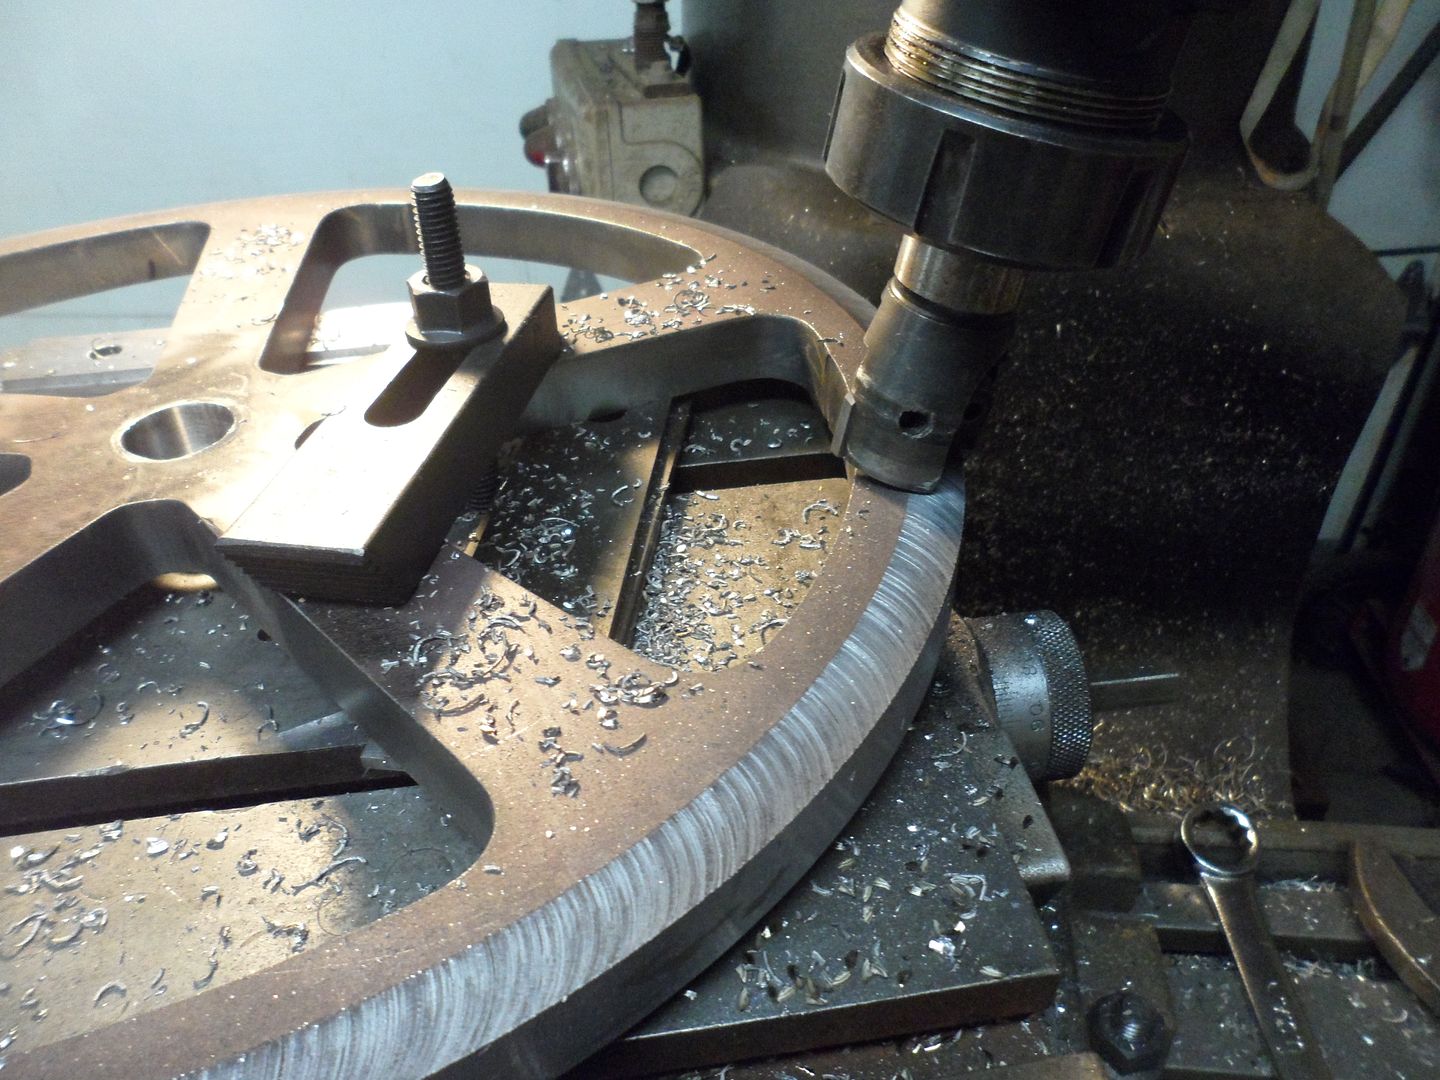
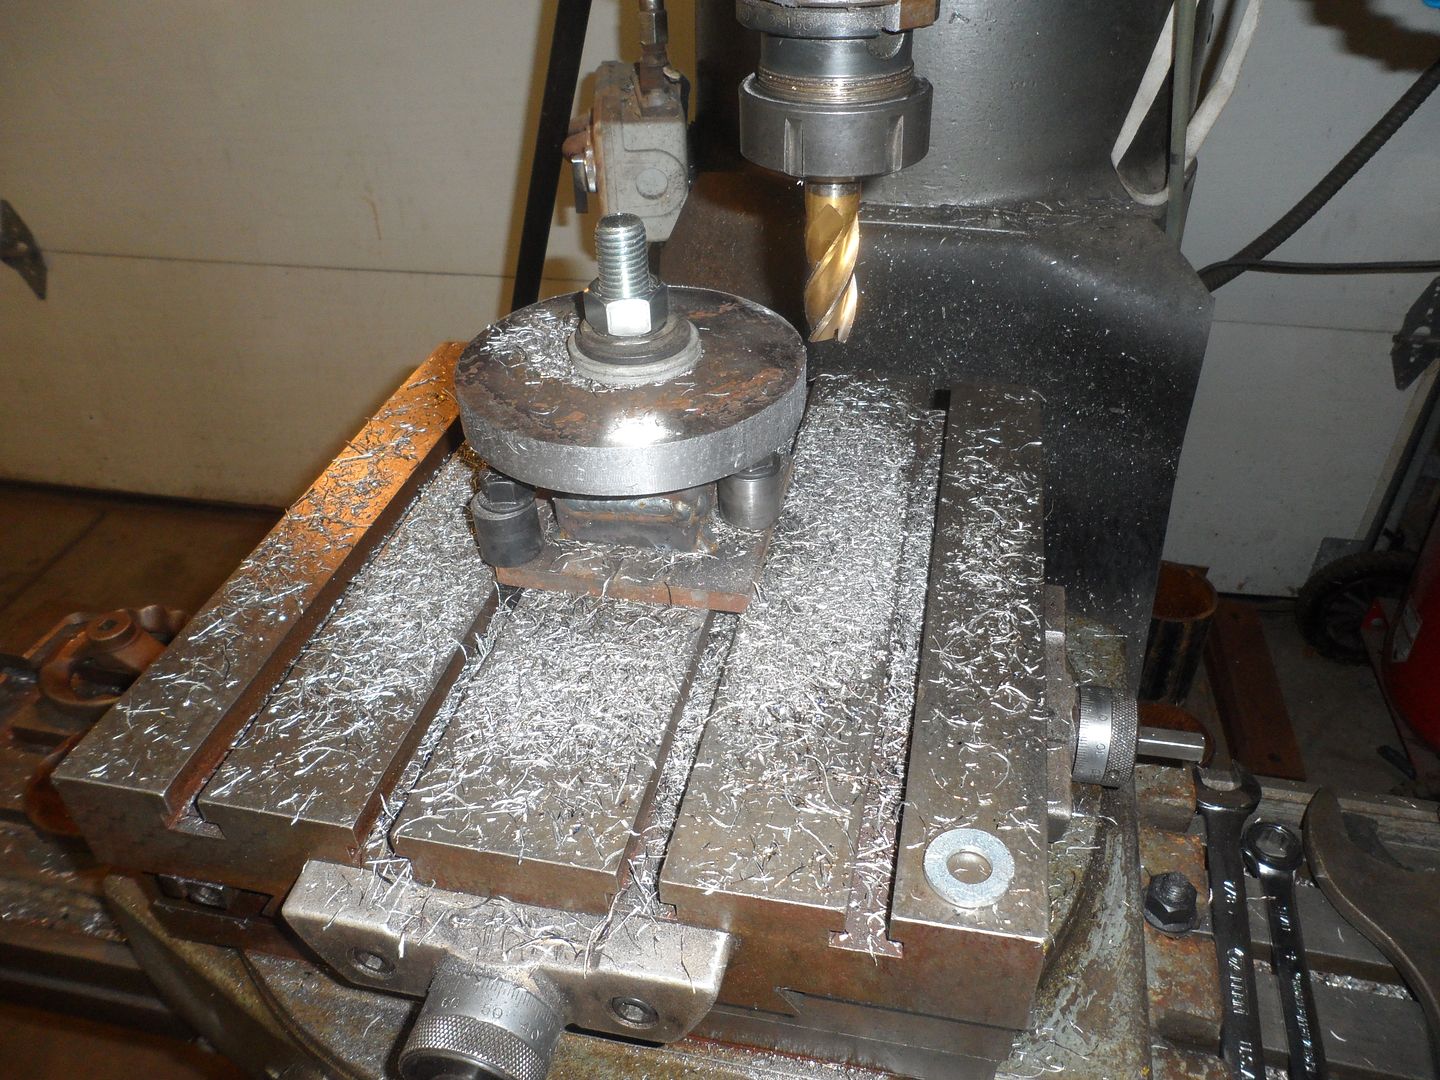
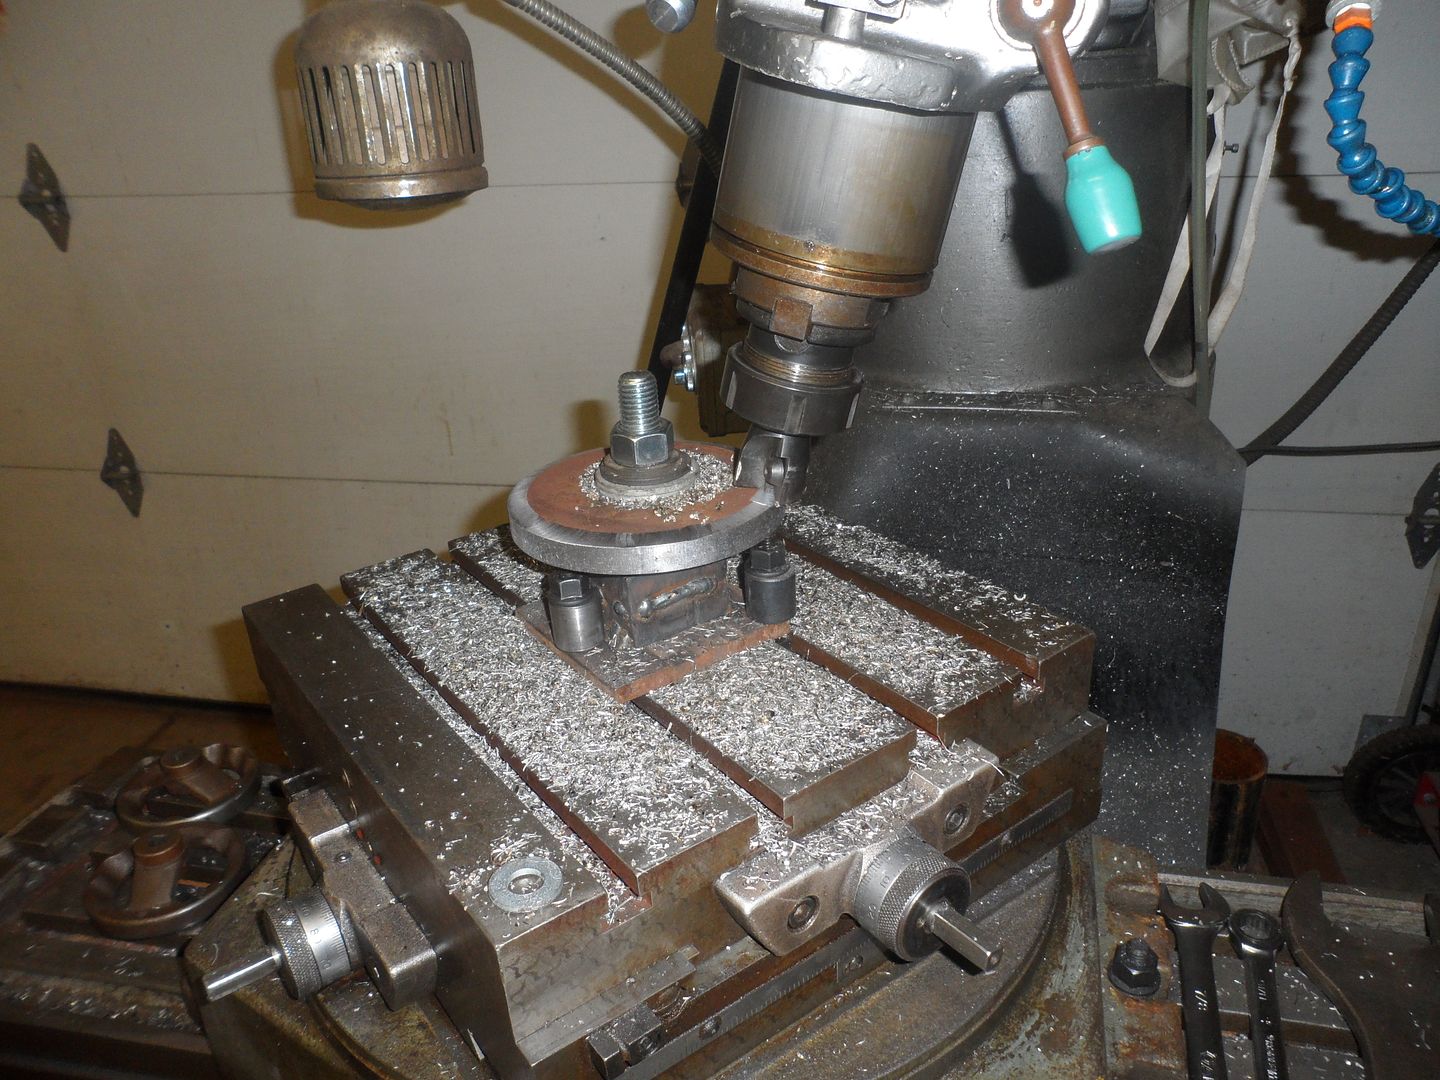
I also have a few plans to use this on some dozer parts.

Now that I see what was wrong with my DXF files (have to export as a 2D dimension instead of straight DXF), I'm hoping my plasma guy can get me in instead of having to fix all of my lines.

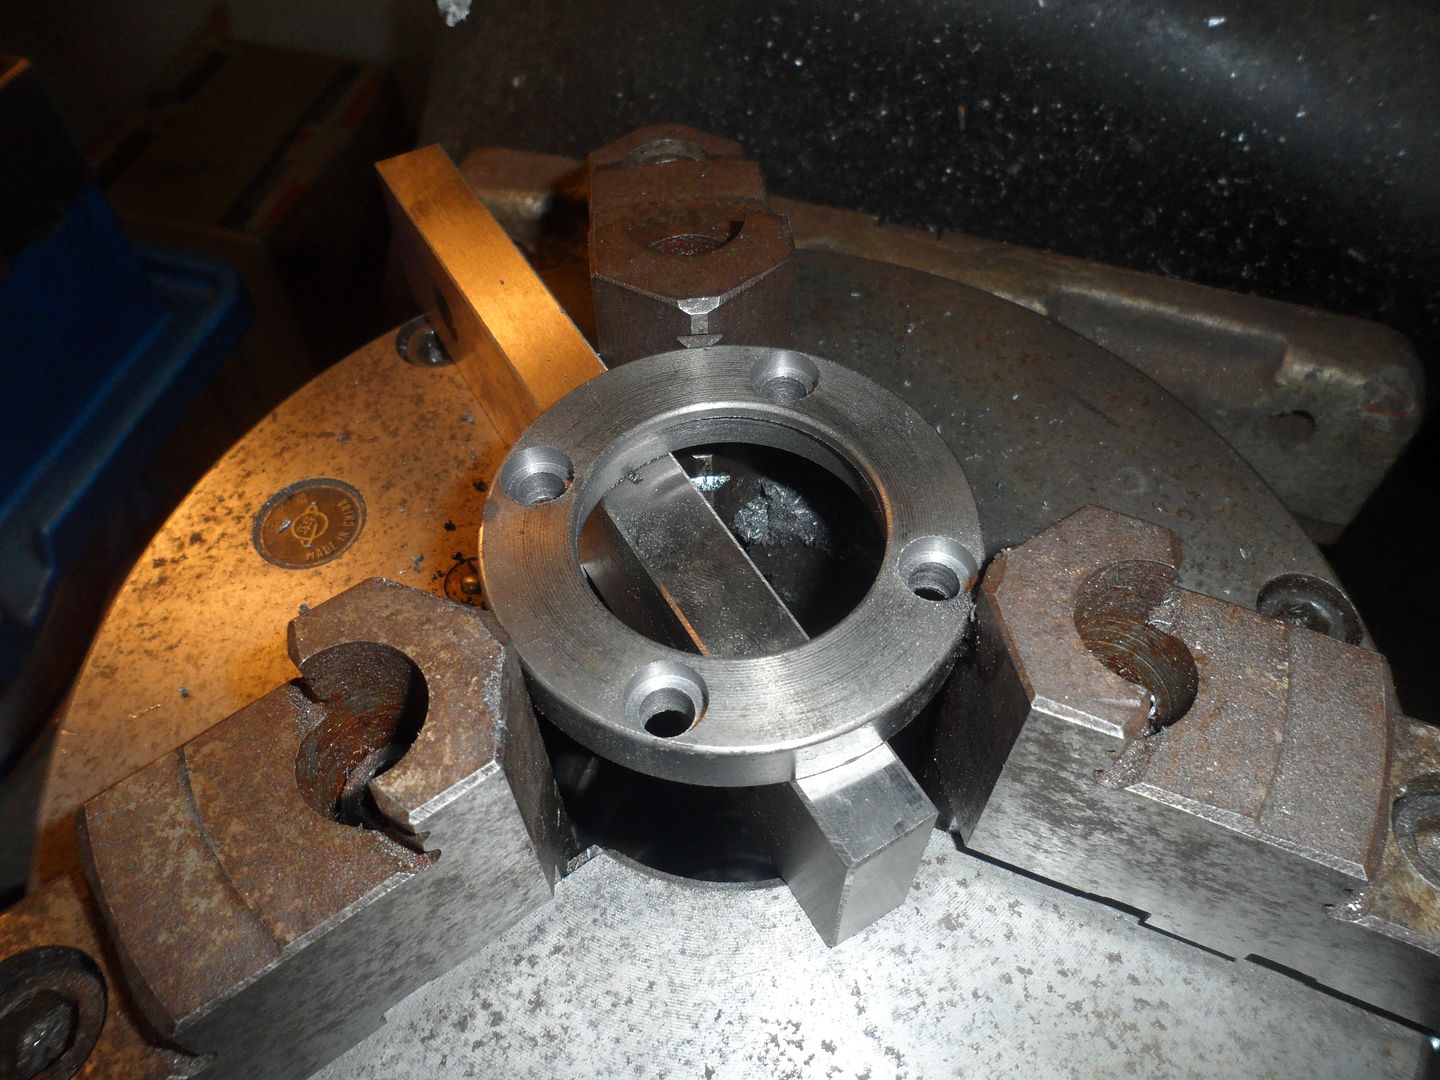
Should get back to the dozer soon.
 
Last edited:

Turbo1Ton

Well-known member
Joined
Dec 23, 2007
Messages
53
I can't remember if I've posted in this thread before or not but your craftsmanship is definitely something to be admired! I'm quietly following this, I check in every couple of days to see if there has been any updates on progress.

I would love to see a build on the CNC router. If you start another thread for that, please drop a link in here so I'll see it as I don't spend too much time perusing the forum.

Thanks,

Jeff
 
To avoid these ads, REGISTER NOW!

carterbeauford

Well-known member
Joined
Oct 2, 2011
Messages
1,550
Location
NW PA
this is the coolest thing I have ever seen, if it hasn't been asked yet, how many hours do you have in it to date?
 
OP
D

dozerbuilder01

Well-known member
Joined
Jun 20, 2011
Messages
180
Location
Far Northwest Burbs of Chicago
Do you ever buy anything ?

Nope. That would be way too boring.

I can't remember if I've posted in this thread before or not but your craftsmanship is definitely something to be admired! I'm quietly following this, I check in every couple of days to see if there has been any updates on progress.

I would love to see a build on the CNC router. If you start another thread for that, please drop a link in here so I'll see it as I don't spend too much time perusing the forum.

Thanks,

Jeff

Thank you. I'll let you know if I do a thread on the router table. I put a Rigid trim router in it this weekend and did some test cuts. So far so good.

I'm just about speechless. What an incredible feat of design and fabrication. I wish you were my Dad.

Thanks but that means I'd need to build another dozer.

this is the coolest thing I have ever seen, if it hasn't been asked yet, how many hours do you have in it to date?

Not sure. I don't keep track. I don't like to know. I do this for fun so I don't worry about it. I did start working on the design around Nov 2011 and started building around Dec 2011.

Got my sample piece of the new sprocket design. This time, it's right. Should have do that the last time. Then I wouldn't have two sprocket shaped paperweights.

SAM_1064_zps6044c061.jpg


Now that I know everything fits, I can start working on the other side while I wait for the new sprockets. This was kind of putting me in a rut. So now things should start moving again.
 

IndyGarage

Well-known member
Joined
Apr 29, 2010
Messages
9,685
Location
Indy
Set up on the rotory table to cut the radius for the drive sprocket opening.
SAM_0971.jpg

.

Holy #$%@#!

Look at the setup for this single radial cut:

You've got the knee all the way down with the rotary table mounted. you've got an XY table mounted to the rotary table, you've got the part mounted to the XY table.

That's a couple hours setup time for me and several thousands of dollars in equipment - all for a clearance cut on a kid's toy????

Honestly how many other guys would have marked it and done it with an angle grinder or a plasma cutter?
 

redware

Well-known member
Joined
Jul 31, 2012
Messages
103
Location
Middle America
That's a couple hours setup time for me and several thousands of dollars in equipment - all for a clearance cut on a kid's toy????

It's pretty clear that this isn't a kid's toy... at least not by most people's standards. Craft made models like this are the things that end up in the museums of the future. I think that the craftsmanship evidenced in this little bulldozer is so impressive that, with the proper appreciation by generations of future caretakers (beginning with "dozerbuilder's" son), this "toy" will be around for a long time to come.
 
OP
D

dozerbuilder01

Well-known member
Joined
Jun 20, 2011
Messages
180
Location
Far Northwest Burbs of Chicago
Honestly how many other guys would have marked it and done it with an angle grinder or a plasma cutter?

A grinder? No way. A plasma cutter? Maybe but until a few days ago, I didn't have one. And I wouldn't be learning anything new if I just used a grinder or plasma. I don't do this for a living. So the set up and mounting the part to the table is a challenge.

It's not about the time I spend making a part if it's how I expected it to turn out. I wanted it to be a perfect arc because otherwise it would look cheap to me. I don't have a steady hand so I make jigs and fixtures for as much as I can to make things look consistent. I want it to look professionally built.

With that being said, you may not like my next post.

I've acquired an old t slot table. It's about 14" x 14". I found it under a pile of parts in a surplus store by my inlaws. I got it for real cheap. I don't have t slots that small so I drilled and tapped 20 3/8-16 holes to use my clamping set. I may eventually open up the slots if I can get a cutter. It's all two tiered so I can use clamps near the edge too.

Reason I did this is because my welding table isn't flat. It's one of the first things I ever made and I didn't have the tools at the time to get the bow out all the way. And now it annoys me. So I've always wanted something flat that I could clamp to so I don't warp parts and to hold things still. Overkill? Probably. But I like it that way.

So the next several posts will be a little repetitive because I'm just building the other side of the track frame. But starting off, it was a lot easier to weld the motor mount block to the tube.

SAM_1072_zps0ebcfde7.jpg


I also ran an end mill down two sides so I can lay out parts with my squares.

SAM_1067_zpse6dfbe15.jpg
 
Last edited:

RonRock

Well-known member
Joined
Oct 6, 2007
Messages
1,171
Location
Iowa, USA
Man, that is a nice setup. I really like the opening so that you can use C-clamps around the sides. Nice flat surface to work on always helps out.
 

Omphaloskeptic

Well-known member
Joined
Oct 11, 2008
Messages
2,346
Location
Ultima Ratio, Wa.
"I've acquired an old t slot table. It's about 14" x 14". I found it under a pile of parts in a surplus store by my inlaws. I got it for real cheap. I don't have t slots that small so I drilled and tapped 20 3/8-16 holes to use my clamping set. I may eventually open up the slots if I can get a cutter. It's all two tiered so I can use clamps near the edge too."


Okay, gotta ask if this acquisition is 'YOU ****' worthy; how much is "real cheap"? Is this one of those serendipitous purchases where you have to hurry out of the store with it so you can load it into the car, start jumping up and down yelling 'WOOO-HOOO!' and doing 'Air-High-Fives' with yourself? Not being a machinist of any sort:dunno:, I have come to associate anything labeled "Precision" or "Machinist" as being priced as if it were made of gold bullion. I'm sure a lot of the guys here who live and breath in 0.0001's" can bestow upon you the proper 'Suckiness' award if you tell us the price you paid. Go ahead - I dare ya'! :evil:
 

V-10 Killer

Well-known member
Joined
Feb 11, 2007
Messages
1,011
Location
Midland, MI
You sir are among the Elite!
I enjoy building stuff, but the skill you show between CAD, CNC, tool/die/jig setup, creativity, improvization, is beyond incredible. Truely a craftsman among men. I can't wait to see what else you show us :)
 

CNGsaves

Well-known member
Joined
Sep 26, 2012
Messages
13,233
Location
KS and OK
Came across your "mini 22 Dozer" build and totally IMPRESSED with the vast skills you're using for this project . . . EXCELLENCE in every way on a shoestring budget!! I was expecting to see a 40' x 60' shop with 5 employees building this thing instead of just you!! Wow.

Most impressive is your end-to-end dedication to do everything, forcing yourself to use CAD daily and integrating that with your fabrication skills. Thus far you've only "out-sourced" a few parts for plasma cutter . . . wow! These skills and experiences surely help you as an engineer for your career path. Hope your work mgmt knows what a great resource they have and putting your skills to use . . . this is great groundwork for moving up the company ladder!!

Got to say that the JOURNEY is proving to be the best teacher . . . even those sprocket paperweights . . . as they all add knowledge. When you're old and gray in retirement, those "sprocket paperweights" can remind you of great days of Dozer 22 build . . . keep those suckers . . . maybe even chrome one of them!!

Couple questions since "mini 22 Dozer" is really turning out to be functional scale version, why not also make it SNOW PLOW ready with some sort of temporary cab on rollbar (ie quick connect tarp and clear heavy plastic windows)?? Build in some electrical source of heat and that would be great for Chicago winters of heavy snow!! Mount a snowblower attachment to front and it becomes even more useful, AND a ready-made revenue source for you and your son in future winters!! The clutch mechanism that would have powered the mower, could instead power the snowblower??

Also, what about adding a front loader attachment? The mini Dozer 22 would then jump in usefulness to $15K to $20K Kubota??!!#!?

This is multi-generational KEEPER you're building. Good luck on rest of build, and keep pics coming. We Love it!!
 
Last edited:

Sunbimmer

Well-known member
Joined
Dec 6, 2011
Messages
2,022
Location
The province of Limburg, The Netherlands
That is truly AWESOME man what you are doing there :thumbup::thumbup::thumbup:

If you want some inspiration or just wanna look at more awesome stuff, check this guy's work...http://doncampbellmodels.com/ be sure to click the archives on the right side of the homepage.
Another link to flickr...http://www.flickr.com/photos/doncampbellmodels/sets/

I think he is a genius, do not only look at the pictures but be sure to read his story too.
 
OP
D

dozerbuilder01

Well-known member
Joined
Jun 20, 2011
Messages
180
Location
Far Northwest Burbs of Chicago
Okay, gotta ask if this acquisition is 'YOU ****' worthy; how much is "real cheap"?

Well, I paid $40. Maybe that's still too much but I felt like I did good. I was looking for tables for a while and found nothing cheap. Other than some scratches and a few banged up corners, there were no drill marks (of course until I put 20 in it). I couldn't run out of there too fast though. It weighed a ton.

Came across your "mini 22 Dozer" build and totally IMPRESSED with the vast skills you're using for this project . . . EXCELLENCE in every way on a shoestring budget!! I was expecting to see a 40' x 60' shop with 5 employees building this thing instead of just you!! Wow.

Most impressive is your end-to-end dedication to do everything, forcing yourself to use CAD daily and integrating that with your fabrication skills. Thus far you've only "out-sourced" a few parts for plasma cutter . . . wow! These skills and experiences surely help you as an engineer for your career path. Hope your work mgmt knows what a great resource they have and putting your skills to use . . . this is great groundwork for moving up the company ladder!!

Got to say that the JOURNEY is proving to be the best teacher . . . even those sprocket paperweights . . . as they all add knowledge. When you're old and gray in retirement, those "sprocket paperweights" can remind you of great days of Dozer 22 build . . . keep those suckers . . . maybe even chrome one of them!!

Couple questions since "mini 22 Dozer" is really turning out to be functional scale version, why not also make it SNOW PLOW ready with some sort of temporary cab on rollbar (ie quick connect tarp and clear heavy plastic windows)?? Build in some electrical source of heat and that would be great for Chicago winters of heavy snow!! Mount a snowblower attachment to front and it becomes even more useful, AND a ready-made revenue source for you and your son in future winters!! The clutch mechanism that would have powered the mower, could instead power the snowblower??

Also, what about adding a front loader attachment? The mini Dozer 22 would then jump in usefulness to $15K to $20K Kubota??!!#!?

This is multi-generational KEEPER you're building. Good luck on rest of build, and keep pics coming. We Love it!!

Thank you. I like the idea of chroming those old sprockets. Sometimes, screwin up is the only way to learn. As for the plow, I've always had intentions of adding one since the beginning. I just haven't focused much on the design. I have been working on it a bit though lately. After much thought (which is still subject to change), it will be hydraulic up and down and manual swivel. And it will be easily removable. So other attachments may come later. Tryin not to make it over done though. I keep telling myself it's just for my son. I don't have any land so it's not like I'd need it to do a lot of work.

I did figure my son could go plow the neighbors driveways in the winter and make a few bucks. I told my wife I'll have to build one of those mini semi truck go karts with a trailer so he can haul it to the job site. She just walked away.

That is truly AWESOME man what you are doing there :thumbup::thumbup::thumbup:

If you want some inspiration or just wanna look at more awesome stuff, check this guy's work...http://doncampbellmodels.com/ be sure to click the archives on the right side of the homepage.
Another link to flickr...http://www.flickr.com/photos/doncampbellmodels/sets/

I think he is a genius, do not only look at the pictures but be sure to read his story too.

I have seen that guy. He does some amazing work with very little info or photos. I wish he'd detail his builds or his shop a little more. I'm curious how he does somethings. Hell, maybe he has and I just missed it. Looks like he does great paint work too. I wonder where he keeps all of those after he's done. Some of them are huge!

Not much. Finished surfacing the motor mount block and bored the two stepped hole. Also drilled and tapped the 4 holes. Sorry for the crappy cell phone pic.
photo9898_zps06a07cda.jpg


That is all for now.
 
To avoid these ads, REGISTER NOW!
Top Bottom