To avoid these ads, REGISTER NOW!

Mark's Monster Garage....3800 sq ft

OP
I

IGO2XS

Well-known member
Joined
Apr 24, 2012
Messages
1,415
Location
Sarasota, FL
The receiving department has been pretty busy here at the monster garage. Packages are arriving daily for the Chevelle and the Nova. This is just a few of the packages that have arrived......its like Christmas everyday here. It funny how one develop's a friendship with the UPS and FedEx drivers. My credit card has taken a pretty serious hit in March. We had some big parts arrive for the Nova sitting in the background.......new front fenders and new door shells. I will roll the Nova out in the next few days and take some pictures.


DSC_0474.jpg


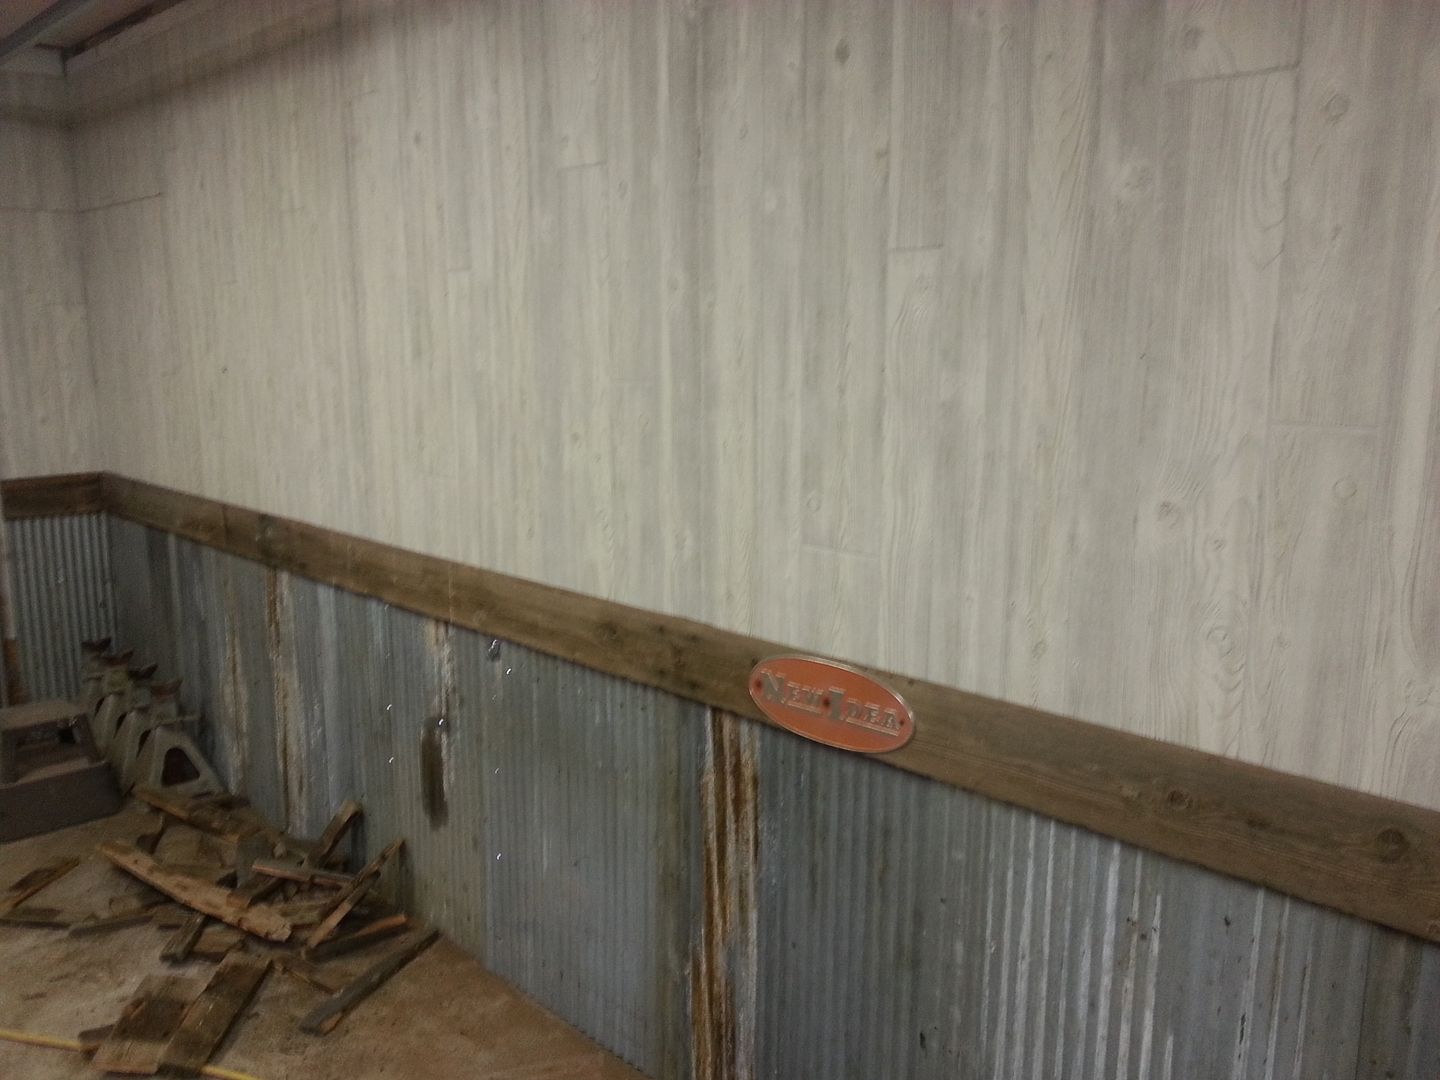
A few guys showed up today from the stucco crew. I think one of the guys spent more time outside smoking a cigarette than working. They are installing the 3/4 inch stucco bead and the wire lath. They will finish tomorrow and then stucco on Monday. I picked up some nice corregated metal from Lowes yesterday and hope to get a few pieces cut and throw some up on the wall just to see how it looks. I am going to try wiping muratic acid on one of the pieces to try to weather it. I want to stay away from the new shiney metal look.

DSC_0475.jpg


Last week we broke the rules aorund here. We took in another small project. Its not that we dont have enough on our plate!! Our friend Shawn who owns the 66 Nova brought his operations manager over here with a favor. He has this 44 Willys jeep body that needed a quick paint job. Its quite a project and as the body is fiberglass it needed quite a bid of reinforcing. The cool thing about this jeep is it sits on a custom chassis and has 44 inch mud tires on it. :rocker: I cant wait to share the photos of this bad @@s jeep when its finished.
DSC_0468.jpg

DSC_0463.jpg


We had the Chevelle rolled outside and I thought I would snap a photo. We had a set back last week when a laborer who works for me fell on one of the brand new fenders:( It was a major dumb@@s attack as he put a serious dent in the fender. It could have been fixed but was going to require bondo to get the lines back in the fender. With this car having nearly all new metal had no choice than to order a new fender........$300 plus $150 shipping. Without both front fenders Bob can finish fitting the doors and hood.


DSC_0479.jpg
 
To avoid these ads, REGISTER NOW!
OP
I

IGO2XS

Well-known member
Joined
Apr 24, 2012
Messages
1,415
Location
Sarasota, FL
Just got this picture texted to me from the Monster Garage............Deannna is welding the rockers on the 72 Blazer we are working on:rocker: Looks like Bob's job is in jeopardy.......she's alot better looking than he is!!!:D

EC9CAD32-118D-45B9-9BB3-9273E38E9C0E-8527-000005753CC6BE6A.jpg
 

vtec?lol

Well-known member
Joined
Feb 14, 2013
Messages
84
Location
DFW
Man this is just great. Really really inspiring!
I sent you a PM. I noticed you were in the rental business and would like to know more if you'd care to share.
My favorite has to be the 'Burb. That contrast... Sekksie stuff
 
OP
I

IGO2XS

Well-known member
Joined
Apr 24, 2012
Messages
1,415
Location
Sarasota, FL
She can weld TOO!!! damm poor Bob wonder what else she might do? :evil: mind you I'm just an old car guy. :lol_hitti

I would hate to be the guy who would make any inquiries like that........I hear you do not want to mess with a chick who can weld:lol:

P.S. By the way, she checks the forum all the time to see if I am behaving myself. Dont get me in any more trouble than I already get myself into!!;)

We picked up the Chevelle frame today from the powder coating shop. Wow, it looks nice. As some of you may remember we sandblasted the frame from our last project and painted it right here in the shop. It was way too much work!! It was pretty nice dropping off a rusty old frame and getting back a nice shiny one. It cost $450 to sandblast the frame and 4 coil springs......it was a deal.

DSC_0482.jpg

DSC_0483.jpg
 
Last edited:

Omphaloskeptic

Well-known member
Joined
Oct 11, 2008
Messages
2,346
Location
Ultima Ratio, Wa.
Just got this picture texted to me from the Monster Garage............Deannna is welding the rockers on the 72 Blazer we are working on:rocker: Looks like Bob's job is in jeopardy.......she's alot better looking than he is!!!:D

EC9CAD32-118D-45B9-9BB3-9273E38E9C0E-8527-000005753CC6BE6A.jpg


Okay, Deannna! YOUGOGIRL!

Mark, maybe you should set her up with a cutting torch and let her go at the circular sign for the stucco wall. She might be a 'closet artist' with it as she cuts the letters out of a metal disc. You could then mount it up there on some generous standoffs and wedge some cool 'back lighting'. Throw a circular tinted (?) mirror on the wall between the lights and the metal sign and you've got a snazzy sign that's almost as good as paying someone to create the sign in neon.

Sorry, I sometimes get carried away - something I call J.A.W.I.F.O. (Just Another Wacky Idea From Omphaloskeptic)! :evil:

P.S. - Give her a 'Carburizing Flame' on the OA rig and let her 'antique' those corrugated metal panels just for the hell of it! Some bluing, some oxidizing, some shiny, some carbon - OH WHAT FUN!
 
OP
I

IGO2XS

Well-known member
Joined
Apr 24, 2012
Messages
1,415
Location
Sarasota, FL
I thought I spied a Blazer in the background of one of the photos... do tell!


OK well we are busted. Yes, we have a few other things in the shop and I didnt want to bore you guys. I had a friend bugging me about his Blazer. At first we were just going to fix a few rust spots. Next thing you know Bob and the guys had this whole truck stripped down to bare metal. It is an Arizona truck and everything was great except for the rockers. As you will see in the pictures they were cut out and replaced with new metal. The truck leaves the shop Monday completely in primer. After the motor gets done by others we get it back for interior refinishing and a complete paint job.

5C65236B-F45A-4FE9-B45E-0D5DA39FF98D-121-00000001F8CB5D46.jpg
DSC_0440.jpg

DSC_0438.jpg

DSC_0428.jpg

DSC_0424.jpg


FROM THIS


03C59CB9-43E1-46DF-9CA3-BB6A832D487F-121-000000021909ED3E.jpg


TO THIS


DSC_0466.jpg


TO NEW INNER AND OUTTER ROCKERS


DSC_0465.jpg
 

Bob Heine

ALLIANCE MEMBER
Joined
Oct 24, 2009
Messages
10,708
Location
Boca Raton, Florida
We picked up the Chevelle frame today from the powder coating shop. Wow, it looks nice. As some of you may remember we sandblasted the frame from our last project and painted it right here in the shop. It was way too much work!! It was pretty nice dropping off a rusty old frame and getting back a nice shiny one. It cost $450 to sandblast the frame and 4 coil springs......it was a deal.
Mark,
Just another thing that makes me jealous. A friend lives in Inverness, FL and had his '67 Chevelle frame, front and rear suspension components blasted and powder coated for $500. On my side of Florida, the 'bargain' powder coater offered to do my already stripped and sandblasted pair of stock upper control arms for $75. I guess there's a reason they call this the Gold Coast.
 

FunkyfullWidth

Well-known member
Joined
Oct 3, 2011
Messages
1,238
Location
Three Rivers, ma


That picture made me cringe when I saw it... I'm assuming it's on the locks but still.

But you got a great looking operation going on there.. Everything about it screams clean and classy, from the workshop, the cars, and to the home. Are you still looking for a helper? I might be up for a relocation, most people would do anything to work for a person with your type of talent and drive.
 
OP
I

IGO2XS

Well-known member
Joined
Apr 24, 2012
Messages
1,415
Location
Sarasota, FL
That picture made me cringe when I saw it... I'm assuming it's on the locks but still.

But you got a great looking operation going on there.. Everything about it screams clean and classy, from the workshop, the cars, and to the home. Are you still looking for a helper? I might be up for a relocation, most people would do anything to work for a person with your type of talent and drive.

Yes the lift was locked into place. :D Thanks for the offer. If you have been following you will know Deanna and last week her brother started helping out in the garage a few weeks ago so we are in pretty good shape right now.
 
OP
I

IGO2XS

Well-known member
Joined
Apr 24, 2012
Messages
1,415
Location
Sarasota, FL
Update on the garage improvement project. The stucco crew showed up today and got the scratch coat on the exterior of the build room. About the time they showed up I got this brainstorm:lol: Since I am going for the old building look why not have some old style brick on the side. We had some real brick veneer's laying around in the garage so we stuck them up on the wall randomly. Tomorrow when the top coat of stucco goes on they will stucco around them. It is suppose to look like the plaster is falling off the wall and leaving exposed brick. We did some of this inside our house and it looks pretty cool.

You will also notice in the first picture I got the door to the build room hung on Sunday. It is an 8 ft tall door and it has a big glass window in it.

Yes, things are a little bit of a mess because of the construction. This place was all cleaned up until the stucco guys showed up and we had to start moving things around. I go crazy when the garage is a mess. It just gives me a feeling of disorganization:sad:

p.s. stucco guys stuccoed a nice bow tie on the wall!!


DSC_0490.jpg

DSC_0491.jpg

DSC_0492.jpg
 

Wingnut65

Well-known member
Joined
Apr 21, 2010
Messages
3,170
Location
Tampa Bay, FL

You even detailed the staircase going to the attic storage! :shocking: :shocking: You haven't missed a thing!

You know, I didn't notice anything in your shop that was finished to an acceptable condition. Everything was as near perfection as can be had and the stucco and bricks just show that level of quality continues.

And, Deanna really does excellent work. I sure don't want to get on her bad side, again.
 
OP
I

IGO2XS

Well-known member
Joined
Apr 24, 2012
Messages
1,415
Location
Sarasota, FL
I had the stucco crew back this morning for the final coat. Last night I made sure to seal the brick with an acrylic sealer. They are real brick and from past experience if you don't seal them the mortar will stick to the face and it is hard to get off. The stucco guys had never done anything like this (plaster over brick) look before so I hung around with them and showed them what I wanted. I was concerned about getting the right look. They built the mortar up so we could wipe the mortar across the face of the brick on the edges to get the right effect. We ended up putting a rough texture on the stucco to make the wall look older. When we finished I picked up some grout bags and we grouted the brick. If you will notice on some of the bricks we just squeezed the mortar in the joints and didnt strike them to give it that antique look.

It was one of these projects where I wasnt sure how it was going to turn out but I must say it looks awesome. I couldnt be any happier with the look. Next i will start working on the corregated metal on the top. I will also be bringing in the faux dude here in 10 days to antique the stucco.


DSC_0505.jpg

DSC_0508.jpg


DSC_0509.jpg


DSC_0512.jpg


Here is a picture of the build room. As you can see we have a nice coat of white shiny paint on the ceiling and one wall. Hope to finished painting the other walls soon. It looks a lot better in there. I am liking the new door more and more every day.
DSC_0507.jpg


Tomorrow Bob will be painting the 44 Willys jeep satin black. Whoa, its a tuff job to paint satin because there is no sanding or buffing to take out any dirt or defects in the paint. We will be cleaning the room and hope for good results.
We used to screw a tarp over the opening but now we have the new improved look I am going to upgrade our filtering system. The 2 x 4's are frame to the same size of the opening, around the front I picture framed some 1 x 3's as a stop so when we push the frame in the opening it acts as a stop. Five 16 x 20 filters will line the bottom. We will use a fixed tarp or heavy plastic to close in the top.


DSC_0510.jpg
 

Omphaloskeptic

Well-known member
Joined
Oct 11, 2008
Messages
2,346
Location
Ultima Ratio, Wa.
That stucco/brick combination really does give the build room that aged appearance; looking great!

What color(s) are you going to use on the stucco? I wonder if you can 'age' the wall even more by using multiple colors and 'rag' painting for effect.

Have you decided on any ideas for the round sign going up the stairs?
 

Attachments

  • rag painting.jpg
    rag painting.jpg
    62.1 KB · Views: 58

tncumminsguy

Well-known member
Joined
Feb 26, 2012
Messages
332
Location
Nashville,TN
I love your attention to detail along with your taste in vehicles and their mods. Some people make stuff to "loud" and to me that just draws away from the vehicle, you do some awesome work.


Badass blazer! I really want one of that era badly
 

Carbine

Well-known member
Joined
Apr 2, 2013
Messages
66
Location
Tyler, Texas
Mark,
This has been said before and I'm sayin' it again. Your thread is what made me decide to join this forum.
I really liked the way the Camaro project turned out. I guess I am the type that prefers a mild resto-mod, so I was really glad to see the way you finished out the Camaro.
I also like Mopars! You hit it right on with the Dart. A perfect blend of muscle and factory!

I'm working on a '38 Plymouth Pickup. You think that Dart was expensive? Boy, this truck is going to bankrupt me!

Keep the Monster Garage crankin' and keep posting !
 
To avoid these ads, REGISTER NOW!
OP
I

IGO2XS

Well-known member
Joined
Apr 24, 2012
Messages
1,415
Location
Sarasota, FL
:thumbup:The brick and stucco look great...really achieves the old look.

thank you very much. I am very happy with our start on it.

That stucco/brick combination really does give the build room that aged appearance; looking great!

What color(s) are you going to use on the stucco? I wonder if you can 'age' the wall even more by using multiple colors and 'rag' painting for effect.

Have you decided on any ideas for the round sign going up the stairs?

great questions and now you are making me think. I have a guy who will seriously make the wall look old. We did some inside our house and it looks cool. Maybe we'll put some cracks in.........this guy is talented. I really need to figure out the round sign. I am going to get on the internet and try to borrow an idea from a old sign. I think I want it to say something like Hot Rod Shop or something similar????

I was just curious. But what is your other job that allows you to afford such awesome toys, and build a sweet garage like that?.

I am humbled by your question....I will say I dont do anything fancy like a vice president or CEO:lol: I am just a blue jeans wearin redneck!


I love your attention to detail along with your taste in vehicles and their mods. Some people make stuff to "loud" and to me that just draws away from the vehicle, you do some awesome work.
Badass blazer! I really want one of that era badly


I think the key is keeping customizing clean. Its great to have a good idea but dont over do it. The Blazer is a cool truck. I am hoping we can get back on my 69 C10 pickup soon.


Mark,
This has been said before and I'm sayin' it again. Your thread is what made me decide to join this forum.

I also like Mopars! You hit it right on with the Dart. A perfect blend of muscle and factory!

I'm working on a '38 Plymouth Pickup. You think that Dart was expensive? Boy, this truck is going to bankrupt me!

Keep the Monster Garage crankin' and keep posting !

Glad you joined up!! When I came home tonight I saw the neighbor driving the Dart down the street. It really did look good going down the road and it really sounds awesome. He wanted to take me for a ride but I didnt have time tonight. Your pickup sounds like a great project. Would like to see a picture of it sometime. You have a thread going?
 
OP
I

IGO2XS

Well-known member
Joined
Apr 24, 2012
Messages
1,415
Location
Sarasota, FL
I know it aint pretty but this is currently the "bone yard" behind the garage. On the right is the Chevelle convertable top frame and the left is.....well.......those bed frames we use around here:lol: You can also see the wheels we used to dolly the Camaro around and the old radiator. Today I started cutting the corrugated metal to use on the upper part of the build room. For you safety nuts I will admit I used a 4 inch angle grinder with no guard and used a 8 inch metal blade. This metal will be installed in the 4 foot area above the stucco you still see in plywood. When I was done I sprayed the panels with muratic acid and I am going to let them sit out for a week and see if I can grow some rust before I put them up.

A625FE87-C86E-4107-8D7C-6F0B282FC2BE-145-00000014072DB046.jpg


I snapped this picture through the new door into the paint room. I guess it is pretty obvious what Bob is painting;) There is no missing the 44 Willys front grill and hinges. The body was painted earlier in the day.

A9672FF7-E4BA-4ADD-B84B-86430D96C1B4-145-00000014017A11BF.jpg
 

FunkyfullWidth

Well-known member
Joined
Oct 3, 2011
Messages
1,238
Location
Three Rivers, ma
I'm curious about this willys... It looks like a 7 slat grill, making it civilian. Also the body looked like a cj-5, but maybe an aftermarket body, or possibly even an m38-a1 due to the tailgate opening being non existent. But I think my guess will still with an aftermarket cj-5 body due to the lack of a fuel filler access on the body drivers side.

Either way... I think we (as in I at the very least) need some more on the willys!
 

MSG C5

Well-known member
Joined
Jan 11, 2011
Messages
193
Location
Sarasota Area
Whew! I just read through the 50+ pages of this build. Complete awesomeness! I really don't know what to say in addition to what's already been said. :dunno:

I also live in the Sarasota/Lakewood Ranch area and just signed up for the cookout.

I look forward to meeting you and seeing this great garage in person. :rocker:
 
OP
I

IGO2XS

Well-known member
Joined
Apr 24, 2012
Messages
1,415
Location
Sarasota, FL
I hope this will all be finished in time for the party :thumbup:

I work better with deadlines......it will be ready;)

Whew! I just read through the 50+ pages of this build. Complete awesomeness! I really don't know what to say in addition to what's already been said. :dunno:

I also live in the Sarasota/Lakewood Ranch area and just signed up for the cookout.

I look forward to meeting you and seeing this great garage in person. :rocker:

Awesome I am glad you are coming. We seem to be gaining some speed on area members of GJ. I may need to order some more food. Just bring what your drinking and we will have the rest.


I'm curious about this willys... It looks like a 7 slat grill, making it civilian. Also the body looked like a cj-5, but maybe an aftermarket body, or possibly even an m38-a1 due to the tailgate opening being non existent. But I think my guess will still with an aftermarket cj-5 body due to the lack of a fuel filler access on the body drivers side.

You are right on the aftermarket cj-5 body. This Willys is a guys mud toy. I have asked him for some photos of the Jeep sitting on the 44 inch tires. I will get some photos of the finished product tomorrow because he is picking it up in the afternoon.
 
OP
I

IGO2XS

Well-known member
Joined
Apr 24, 2012
Messages
1,415
Location
Sarasota, FL
Build room is looking great but man am I glad I found my metal pre-patina'd!:D

Oh man I am jealous.....that is some beautiful rusted metal. Could you send some down my way? Mine is sitting outside right now. Yesterday evening I placed a piece of the corrugated metal in my pond........yes thats right, I am seeing if it will rust faster submerged in water. :lol: I will check it tomorrow.......crazy the things we do for our garages!!

I know a few of you guys asked me about the jeep. The owner stopped by today to pick up the body. I forgot to get pictures of it as it went out the door but it was a beautiful satin black....here are a few photos of this awesome jeep before we painted it.:thumbup:

5E1A65AE-B02A-4941-95A8-942C95F6C749-10448-00000BEE03B3D870.jpg

24255042-2E2C-453D-AC40-E5365CC457D9-10448-00000BEE0942764E.jpg
 

Omphaloskeptic

Well-known member
Joined
Oct 11, 2008
Messages
2,346
Location
Ultima Ratio, Wa.
Special thanks to Omphaloskeptic for my new avitar:D


No need to thank me, I'm just having fun using Google/Image search now and then to spice up my posts! lol


P.S. - I still think you ought to let Deanna loose with the OA rig to add a 'patina' to the corrugated sheet metal.
 
Last edited:

csp

Well-known member
Joined
Mar 23, 2010
Messages
5,720
Location
Franktown, CO
You are right on the aftermarket cj-5 body. This Willys is a guys mud toy. I have asked him for some photos of the Jeep sitting on the 44 inch tires. I will get some photos of the finished product tomorrow because he is picking it up in the afternoon.

Looks like it's a Willys only on the title. Aftermarket body, '72 and up fenders, 76 and up windshield frame dash and column, homemade frame, etc.;)
 

Toolfool

Well-known member
Joined
Aug 22, 2011
Messages
4,983
Location
Tallahassee, FL
If your metal siding is galvanized it's not a good idea to put it in the pond. Zinc is toxic for fish and plant life in your pond. Could end up with a "dead" pond.
 
OP
I

IGO2XS

Well-known member
Joined
Apr 24, 2012
Messages
1,415
Location
Sarasota, FL
Looks like it's a Willys only on the title. Aftermarket body, '72 and up fenders, 76 and up windshield frame dash and column, homemade frame, etc.;)

your probably right but it is a really cool mud toy:D

If your metal siding is galvanized it's not a good idea to put it in the pond. Zinc is toxic for fish and plant life in your pond. Could end up with a "dead" pond.

I know, I put one piece in the pond and then the next day took it out.......damn, who knows, maybe I am starting to get senile!!:D


Oh almost forgot. After church decided to do a little sandblasting on the Chevelle parts. Yes I did stop by Home Depot and made sure I had a good respirator. Just spent a few hours on the parts. Its 10 pm and I am still picking sand out of my eyes and ears!!
ECFDF4AC-1009-4F9A-B544-611D202E419D-428-00000020E34DA1CA.jpg
 
Last edited:
OP
I

IGO2XS

Well-known member
Joined
Apr 24, 2012
Messages
1,415
Location
Sarasota, FL
Mark, let me know how the muratic acid on the corrugated steel works? Ive been looking for rust glvn steel so long time that I gave up. I looking to do this ..http://www.piehtoolco.com/contents/en-us/d1232.html
Ill be using mine for the ceiling. good luck

The acid took the shine off of the galvanized metal but not much rust added. I am leaving the panels outside for now in the weather. There is a little bit of rust in the low areas but not much. At least they dont look shiny any more. I checked your link and I like it. I am thinking of ordering some of their product. thank you.!!!!
 
OP
I

IGO2XS

Well-known member
Joined
Apr 24, 2012
Messages
1,415
Location
Sarasota, FL
The sandblasting continued for another day and then Bob installed all of the bushings. Its really impossible to install the bushings after painting because you end up scratching everything up. Man, that is a job in its self installing the upper, lower, and rear trailing arm bushings. Today was the day for color. They were shot with Bob's favorite etch primer and then 2 coated with black imron paint.


DSC_0392.jpg

DSC_0393.jpg
 
To avoid these ads, REGISTER NOW!
Top Bottom