To avoid these ads, REGISTER NOW!

Above 1200 Sq/FT The ASYLUM - Happy 40th Birthday to Me! (Est. 2005)

Wokspaces above 1200 squarefeet.

Omphaloskeptic

Well-known member
Joined
Oct 11, 2008
Messages
2,346
Location
Ultima Ratio, Wa.
The Chevelle's rear window is quite well-known as one of the world's best 'gravity wells', and as sure as the trailer roof is a pollen-magnet, that window will attract any falling heavy object quicker than you can say 'Aw-****'!

P.S. - In regard to the trailer roof --- they make these highly useful things called TARPS! LOL
 
To avoid these ads, REGISTER NOW!
OP
S

shopnut

Well-known member
Joined
Feb 22, 2006
Messages
4,237
Location
Florida
Vernmotor - Would it help any if I said it was all “good” junk? :) To my defense, there are some truly useful things in all that clutter. The stack of cardboard boxes is all the fluorescent fixtures yet to be installed. In-process building materials are leaned against the wall. I could go on and on. (Of course, I’m still in that “denial” stage of my disorder ;))

Honestly, I keep telling myself I will give this place a thorough cleaning when I complete the construction, but the end of the construction never seems to come :sad:. Soon I hope. (I never thought I would be looking forward to cleaning! :eek:)

Omphaloskeptic - Yep, you’re right. That Chevelle window is begging for a drill/driver to be dropped on it. Since the car has all original glass, I would hate to sit up in the manlift and watch something plummet to a shattering end. I’ll add some extra padding on the next trip out - better safe than sorry!

I have a few of those useful blue things. The problem is, if it’s not spaced off the roof a little bit to allow the condensation (in our wonderfully humid climate) to dry out, they can do more harm than good. The bump for the vent might do the trick in front, but maybe a small inflated inner tube might create an air gap at the other end :dunno:
 

Omphaloskeptic

Well-known member
Joined
Oct 11, 2008
Messages
2,346
Location
Ultima Ratio, Wa.
Shopnut, I'm not sure if they still market these 'pool toys', but I recall seeing these dirt cheap foam plastic tubes and such. They're light, fairly soft and would make an excellent buffer between the tarp and the trailer roof to allow the condensation to evaporate.
 
OP
S

shopnut

Well-known member
Joined
Feb 22, 2006
Messages
4,237
Location
Florida
Vernmotor - There's a couple things I need to do up there before I can start filling it. But when I do, I'm saving space up there for some surplus windows, two sections of the scaffold, the extra light fixtures I don't use, and a few other things.

Omphaloskeptic - "Noodles" I think they call them. We have some, but they are starting to turn to dust after 10 years of UV exposure. I need to see if they still sell those things because that would be a good use for them.

akdiesel - Don't worry about the change, I rigged the meters to take credits cards :)
 
OP
S

shopnut

Well-known member
Joined
Feb 22, 2006
Messages
4,237
Location
Florida
WHO WOULD BELIEVE 3/8” COULD CAUSE SO MUCH WORK…

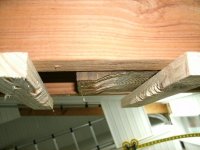
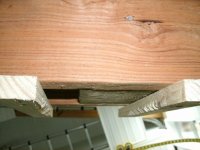
When the builder constructed the rafters, they probably never considered that somebody might cover them. The 4x6 blocks hung down below the rafter beams as this shows.

2006-Center-Rafter-55.JPG

I could have just added spacers it bring everything down to that same level, but other variables make that simple method not real desirable. So I set out to trim those guys off and just be done with it.

I first tried taking a hand saw to it. The answer to that was not “NO”, but “HELL NO”. I would still be sawing right now with my dull saw if I took that route.

2007-Center-Rafter-45.JPG

My chainsaw was the next thing that came to mind, but I didn’t want to risk putting nicks in the rafter beams and weakening them. It wouldn’t, however, be the first time I ran that saw inside this building for a special job (see Reply #556).

Then I remember a method suggested by mdbeck1 (I believe) over in Red Leader’s thread for truing up his workbench surface. That method was easily adapted to my situation (at a much smaller scale) using some blocks of wood as guides and a cordless circular saw.

Because of the short length of my circular saw shoe, I could only trim about half the face at a time and that explains the offset of the guide blocks in the following picture. They would be moved to trim all of it.

2008-Center-Rafter-57.JPG

The saw shoe rides on the blocks and the blade was set to the perfect depth.

2009-Center-Rafter-58.JPG

Here’s a shot with the guide blocks just moved to the second position after trimming the first half. I just nibbled the wood away with the saw.

2010-Center-Rafter-59.JPG

And then the second half was trimmed away.

2011-Center-Rafter-62.JPG

I was very pleased with the results. Note there was just a slight shave on the rafter beams.

2012-Center-Rafter-66.JPG

It took me about 2 hours to trim all 6 of the boards once I was set up. It still was a tough job holding the saw upside down in the air like that, but probably better than the alternatives I had in mind.
 
Last edited:

akdiesel

Well-known member
Joined
Aug 8, 2008
Messages
2,617
Location
Wasilla, AK
shopnut

Nice work. Now that is one way I would not have thought of cutting it down. Way to think outside the box.
 
OP
S

shopnut

Well-known member
Joined
Feb 22, 2006
Messages
4,237
Location
Florida
akdiesel - Thanks. I may not always find the best way, but I always find some way to get things done.
 
OP
S

shopnut

Well-known member
Joined
Feb 22, 2006
Messages
4,237
Location
Florida
SOME PREP WORK FOR THE RAFTER LIGHTS…

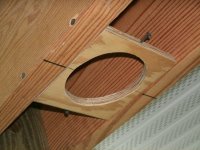
Mounts were added for the recessed LED can lights, two on each side of the center fixture.

2013-Center-Rafter-67.JPG 2014-Center-Rafter-68.JPG

Here’s a close-up of the plywood mount. The little screws sticking out are there because I cut the boards too narrow and the screws will keep the light retaining tabs from pushing on the vinyl panels that cover the rafters.

2015-Center-Rafter-71.JPG

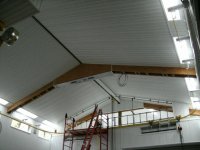
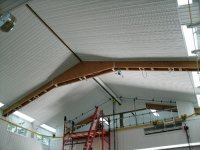
Here’s an overall view showing the new center fluorescent fixtures installed. The coil of MC cable hanging there to the right of the fixtures runs across the ceiling to the back rafter where I decided to add two more can lights above the crane. Six lights total in the main bay will illuminate it nicely for a quick walk through without needing to turn on the operating room lights.

2016-Center-Rafter-69.JPG

MAKING THE FIRST CUTS FOR THE CONTROL PANEL…

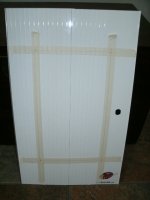
All parts were gathered for the front control panel, but sometimes I have a tough time making that first cut. In this case, the first cut was a critical one that could have rendered a door useless.

I have different aluminum doors, some with key locks and some with slide latches, but for this application, I chose the key latch version. Two things pointed me this direction - 1) a locked cabinet will keep people out of a dangerous area with live 110V power 2) it allowed me to center the control panel on the door face (side-to-side).

With a little masking tape laid down, I could scribe out the exact cut lines. I think I double-checked the measurements 4 times!

2017-Front-Control-Panel-35.JPG

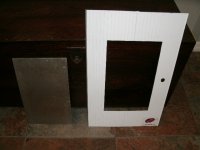
After a little saber saw action with a fine tooth blade, here are the results. The aluminum panel that will be bolted in the hole is sitting to the left.

2018-Front-Control-Panel-36.JPG

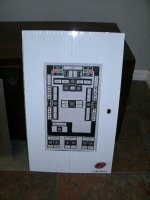
And here it is all finished! Man, I wish it was that easy. I spent some time updating my crude initial layout to the exact size of every component to be used, right down to the ½” wide label maker tape that will be used. This full scale paper template should give you a little clue to what it will look like when finished.

2019-Front-Control-Panel-38.JPG
 
Last edited:

akdiesel

Well-known member
Joined
Aug 8, 2008
Messages
2,617
Location
Wasilla, AK
shopnut

Those LED can lights work great. We bought one as a test for $36 (ouch) in the warm white and I am really impressed with the output. It sits 4 feet from a 75 watt incon recessed bulb and the LED outshines it with a nice pattern. They are in 9' ceilings and the LED gives enough outward light that it does not appear as a spot beam.
So your shop ceiling height will give you a very good light output.
The panel looks great. Reminds me of our Honeywell Mimic panel for our turbines.
 

Omphaloskeptic

Well-known member
Joined
Oct 11, 2008
Messages
2,346
Location
Ultima Ratio, Wa.
Shopnut, slick trick with the circular saw! Did you have to eat much sawdust as you held it up to the work? lol

The LED lighting is going to look so cool, you may never want to turn on the operating room lights; might spoil the 'mood' lighting effect. heh-heh When I saw the fixture placement for them, I immediately thought of another JAWIFO. Wouldn't it be wild to create some long narrow (beam width) mirrored (blue, bronze, ?) plexi/lucite bezels for the LEDs? I'm thinking of the possibility of creating an 'edge-lit' glowing reflective lens by experimenting with the LED's light beam shining through 'portholes' in the mirror coating and satin-polishing the bull-nosed edges of the panels. JAWIFO! As if you didn't have enough on your project to-do list!:lol_hitti

The AFCP is looking real sharp! Before too long, the Asylum will look like the bridge of the star ship Enterprise. :bounce:
 
Last edited:
OP
S

shopnut

Well-known member
Joined
Feb 22, 2006
Messages
4,237
Location
Florida
akdiesel - I paid $14 each for the first 4 and then $54 each for the last two just because I wanted to be sure they were all the same. That's about $27/each so I guess I didn't do too bad then overall. Hopefully they last as long as they say because there doesn't appear to be any way to replace the bulb.

Well, if the panel turns out half as nice as something Honeywell makes, guess I will consider this a success. Thanks.

Omphaloskeptic - I certainly inhaled plenty of that fine dust when sawing up there. I remember a little going in my eyes (despite wearing safety glasses) and probably some making it down my throat too. I was happy to wash up after that job.

That lighting would be pretty cool. I've also always liked those signs where light is projected through the glass and wherever it's etched, it lights up. But this time to eliminate the lengthening of that darn list, I'm just popping those cans in and calling it a day. (Or at least I'm hoping it's that easy!)

Just call me James T. ;) Actually, Scotty might be more fitting. :)
 
OP
S

shopnut

Well-known member
Joined
Feb 22, 2006
Messages
4,237
Location
Florida
TIME TO RUN THE RAFTER WIRING…

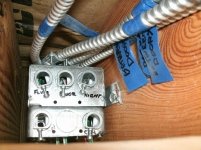
Electrically, there’s quite a bit happening up on the center rafter with five switched circuits available. Cables were feed into this junction box and it nestled up in the rafter next to the center fixture. Of course, the center fixtures had to come down so wires could be routed behind them.

2020-Center-Rafter-73.JPG 2021-Center-Rafter-76.JPG

All the rough electrical is installed in these pictures.

2022-Center-Rafter-85.JPG 2023-Center-Rafter-87.JPG 2024-Center-Rafter-88.JPG

AND THEN THE INSPECTOR SHOWED UP…

Whoever said the inspection job is “for the birds” wasn’t kidding! But who better to get a birdseye view of my high wire act then this little guy:

2025-Center-Rafter-79.JPG

He moved in for a closer look at the junction box. He said I might have just a tad too many wires going in that little box. So I gave him a sack of bird seed to “look the other way” :). All is well and the project will continue.

2026-Center-Rafter-82.JPG

All kidding aside, I was a bit concerned when the bird got trapped in the Asylum. I’m not a superstitious person, but the last time I had to capture and release a bird in here was 1 hour before I fell off the ladder and broke my heel. Both times the bird was saved, but luckily history did not repeat itself on the emergency room visit!
 
Last edited:

Omphaloskeptic

Well-known member
Joined
Oct 11, 2008
Messages
2,346
Location
Ultima Ratio, Wa.
"All kidding aside, I was a bit concerned when the bird got trapped in the Asylum. I’m not a superstitious person, but the last time I had to capture and release a bird in here was 1 hour before I fell off the ladder and broke my heel. Both times the bird was saved, but luckily history did not repeat itself on the emergency room visit! "


The early bird gets the worm,
The squirrely bird makes me squirm!

Shopnut, it sounds like my latest JIWIFO is going straight onto the 'NOT To-Do' list. lol
 
OP
S

shopnut

Well-known member
Joined
Feb 22, 2006
Messages
4,237
Location
Florida
HOTFR8 - I think the clerestory windows in my place really throw the birds (and dragonflies) off. I can open up all the doors down below, but they just seem to concentrate on making their escape through the upper windows. I immediately closed the windows as soon as I saw the bird for fear of him scratching his way through a screen.

I didn’t want to leave him in there after I left so I finally chased him around with a 12’ pole and tired him out. He perched up in a corner that I easily reached and I grabbed him (much to my amazement!). He bit me as I carried him outside to set him free. Can’t blame him though, I suppose he thought the next step was him getting stuffed in my mouth :)

Omphaloskeptic - Another time, another place for that lighting idea. It sounds like it would be pretty cool to tie in with my “night light” circuit that loops around the shop, rather than the main lighting system.
 

Omphaloskeptic

Well-known member
Joined
Oct 11, 2008
Messages
2,346
Location
Ultima Ratio, Wa.
"Omphaloskeptic - Another time, another place for that lighting idea. It sounds like it would be pretty cool to tie in with my “night light” circuit that loops around the shop, rather than the main lighting system. "

Okay, I'll take that as being firmly placed on the 'Maybe, Possibly, Almost Probably To-Do' list. lol

At least I'm comforted knowing 'The C.U.P.O.L.A.' is firmly on 'The To-Do' list! The C.U.P.O.L.A. wrap-around windows (?) would certainly look cool at night with some artsy-fartsy lighting accents; just sayin'....:evil:
 
OP
S

shopnut

Well-known member
Joined
Feb 22, 2006
Messages
4,237
Location
Florida
Omphaloskeptic/HOTFR8 - Hey, maybe the CUPOLA idea could have yet another use - BIRD EXTRACTION! It would be the highest point inside the building. A motion detector could activate a roof panel to open up and let the little feathered friend escape a certain death from being trapped in the ASYLUM all week. :dunno:
.
.

And for those that have Rated this thread lately:
A big THANKS goes out to those members that took the time to use the "Rating" menu on this thread. I've noticed 3 additional recently and since it creeps up slowly, I'm always thrilled to see any new ones get added. (It's the little things in life sometimes, you know :))
 
Last edited:
To avoid these ads, REGISTER NOW!

Wingnut65

Well-known member
Joined
Apr 21, 2010
Messages
3,170
Location
Tampa Bay, FL
Omphaloskeptic/HOTFR8 - Hey, maybe the CUPOLA idea could have yet another use - BIRD EXTRACTION! It would be the highest point inside the building. A motion detector could activate a roof panel to open up and let the little feathered friend escape a certain death from being trapped in the ASYLUM all week. :dunno:

I could just see it now, one gets in while you have the door open, but knowing the CUPOLA is designed to handle situations like this, you close the door and ride home. Later in the afternoon as one of our typical gully-washers comes through, the bird trips the motion seonsor to open the escape route and flies out, but not before letting three more in out of the weather! :shocking:

Just thinking, it could happen! :thumbup:


BTW, it was Alan Jackson and Jimmy Buffet, not Toby Keith. :beer:
 

HOTFR8

Banned
Joined
Mar 2, 2007
Messages
24,498
Location
Castlemaine, Victoria. The Hot Rod Centre of Austr
Omphaloskeptic/HOTFR8 - Hey, maybe the CUPOLA idea could have yet another use - BIRD EXTRACTION! It would be the highest point inside the building. A motion detector could activate a roof panel to open up and let the little feathered friend escape a certain death from being trapped in the ASYLUM all week. :dunno:

I prefer to know the bird is out before it makes a mess. Specialy on a car.
Automatic window just for a bird :dunno::willy_nil are you sure you do not have to much time on your hands and you are not over thinking this ?

:lol_hitti Bouncing a tennis ball round with the big door open works for me or better still keeping the door shut so they do not fly in. :beer:
 
OP
S

shopnut

Well-known member
Joined
Feb 22, 2006
Messages
4,237
Location
Florida
Wingnut65 - Yeah, if I'm not careful, the Asylum will become a hurricane shelter for all kinds of fleeing birds! :wtf:

Thanks for the correction on the AJ/JB song. My apologies go out to all the country music lovers out there (I'll go back and fix it :eek:)

HOTFR8 - Over thinking this? Well, I guess that does describe half of my projects. But what else am I going to do when I'm not locked up in the Asylum? ;).

The tennis ball trick sounds like a better idea then chasing the bird around with a stick. Of course then I might be spending a fair time chasing the ball. But then again, I'm easily entertained :).
 
OP
S

shopnut

Well-known member
Joined
Feb 22, 2006
Messages
4,237
Location
Florida
MORE WORK ON THE FRONT CONTROL PANEL…

The control panel will be recessed about 1/2” to give the switches a bit of protection and just generally make it look better. Here’s a somewhat blurry overall shot (sorry).

2027-Front-Control-Panel-42.JPG

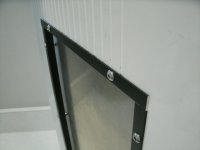
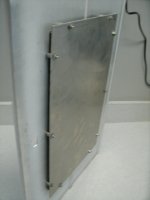
Some 1/2” aluminum angle was trimmed and fitted to fill the gap. It came anodized black, but I will still probably need to paint it anyway to cover the cut edges. Some SS socket truss head screws complete the package. I was actually surprised that Lowe's had them.

2028-Front-Control-Panel-44.JPG

Here is what it looks like from the back side.

2029-Front-Control-Panel-46.JPG 2030-Front-Control-Panel-45.JPG

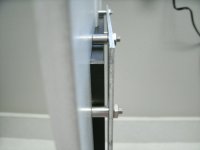
I found some little SS “standoffs” that made the job easier. Here’s a shot with the parts taken apart.

2031-Front-Control-Panel-51.jpg

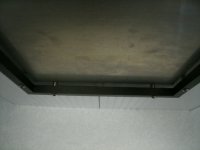
The panel doesn’t mount tight up against the angle so that 1/8” gap might be a perfect spot to shine a bit of light in for panel illumination.

2032-Front-Control-Panel-54.JPG 2033-Front-Control-Panel-55.JPG

So the foundation is done and I’m ready to start drilling holes for switches and LED lights.
 
Last edited:

Wingnut65

Well-known member
Joined
Apr 21, 2010
Messages
3,170
Location
Tampa Bay, FL
The tennis ball trick sounds like a better idea then chasing the bird around with a stick. Of course then I might be spending a fair time chasing the ball. But then again, I'm easily entertained :).

:bounce: I knew we were made from the same mold! :thumbup:

No problem. I'm sure Toby wishes he had thoguht of it first!
 

akdiesel

Well-known member
Joined
Aug 8, 2008
Messages
2,617
Location
Wasilla, AK
shopnut

That's coming together great.
How are the fans working? I've been wanting to start work on my storage cabinet but the wife wanted me to make her a rolling potting cart out some pallets I had left over and then my daughter wanted a table for her new place. Six week vacation hmmmmm, some times I wonder.
 
Last edited:

Omphaloskeptic

Well-known member
Joined
Oct 11, 2008
Messages
2,346
Location
Ultima Ratio, Wa.
"Omphaloskeptic/HOTFR8 - Hey, maybe the CUPOLA idea could have yet another use - BIRD EXTRACTION! It would be the highest point inside the building. A motion detector could activate a roof panel to open up and let the little feathered friend escape a certain death from being trapped in the ASYLUM all week."

I like that idea Shopnut, but I have to admit my bent mind visualized a 'Big *** Fan' up there, sized to just clear the CUPOLA side walls and provide maximum ventilation to the Asylum. Unfortunately, my next thought was the 'aviary' equivalent of Dan Aykroyd's famous SNL skit 'The Amazing Bass-O-Matic'! Mental image of a bird in a blender... LOL

http://www.hulu.com/watch/19046
 
Last edited:
OP
S

shopnut

Well-known member
Joined
Feb 22, 2006
Messages
4,237
Location
Florida
Wingnut65 - Maybe a slightly warped mold! :)

HOTFR8 - Maybe one more justification for an air conditioning system to keep it cool in here without have the doors open all the time.

akdiesel - The fans are working great, especially with getting a direct blast working on that center rafter with temps hovering around 90F during the last work session. When it gets humid, it really helps to get some air circulation in here.

Six weeks! Now that’s a REAL vacation.

Omphaloskeptic - I'm trying to SAVE the birds, not turn them into mince meat. Thanks for the link. I watched SNL quite a bit back in the Aykroyd/Murray/Belushi days, but I don't recall that particular skit - funny!
 
OP
S

shopnut

Well-known member
Joined
Feb 22, 2006
Messages
4,237
Location
Florida
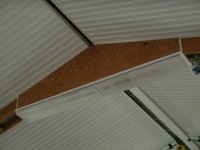
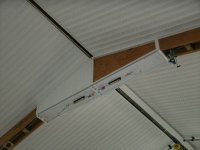
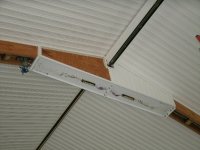
COVERING UP THE GUSSET ON THE MAIN RAFTER…

With the wiring routed, the light fixtures were re-installed for hopefully the final time. I needed the fixtures up there to get the trim spaced properly above.

2034-Center-Rafter-93.JPG

The following pictures show the vinyl trim added.

2035-Center-Rafter-95.JPG 2036-Center-Rafter-96.JPG

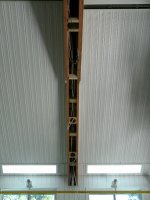
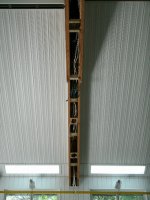
Here are some shots with half of the vinyl siding added. I was able to do both sides within the reach of the manlift as I marched across the gusset faces.

2037-Center-Rafter-97.JPG 2038-Center-Rafter-98.JPG

And the rest of the vinyl added.

2039-Center-Rafter-99.JPG 2040-Center-Rafter-102.JPG
 
Last edited:

Wingnut65

Well-known member
Joined
Apr 21, 2010
Messages
3,170
Location
Tampa Bay, FL
You know you are about to work yourself out of vinyl siding projects? Congrats and keep on going!

Lights look great. Might even look better if they work. I mean 'when' they work!
 

GGB

Well-known member
Joined
Oct 26, 2011
Messages
388
Worst of all-you're almost "finished". When you are, how are we mere mortals supposed to get our "vinyl" fix????

Seriously, you've done some amazing craftsmanship, which I enjoy following with your updates. And if you are anything like I expect, you'll never be "finished"! There's always something else to improve. I tell my Bride that her and my projects are what keep me off the streets and out of the bars!

GGB
 

Vernmotor

Well-known member
Joined
Jan 12, 2008
Messages
1,318
Location
Mt.vernon oh
He has work on the shop for so long..He don't know how to do anything else ! LOL..He said he going to work on his cars someday I believe it when I see it.
 
OP
S

shopnut

Well-known member
Joined
Feb 22, 2006
Messages
4,237
Location
Florida
Wingnut65 - Don't worry, I still need to double back to the side bay and line out the side storage lofts before I can hang up the vinyl tools. In fact, I built them before I even decided to insulate this place so there is a bunch of work to do up there :(

GGB - I can send you a package of vinyl scraps if that would help with your "fix" :)

Thanks for the kind words and following along. You're right, I'll sure I'll never really view this place as completely done. The older I get, it seems the higher my standards get too, so that isn't helping with being satisfied with the condition of this place.

Vernmotor - Man, you sound like my dad! He asked me the other day if I'm EVER going to start working on the Chevelle. Does working on a bike count? I've made some decent progress on my new (to me) Yamaha. It's still not back running yet because I got side-tracked with the control panel. The panel is absorbing most of my spare time when I'm not at the Asylum :eek:)

HOTFR8 - With the addition of insulation just about everywhere now, maybe the cooling cost is within reach :dunno:
 
OP
S

shopnut

Well-known member
Joined
Feb 22, 2006
Messages
4,237
Location
Florida
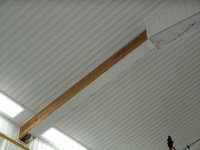
TRIMMING OUT THE RAFTER BEAMS…

I first needed to install the outlet boxes for the ASYLUM sign spotlights. There’s one where each end of the beam meets the wall.

2041-Center-Rafter-107.JPG

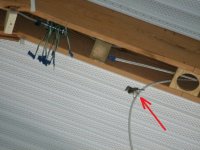
I had just a little time to experiment with covering the rest of the rafter. For this, I needed a “helping hand” in the form of some wire to hold it up where I could verify it was placed centered on the beam face along the majority of its length.

2042-Center-Rafter-103.JPG

And then the ends were fastened.

2043-Center-Rafter-104.JPG

Next was some covering for the side of the beam.

2044-Center-Rafter-105.JPG

I ran into a little snag here because the vinyl plank wasn’t quite wide enough in a few spots. I think the same trick I used on the Front Hoist track trim should help me out here too. But that will have to wait until the next trip out to give it a go.
 
Last edited:

HOTFR8

Banned
Joined
Mar 2, 2007
Messages
24,498
Location
Castlemaine, Victoria. The Hot Rod Centre of Austr
HOTFR8 - With the addition of insulation just about everywhere now, maybe the cooling cost is within reach :dunno:

I have considered what we call Swampy coolers here. Would be well within your budget. I have one on the house so on the roof of my shed it would be perfect.

images
 

Wingnut65

Well-known member
Joined
Apr 21, 2010
Messages
3,170
Location
Tampa Bay, FL
GGB - I can send you a package of vinyl scraps if that would help with your "fix" :)

Now if those could be autographed... I can see a new product line... Shopnut's Ofishal ASYLUM Memorabilia!. Hey, it could pay some expenses, like buying a can of paint or something... :thumbup:
 

GGB

Well-known member
Joined
Oct 26, 2011
Messages
388
Now if those could be autographed... I can see a new product line... Shopnut's Ofishal ASYLUM Memorabilia!. Hey, it could pay some expenses, like buying a can of paint or something... :thumbup:

Oh boy, oh boy, oh boy! Genuine vinyl from The ASYLUM! My life would then be complete! And autographed would just be priceless......

It would have to be displayed in my barn for inspiration and encouragement to persevere in my own efforts to improve it to the standards of the great projects like The ASYLUM. I'll need to find just the right place in my own "ASYLUM" for it. And of course I'd have to get a $400 frame to properly display and preserve it, do an upgrade the security and surveillance system at the barn to make sure no one would try to abscond with it once word got out that I had this incredible piece of posterity. Then I'll need to increase the parking area at the barn to deal with all the traffic from all the other garage aficionados in our part of the world wanting to come see this piece of perfection from one of the great shop "artists" of our time!

Fortunately, our state has favorable liability protection in state law for agri tourism (since the vinyl will be displayed in my barn), so I think my current umbrella liability policy will still cover me in case of an accident with all the people who want to see my very own piece of the original ASYLUM. But just to be safe, I'll still check with my insurance agent. I figure about $120,000-125,000 ought to cover all the other upgrades including separate men's and women's restrooms.

I'm going to start working on a pro forma to see how much I'll need to charge for admission (probably $1-2 per person, with an annual admittance pass for $10-20?). Based on my preliminary calculation, I figure the payback should be in 6-8 months, tops. Pretty much profit after that, but I figure I'll also be able to sell concessions, so that will probably reduce the break even point to 2-4months. Any suggestions on what food and beverages to sell? Obviously, it would have to be the foods and beverages preferred by the original Shopnut when building the one and only ASYLUM, so I'll anxiously wait to hear what you eat and drink when building that monument!

Of course, I'll want to run this by my Bride to make sure it's a good idea to her, too! She'll probably need to think about turning in her two weeks notice to come to work right here to help run the concessions and do all the bookkeeping this new endeavor will require.

On second thought, maybe I'll pass for now-I just realized that my barn isn't quite ready to display such a wonderful piece of memorabilia. I'm humbled by the thought of your generosity

(For all you skeptics out there, it has nothing to do with running this by my Bride for her approval-I'm certain she'd be onboard with doing this!) .

Seriously, you and the many other good folks who have taken time to share your projects with the rest of us truly are inspirational. Thanks!

GGB
 
To avoid these ads, REGISTER NOW!
Top Bottom