To avoid these ads, REGISTER NOW!

Show us your welding projects

Stooge

Well-known member
Joined
Mar 24, 2013
Messages
3,533
Location
South Shore, MA
Hell yea man, looks good.
Can't beat it for the price of cut off wheels!

thanks! werent even nice one wheels, all just HF cheapos :pimpflash 
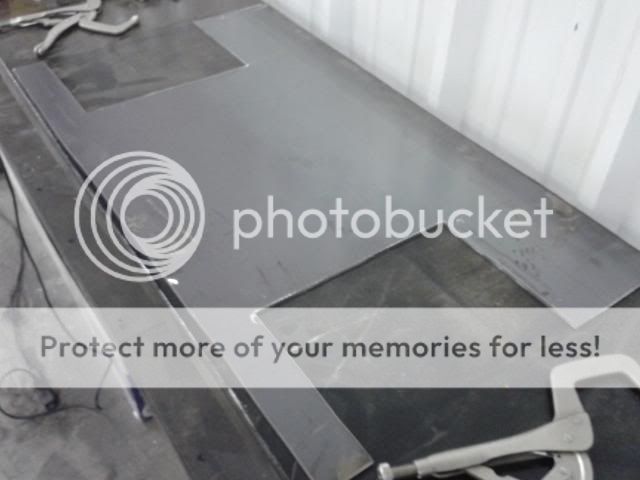
and a bunch of sheetmetal scrap i got for free, the console was actually made from a bulk rack shelf they were throwing out at work, hence the black paint
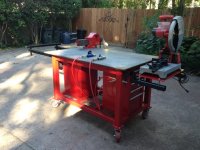
 
To avoid these ads, REGISTER NOW!

Duker

Well-known member
Joined
Sep 25, 2010
Messages
10,861
Location
Livingston, TX
Finally finished my welding table build (additional pictures can be seen in my thread in my signature.)

Now I can actually weld a project worthy of the thread. :)
 

Attachments

  • WeldTable63.jpg
    WeldTable63.jpg
    116.5 KB · Views: 758
  • WeldTable62.jpg
    WeldTable62.jpg
    99.9 KB · Views: 728

F-117HWK

Well-known member
Joined
Apr 17, 2012
Messages
283
Location
Virginia
Finally finished my welding table build (additional pictures can be seen in my thread in my signature.)

Now I can actually weld a project worthy of the thread. :)

Love it! The contrast with the black and red is great. Very well thought out.

Any details on how the electric is setup?

I want to have a 220V line come into my cart and then have 2 220v plugs (welder and plasma) and then have a set of 4-6 110v plugs for the grinders and such. Would that even be possible?
 

alpinewhite

Well-known member
Joined
Aug 4, 2012
Messages
1,315
Location
Orange County, California, USA
I want to have a 220V line come into my cart and then have 2 220v plugs (welder and plasma) and then have a set of 4-6 110v plugs for the grinders and such. Would that even be possible?
You will need to run 4 wires (hot, hot, neutral, ground). Hot-to-hot for 220v. Hot-to-neutral for 110V. Have half your 110v outlets use one hot wire and the other half use the other hot wire. This makes your load as balanced as possible.
 

WakonTonka

Well-known member
Joined
Feb 20, 2012
Messages
118
Location
The BORG ship
You will need to run 4 wires (hot, hot, neutral, ground). Hot-to-hot for 220v. Hot-to-neutral for 110V. Have half your 110v outlets use one hot wire and the other half use the other hot wire. This makes your load as balanced as possible.

Disclaimer: I am not an electrician.

Wire size is the next consideration, and also how you encase them so as to form the equivalent of an extension cord on steroids. Last time I did the calculations I needed #6 wire. Your welder's input current and the length of the conductors will be the data points needed to go into a wire size calculation. I have seen some tough flexible conduit that may be up to the encasement requirement. I suggest you do this right, terminate both ends properly, & use quality flex conduit. Your local electrical supply will be able to help you IF you do not ask them to specify wire size and such (LAWYERS). If you do the homework and ask for "guidance" on the components, if my experience is any guide, they will be most helpful.

So, when you have the extension made up, photos please and specify the components that you used, for the rest of us to bookmark.....
 
Last edited:

aka Larry

Well-known member
Joined
May 2, 2012
Messages
8,009
Location
Eastern, NC
Here are a pair of racks I built for my wife's fitness studio. I used 1/8"x 1.5" flat bar and 3/4" square tubing. These are used to store folding chairs on the wall.

Notice the emblem in the middle of the racks. That is part of thier company logo so to create it I used some leftover DOM roll bar tubing. I thought it added a nice touch and she was super happy with it.


IMG_20130605_080629_011_zps212792e3.jpg


IMG_20130605_080640_600_zps5dcd37a5.jpg
 

F-117HWK

Well-known member
Joined
Apr 17, 2012
Messages
283
Location
Virginia
You will need to run 4 wires (hot, hot, neutral, ground). Hot-to-hot for 220v. Hot-to-neutral for 110V. Have half your 110v outlets use one hot wire and the other half use the other hot wire. This makes your load as balanced as possible.

Disclaimer: I am not an electrician.

Wire size is the next consideration, and also how you encase them so as to form the equivalent of an extension cord on steroids. Last time I did the calculations I needed #6 wire. Your welder's input current and the length of the conductors will be the data points needed to go into a wire size calculation. I have seen some tough flexible conduit that may be up to the encasement requirement. I suggest you do this right, terminate both ends properly, & use quality flex conduit. Your local electrical supply will be able to help you IF you do not ask them to specify wire size and such (LAWYERS). If you do the homework and ask for "guidance" on the components, if my experience is any guide, they will be most helpful.

So, when you have the extension made up, photos please and specify the components that you used, for the rest of us to bookmark.....

Thanks for the input. My buddy has an electrician that works for him so we will probably get his input as well while actually adding the electric to the cart. I will make sure to get a list of everything I got and pics of putting it together. :shocking:

My fab table, my biggest project and most beloved:

That table is straight beef. Looks awesome
 

kazlx

Well-known member
Joined
Oct 30, 2012
Messages
2,851
Location
Tustin, CA
Thanks...it was one of those things I had a picture in my mind of doing it a certain way and it came out exactly how I wanted it to.
 

Duker

Well-known member
Joined
Sep 25, 2010
Messages
10,861
Location
Livingston, TX
Wow. That's a thing of beauty. Very well engineered!

Love it! The contrast with the black and red is great. Very well thought out.

Any details on how the electric is setup?

I want to have a 220V line come into my cart and then have 2 220v plugs (welder and plasma) and then have a set of 4-6 110v plugs for the grinders and such. Would that even be possible?

Very nice. Great job on the planning and execution.:thumbup:

Mike.


Thanks Guys, I had to pack a lot into the table as my shop space is limited.

As for the electrical, I think the other guys gave you some great feed back. Mine is just 120V as I have 240V all over my garage (I run a lot of 3 Phase equipment on VFD's) so I have some large 8 guage cords if I need to extend out into my driveway.
 

DoghouseForge

Well-known member
Joined
May 11, 2013
Messages
374
Location
Lakeland, Fl
Finally finished my welding table build (additional pictures can be seen in my thread in my signature.)

Now I can actually weld a project worthy of the thread. :)

Ummm, yes please!

When do you start taking orders? ;)

Looks great! very versitle and efficient with the way you layed everything out and kept the necessary tools for metal fab right on the table.

Excellent!

JP
 

Duker

Well-known member
Joined
Sep 25, 2010
Messages
10,861
Location
Livingston, TX
Ummm, yes please!

When do you start taking orders? ;)

JP

LOL, right after I get through with my wife's projects and all of mine!

Right on. One stop fab shop.:thumbup: I would of turned the boxes to make access a bit easier, but that layout may keep the dust out of the drawers more.

The original plan in my head called for the tool boxes to face out so that i could reach either side sitting on a stool but the scrap piece of steel I bought was not big enough to leave any edge for clamping and I would have lost the slide out extension.

If I build my welding cart next I hope to break out the dimple dies I got from you to incorporate into the design! :thumbup:
 

MarkG

Well-known member
Joined
May 23, 2012
Messages
1,219
Location
Elgin, IL
Finally finished my welding table build (additional pictures can be seen in my thread in my signature.)

Now I can actually weld a project worthy of the thread. :)

Awesome. Looks good. Very nice attention to detail too-----I like the painted junction boxes and the saw table set-up that uses the table as stock support. Creative.
 
Last edited:
To avoid these ads, REGISTER NOW!

Jack Olsen

Super Moderator
Staff member
Joined
Mar 22, 2009
Messages
6,678
Location
Los Angeles
My latest is another example of the fact that I'm not much of a welder -- but I never let that stop me from 'going big.' :)

There's been a separate thread on the deck and the pergola already, but the steel part of it might interest someone here. (If you've already seen it, accept my apologies.)

I decided to make a cover for a deck I was building -- the idea was that it would hold shade fabric so my kids wouldn't get sunburned when they played on the deck.

I started with 500' of 1-1/4" square tubing. I have a Harbor Freight tubing roller and I got some square dies.

e4b58559a933b0b106c83e54d54c9375.jpg


39cf039223edca0fe1f65c14e2df0642.jpg


My math on what the arches should have been was all wrong. In the end, it made sense to do them all at a 17'-radius bend.

Two of them together make a Gothic arch:

882ecb04ab91e3aec979d646b81a66c7.jpg


There was very little math involved in this. But a lot of it was just putting it into position and marking it.

7f8e29bd0bb782c319c2d756e1804974.jpg


The idea was to use the same pattern that stone arches are made with in cathedrals. I didn't have ladders high enough to do the full height of the thing, so I did the top part as it's own unit. This is 9' or 10' up in the air.

bb9bd97b81d275bc4b5f50e0ea9ca6c6.jpg


Here it is welded together. I also painted it while it was just the top section. But the problem was that this thing was 20' by 20', and it needed to levitate up about 7' so I could put the pillars in place.

a3f852acc4cb6c1023a453bdc88f4883.jpg


My solution was to put up a mast -- or a boom. I took one of the round dies from the roll bender and used it as a pulley at the top. Then I put a hand-cranked worm-gear type winch at the base. The idea was going to be to find the center of the thing and lift it straight up. I also made a cradle to distribute the lifting force across as much of the assembly as possible so I didn't overstress it and break it.

9769d0696537166674a90f9331bf15fe.jpg


It worked.

282cde388a9060a3108f2e9999a84d75.jpg


I got all the pillars welded and positioned under the roof before the sun went down.

c2904e9279f5c9f0b3c63bf9ca9016f3.jpg


Here you can see it all together. The support wires later came out.

fe98dac9d67c085b6f63a8dc3a051ad3.jpg


And here it is covered with shade fabric.

dayan.jpg
 
Last edited:
OP
N

neonnblack

Well-known member
Joined
Jun 7, 2010
Messages
4,913
Location
Reno, NV
You gotta go around everywhere, and make people feel like lazy assholes by posting that up, dont ya? You and Dozerbuilder... :D
 

IONH

Well-known member
Joined
Feb 12, 2010
Messages
2,043
Location
Central Massachusetts
My latest is another example of the fact that I'm not much of a welder -- but I never let that stop me from 'going big.' :)

There's been a separate thread on the deck and the pergola already, but the steel part of it might interest someone here. (If you've already seen it, accept my apologies.)

I decided to make a cover for a deck I was building -- the idea was that it would hold shade fabric so my kids wouldn't get sunburned when they played on the deck.

I started with 500' of 1-1/4" square tubing. I have a Harbor Freight tubing roller and I got some square dies.
dayan.jpg

That is pretty boss! :beer::beer::beer:
 

Jack Olsen

Super Moderator
Staff member
Joined
Mar 22, 2009
Messages
6,678
Location
Los Angeles
Thank you very much guys. It was a lot of hours -- I'm very slow (and sloppy) compared to a pro. But not the whole family is enjoying it. The most recent addition is a digital projector and screen so we can watch movies out there at night.

Nastyzen, I covered the decking with 4x8 sheets of Masonite for all the painting/welding/grinding/etc. I'm glad I did it, since the stuff was seriously ugly when I finally took it off.
 

RivennHewn

Well-known member
Joined
Jun 4, 2011
Messages
10,356
Location
PNW
Nice work.

How is the fabric attached. I'm sure you figured wind considerations, but I'd be interested in how you approached it.

In my neck o' the woods, that would end up a couple houses away upside down, and on top of my neighbors car.
 

BigChevy17

Well-known member
Joined
May 1, 2013
Messages
64
Finished my dynasty cart, as simple and lopro as possible. I just need to get more rivets for the plates.
The pics were taken right after sitting the welder on the cart, the cables and hoses are cleaned up now and there is a strap holding it down,


And I got started cutting some tubing for a tig rod holder but I got sidetracked by other things so ill post some pics when I get more done on that.

 
Last edited:

Jack Olsen

Super Moderator
Staff member
Joined
Mar 22, 2009
Messages
6,678
Location
Los Angeles
Nice work.

How is the fabric attached. I'm sure you figured wind considerations, but I'd be interested in how you approached it.

In my neck o' the woods, that would end up a couple houses away upside down, and on top of my neighbors car.

It's odd. I did a patio cover with the same fabric back in 2010. It's only held in place with spring-type clips (they're actually binder clips like you'd use for a thick paper report), and they've done fine even with 50mph winds. But my guess is that the wind's effect is reduced with the patio piece because of the surrounding roof structures.

final02.jpg


For the new frame, I sandwiched the fabric between two pieces of steel at either end. The frame is made of 1-1/4" square tube, and there's a curved piece of 1/2" bolted (every 18") to the top of it. The fabric is compressed between those two pieces, and then there's also a roofing caulk I used surrounding the edge of the fabric, so it would be even harder to pull through the gap. I don't think I've had more than 35-mph gusts so far, but it's held up fine.
 

Firefighter315

Well-known member
Joined
Apr 28, 2010
Messages
81
Location
Born & Raised in the Bluegrass
Now that Jack has made me feel totally inadequate with that incredible project, I'm not sure I should even add this latest project....:headshake:

I finally got around to making a new stubby front bumper for the Heep so I can finally put the winch I bought last year to use.

I wanted to keep as much as possible from a single sheet and avoid joints. Not sure why, just for the fun of it I guess...started with some 3/16 plate

IMG_20130414_004303_zps664969f1.jpg


basic shape...
IMG_20130414_004345_zps96355856.jpg


loaded it into the small press brake...
IMG_20130414_011919_zpsc55406f3.jpg


that brake limited out at this when the press got in the way...
IMG_20130414_015735_zpsa08312f5.jpg


finished the bends in a larger brake...
IMG_20130420_224433_zpsb9b185e9.jpg


internal gussets to stiffen the 3/16 and the clevis mount...
IMG_20130421_220747_zps06b0eb61.jpg


IMG_20130421_222224_zps82a445d7.jpg


Filled in the corner angles...
IMG_20130422_212040_zps943a9c4e.jpg


IMG_20130423_234234_zps38aeb409.jpg


and evidently I forgot to take any more photos as I did my tube work. I used 1.75x0.120 HREW for that...
IMG_20130518_171445_zpsb79af1bc.jpg


Took a 0.25 winch plate I had and married it to the top of the 3/16 for some added strength under the winch, drilled the winch and fairlead mounts, then primer and paint...
IMG_20130610_012503_zpsf0b8fcee.jpg


IMG_20130610_012522_zps27f80051.jpg


IMG_20130610_012657_zpsbfe8f52d.jpg


Pretty happy with it. The grill hoop will be tied into tubular fenders that will carry into through the firewall and into a new cage I hope to get going on this winter. Gotta get a rear bumper/carrier done first! :lol:
 
Last edited:

BigChevy17

Well-known member
Joined
May 1, 2013
Messages
64
My little 4x6 delta bandsaw that I got off craigslist was living on two 2x4s due to the trashed stand that it came with so I made a little stand for it when I got back from orlando on saturday. The tubing and expanded metal was all stuff that I got for free, the hardware was stuff that I already had along with the flat bar that I keep around for my random projects.
I also wanted an excuse to play with my jd2 notchmaster that I got a few weeks ago :D

Welded up two basic frames and welded on the tubes.


Then added some cross braces.


Then connected those two and tacked on some expanded metal for a shelf.


I welded plugs on the bottom and tapped them to 3/8-16, I actually welded these all the way around and smoothed it with a flap wheel but I dont have any pics.


Coat of paint and some hockey pucks and its ready to go :rocker:


OP
N

neonnblack

Well-known member
Joined
Jun 7, 2010
Messages
4,913
Location
Reno, NV
exactly what i need to do to mine. It fell on my toe the other day, i pushed it over and cussed at it loudly while the neighbors watched.
 

Twisted Sid

Well-known member
Joined
May 23, 2013
Messages
741
Location
CA
Got a new welder. Had some scrap steel, and was bored so i made my garage mascot. Name is Lincoln.
IMG_20130617_224653_641.jpg

IMG_20130617_224937_469.jpg

IMG_20130617_224848_986.jpg

after it was put together, i heated it up with a torch and quenched it in old motor oil to turn it back.
 

BigChevy17

Well-known member
Joined
May 1, 2013
Messages
64
It's not blue?? Am I dreaming? :rocker:

That would have been way too much blue, I can photoshop it of your having withdraws of seeing all my blue projects if you want. ;)

exactly what i need to do to mine. It fell on my toe the other day, i pushed it over and cussed at it loudly while the neighbors watched.

It will make a huge difference, it's rock solid and dosent vibrate like it used to with that pos stand that was on it.
 

PCO6

Well-known member
Joined
Dec 25, 2008
Messages
4,573
Location
Newmarket, Ontario
I've been pushing my Lincoln 225 arc welder around on a small dolly for the last year or so and finally got around to building a proper stand for it.

It's basically made out of 1.5" square tubing, 2" flat bar, 1.5" angle, some expanded metal and a storage box that I made out 16 guage sheet metal.
Welder-Arc-Lincoln225-2_zps30180a55.jpg

As I age my welding and photography seem to get worse. Maybe it's my eye sight.
Welder-Arc-Lincoln225-3_zpsf95fca15.jpg

From the front ...
5d4568ba-936b-4b35-b96b-585adba0ba50_zps1833242d.jpg

... and the rear.
21a7fc95-99c1-4e15-bd6e-5a9a5289d9a3_zps6d13d8ac.jpg

I added a pad to the top to protect the paint. It's attached by a magnetic sheet.
Welder-Arc-Lincoln225-6_zps2c6bf33a.jpg
 

LG63

Well-known member
Joined
Sep 7, 2012
Messages
1,003
I've been pushing my Lincoln 225 arc welder around on a small dolly for the last year or so and finally got around to building a proper stand for it.

Great job, amongst all the MIG carts it's nice to see the classic tombstone get some attention.
 
To avoid these ads, REGISTER NOW!
Top Bottom