

jesse72
Well-known member
I thought I would make this build thread about my new bench. I had a lot of questions about things and maybe this will help someone else too. Enjoy!
I wanted to someday have a US General / Harbor Freight 13 drawer box so I built this bench to be able to flush mount a cabinet without casters in both openings. It will sit on a 2x4 frame and slid into place. Someday that is...
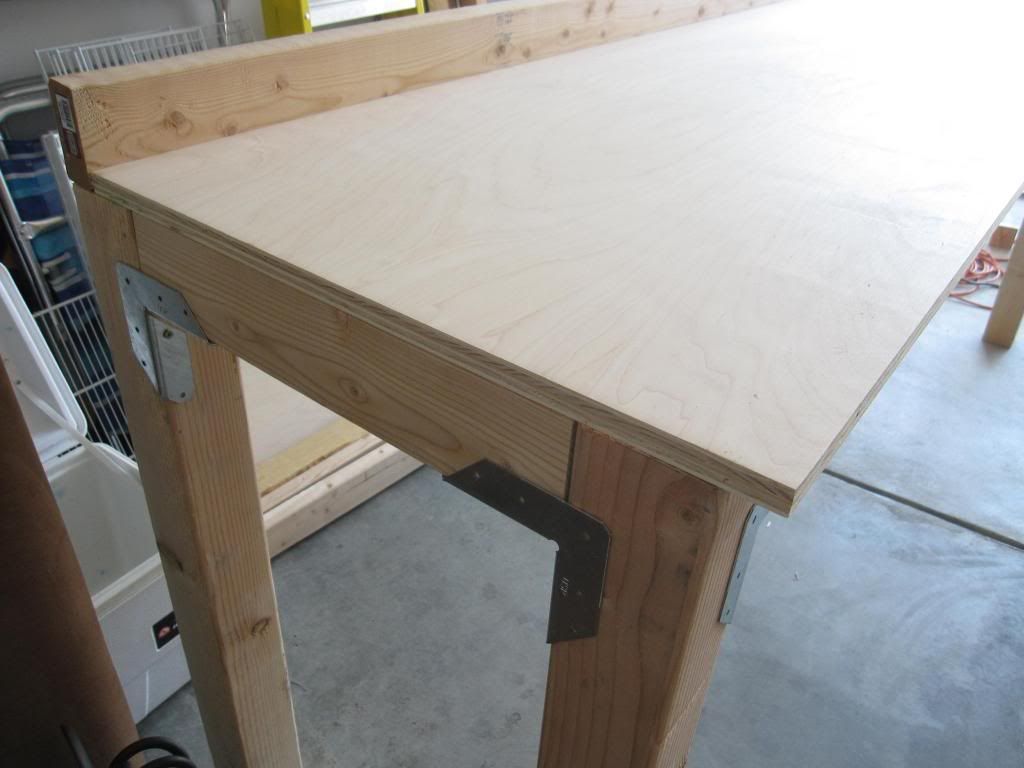
I wanted to have an industrial look as well as extra heavy duty support so I used these steel corner and "T" brackets that are in the framing section of Lowes, they are about $2 each I think. I painted them with Rustolium Hammered Black.
It was about $130 worth of wood from Lowes.
4x4's for legs
2x4's for cross supports
3/4" sheet for bench top, I had them rip it for me into 2 sheets at 24"x 96" because it was easier than using my small table saw to do it. Came out perfect too.

Then cut it up and did a test fit of everything.
You see there are no middle supports in the picture, but they will be
Also you can see the small 1.5" over hang that I have in the front. This is made possible because I used a 2x4 as a back splash.
Then once I knew it all fit how it should I laid it out and stained it with one coat of MinWax Dark Walnut finish. Cost $7 at Lowes


Then it dried over night with a fan on it and the garage door cracked for ventilation.
After that, I started assembling.
Here is a mock up

Then with the frame assembled, I forgot to get a picture of the cross supports in the center but that's simple to imagine.

These clamps from Harbor Freight are cheep and work great! I screwed the first layer of plywood to the frame and center supports, then glued the second layer onto the first in order to have a completely flush top with no screws showing

Here it is fully assembled with no Ploy on top yet

Here is after 2 coats of MinWax Ploycrylic in clear semi-gloss. This was my first time staining or sealing anything so you can see some brush marks, but its just a work bench.

Vise in it's approximate position, not bolted yet because Im not sure where I want it. I got it for free out of the trash and fixed it up with Hammertone grey and a clear coat.

Here and here is the finished product! It came out how I wanted it to and like it a lot. But the problem is, its too nice to work on hahaha. I wanted to do the stain and ploy on it so that I could practice on something large because I want to be able to build and stain tables and cabinets in the future. So even though it is just a bench, its a little too nice.

The stuff on the shelves is all old Marine Corps gear I used in my times fighting in Iraq and Afghanistan and the pictures are of friends I have lost while there. Its cool to be able to look at everyday and reminisce on the good times.
Hope that you like the bench and can get some ideas from it, Ill dirty it up one of these days when I get a project to work on.
Now I need to find a nice old stool for it.
I wanted to someday have a US General / Harbor Freight 13 drawer box so I built this bench to be able to flush mount a cabinet without casters in both openings. It will sit on a 2x4 frame and slid into place. Someday that is...
I wanted to have an industrial look as well as extra heavy duty support so I used these steel corner and "T" brackets that are in the framing section of Lowes, they are about $2 each I think. I painted them with Rustolium Hammered Black.
It was about $130 worth of wood from Lowes.
4x4's for legs
2x4's for cross supports
3/4" sheet for bench top, I had them rip it for me into 2 sheets at 24"x 96" because it was easier than using my small table saw to do it. Came out perfect too.

Then cut it up and did a test fit of everything.
You see there are no middle supports in the picture, but they will be
Also you can see the small 1.5" over hang that I have in the front. This is made possible because I used a 2x4 as a back splash.

Then once I knew it all fit how it should I laid it out and stained it with one coat of MinWax Dark Walnut finish. Cost $7 at Lowes


Then it dried over night with a fan on it and the garage door cracked for ventilation.
After that, I started assembling.
Here is a mock up

Then with the frame assembled, I forgot to get a picture of the cross supports in the center but that's simple to imagine.

These clamps from Harbor Freight are cheep and work great! I screwed the first layer of plywood to the frame and center supports, then glued the second layer onto the first in order to have a completely flush top with no screws showing

Here it is fully assembled with no Ploy on top yet

Here is after 2 coats of MinWax Ploycrylic in clear semi-gloss. This was my first time staining or sealing anything so you can see some brush marks, but its just a work bench.

Vise in it's approximate position, not bolted yet because Im not sure where I want it. I got it for free out of the trash and fixed it up with Hammertone grey and a clear coat.

Here and here is the finished product! It came out how I wanted it to and like it a lot. But the problem is, its too nice to work on hahaha. I wanted to do the stain and ploy on it so that I could practice on something large because I want to be able to build and stain tables and cabinets in the future. So even though it is just a bench, its a little too nice.

The stuff on the shelves is all old Marine Corps gear I used in my times fighting in Iraq and Afghanistan and the pictures are of friends I have lost while there. Its cool to be able to look at everyday and reminisce on the good times.
Hope that you like the bench and can get some ideas from it, Ill dirty it up one of these days when I get a project to work on.
Now I need to find a nice old stool for it.

")
