To avoid these ads, REGISTER NOW!

Applying brick to block as a vaneer?

JimVonBaden

Well-known member
Joined
Dec 2, 2011
Messages
15,716
Location
Northern Virginia
So, I have the pillars:

3E3AB960-AAF7-4D64-AAB9-8F89B27D3F58.jpg

18775325-737E-494E-A839-10DCE90081BD.jpg


I have the brick (pavers at 3.88 X 7.81 X 1.75 inches):

03A23AD3-3917-4527-A7B7-3A60C1A2EBD4.jpg


I am going to attach them to the pillar with mortar. Do I wet the block first? Do I use a notched trowel, and if so, what size notches? Di I apply a scratch coat, or is that necessary?

Thanks in advance for you advice!
 
To avoid these ads, REGISTER NOW!

southernfriedcj

Well-known member
Joined
Dec 28, 2005
Messages
421
Location
Athens, GA
I would have put wall ties in the block joints.

If the brick is extremely dry it if good to wet it. If the brick is extremely wet, it is good to let it dry. You want the mortar to bond well.

No notch trowel need to lay brick.
 
OP
J

JimVonBaden

Well-known member
Joined
Dec 2, 2011
Messages
15,716
Location
Northern Virginia
I would have put wall ties in the block joints.

If the brick is extremely dry it if good to wet it. If the brick is extremely wet, it is good to let it dry. You want the mortar to bond well.

No notch trowel need to lay brick.

I wasn't clear at all I see. I intend to lay the pavers on their sides and expose the paver face, no mortar between them to look like pavers do. Is that a bad idea? Should I lay them on end but like bricks with mortar between them?
 

southernfriedcj

Well-known member
Joined
Dec 28, 2005
Messages
421
Location
Athens, GA
I wasn't clear at all I see. I intend to lay the pavers on their sides and expose the paver face, no mortar between them to look like pavers do. Is that a bad idea? Should I lay them on end but like bricks with mortar between them?

I can't throw in my $.02 on that. I haven't seen that done.

Probably one of those deals where you stick them on and you couldn't get them off with a 20lb sledge.
 

Zeke

Well-known member
Joined
Aug 13, 2009
Messages
17,176
Location
Long Beach CA, the sewer by the sea.
I would mist the block but many masons won't. A lot of it depends on the mix and the weather. If you decide to scratch coat the pillar, wrap some mesh around it and bury it in the scratch. Nail it into the grout joints. Don't worry if it doesn't look great and has holidays. Just butter the brick and lay them into the pillar and a bed of mortar on the course below. You want a nice 1:3 mortar mix with a bit of lime. The stuff in sacks is not rich enough. I do use it but I add another shovel of plastic cement per bag. It should peak like frosting and you can 'shake it up' with fresh cool water each hour all day long. That's about a large coffee for half a wheelbarrow.

Edit: I see you're going to do a dry stack. Same procedure just w/o the bed of mortar between courses. I think I'd definitely do the lath wrap for the dry stack.
 
Last edited:
OP
J

JimVonBaden

Well-known member
Joined
Dec 2, 2011
Messages
15,716
Location
Northern Virginia
It is supposed to be 70° and 6% humidity. I think I will mist the block.

What kind of lath wrap should I use, and do I fix it with nails or tapcons?
 

rancherbill

Well-known member
Joined
Oct 18, 2007
Messages
5,335
Location
Foothills County, Alberta, Canada
I'd use masonry mesh. I'd attach only on the overlap with whatever you have. The mortar will hold it over the long term.
201006091609448446.jpg

When you are stacking have a slight angle outward so they shed water.

You should consider angle iron on the bottom row. I don't think you live where there is freezing weather, but, if you do you need to have a separation from the ground so water does not wick up into the block.

I would wet / mist the columns and have at it.
 
OP
J

JimVonBaden

Well-known member
Joined
Dec 2, 2011
Messages
15,716
Location
Northern Virginia
Thanks guys.

The reason I am using the pavers is because I want the columns to match my paver driveway. There isn't much in the way of brick veneer that would look right.

Another issue I have, when it comes to attachments is that the block is 16" making the columns 16" square right now. The pavers are slightly under 8" each, so with no mortar in between the pavers they will fit just about right at 2.5 bricks wide. Adding too much attaching material will throw off the spacing and the pavers will come up short making me have to cut about 2" off a LOT of them instead of splitting a bunch in half. Lots of waste.

I'm wondering if something like this would work?

wkr102_4fd_lg.jpg


I know a bit late in planning, but I can add some the day before I add the pavers. Should be secure by then. What do you think?
 

chops101

Well-known member
Joined
Jul 15, 2013
Messages
554
Location
S. FL
I would put a scratch coat on the block with deep grooves, to hang brick, and use a good bonding additive to the mortar.

So just as another opinion, I would face the block with a contrasting veneer against the driveway pavers. You want columns to look like columns, I would vote for slate or travertine.
I just did my front stoop in 100sf of 8x12 slate and it looks awesome.
 
OP
J

JimVonBaden

Well-known member
Joined
Dec 2, 2011
Messages
15,716
Location
Northern Virginia
Why aren't you facing the columns with stone that matches the wall behind the column in the first picture?

That is retaining wall block. I have yet to find a stone that looks anything like it. If it existed I would, but the stone veneer looks so different it would look dumb, IMHO.

paverproject220.jpg


I thought about a travertine covering, but I just couldn't work out the logistics of cutting 12" squares to cover 16" columns without a LOT of cuts to make a pattern that worked and minimize the waste. I'll be honest, I don't want to work that hard or pay that much.

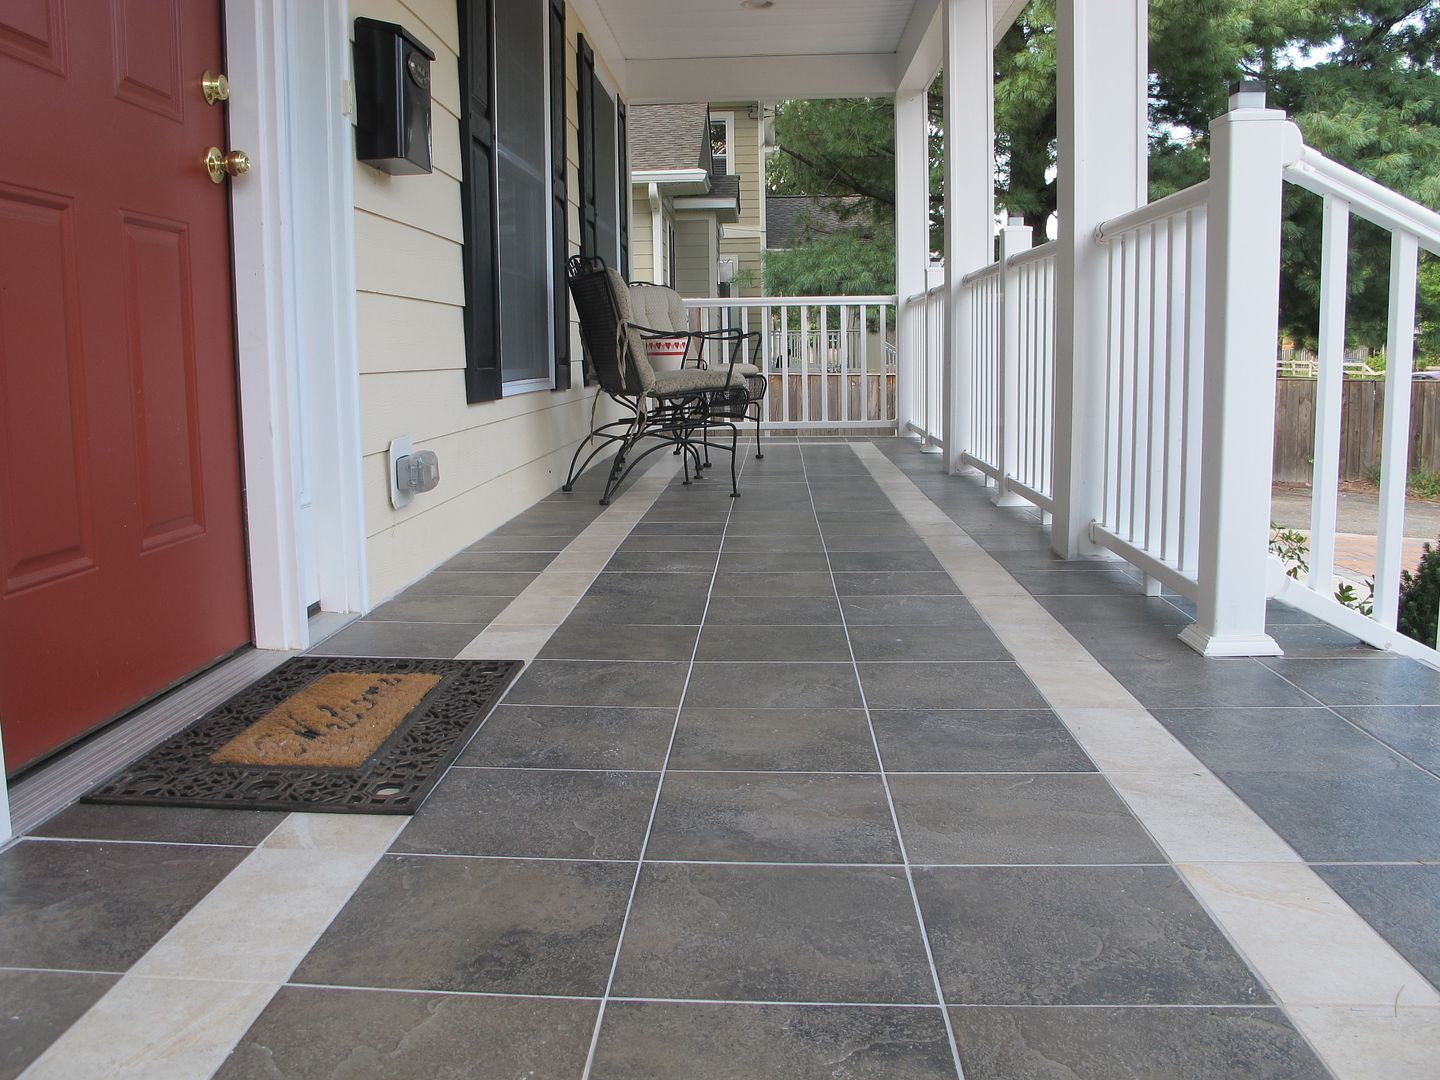
I did my porch in porcelain and considered that, but same issues.

PorchTile3.jpg
 
Last edited:

Zeke

Well-known member
Joined
Aug 13, 2009
Messages
17,176
Location
Long Beach CA, the sewer by the sea.
Jim, I don't think at this point that you need or can install ties. The expanded metal can be formed and attached to the columns with Teco nails and maybe some washers. You want it to be just a bit loose so that your mortar squeezes through and in behind in a lot of places. Screed it off best you can and rough it up with a notched trowel.

images


You can make one out of a piece of angled flashing and tin snips. The thing I don't know about is freezing. We don't have frozen masonry here so I don't know what it takes there. Maybe your mortar should be hot rodded up to a modified acrylic. Seems to me just sticking those pavers on the bare block will allow them to pop. I think I'd cap the tops and seal the heck out of them.
 

Architorture

Well-known member
Joined
Feb 13, 2013
Messages
625
Location
PA
Get the adhesive they used to glue down your cap stone on the retaining wall...that stuff holds on too well in most situations
 
OP
J

JimVonBaden

Well-known member
Joined
Dec 2, 2011
Messages
15,716
Location
Northern Virginia
Zeke, how does the expanded metal help to hold the brick on differently than just going straight on the walls? I'm not doubting, just trying to work it out in my head.
 

rancherbill

Well-known member
Joined
Oct 18, 2007
Messages
5,335
Location
Foothills County, Alberta, Canada
Post = 16"
Placing them in a conventional brick pattern.
LONG SIDE
paver (7.75) x 2.5 = 19.35
difference = 3.35
gap on each side for scratch coat(wire) + mortar = 1.68 = 1 11/16"
SHORT SIDE
2 x 7.75 = 15.5 OMG!!!

You are going to have to put them on will ALL the side the same length in a overlapping style pattern.

daaaaa
d b
d b
d b
d b
ccccc b
It doesn't look right with characters but it hopefully conveys the idea. You will have to double cut the middle one for whatever dimension you choose. Does the color go all the way through?
 
To avoid these ads, REGISTER NOW!

sands35

Well-known member
Joined
May 29, 2012
Messages
936
Location
St. Joseph, MI
At the bottom of the column, I don't see a foundation for the brick. (not sure if it's just under the grass).

The connective method to the CMU column won't matter if you have have that.
 
OP
J

JimVonBaden

Well-known member
Joined
Dec 2, 2011
Messages
15,716
Location
Northern Virginia
Post = 16"
Placing them in a conventional brick pattern.
LONG SIDE
paver (7.75) x 2.5 = 19.35
difference = 3.35
gap on each side for scratch coat(wire) + mortar = 1.68 = 1 11/16"
SHORT SIDE
2 x 7.75 = 15.5 OMG!!!

You are going to have to put them on will ALL the side the same length in a overlapping style pattern.

daaaaa
d b
d b
d b
d b
ccccc b
It doesn't look right with characters but it hopefully conveys the idea. You will have to double cut the middle one for whatever dimension you choose. Does the color go all the way through?

The color does go all the way through. In laying them up it looked like this would be close if I keep the mortar thin, but there will likely be a differential of about half an inch on the corners where the two sides overlap.

Like this:
column.jpg

Side view

columntop.jpg

Top view of a single row. I expect they will stager fine, and I was hoping that corner joint would keep the brick firm to the column. Some of the attaching mortar will get between the bricks as they have small nubs on the sides and the mortar will be fairly wet.

I expect the half inch difference might look cool, or intended.

I'm not sure I quite get what you are saying, but I think you think I will need to cut one odd shaped brick per row and discard the appx 1/3 of a brick waste. :dunno:
 
OP
J

JimVonBaden

Well-known member
Joined
Dec 2, 2011
Messages
15,716
Location
Northern Virginia
At the bottom of the column, I don't see a foundation for the brick. (not sure if it's just under the grass).

The connective method to the CMU column won't matter if you have have that.

The center of the column is a steel 4" pole that has conduit in it and is set in a concrete base. I added concrete in that to about 2" past the 16" block column, so it does have a "footer" of sorts, so that will support the brick, but since I do not plan to mortar between the brick, except some bleed out from the mortar on the back of the brick, I'm not sure if that will help too much. :dunno:

FrontYard6.jpg
 

kbs2244

Well-known member
Joined
Nov 11, 2006
Messages
14,065
Epoxy mortar
You should have some kind of foundation to take the weight
You will need some kind of cap to keep water out of the void.
 

Zeke

Well-known member
Joined
Aug 13, 2009
Messages
17,176
Location
Long Beach CA, the sewer by the sea.
Zeke, how does the expanded metal help to hold the brick on differently than just going straight on the walls? I'm not doubting, just trying to work it out in my head.

Same way a thin metal wrap around a column supporting a road or rail way. The engineers decided that a cigarette was pretty strong for it's ingredients. Our state highway engineers are wrapping 1000's of columns for earthquake resistance. You might remember, we've had some freeways fall down.

Your post will move and the mortar joints will develop cracks. By wrapping them those stresses won't reach the surface.

Epoxy mortar sounds like a good idea especially since you won't see it.
 

akdiesel

Well-known member
Joined
Aug 8, 2008
Messages
2,617
Location
Wasilla, AK
Jim

As mentioned, use adhesive. I used concrete adhesive (the same stuff from Lowes in the concrete section) to hold real river rock to my cinder block wall. The rocks have been there for two years now with no problems. As you know the weather up here goes from 70 deg f. to -20 deg f.
You just need to make sure the bricks are supported during the curing process. Not sure why your caps came loose unless they put them down when the blocks were wet.
 

f150skidoo

Well-known member
Joined
Dec 29, 2012
Messages
1,206
Location
Ontario, Canada
Rent a tile saw and cut the brick into 1" thick pieces and use tile adhesive and just butter up the back side off the brick. Theres no need to do anything to the block to make the veneer to stick. If you don't cut the brick into 1" thick pieces the mortar will sag before it cures because off all the extra weight.
 
OP
J

JimVonBaden

Well-known member
Joined
Dec 2, 2011
Messages
15,716
Location
Northern Virginia
Rent a tile saw and cut the brick into 1" thick pieces and use tile adhesive and just butter up the back side off the brick. Theres no need to do anything to the block to make the veneer to stick. If you don't cut the brick into 1" thick pieces the mortar will sag before it cures because off all the extra weight.

I would be throwing away half the brick since they are one sided pavers. Besides, the spacing would be messed up.

This is how they turned out back buttered and stacked.

Pillars25.jpg

Pillars24.jpg

Pillars16.jpg


I think it looks OK, and by the time I was done with both, the first one was rock solid. Time will tell if it holds up like I hope it will.
 

Lassen Forge

Well-known member
Joined
Apr 26, 2014
Messages
15,383
Location
The romantic hills of central Umbria, Italy,
Capstones? Thats an easy fix. Get a good epoxy based mortar that will withstand wide temperature changes. (Our local building supply store has a few different ones, I know the BBS ones like Lowers and Home Despot have a few as well) Make sure both the top of your wall and the bottom of the capstone are clean clean (wire brush time!). Re-mortar and re-attach.

As to the no mortar between the brick - I would not recommend it, as your brick will never be set solid and will likely fall out, probably within a year. When you joint your mortar (ie smooth out the grout joints between the brick with a jointer), you can undercut it by a bit to give the same appearance, but otherwise you need that grout there to keep it waterproof and standing.

If you haven't read this, it is a good basic primer on brickwork.

http://www.motherearthnews.com/diy/diy-bricklaying-zmaz98onzraw.aspx#axzz32k73Y8GO

Good luck with your project - looks great so far!
Sus @ the Forge
 
Last edited:
To avoid these ads, REGISTER NOW!
Top Bottom