To avoid these ads, REGISTER NOW!

VISE REPAIR 101 all vise repairs, lubricants, sources for parts and the tricks to fix

Carla

MEMBER EMERITUS
Joined
Nov 27, 2010
Messages
672
All: as i get time and if there is room i'd also like to put the model #'s of the vises each company made, but what would be really great is if one of you has a favorite brand and can post all the models of that brand on a post then i'll just refer to the post #. Dayid's list is great, but it has a lot of holes i'd like to see filled in until one of us writes a book like Anvils of America if one for Vises would be worth writing. i know i'd buy a copy if i didn't end up writing it with some other members.

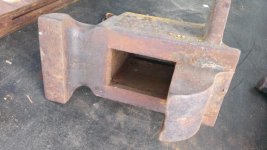
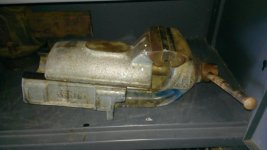
also if you have all the specs of the models and pictures too that would be awesome. even posting a rare vise on it's own would add to the flavor of the thread if it is truly rare and you can find that out by posting it on the vises of garage journal and finding out if you are unsure and need a little help.

Hello, DIF,

I'll offer you a thought, if I may........which is that the 'vises thread' on this site is that book, just in its 'as quarried' or 'unrefined' state, so far.

It appears to be an excellent example of the modern communications power of the internet, a practical 'Wikipedia' of vises, with, as has been noted, information published nowhere else.

I have been doing restoration work for quite a few years now, and have collected various old catalogues for reference.......but I've been ever so impressed with all the photos and data posted here about quite a few models of vises which I'd never even heard of.

cheers

Carla
 
Last edited:
To avoid these ads, REGISTER NOW!

Fretters

Well-known member
Joined
Jan 25, 2014
Messages
4,217
Location
South Yorkshire, England
Fretters: good to hear from your side of the pond and will note them and others as you and others let me know what else is missing. also since we don't get some of those often any pictures you can share and methods of taking apart and putting together to use would be really helpful.

I'll make sure to take plenty of photo's with future projects for reference. :D
 
OP
D

drivesitfar

Well-known member
Joined
Oct 23, 2013
Messages
36,032
Location
Pacific Northwest
All: thanks guys and Carla for any and all new information. I added more comments to the bottom of the first post if any care to read why i started this thread and also asking for the help to make it the best resource for vise repair so far in one place.

also if any of you that know a particular maker's models with all their specs and want to share please make a post saying you are doing so. then go in an edit it as you have time and i'll refer to it in on the page with all the vises.

thanks again and i'll edit the new items as i can and appreciate a little reminder if you think i missed something.

:thumbup::thumbup::thumbup:
 
Last edited:
OP
D

drivesitfar

Well-known member
Joined
Oct 23, 2013
Messages
36,032
Location
Pacific Northwest
All: GJ's vise list has been updated and probably tripled Dayid's original list. check for vise company names that might still be missing or if i mis spelled any when posting. also if you know any more details on the companies i'd be happy to post them there to if there is room.

now while I was adding all the names that you have all been mentioning i remembered i have a L.M. & V vise that i have that is missing a vise nut. it is a 6 inch wide jaw and weighs about 160 pounds so not a little vise. here's the pictures i have so far and hopefully before i pass on i'll have a new vise nut made and have this painted or oiled and sitting on one of my benches or mounts.

also feel free to post pictures of your vise challenges that you have had and overcome in the past and also any methods you do that might make the vises look as new or even better than new.
 

Attachments

  • WP_20140331_007.jpg
    WP_20140331_007.jpg
    146 KB · Views: 588
  • WP_20140327_021.jpg
    WP_20140327_021.jpg
    148.1 KB · Views: 417
  • WP_20140327_022.jpg
    WP_20140327_022.jpg
    149.3 KB · Views: 450
  • WP_20140401_002.jpg
    WP_20140401_002.jpg
    148.9 KB · Views: 456
  • WP_20140327_025.jpg
    WP_20140327_025.jpg
    145.1 KB · Views: 444
  • WP_20140327_024.jpg
    WP_20140327_024.jpg
    146.8 KB · Views: 487
  • WP_20140331_009.jpg
    WP_20140331_009.jpg
    141.7 KB · Views: 501
OP
D

drivesitfar

Well-known member
Joined
Oct 23, 2013
Messages
36,032
Location
Pacific Northwest
this post is reserved for my L.M. & V vise after it is restored so i can post the process in fixing it. i suggest others make an extra spot after they post a vise with an issue if they are planning on fixing it.
 

Attachments

  • WP_20140331_009.jpg
    WP_20140331_009.jpg
    141.7 KB · Views: 264

JeremyBurke

Well-known member
Joined
Nov 5, 2013
Messages
609
Location
Near Portland, OR
Collected vise repair genius' I am working on a restoration of this little guy.


I'm about midway through this one here are a few current shots.


What I need to know is as I put it back together what is the best way to lubricate the moving parts for a long, good life for this vise. :dunno:
 

JeremyBurke

Well-known member
Joined
Nov 5, 2013
Messages
609
Location
Near Portland, OR
Here is the completed Vise From above.


here are the steps I used.
1) Disassemble and clean with simple green degreaser.
2) Derust with Electrolysis tank for all the major pieces (Static, Dynamic, Swivel Base)
3) Hand wire Brushed everything after the e-Tank.
4) Low speed (Drill Driven) wire brushed after large chunks were removed.
5) Used a 3M 8S deburing wheel to clean and polish the jaws, slide, handles, and knobs.
6) Taped the bare metal surfaces
7) Primed with Rustoleum Self Etching Primer
8) Painted 3 coats using Rustoleum Navy Enamel.
9) Painted the letters using Rustoleum Hammered Silver
10) Reassembled with High Pressure Bearing grease on all action surfaces.
11) I used anti-seize on the screws and the lock knob screws. Not the main screw I used the high pressure bearing grease for that.
12) :beer:
 
Last edited:
OP
D

drivesitfar

Well-known member
Joined
Oct 23, 2013
Messages
36,032
Location
Pacific Northwest
Dave: thanks for the vise company addition and just added. do you have any wisdom to share on any of other areas such as repairs, cleaning or lubrication and such to add that i can edit on to the existing ones there on the first few posts of this thread.
 
OP
D

drivesitfar

Well-known member
Joined
Oct 23, 2013
Messages
36,032
Location
Pacific Northwest
All: I have decided to mount my Leinen F150 vise to my old Boeing surplus bench. it probably is in good enough condition to just mount and use, but i'm a member of GJ and would like it to be a little better than that.

it is a fairly big vise at 112 pounds with 6 inch wide jaws and the interesting thing about this vise is the static jaw moves backwards and the dynamic stays in place.

anybody taken one of these apart and put it back together before i try? i think the static will just come off the back, but not sure.

please tell me the positive and negatives about this vise if you own one or have used one. also any tricks or things that i might do to make it as good as it can be.

i would like to take it apart, wire wheel off the overspray blue and white paint and paint maybe a Hammered Green rustoleum or does anybody have a brand of green wrinkle paint to tell me about and where to get it? then shine up and maybe put linseed oil on the bare steel after i get it to shine maybe like my avitar i borrowed, grease and use. sound good and any help appreciated as always or just be jealous because it is an awesome vise and tool to own.

thanks
 

Attachments

  • 00u0u_40BYRpGK3Kf_600x450.jpg
    00u0u_40BYRpGK3Kf_600x450.jpg
    44 KB · Views: 383
  • 00j0j_9nWmhMClKlH_600x450.jpg
    00j0j_9nWmhMClKlH_600x450.jpg
    40.7 KB · Views: 370
  • 00A0A_gk0SA7tqvBO_600x450.jpg
    00A0A_gk0SA7tqvBO_600x450.jpg
    30 KB · Views: 359
  • WP_20140706_012.jpg
    WP_20140706_012.jpg
    89.1 KB · Views: 380
  • WP_20140706_010.jpg
    WP_20140706_010.jpg
    102.2 KB · Views: 408
  • WP_20140706_007.jpg
    WP_20140706_007.jpg
    86.7 KB · Views: 409
  • WP_20140706_004.jpg
    WP_20140706_004.jpg
    99.1 KB · Views: 483
OP
D

drivesitfar

Well-known member
Joined
Oct 23, 2013
Messages
36,032
Location
Pacific Northwest
I'm reserving this space so when i get my Leinen vise ready to mount on this metal desk this post will be next to the one of it as i bought it.

anybody see any issues with me mounting this vise to the old metal desk type bench made of steel?

any help or comments appreciated
 

Attachments

  • WP_20131221_001.jpg
    WP_20131221_001.jpg
    144.4 KB · Views: 397

Carla

MEMBER EMERITUS
Joined
Nov 27, 2010
Messages
672
Hello, DIF,

Here's photos of a little Reed miniature (22lbs.) vise, which I did up about fifteen-ish years ago, to be part of a small-arms maintenence kit I'd take to the range. Its usual work was to gently hold open-sight rifle barrels, using suitably-shaped hardwood jaw inserts, for windage adjustment, done by gently tapping sights laterally in their dovetails.

with just a couple layers of masking-tape for cushioning, the smooth jaws would hold 45 frames or slides without risk of marring, if done carefully.

As hind-sight, I really should have started with another make of vise, such as a Prentiss, for which I could have made easily interchangable steel, brass, and hardwood jaw-facings. The little Reed was what I had available at the time, so I used it. Best quality vises in that tiny 3" jaw size seemed relatively hard to find, compared to the usual 4" or 4-1/2" sizes.

I really should have cleaned it up a bit better for the photos, as it shows the 'patina' and grime from fifteen-ish years of regular use, but I mostly wanted to illustrate the two really useful mods to the old Reed vises. (This one was a pretty good example of 'rusty relic' condition when I got it.)

I fixtured the jaws for the surface grinder, and brought them to a reasonably high finish, flat, and parallel, re-setting for parallelism so that the jaws, when finish-ground, would hold a .001 feeler at any corner when snugged-up.

I made the thin retaining-nut to allow fitment of a ball thrust-bearing by roughing-out a scrap of brass about 1/8" over, then splitting it, and soft-soldering the halves back together.

After drilling for the dowel-pins, and reaming a half thou under, I ran the threads, using the front jaw itself as the gage. After parting-off and facing, I fixtured the part in the mill to mill the turning-slots.

The nut was then warmed to melt the solder, and short dowel-pins pressed as shown, with the holes to receive the dowels reamed a half-thou over for an easy slip-fit.

Taking the time to grind the jaws dead smooth and fit a ball thrust-bearing makes a very worth-while difference when working with delicate and/or valuable/irreplaceable small parts, which mustn't have any vise jaw scars, but must be held firmly.

cheers

Carla

www.tactical-link.com/cpix/103r1.jpg
www.tactical-link.com/cpix/103r2.jpg
www.tactical-link.com/cpix/103r4.jpg

(would someone who knows computer work better than I be so good as to post the photos here for me?)
 

zkling

Well-known member
Joined
Jan 23, 2007
Messages
16,939
103r1.jpg

103r2.jpg

103r4.jpg

(would someone who knows computer work better than I be so good as to post the photos here for me?)

WOW, the scraping just puts it over the top. No offense, but it seems the paint job doesn't do it justice compared to the mechanical work you put into the vise. Pics should show up now. :beer:
 

nine4gmc

Well-known member
Joined
Mar 24, 2012
Messages
14,357
Location
Dallas
Thanks for quoting Carla, ZK, I just noticed the scraping, dayum :drool:

ZK, Where ya been man, haven't seen a lot of you lately?

Drives, if you can't find a good wrinkle paint in green, use the standard black wrinkle from the auto parts stores and hit it with a few light coats of your favorite green. It will retain the wrinkle look with the color you like. Car show guys do it all the time. :beer:
 
OP
D

drivesitfar

Well-known member
Joined
Oct 23, 2013
Messages
36,032
Location
Pacific Northwest
Jeremy: thanks for posting the before pictures of your Craftsman vise and then taking up the very next post to save for the after pictures which will be nice when you get it done. also when you get some time Jeremy can you maybe document some of the steps you took to get from rusty Craftsman to where you are now until you finish?

by the way if all posters with a vise repair or restore question can post a picture of it along with the question and then take up the very next post so we can see the fix or restoration next to it that would be great.

any lubrication tips, brands, methods for Jeremy or the rest of us are needed?

Carla: I'm not sure why you needed to delete your thoughts that were so well written in an earlier post, but that's your choice and i respect that. now as far as your new post I'm still and will be trying to figure out exactly what you said and how to do that process myself someday, but the jaws on that little Reed are unbelievable. also the customized bearing split nut you made is the best one I've seen. nice work and thanks for the post.

ZK: thank you very much for posting up the pictures for Carla's vise so that we can all enjoy them. Please feel free to post a few pictures of your recent before and after vise fixes if you would. pretty amazing what you can do and we'd all like to at least see and maybe learn how to ourselves or hire you to if you want to take on a few of member's vise issues.

Nines: If i can't find a good wrinkle paint in a color i want to look at then i really appreciate your method of creating one. you are the best. also if you have any tips or a vise to add a before and after with steps you did then please do.
 
Last edited:

JeremyBurke

Well-known member
Joined
Nov 5, 2013
Messages
609
Location
Near Portland, OR
Per Drives Request here are the items and techniques I have used to get my vise this far.

1) Simple Green and a elbow grease powered wire brush to clean off the big chunks of crud.

2) E-Tank.


3) More hand powered wire brush and some drill powered wire cup and wheel. I didn't want to use the wire wheel on my grinder because I thought it was too aggressive. This is my first vise restoration so I am being cautious (maybe too much). I will let the true experts chime in if heavy power works for them.

4) I then shined up the parts that will be exposed and bare steel using a fine 8S deburing.

This is my initial cleaning shot.


And this is after the deburring wheel. I used this one. and got these results.


5) I then wiped everything down with Acetone and taped up the friction areas.


6) Started priming parts.

14563641013_b1a1544671_c.jpg


That is as far as I have gotten.
 
To avoid these ads, REGISTER NOW!

AndrewH

Well-known member
Joined
Sep 8, 2013
Messages
685
Location
Three Rivers, MI
Reed 104 1/2

Edited to add, this Reed was really a pain in my ***, when I bought it it was growing moss / mold on the side so after taking a wire wheel to it for awhile I got it down to what it looks like in the second picture. At that point a wire wheel would NOT remove any more paint so, I got frustrated with it and let it sit for a couple months, until I came across a MIRACLE product, a gel stripper I found at Walmart called Strip-X or something or other. Anyways, I 'painted' on the gel and in less than 30 minutes all the paint was gone and I had it stripped down to bare metal as shown in the 3rd picture.

At that point it was time for paint, so I carefully masked it off with painters tape, making sure none of the friction surfaces would be painted.

Before pictures..

20140412_130156.jpg


20140413_192814.jpg


20140606_022313.jpg
 
Last edited:

AndrewH

Well-known member
Joined
Sep 8, 2013
Messages
685
Location
Three Rivers, MI
Reed 104 1/2

Sorry, I do not have any pictures of the vise masked off, I'll be sure to take some on my upcoming Morgan 150 restoration that is wrapping up.

As for what lubricants I use, I use SuperLube for the main screw as well as the washer / handle that sits against the dynamic jaw to pull it in. I haven't used anti seize like others do but am considering it on one of my next restorations just to compare the smoothness to SuperLube. I also put a little bit of lube on the bottom of the slide to help it glide better. All the vises that I've restored so far could be moved in and out with a pinky, probably even a broken one!

When it comes to paint, I'm a fan of the Rustoleum line, I use their more expensive cans as I think they coat better and have a harder finish. Unlike a lot of people after I paint my vises, I let the paint cure for at least 7 days to make sure the finish is going to hold up over time.

After pictures...

20140622_113926.jpg
 
Last edited:

balane

Well-known member
Joined
May 4, 2011
Messages
2,996
Location
Pacific Northwest
Great work Andrew, those look terrific. What is the brand/color-name you used on the Parker? Is it gloss or satin? Looks very nice.
 

AndrewH

Well-known member
Joined
Sep 8, 2013
Messages
685
Location
Three Rivers, MI
Great work Andrew, those look terrific. What is the brand/color-name you used on the Parker? Is it gloss or satin? Looks very nice.

I have a few more restorations, just gotta take the time to post them, takes forever on my phone. Thank you for the compliment, here's the paint for the Parker. I really like it a lot, I'm just waiting for the right vise to appeal to me for that color!

1f15306b-7051-4e5b-8354-137f692454b7_400.jpg
 
OP
D

drivesitfar

Well-known member
Joined
Oct 23, 2013
Messages
36,032
Location
Pacific Northwest
Jeremy: Awesome pictures with good write ups on the steps you took to take it apart and get your Craftsman restored. any problems or special challenges so far or just waiting for information on the best grease to use and time to get back in the garage?

Andrew: awesome job on that old Parker and thanks for posting pictures of before in one post and after ones in the very next post. :thumbup:

when you get a minute to sit down and take a breather from all the vise projects you are currently working on along with your busy work schedule can you edit those 2 posts maybe and add some good words similar to what Jeremy did so we can learn more about the process? maybe not exact step by step, but highlighting a few of the good points to know and maybe any issues or problems you came across.

I know you too have experienced a tough time getting the pins out of Parker jaws to remove them so was it this vise? or post the one that it was if you will because the members need to know that sort of stuff and especially me since i have a nice big Parker with hacked up jaws that i might replace some day.

also since you are restoring so many vises can you share the lubricants, paints and tools you use too if you don't mind sharing and i'll post them in the first few posts? also maybe even a simple post of not putting a towel under or near a vise while using a hand grinder?

Blue: Thanks for adding another vise company that i'll add as i get time and also for adding the picture of your vise. or was it just a vise from that company? in any case that is awesome if others can do so if they find any companies that we are still missing on the growing list.

ALL: With the help of a very knowlegable GJ member I'm adding a few more vises to the Vise (vice) companies that made vises. the list i'm creating with the help of all the GJ members and a few I've found by searching for hours at times looking at vises is grown so big I wonder if anybody here wants to host them on their web site. i would if i figure out how because I've got one i'm not using any longer. that way we can start imputing all the models and pictures as does Dayid for quick reference guide?

here's a few more vise companies i'll be adding and I was a little tired, but i think most have not been mentioned yet if not all of them:

Amateur Bench Vises
American Chain Co. (ACCO)
Backus
Bignall & Keeler Mfg Co
Bonney Vise & Tool Works
Buhl
Buffalo
Capital Machine Tool Co, The
Cardinal (They did make at least one model of bench vise)
Champion
Chicago Flexible Shaft Co
Chicago Vise and Tool
Cheney
Desmond-Stephens
F&R (made by Futon Machine & Vise Co)
Fisher and Norris
Franklin Tool Co
Futon Machine & Vise Co
Goodell-Pratt
Hartman
Howard Iron Works
Illinois Iron & Bolt (I.I. & B Co)
Jacobsen (became Rock Island in 1906)
Leavens Mfg Co
Leet Mfg Co
Meadville
Merrills
Modern
Moran, Fred C
National Metal Products
National Vise and Tool
New Britain Machine Co
Oil Well Supply Co
Oswego
Penfield
Pittsburg (the old one, not harbor freight)
Read Gleason & Read Brooklyn, NY
Ritchie's Champion
Rumsey Mfg Co, LM
Sawyer Tool Co
Scout
Simplex
Simpson's
Smith, H.B.
Stephens Patent Vise Co
Sterling
Tower & Lyon
Union Vise Co
Vacu-Vise
Vanderman
Victor Tool
Vindex
Walworth
Van Wagoner & Williams
Ware, J.L.
Western Tool & Mfg Co
Williamson
Yankee

Thanks GJ members:thumbup:
 
Last edited:
OP
D

drivesitfar

Well-known member
Joined
Oct 23, 2013
Messages
36,032
Location
Pacific Northwest
Balane: thanks for posting on this thread and a few of your gems with some of the process from ugly to pristine would be great to add if you have time. it might take more time for you to make 2 posts of before and after with some information on them than it does for you to actually do the actual work on one, but i know I (we) would appreciate it. :thumbup:
 

Fretters

Well-known member
Joined
Jan 25, 2014
Messages
4,217
Location
South Yorkshire, England
Not sure if this one is already listed, but Marples did make the odd vice or two too. Don't see many of those, but they crop up occasionally. Had vaguely similar styling to that old Parkinson's which I got, with a bolt on top body section.

I'll try and get a full photo of a quick release mechanism too, for this thread, so that people can see how that works. The only problem those tend to suffer is the end of the spring snapping off, so usually an easy fix just to bend the end over where it snaps and retension the spring. They're usually fairly bulletproof though.
 
Last edited:
OP
D

drivesitfar

Well-known member
Joined
Oct 23, 2013
Messages
36,032
Location
Pacific Northwest
Fretters: Marples added and I'm guessing English. while we are talking about them any history to note about them like when in business, city they had factory even owner if you know more? or just thanks for posting a good old vise company's name you didn't see on the growing list. thanks:thumbup:
 

Fretters

Well-known member
Joined
Jan 25, 2014
Messages
4,217
Location
South Yorkshire, England
Marples was another old Sheffield manufacturer, mainly reknowned for their woodworking equipment. Not sure if they're still independent or just another Irwin brand name now.
 
Last edited:
OP
D

drivesitfar

Well-known member
Joined
Oct 23, 2013
Messages
36,032
Location
Pacific Northwest
All: since i didn't start this thread saying only old or US and European vises anybody that wants to put together a list of all the import brands please do and I'll post them because they break or need care too if you happen to own one or are thinking of buying one.

thanks in advance for anybody that wants to or has that list available to post so i can post in #2 post with all the other vises (vices).

cheers
 

Blue Frog

Well-known member
Joined
Jun 22, 2014
Messages
363
Location
Lynn Haven, FL
Blue: Thanks for adding another vise company that i'll add as i get time and also for adding the picture of your vise. or was it just a vise from that company? in any case that is awesome if others can do so if they find any companies that we are still missing on the growing list.

The vise is mine. I found it at an estate sale and just couldn't pass it up since it is in such fine unrestored condition.
 

Outlawmws

Well-known member
Joined
Aug 9, 2011
Messages
39,266
Location
The Badlands
Collected vise repair genius' I am working on a restoration of this little guy.


I'm about midway through this one here are a few current shots.


SNIP


What I need to know is as I put it back together what is the best way to lubricate the moving parts for a long, good life for this vise.
:dunno:

Lots of options, but I prefer a high pressure grease myself and have been using Mobil 1 Synthetic for ages; before that I used Blue marine grease, (both are multi purpose wheel bearing and U joint greases, and work well.)

Particularly on the screw since, unless it is a homeowners exposed screw vise, collecting crud isn't too big an issue. the slide can be cleaned and re-lubed without major fuss, so I still use it there top and bottom (not a lot of pressure on the sides...)
 

Outlawmws

Well-known member
Joined
Aug 9, 2011
Messages
39,266
Location
The Badlands
Hello, DIF,

Here's photos of a little Reed miniature (22lbs.) vise, which I did up about fifteen-ish years ago, to be part of a small-arms maintenence kit I'd take to the range. Its usual work was to gently hold open-sight rifle barrels, using suitably-shaped hardwood jaw inserts, for windage adjustment, done by gently tapping sights laterally in their dovetails.

with just a couple layers of masking-tape for cushioning, the smooth jaws would hold 45 frames or slides without risk of marring, if done carefully.

As hind-sight, I really should have started with another make of vise, such as a Prentiss, for which I could have made easily interchangable steel, brass, and hardwood jaw-facings. The little Reed was what I had available at the time, so I used it. Best quality vises in that tiny 3" jaw size seemed relatively hard to find, compared to the usual 4" or 4-1/2" sizes.

I really should have cleaned it up a bit better for the photos, as it shows the 'patina' and grime from fifteen-ish years of regular use, but I mostly wanted to illustrate the two really useful mods to the old Reed vises. (This one was a pretty good example of 'rusty relic' condition when I got it.)

I fixtured the jaws for the surface grinder, and brought them to a reasonably high finish, flat, and parallel, re-setting for parallelism so that the jaws, when finish-ground, would hold a .001 feeler at any corner when snugged-up.

I made the thin retaining-nut to allow fitment of a ball thrust-bearing by roughing-out a scrap of brass about 1/8" over, then splitting it, and soft-soldering the halves back together.

After drilling for the dowel-pins, and reaming a half thou under, I ran the threads, using the front jaw itself as the gage. After parting-off and facing, I fixtured the part in the mill to mill the turning-slots.

The nut was then warmed to melt the solder, and short dowel-pins pressed as shown, with the holes to receive the dowels reamed a half-thou over for an easy slip-fit.

Taking the time to grind the jaws dead smooth and fit a ball thrust-bearing makes a very worth-while difference when working with delicate and/or valuable/irreplaceable small parts, which mustn't have any vise jaw scars, but must be held firmly.

cheers

Carla

www.tactical-link.com/cpix/103r1.jpg
www.tactical-link.com/cpix/103r2.jpg
www.tactical-link.com/cpix/103r4.jpg

(would someone who knows computer work better than I be so good as to post the photos here for me?)

103r1.jpg


WOW, the scraping just puts it over the top. No offense, but it seems the paint job doesn't do it justice compared to the mechanical work you put into the vise. Pics should show up now. :beer:

I've had the true honor of visiting Carla's shop areas (several on her property) When I bought the Parker 386 from her, and the pleasure of seeing that vise in person. Don't kid yourself, that vise looks better in person than in pics, and it's an unbelievable job she did detailing it.

I also got to peruse her collection of scrap books she somehow managed to buy when the Colombian vise co closed. 15 volumes collected from their own ads, and those of their competitors. DECADES worth of ads and notes and other documentation. :eyecrazy:

I have a 403-1/2 Reed I'd like to detail out for similar detail/delicate work. I'll probably set it up so it can land in one of my WorkMates. Not sure I have the patience and skills to get it to Carla's level, but I'll try for better than factory...
 

JeremyBurke

Well-known member
Joined
Nov 5, 2013
Messages
609
Location
Near Portland, OR
Lots of options, but I prefer a high pressure grease myself and have been using Mobil 1 Synthetic for ages; before that I used Blue marine grease, (both are multi purpose wheel bearing and U joint greases, and work well.)


Particularly on the screw since, unless it is a homeowners exposed screw vise, collecting crud isn't too big an issue. the slide can be cleaned and re-lubed without major fuss, so I still use it there top and bottom (not a lot of pressure on the sides...)


Thanks very much outlaw.
 

Carla

MEMBER EMERITUS
Joined
Nov 27, 2010
Messages
672
hello, DIF

Here's a couple photos of another little vise I reconned for my own use, nearly twenty years ago. This one is a 1920's vintage Reed 403-1/2.

I ground the jaw facings smooth/parallel, and fitted a ball thrust-bearing to the screw, which, of course, was much easier on the early type.

What I wanted to illustrate here as a rebuilding detail, tho, was the taper pin for the swivelling back jaw. This one had the taper bore badly scarred by a previous owner, who apparently lost the pin, and substituted a rather roughly-ground bolt.

The technique for a proper repair was to set the vise up in the vertical mill, with the jaws firmly clamped, as tightly as would ever be used. After deburring the damaged taper bore as well as I could, I dialled-in the bore, and bored the hole to the 'small end' size of a No. 2 Morse taper. If I remember correctly, the large end of the taper didn't quite clean up, which was not a problem.

After boring straight, I used a No. 2 Morse reamer to ream the taper, kept in alignment with a centre-pin in the mill collet, just going to a min. depth of taper.

With the taper hole now a known taper, I could use a 2 Morse lathe centre to set the taper attachment on the lathe, to turn the replacement pin. The result is a jaw pin which fits correctly, and holds the back jaw in alignment reliably, for general use.

Note the mistake, I should have tapped the replacement pin for a small forged eye-bolt, and done a neat weld, instead of just bringing it to a 'pretty' shape. The reason for this is that the taper pin will 'stick' when knocked in for general use, and need to be 'rapped' sideways with a soft-hammer to free it, whereas a jaw pin with an eye-bolt can be easily freed by twisting it with any convenient bit of round stock, or a tool handle.

cheers

Carla

www.tactical-link.com/cpix/reed4031.jpg
www.tactical-link.com/cpix/reed4032.jpg
 
OP
D

drivesitfar

Well-known member
Joined
Oct 23, 2013
Messages
36,032
Location
Pacific Northwest
Carla: thanks again for the awesome pictures of another Reed you put your magic touch on to make it look that good. while i don't understand all you are saying about the machining of the swivel jaw pin and hole i bet a ton of members do and thanks for sharing. I'm thinking of changing one of the MISC. to MACHINING and then referencing the posts that have that information. it might end up being a bit difficult to keep up with once all this takes off, but i'll do my best. thoughts on how to document these type of pages if not that method are appreciated.

in the meantime keep posting information like this when you are able and especially with pictures because they sometimes tell it all. :thumbup:

Jake: thanks for the assist and i bet you haven't seen a little swivel jaw Reed or any vise with steel that cleaned up in a while either except for maybe the last post Carla made of a non swivel jaw Reed.

All: any more pictures of before and after vise restorations are appreciated and especially if you can highlight a few of the challenges or things that you had to think about while doing it.

any more lubrication, cleaning, polishing methods are always welcome so post what you do to make these old vises work and shine maybe better than when they were sold new from the factory over 50 years ago. thanks
 

JeremyBurke

Well-known member
Joined
Nov 5, 2013
Messages
609
Location
Near Portland, OR
Back to lubrication thoughts. It is the one open item I know I have. I have a few greases laying around I may use if they aren't bad for the application but last night I had a strange thought and I wanted to get the input of the collected vise genii. When I was restoring an old tool box several people recommended Bee's Wax for lubing the slides. This worked great. I was just wondering if this might also work on the exposed portions of the slide to prevent dirt and grit from sticking to the grease and causing build up? Would this be a sufficient lube? Thanks in advance for the help.
 

senlow

Well-known member
Joined
Apr 26, 2008
Messages
2,236
Location
Wheat Ridge, Colorado
Back to lubrication thoughts. It is the one open item I know I have. I have a few greases laying around I may use if they aren't bad for the application but last night I had a strange thought and I wanted to get the input of the collected vise genii. When I was restoring an old tool box several people recommended Bee's Wax for lubing the slides. This worked great. I was just wondering if this might also work on the exposed portions of the slide to prevent dirt and grit from sticking to the grease and causing build up? Would this be a sufficient lube? Thanks in advance for the help.

I like to use wax on the sliding surfaces. My preference is Dupont Teflon Chain-Saver.

For the screw, you should use an extreme pressure grease. The best that I have found is Molykote G-n Paste.
 
To avoid these ads, REGISTER NOW!
Top Bottom