To avoid these ads, REGISTER NOW!

GJ Worthy jacks

gte718p

Well-known member
Joined
Mar 12, 2009
Messages
3,977
Blackhawk S4 and Hein Werner O'boy restoration

I picked up some new to me toys today.

1 1939 4 ton blackhawk jack
14%2520-%25204.jpg


14%2520-%25205.jpg


14%2520-%25206.jpg


14%2520-%25207.jpg


and a little 1.25 ton Hein Werner o'boy

14%2520-%25203.jpg


14%2520-%25202.jpg


14%2520-%25201.jpg


The hydraulics on the Hein Werner are about shot. It will go up, but only on the very bottom of the stroke. I'm hoping it just needs a quick rebuild and seals. I hope the cylinder is not shot. The 4 ton needs new wheels. The pivoting castors are almost worn to nothing. I'm sure McMaster Carr can source me a suitable replacement, but if anyone has a line on some originals or a good picture of the originals I would love to hear about them. Other then the wheels it is in perfect working order. Even has the little light cover intact.

Both jacks are going to get a cosmetic makeover. They are going to head out to the sand blaster and either powder coat or paint. Then they are going to take up continued service as working tools in my garage.

The blackhawk is a beast. It weights in at 290 lbs.
 
Last edited:
To avoid these ads, REGISTER NOW!

redwrench60

Well-known member
Joined
Sep 10, 2011
Messages
6,075
Location
East Tennessee
Nice finds! Hiball can help with parts and advice. Here's my GJ worthy rehab...a Lincoln/Hein Werner 93642 2 ton that I rescued from the scrap pile and rebuilt using one of Hiball's kits. I didn't bother with any lipstick for this pig, just rebuild and return to work! :beer:
 

Attachments

  • 008 (3).jpg
    008 (3).jpg
    142.7 KB · Views: 126

Carla

MEMBER EMERITUS
Joined
Nov 27, 2010
Messages
672
dunno whether this one is 'worthy' or not......it is old, tho.

Its 'pet name' here has been 'jackosauras'.

I think its a 10 ton Walker, could be mistaken, its data plate is missing, can anyone identify it, and its approximate age?

We used this one for years and years, it looked like this when we got it, and there was never time/energy to restore it.....it finally had its main seal wear enough that it will lift a person, but not a vehicle....I shall have to get around to rebuilding it, one of these days....or would happily trade it for a 5ton, which is all we'd ever really need here.

cheers

Carla

<img src=http://www.tactical-link.com/cpix/walker10ton.jpg>
 
Last edited:
OP
G

gte718p

Well-known member
Joined
Mar 12, 2009
Messages
3,977
I started on the restoration project this week. The rear casters in the BlackHawk were dead. I was not able to find any replacement casters.

These where the closest I could find:
14%2520-%25204.jpg


Unfortunately the through hole was the wrong size and the were to wide. Not a problem. The old Walker Turner drill press made short work of that. (Did I mention I like vintage equipment)

14%2520-%25201.jpg


Not exactly the finest example of a machine tool setup, but it worked. I ordered a proper set of hold downs immediately after I was done. After drilling, the hub was still too wide. A couple of minutes with a file and the fit perfectly.

Old and new:
14%2520-%25202.jpg


One of the retaining screws for the castors was sheared. It was a little nerve racking with the easy out to get it to back out. The AFFF/Acetone mix penetrating oil did wonders. The bearings for both rear castors were also completely missing. Of course no one stocks them anymore and they are not a standard size. I think I've found some that I can make work. If not I'm going to have to have some bearings machined which should be interesting. I'm thinking about just putting a bronze sleeve in to replace the bearing.

I didn't take any pictures of the O'Boy. It is stripped waiting for blasting. I ordered the seal kit and paint for it. It was a pain in the @ss to get apart, but it is done.
 
OP
G

gte718p

Well-known member
Joined
Mar 12, 2009
Messages
3,977
Anyone happen to know the size for the grease fittings on the front wheels?
 

dewalt378g

Well-known member
Joined
Mar 17, 2012
Messages
180
Nice find!!! Do you think you have original paint? I'm interested if you have an original color. A loooong time ago I bought an S4 rebuild kit from hyjacks.com. He, Richard if I remember correctly, told me that they used to be fire engine red which seems to be what you have. HiBall would probably know, but I'll check if I have grease zerks on my front wheels tomorrow and let you know the size. Also, I believe someone here turned out new bearing races for the rear casters on a lathe...if I find the thread I'll post. You might get lucky with the appropriate thrust bearings if you can find the right size.
 

Bull

Super Moderator
Joined
Dec 12, 2005
Messages
16,189
Location
MA
I replaced the bearings on the rear casters of my S4 with some I found very cheaply available on Amazon. I determined the proper size by fitting one of the original bearings into a spot on a drill index.
 

zkling

Well-known member
Joined
Jan 23, 2007
Messages
16,939
Very nice. The O boy may not have an issue they seem to have a very low engagement/swing arc. At least my walker badged version does and it has no problems lifting.
 

Farmall 1066

Well-known member
Joined
Jul 21, 2012
Messages
1,805
Location
Suburban Rockford, NE
Nice finds. Glad to see them being treated to a restoration and continued useage.
Love the iconic looks of the Blackhawk.
Why can't anything be designed to be aesthetically pleasing today?
 

zkling

Well-known member
Joined
Jan 23, 2007
Messages
16,939
Nice finds. Glad to see them being treated to a restoration and continued useage.
Love the iconic looks of the Blackhawk.
Why can't anything be designed to be aesthetically pleasing today?

$ :dunno:

Although do realize those jacks were sold to professionals back in the day. But I agree, the worst is metal lathes. From lots of curves to all boxy.
 
OP
G

gte718p

Well-known member
Joined
Mar 12, 2009
Messages
3,977
I replaced the bearings on the rear casters of my S4 with some I found very cheaply available on Amazon. I determined the proper size by fitting one of the original bearings into a spot on a drill index.

It is not actually the balls I needed. Well, I did need balls as all of the balls were missing, but mainly I needed races. I'm not sure if the races were damaged by being used without ball bearings, or there were no ball bearing as a result of the races wearing out and allowing the balls to fall out. Either was the bottom race on one side looked like flat washer. The other still had its curve but was missing a good 30 deg chunk.

These look like the are going to work as replacements
http://www.amazonsupply.com/dp/B0034G64ZC?ref_=sr_1_1_txt
They are a little thicker then the original. The bore on the jack is only 2" so the bearing is .09" over. I'm hoping I can make it work with some sand paper and call it light press fit

Ahh good 'ol Amazon....lol

Here's the thread anyway...lots of info

http://garagejournal.com/forum/showthread.php?t=101999&highlight=blackhawk+rear+caster

I've seen the thread. A lot of the pictures are missing for me.

Nice find!!! Do you think you have original paint? I'm interested if you have an original color. A loooong time ago I bought an S4 rebuild kit from hyjacks.com. He, Richard if I remember correctly, told me that they used to be fire engine red which seems to be what you have. HiBall would probably know, but I'll check if I have grease zerks on my front wheels tomorrow and let you know the size. Also, I believe someone here turned out new bearing races for the rear casters on a lathe...if I find the thread I'll post. You might get lucky with the appropriate thrust bearings if you can find the right size.

Thanks. Eventually both jacks are going to be a bright red metallic.
rsp2701.jpg

The s4 works perfectly. As soon as I get the castors sorted I'm planning on putting it back in service. I'll paint it eventually. The O'Boy is torn down and will go to the sand blaster tomorrow. I'm hoping to have the pain in tomorrow and get it painted this weekend. The seal kit for it should be in next week and hopefully I can put it back in service.
 

Garage Junky

Well-known member
Joined
Jul 19, 2013
Messages
673
Location
MI
I've got both the S-4 and the Weaver in one of the subsequent posts. Keep the updates coming, gte718p, as I'm keen on seeing how yours turns out... it's going to be a bit before I can start on a proper restore.
 

Farmall450

Well-known member
Joined
Dec 23, 2011
Messages
13,371
Location
Marengo, Illinois
Nice finds! Hiball can help with parts and advice. Here's my GJ worthy rehab...a Lincoln/Hein Werner 93642 2 ton that I rescued from the scrap pile and rebuilt using one of Hiball's kits. I didn't bother with any lipstick for this pig, just rebuild and return to work! :beer:

I'm not sure if I like the truck or the jack more.

I've got the same one, albeit no service box.
 

zkling

Well-known member
Joined
Jan 23, 2007
Messages
16,939
I'd really like to know how that happened.

$,greed, consumer demand, profit margin, increased population, etc.

Today I think one the the nicest looking and working jacks made is a milwaukee, but very few folks are willing to spend the $ for one. But again it is designed as a professional tool, targeted to pros.
 
To avoid these ads, REGISTER NOW!

dewalt378g

Well-known member
Joined
Mar 17, 2012
Messages
180
Yeah pics were missing for me too, but it's well described. Dude, that color is going to be amazing.
 
OP
G

gte718p

Well-known member
Joined
Mar 12, 2009
Messages
3,977
Thanks for the info and the link. I had never heard of pressed in grease fittings.
 
OP
G

gte718p

Well-known member
Joined
Mar 12, 2009
Messages
3,977
Before:
14%2520-%25201.jpg


After:
14%2520-%25202.jpg


I still have some clean up to do with the wire wheel. The blaster (not mine) was almost out of media. The window was so scratched there was only about 1 sq inch you could see through. All and all a quite frustration two hours. However progress was made. It looks like the paint will not be here till next week due to the holiday. :(
 
OP
G

gte718p

Well-known member
Joined
Mar 12, 2009
Messages
3,977
I finally got the pump section apart around 1 am yesterday. It refused to cooperate. Penetrating oil, a pipe wrench, and a larch cheater bar proved to be the magic combination.

The pump and release came out fairly easily. After soaking in some penetrating oil the spring and ball assembly came out easily.
14%2520-%25206.jpg


The brass packing nut came out without a problem.
14%2520-%25204.jpg


This is where I stalled. I could not get the outside of the cylinder off.
14%2520-%25205.jpg


Finally after a couple off hours of soaking in penetrating oil I broke out the cheater bar and it came apart.

14%2520-%25201.jpg


14%2520-%25203.jpg


14%2520-%25202.jpg
 

Matt Irvine

Well-known member
Joined
Nov 4, 2013
Messages
248
Location
Aussieland!
Cute little one at work.

For reference that cans a little over 4 m in diameter, and that's a boom welder in the back.
hysemubu.jpg


Sent from my iPhone using Tapatalk
 
Last edited:
OP
G

gte718p

Well-known member
Joined
Mar 12, 2009
Messages
3,977
Epoxy primer went down today.

14%2520-%25201.jpg


14%2520-%25202.jpg


Color and clear do down tomorrow if it is not raining.
 
OP
G

gte718p

Well-known member
Joined
Mar 12, 2009
Messages
3,977
Sprayed color and clear today on the O'Boy.

14%2520-%25209.jpg


14%2520-%25207.jpg


Came out more burgundy then red. With the pearl in it it really pops in the sun light. Unfortunately the day turned crappy so I had to put up all the walls of the tent and work inside. Pictures don't really do the color justice.
I'm debating if I want to attempt to color sand and buff. I sprayed the Harbor Freight crane I have on the back of my truck b/c I had extra paint. I am going to experiment on it first.

Since I was literally watching paint dry a good portion of the day I started working on the Blackhawk S4 light. I'm not sure it is actually useful, but its there and now it works.

One of the Harbor Freight free LED flashlights gave its life for this repair.

I started by taking the batteries and switch out of the flash light. I then used a dremel to cut two slits in the side of the light. That allowed me to slide the lens and LED out.

14%2520-%25201.jpg


14%2520-%25206.jpg


Solder wire to the pads on the back of the LED,
14%2520-%25205.jpg


Slide the wires through the holes in the case and up the handle. The lights battery pack slides right into the handle in the original location. No wires attacked in the picture. They are simply soldered to the tabs on the battery pack.

14%2520-%25203.jpg


Switch goes onto the end of the handle.

14%2520-%25204.jpg


The switch is a little small for the opening. Right now I just have several layers of electrical tape wrapped around the switch to make it fit. I'm going to have to come up with something better. It looks like I'm going to have to have bearings machined, so I might have a new switch plate machined while I am at it. Or maybe just get some derlin and machine and adapter to fit the two together perfectly.

Anyway the end result is a functional light:
14%2520-%25202.jpg
 

Flattie

Well-known member
Joined
Dec 30, 2013
Messages
151
Location
Kansas
Sprayed color and clear today on the O'Boy.

14%2520-%25209.jpg


14%2520-%25207.jpg


Came out more burgundy then red. With the pearl in it it really pops in the sun light. Unfortunately the day turned crappy so I had to put up all the walls of the tent and work inside. Pictures don't really do the color justice.
I'm debating if I want to attempt to color sand and buff. I sprayed the Harbor Freight crane I have on the back of my truck b/c I had extra paint. I am going to experiment on it first.

Since I was literally watching paint dry a good portion of the day I started working on the Blackhawk S4 light. I'm not sure it is actually useful, but its there and now it works.

One of the Harbor Freight free LED flashlights gave its life for this repair.

I started by taking the batteries and switch out of the flash light. I then used a dremel to cut two slits in the side of the light. That allowed me to slide the lens and LED out.

14%2520-%25201.jpg


14%2520-%25206.jpg


Solder wire to the pads on the back of the LED,
14%2520-%25205.jpg


Slide the wires through the holes in the case and up the handle. The lights battery pack slides right into the handle in the original location. No wires attacked in the picture. They are simply soldered to the tabs on the battery pack.

14%2520-%25203.jpg


Switch goes onto the end of the handle.

14%2520-%25204.jpg


The switch is a little small for the opening. Right now I just have several layers of electrical tape wrapped around the switch to make it fit. I'm going to have to come up with something better. It looks like I'm going to have to have bearings machined, so I might have a new switch plate machined while I am at it. Or maybe just get some derlin and machine and adapter to fit the two together perfectly.

Anyway the end result is a functional light:
14%2520-%25202.jpg

Well done, sir. Tip of the cap to you.
 
OP
G

gte718p

Well-known member
Joined
Mar 12, 2009
Messages
3,977
The bearings in the blackhawk wheels were completely shot. For the life of me I can't find a suitable replacement. Right now I have some thrust bearings in them. They work okay, but don't provide the axial support that is needed for the wheels to turn.

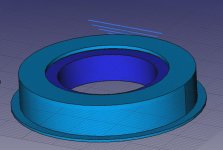
There is a thread on here where a guy made is own. Unfortunately he has not logged on in over a year and a half. I would love to get his dimension, but I'm not expecting much. I've designed a new bearing. Unfortunately I'm working with a new program and I can't for the life of me figure out how to make dimensioned drawings.
Even though I'm frustrated with it right this second. I highly recommend FreeCAD. It is a really powerful parametric program. It can do Finite Element analysis, motion analysis, all kinds off cool things. Best part is it is free :)

attachment.php


attachment.php


attachment.php


I really want to 3D print these bearing to ensure they are going to work. They are angular contact with a fairly large contact angle. It is less then idea, but since they are extremely low RPM I think I can get away with it. Unfortunately the company I ordered my printer from has delayed and delayed and now they are saying early next year. :shocking:

If anyone is willing to print them, I have uploaded the IGES files in a .zip. I'm more then happy to contribute some $. I know PLA and machines are not free.

If you happen to know where I can source a 2" OD angular contact bearing with 1 1/8 bore that is .37" thick I would appreciate it. I'm also thinking about just doing a solid piece of bronze bushing stock. I'm looking for opinions on that as well.
 

Attachments

  • Bearing cross section.jpg
    Bearing cross section.jpg
    41.1 KB · Views: 276
  • bearing top.jpg
    bearing top.jpg
    53.7 KB · Views: 276
  • iso lower.jpg
    iso lower.jpg
    68.1 KB · Views: 277
  • Bearing upper race.zip
    10.3 KB · Views: 0
OP
G

gte718p

Well-known member
Joined
Mar 12, 2009
Messages
3,977
The O'Boy is done.
Before:
14%2520-%25203.jpg

After:
14%2520-%25201.jpg


14%2520-%25202.jpg


Most importantly it now works. The paint is not as hard as I would like or think it should be. Paint and I don't seem to get along. I have some touch up to do. I also think I'm going to give it another coat of clear down the road.
With grease fittings on each wheel and newly rebuild swivels in the casters this jack is a joy to move around. It rolls amazingly. I can't wait to put it in service.
 
OP
G

gte718p

Well-known member
Joined
Mar 12, 2009
Messages
3,977
I don't think anyone is actually reading this thread.

I was reading jack threads on GJ yesterday. Someone cleaned up the image of the ID tag on an old jack and had a new tag manufactured. It looked really sharp, unfortunately he was kind of an @$$ about sharing the image It rubbed me the wrong way. In any case it was not hard to do.

I scanned the original tag at 1600 dpi:
attachment.php


I used GIMP which is a free program to straighten up the image. I used the threshold command to convert it to black and white. I went in with paint brush and cleaned up the imperfections in the image. Its not perfect, blown up you can see imperfections, but the tag is only 2.5"x2.75" it prints perfectly.

It is off to the printer and in a month I should have a new tag.

attachment.php
 

Attachments

  • OBOY LOGO.jpg
    OBOY LOGO.jpg
    128.2 KB · Views: 240
  • OBOY.jpg
    OBOY.jpg
    141.4 KB · Views: 238

Garage Junky

Well-known member
Joined
Jul 19, 2013
Messages
673
Location
MI
That O'Boy came out awesome! I give you a lot of credit for getting that project done so quickly.

Love the light on the Blackhawk. I may just borrow that idea
 
OP
G

gte718p

Well-known member
Joined
Mar 12, 2009
Messages
3,977
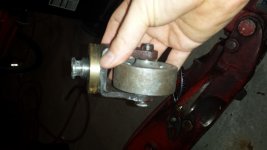
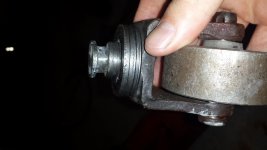
Finally made some progress on the S4. I ended up designing a simple sleeve to adapt the bore to modern thrust bearings.

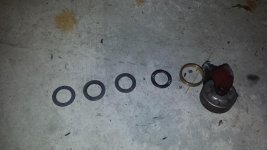
You can see the wheel stud, the sleeve, the thrust bearing cage, and a couple of shim washers.
attachment.php


Thrust bearing and shims stacked up
attachment.php


Sleeved
attachment.php


I haven't greased the wheels yet, but it rolls extremely well. I'm not planning on greesing it until after paint however, I expect it will be amazing especially considering how much it weighs. Unfortunately I just found out I'm going to be spending 9 months in a very hot sunny place that is not my home. It is probably going to be late next year before it is finished. Oh well its been waiting since 1949, I don't think another year will hurt it to much.

mtnwkr: your build is one of the ones that inspired me to do this.

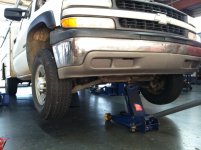
The Hein Werner is back in full service. It rolls absolutely amazing. It really is a pleasure to use. I used it last week to lift my 4runner for brake and transmission work. My only complaint is how low you have to be to actually engage the pump. The handle is almost horizontal before it starts to engage the pump. Full stroke is really short. It makes since and works well under small cars, but on my trucks it seems like it is wasting a ton of potential stroke.
 

Attachments

  • 20141020_153731.jpg
    20141020_153731.jpg
    124.4 KB · Views: 171
  • 20141020_153708.jpg
    20141020_153708.jpg
    138 KB · Views: 170
  • 20141020_153641.jpg
    20141020_153641.jpg
    146.2 KB · Views: 172
Last edited:

OP
G

gte718p

Well-known member
Joined
Mar 12, 2009
Messages
3,977
My local printer failed me. He has been jerking me around for weeks about getting the metal tag printed for the Hein Werner. Anyone have aplace online that they have used for metal printing?
 
To avoid these ads, REGISTER NOW!
Top Bottom