To avoid these ads, REGISTER NOW!

Craftsman 6512 Toolbox

jgschroeder99

Well-known member
Joined
Aug 12, 2012
Messages
92
Location
NW Ohio
Hey everyone. This is my first thread on the forum. Thought I'd start with something easy like a small toolbox restoration. I use the term restoration loosely in this case. My dad used this toolbox for many years at work. It was in pretty rough shape when I started (still is). But it has sentimental value to me because my dad passed away in 2007 with almost 40 years under his belt at Clevite (now part on Tenneco along with Monroe). Anyways, here are some pictures.
 

Attachments

  • 20140827 (91).jpg
    20140827 (91).jpg
    143.2 KB · Views: 131
  • 20140827 (95).jpg
    20140827 (95).jpg
    145.9 KB · Views: 83
  • 20140827 (1).jpg
    20140827 (1).jpg
    141.4 KB · Views: 90
  • 20140827 (100).jpg
    20140827 (100).jpg
    142.9 KB · Views: 89
To avoid these ads, REGISTER NOW!
OP
J

jgschroeder99

Well-known member
Joined
Aug 12, 2012
Messages
92
Location
NW Ohio
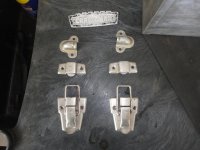
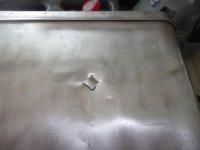
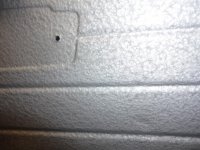
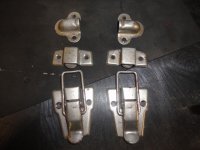
The first thing I did was clean the box with WD40 and then mineral spirits. This let me get a better idea what shape the outside of the box was in. Spoiler alert, not very good. I then removed the hardware and gave the pieces a soak in Simple Green. With the hardware soaking, I removed most of the rest of the paint and rust with a brass wire wheel in my corded drill. The metal is solid, but there is some pitting on the sides and back.
 

Attachments

  • DSC02108_zps915a7c3e.jpg
    DSC02108_zps915a7c3e.jpg
    57.8 KB · Views: 103
  • DSC02111_zps307970bf.jpg
    DSC02111_zps307970bf.jpg
    65.9 KB · Views: 85
  • DSC02113_zpsdca35fc1.jpg
    DSC02113_zpsdca35fc1.jpg
    111.9 KB · Views: 90
  • DSC02116_zps31279db0.jpg
    DSC02116_zps31279db0.jpg
    90.4 KB · Views: 99
  • DSC02117_zpsbc962aeb.jpg
    DSC02117_zpsbc962aeb.jpg
    71.5 KB · Views: 84
  • DSC02118_zpse0c41ab3.jpg
    DSC02118_zpse0c41ab3.jpg
    64.9 KB · Views: 87

jim

Well-known member
Joined
Feb 26, 2005
Messages
284
Location
wi
About to do the same thing!! How did you get the hardware to look that good? Someone told me to scrub with Coke and tin foil. How are going to reattach the hardware? Pop rivets are long on the back end. keep us posted please. Jim
 
OP
J

jgschroeder99

Well-known member
Joined
Aug 12, 2012
Messages
92
Location
NW Ohio
About to do the same thing!! How did you get the hardware to look that good? Someone told me to scrub with Coke and tin foil. How are going to reattach the hardware? Pop rivets are long on the back end. keep us posted please. Jim

I just soaked the hardware in Simple Green and scrubbed with a plastic bristle brush. It took a few hours of soaking and a few rounds of scrubbing, but came out decent. Before I took the hardware off, I thought it was covered with rust scale, but it turned out to be an old repaint. I still need to decide if I am going to try to polish them, or paint them. I was planning on pop rivets to reattach them.

Still not sure how good I can get the lid to look. It's pretty dented up. It may give me an excuse to buy a body hammer set, though.
 
OP
J

jgschroeder99

Well-known member
Joined
Aug 12, 2012
Messages
92
Location
NW Ohio
To remove all the hardware, you just drilled the fasteners out carefully?

Yeah. I had never drilled out rivets before, so I started with a small drill bit. Just kept using larger bits until the rivet popped. If you are more familiar with rivet sizes than I am, you could probably correctly guess the proper drill bit size the first time.
 
OP
J

jgschroeder99

Well-known member
Joined
Aug 12, 2012
Messages
92
Location
NW Ohio
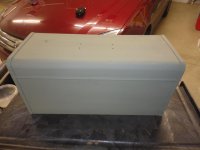
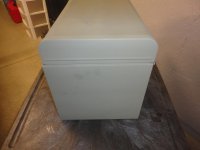
Made some progress on my toolbox today. I started by cleaning with mineral spirits. I kept cleaning until the disposable blue shop rags were fairly clean after wiping the surface. This took about half a roll of rags! I let it dry and then sprayed on 3 coats of Rust-Oleum self etch primer. It came out ok. I wish I had kept the lid open overnight because it stuck shut and some of the primer came off on the lid. I'm now debating whether to try to pound the dents out of the lid or not. I kind of like the beat up look, just don't know if this is too beat up. Also don't know if the dents will look good with a new paint job. What do you folks think?
 

Attachments

  • DSC02119_zps631bda33.jpg
    DSC02119_zps631bda33.jpg
    56.2 KB · Views: 63
  • DSC02121_zps8385b1b7.jpg
    DSC02121_zps8385b1b7.jpg
    55.2 KB · Views: 55
  • DSC02122_zpsb876aec6.jpg
    DSC02122_zpsb876aec6.jpg
    60.3 KB · Views: 54
  • DSC02120_zps3d776786.jpg
    DSC02120_zps3d776786.jpg
    54.6 KB · Views: 57
To avoid these ads, REGISTER NOW!

John in OH

Well-known member
Joined
Jun 2, 2007
Messages
2,444
Location
SE Ohio & Eastern Virginia
Made some progress on my toolbox today. I started by cleaning with mineral spirits. I kept cleaning until the disposable blue shop rags were fairly clean after wiping the surface. This took about half a roll of rags! I let it dry and then sprayed on 3 coats of Rust-Oleum self etch primer. It came out ok. I wish I had kept the lid open overnight because it stuck shut and some of the primer came off on the lid. I'm now debating whether to try to pound the dents out of the lid or not. I kind of like the beat up look, just don't know if this is too beat up. Also don't know if the dents will look good with a new paint job. What do you folks think?

Looking good!! IMHO, unless the dents are really significant, I would not try to remove them. My "body work" skills are nearly non-existent, but when I've tried to remove small dents from items, the result is usually worse than when I started.
 

Seagoon

Well-known member
Joined
Jan 23, 2014
Messages
859
Location
Scunthorpe. UK.
To me the dents are part of it's story. If you leave them in and your Dad walked into the garage(in a dream:)) he would say" Oh! you painted up my old box!" If you straighten it up he would say"That box is like the one I used to have". A subtle but important difference, I think.
 
OP
J

jgschroeder99

Well-known member
Joined
Aug 12, 2012
Messages
92
Location
NW Ohio
Got a couple of coats of Rust-Oleum Hammered Silver on my toolbox this morning. Some areas have a better hammered texture than others. The reviews of this paint on Amazon are correct. You have to put the 2nd coat on thick to get the hammered effect. If you don't, it will just be textured. Now I just need to paint the crown badge and reattach all the hardware. Does anyone know if there is any model paint made in Craftsman red? I'm thinking of reattaching the hardware with stainless steel machine screws, since I don't know how rivets will look. The original factory rivets looked like a hybrid between solid and blind. The fronts were solid, but the portion inside the toolbox was hollow. I assume this was to make the riveting process easier in the factory.

Also, does anyone have any suggestions for coating the hardware? After cleaning the pieces, most of what I thought was rust turned out to be an old repaint and grime. There is very little rust left, which I don't mind leaving. Just wondering if there is something I can put on the hardware to keep the rust from getting worse. Or maybe I should try to polish it out? I'm open to suggestions.
 

Attachments

  • DSC02123_zpsee81b40c.jpg
    DSC02123_zpsee81b40c.jpg
    63 KB · Views: 71
  • DSC02124_zps0677fea9.jpg
    DSC02124_zps0677fea9.jpg
    123.9 KB · Views: 62
  • DSC02125_zps20b5896e.jpg
    DSC02125_zps20b5896e.jpg
    99.4 KB · Views: 55
  • DSC02126_zps91b0d3c5.jpg
    DSC02126_zps91b0d3c5.jpg
    86.1 KB · Views: 54
  • DSC02127_zpsdbea1820.jpg
    DSC02127_zpsdbea1820.jpg
    86.4 KB · Views: 56
OP
J

jgschroeder99

Well-known member
Joined
Aug 12, 2012
Messages
92
Location
NW Ohio
Maybe I missed the answer, but how will you reattach the hardware? Looks good!

Thanks! I'm not going for a full restoration, more of a functional preservation.

I'm not sure yet how I'll reattach the hardware. Originally, I wanted to pop rivet everything back on. I'm just not sure I like the appearance of a pop rivet with the hole in front where the mandrel was. I did figure out that the factory rivets were semi-tubular, hence the lack of a mandrel hole. I think the tools required to set semi-tubular rivets are beyond my budget for this project. I'm actually leaning toward some nice stainless steel machine screws.

I'm open to suggestions.
 

ford33

Well-known member
Joined
Feb 26, 2011
Messages
2,118
Location
Chicago, IL. USA
I have a similar craftsman tool box that I am working on restoring this week. I have owned the box since 1981 when I received it as a Christmas gift from my parents. It was looking bad and had some rust on the bottom. I was going to throw it away and buy a new one for $39 from Sears but I have some great memories of that box and my working on cars with it and decided to keep it. I have certainly spent more money in time and materials than the box is worth.

I agree with you that the Rust-Oleum hammered paint is difficult to spray and obtain a "hammered" appearance. My second coat was applied thick and yet most places on the box do not have that hammered look. I am OK with it. I used Rust-Oleum gloss red color to paint the tool tray and it came out very nice.

I did notice that the paint directions state it requires 48 hours to fully dry prior to recoating. I painted the second coat on after waiting 60 hours and had no problems but I did lightly sand the surface prior to the second coat. I am waiting for the second coat to dry which should be tomorrow afternoon.

Nice work on your box. Enjoy it.
 

Berno082

Member
Joined
Jan 6, 2018
Messages
7
Location
Philadelphia, PA
I know I'm late to the party but I am just about to start this same project. What did you end up deciding on to remount the hardware? Do you have any pictures of the finished results? My hardware is in pretty bad shape with rust and I'm looking for any suggestions on how to go about bringing them back to their original shine as well as best way to remount them.. Thanks in advance for any further suggestions and for sharing everything thus far.
 
To avoid these ads, REGISTER NOW!
Top Bottom