To avoid these ads, REGISTER NOW!

VISE REPAIR 101 all vise repairs, lubricants, sources for parts and the tricks to fix

OP
D

drivesitfar

Well-known member
Joined
Oct 23, 2013
Messages
36,072
Location
Pacific Northwest
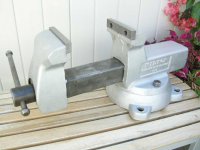
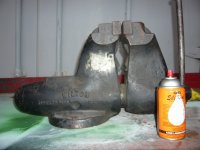
thanks VA. it pales to the legend and some of the pictures of the chain gang, but it's gaining in girth quite a bit some months now. how about a 1000 pound anvil and a 350 pound Craftsman with a one inch nickel plated swivel jaw Prentiss. Dare to dream. :D

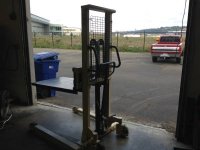
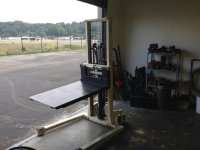
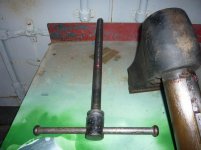
i found a way to transport the big guys and work on them with this Jet lift that is rated for 2200 pounds.

have a great weekend everybody and if you would post your before and after pictures even if you have a vise that has already been mentioned because it seems like they are all a bit different.
 

Attachments

  • 00X0X_2OPkzDCQQhP_600x450.jpg
    00X0X_2OPkzDCQQhP_600x450.jpg
    29.6 KB · Views: 93
  • 00r0r_d7sksxWV0XC_600x450.jpg
    00r0r_d7sksxWV0XC_600x450.jpg
    28.4 KB · Views: 92
  • 01414_5DKLrd1ouIf_600x450.jpg
    01414_5DKLrd1ouIf_600x450.jpg
    33.2 KB · Views: 91
To avoid these ads, REGISTER NOW!

tool_scrounge

Well-known member
Joined
Jul 20, 2010
Messages
4,211
Location
Southern California

Attachments

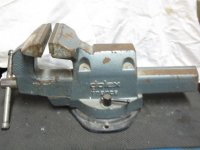
  • Dolex_vise.jpg
    Dolex_vise.jpg
    93.3 KB · Views: 109
OP
D

drivesitfar

Well-known member
Joined
Oct 23, 2013
Messages
36,072
Location
Pacific Northwest
TS: that French vice looks very interesting. the swivel base doesn't really match the main vice so i'm guessing you have a lot of non swivelers in France.

thanks for posting the picture and attaching the links.
 
OP
D

drivesitfar

Well-known member
Joined
Oct 23, 2013
Messages
36,072
Location
Pacific Northwest
ZK: client's shop that I bought lift from. Yes awesome spot and pretty noisy when F-15's take off. Like being on an aircraft carrier. Need to figure out small leak issue on lift and HiBall gave me a few ideas to check out. Like the lift or the MY shelf with the 5 vises on it?
 

KMScott

Well-known member
Joined
Feb 14, 2012
Messages
4,643
Location
Daufuskie Island, South Carolina
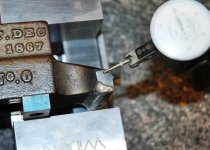
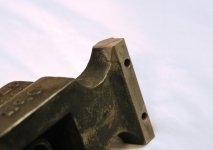
I just finished repairing and installing new jaws on this Chas Parker #0 2-1/4 jaw width vise. Pat. dates are on one side June 20 1854 and the other side says December 10 1867. I had to fill in damage area and I chose welding. There are many different ways to repair this vise, I chose to do it this way, maybe someone might see a answer to a issue on their own vise. One note, I was real nervous striking the first arc but settled down quickly after seeing how the cast flowed.

The vise had what looks like grind marks that removed a big chunk of the jaw support on the Static and Dynamic jaw support. The customer asked for a new set of jaws but also mentioned if I had a way to fill in the voids then please give it a try, treat it like it is yours he mentioned.

I chose to use Inconal as the filler rod and applying it with my TIG welder. I like using Inconal because it sticks pretty good and ends up a soft weld where a file will cut and shape it easy. What I do not like is the dull color you get from Inconal after shaping the weld. I set the weld currant as low as I can ( currant set to some where around 20 amps) so the Inconal filler metal not only fuses with the vise base metal but also lays on top so not to cause sink at the weld line. I had plenty of practice with this while repairing injection molds. Any one that TIG welds can repair vises like this. The heat settings are the trick along with the angle of the heat source and the way you apply the filler rod.
 

Attachments

  • Parker Repair-5.jpg
    Parker Repair-5.jpg
    55.8 KB · Views: 115
  • Parker Repair-4.jpg
    Parker Repair-4.jpg
    77.8 KB · Views: 116
  • Parker Repair-3.jpg
    Parker Repair-3.jpg
    62.8 KB · Views: 118
  • Parker Repair-2.jpg
    Parker Repair-2.jpg
    69.5 KB · Views: 125
  • Parker Repair-1.jpg
    Parker Repair-1.jpg
    75 KB · Views: 119
  • Parker Repair-0.jpg
    Parker Repair-0.jpg
    140.1 KB · Views: 139

KMScott

Well-known member
Joined
Feb 14, 2012
Messages
4,643
Location
Daufuskie Island, South Carolina
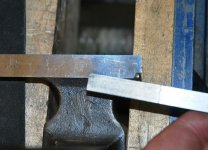
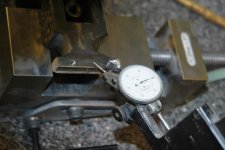
Next is the technique of shaping the weld, yes it is much easier if you have a machine shop to work with. Having a surface grinder speeds up the process and gives a more precision fit but that does not say you can not blend welds with a file and carbide burrs. For a surface grinder I indicate in the jaw face, and in a couple of minutes the weld is ground off flat and easly finished with a hand stone. If you have to do it with a file then I like to super glue a SS shim stock (.003) so if you miss a little with the file it will not damage the jaw face. Even filing along the shim stock and use the shim stock as a wear/guide surface to ride your file or stone will give you a nice flat finished surface. I like using diamond files. When done pull the shim stock off and finish the .003 material that is left with a stone quenched in lamp oil of a fine oil that is similiar.

The weld on the under sides are a little tougher, I like using a small carbide burr in my flex handle Dremel, here you have to get real comfortable, and grind a little at a time, work on the repair at different angles. I like to push the burr. Take your time, the biggest problem you will have is the burr catching and rolling around the vise where you do not want to touch. I keep getting comfortable and rotating the work. This will take time to master.

I finish with polishing stones you can buy on e-bay, the stones are like sanding paper, each one is a different grit and bond, but do not worry about getting to picky, You can purchase a handfull of different assortments on e-bay cheap. Keep the stones in a oil bath, like I mentioned I like Lamp Oil. Shape the stone with a bench grinder and finish the polishing/blending of the weld by hand. The secret is to take your time. Good luck.
 

Attachments

  • Blending Welds -5.jpg
    Blending Welds -5.jpg
    143.5 KB · Views: 127
  • Blending welds-4.jpg
    Blending welds-4.jpg
    56.9 KB · Views: 126
  • Blending welds-3.jpg
    Blending welds-3.jpg
    135.1 KB · Views: 129
  • Blending welds-2.jpg
    Blending welds-2.jpg
    143.1 KB · Views: 130
  • Blending welds-1.jpg
    Blending welds-1.jpg
    88 KB · Views: 129
  • Blending welds-0.jpg
    Blending welds-0.jpg
    80.3 KB · Views: 129
Last edited:

KMScott

Well-known member
Joined
Feb 14, 2012
Messages
4,643
Location
Daufuskie Island, South Carolina
The jaws are installed and the sides ground flat. I own one of these vises and will be finishing mine when I get more time. I am happy with this repair.
 

Attachments

  • Parker # 0 Final fitting (6).jpg
    Parker # 0 Final fitting (6).jpg
    111.7 KB · Views: 171
  • Parker # 0 Final fitting (7).jpg
    Parker # 0 Final fitting (7).jpg
    102.1 KB · Views: 158
  • Parker # 0 Final fitting (11).jpg
    Parker # 0 Final fitting (11).jpg
    134 KB · Views: 161
  • Parker # 0 with new jaws (1).jpg
    Parker # 0 with new jaws (1).jpg
    131.6 KB · Views: 145
  • Parker # 0 with new jaws (4).jpg
    Parker # 0 with new jaws (4).jpg
    118 KB · Views: 144
Last edited:
OP
D

drivesitfar

Well-known member
Joined
Oct 23, 2013
Messages
36,072
Location
Pacific Northwest
KM: awesome job and a labor of love for sure. I'll remove this post and let you have the spot if you have another post with pictures of this awesome Parker restoration and thanks for sharing your talent with us.

i'm sure you have many more vise parts or vise restorations than most of us combined and happy to see as many as you care to share. since I'm not a welder yet i'll leave those questions to others if they have any, but you described the process well.

i do have a question about super gluing the scrap to the jaw face for protection and how you go about removing it when done. a little heat or just a couple light taps with a small hammer?

also did you do that circle pattern on top of the new jaws on purpose and will they stay like that or go away eventually.

thanks again for sharing your talent.:thumbup::thumbup:
 

KMScott

Well-known member
Joined
Feb 14, 2012
Messages
4,643
Location
Daufuskie Island, South Carolina
Dean, the super glue will scrape off real easy and the stone will clean up any glue that is left. The hole pattern is from the drawing oven from the heat treater. I have no control on how the treaters place my jaws in the draw oven. Just a note on A2 Toolsteel, to draw it back to 56 R/C the oven has to get to over 1000 degrees.
 

McBrownie

Well-known member
Joined
Mar 27, 2014
Messages
1,827
Location
Cleveland, OH
The jaws are installed and the sides ground flat. I own one of these vises and will be finishing mine when I get more time. I am happy with this repair.

Kevin, great job on that old Parker. The jaws look like they have easier geometry to replicate. In other words, more right angles. Is that stock or did you change the castings?
 

KMScott

Well-known member
Joined
Feb 14, 2012
Messages
4,643
Location
Daufuskie Island, South Carolina
Kevin, great job on that old Parker. The jaws look like they have easier geometry to replicate. In other words, more right angles. Is that stock or did you change the castings?

Parker built these 2-1/4 vises at right angles. Not like the -16-20 degree angles on the bigger vises. My vise I have to use pins since the threads are damaged beyond repair. So I might as well fabricate a swivel base to make it more useful then reaching under your bench to loosen the swivel clamp.
 

Attachments

  • Chas Parker 0  2inch jaws (3).jpg
    Chas Parker 0 2inch jaws (3).jpg
    117.7 KB · Views: 77
  • Chas Parker 0  2inch jaws (2).jpg
    Chas Parker 0 2inch jaws (2).jpg
    139.2 KB · Views: 101

Blue Frog

Well-known member
Joined
Jun 22, 2014
Messages
363
Location
Lynn Haven, FL
The vise had what looks like grind marks that removed a big chunk of the jaw support on the Static and Dynamic jaw support. The customer asked for a new set of jaws but also mentioned if I had a way to fill in the voids then please give it a try, treat it like it is yours he mentioned.

I learned some time ago to never tell an artist what to create - allow them to make the decisions. In this case, one can see the results of allowing the artist that freedom. Great job Kevin.


Blue
 

EOC_Jason

Well-known member
Joined
Jun 25, 2012
Messages
11,388
Location
Bentonville, AR
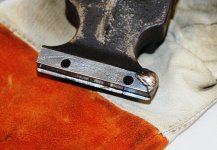
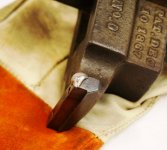
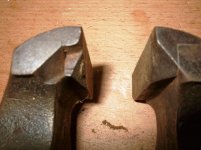
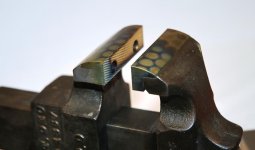
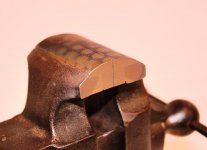
Saw this picture on an estate auction, interesting how it looks like the Parker jaws haven't been ground down in their usual shape. I wonder if they made these rough "blanks" then did the final fitting once on the vise? Or maybe the homeowner made these, who knows...
 

Attachments

  • McCreery 098 (2).JPG
    McCreery 098 (2).JPG
    120.7 KB · Views: 175

Just_George

Well-known member
Joined
Nov 11, 2012
Messages
265
Location
Ypsilanti, MI
Simple question from a restoration newb - Parker 272, are the jaws held on with pins or set screws? Don't want to go trying to beat something out if it's got threads on it! :)
 

Outlawmws

Well-known member
Joined
Aug 9, 2011
Messages
39,332
Location
The Badlands
Should be pins; keep track of which is which, as they are fitted to the jaw, and matched drilled. Personally unless there is a reason to remove, I'd leave them and mask before painting.
 

McBrownie

Well-known member
Joined
Mar 27, 2014
Messages
1,827
Location
Cleveland, OH
Simple question from a restoration newb - Parker 272, are the jaws held on with pins or set screws? Don't want to go trying to beat something out if it's got threads on it! :)

If it's original, they will be pins. They come out by hammering from underneath "up". A long punch, or "drift", works best. Use #4 drill rod (.207" dia) for the replacements and tap them in from the top. It should make for a nice press fit. The pins can then be filed down flush with the surface of the jaws. It's easier than it sounds if the old pins aren't stuck. You can get the drill rod from Graingers. A 272 is a nice vise. Can't wait to see the after pics.
 

mckay3d

Member
Joined
Aug 31, 2014
Messages
23
Location
Utah
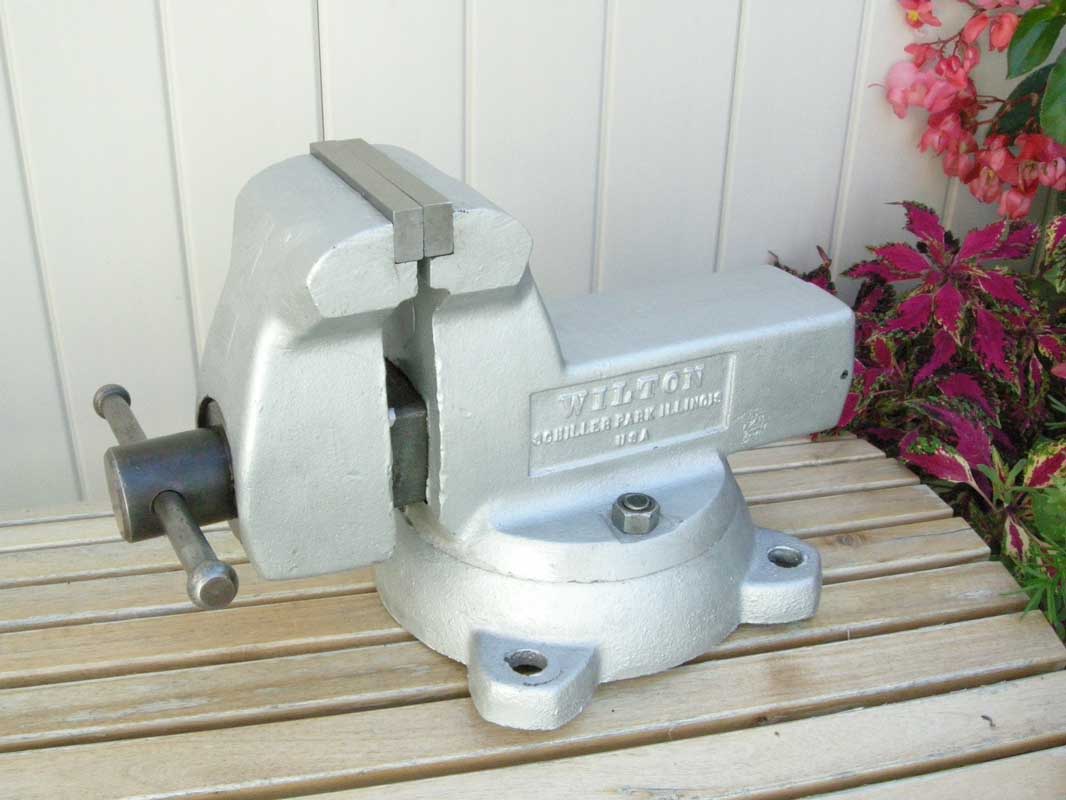
Old Wilton 4" R&R

I picked up this older Wilton from a friend and it seems to be in pretty good shape. I'll post updates and pics on the next post.
Maurice
 

Attachments

  • Wilton3.jpg
    Wilton3.jpg
    144.4 KB · Views: 76
  • Wilton2gj.jpg
    Wilton2gj.jpg
    133 KB · Views: 82
  • Wilton1gj.jpg
    Wilton1gj.jpg
    136.1 KB · Views: 63

mckay3d

Member
Joined
Aug 31, 2014
Messages
23
Location
Utah
Re: Older Wilton 4" R&R

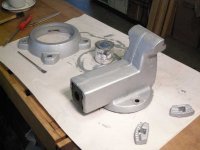
I acquired this vise from a friend with the intention of restoring it. It really didn’t need much more than de-rusting, painting, and new jaw inserts. Instead of using Naval Jelly, wire brushing, or electrolysis, I decided to just coat it with Rust Bullet.
Rust Bullet is used by a lot of automobile restoration folks that do “frame up” restorations. It bonds with the rust and chemically changes to a very hard coating. It's good stuff but costs about $12.00 for 1/4 pint! I found the best price on Amazon. (Standard disclaimer)
I have used it on the apron/legs of my Shopsmith with good results. It gives a nice silvery gray finish that can be covered with most other paints. The pictures show mostly how I coated the parts after disassembly and cleaning. I ordered a new pair of jaw inserts directly from Wilton for about $36.00 including shipping. The screws they sent were 6mm x 1mm pitch… (wrong! This vise is old and used ¼-20 screws, and I had some button head Allen head screws that worked just fine!) Looking closely at the casting, it is a little rougher that the more modern Wiltons. Maybe it's early... I haven't seen any other like it on the 'net or eBay.
The pictures show the final (almost) result. I could leave it just as is, or, I could paint it with a more “Wilton” like color. I would appreciate any suggestions. I also haven’t been able to identify the age or model of this particular vise. It doesn’t have an anvil and weighs about 45 pounds. The top of the jaws are about 9” from the base and the jaws open to about 6 inches. So what color should I paint it? :dunno:
Wiltonb.jpg
 

Attachments

  • Wiltoni.jpg
    Wiltoni.jpg
    57.2 KB · Views: 37
  • Wiltona.jpg
    Wiltona.jpg
    83.8 KB · Views: 37
  • Wiltong.jpg
    Wiltong.jpg
    63.3 KB · Views: 53
  • Wiltonf.jpg
    Wiltonf.jpg
    76.8 KB · Views: 48
  • Wiltone.jpg
    Wiltone.jpg
    86 KB · Views: 41
  • Wiltond.jpg
    Wiltond.jpg
    71.3 KB · Views: 42
Last edited:
To avoid these ads, REGISTER NOW!

McBrownie

Well-known member
Joined
Mar 27, 2014
Messages
1,827
Location
Cleveland, OH
McB: so is your swivel jaw the Prentiss you mentioned without any pictures?

Yep, a little Prentiss 19. Receive it yesterday and still don't have pictures. It needs a little love and I'll get pictures up soon. I spent so much time on my Parkers that I feel like a bit of traitor working on a Prentiss. :dunno: I think it is going to be great little (3") homeowner vise. And, of course, it's a double swiveler, so the cool factor is high.
 
Last edited:
OP
D

drivesitfar

Well-known member
Joined
Oct 23, 2013
Messages
36,072
Location
Pacific Northwest
McB: does it look a little like this Prentiss i own? i do like Prentiss vise a lot and especially the swivel jaw and huge ones.

McKay: thanks for posting your vise restoration and best of luck. i'm pretty sure Wilton was trying to eliminate an anvil on their vises because of the returns from the hammering abuse. all vises should not be used as an anvil or get hammered on unless it is built like a blacksmith's vise that was meant to have things hammered on in it's jaw.

JG: post pictures as you are able to of your vise and Outlaw and McB both covered the options of Parker's jaws. personally I'd probably leave them in place, but if you have the patience and the talent to remove and replace them then i'm here to watch and learn more. take a look at McB's Parker restoration which i think is Posts 117-124 or in that range and i'm sure you will learn something from that. good luck
 

Attachments

  • WP_20140706_037.jpg
    WP_20140706_037.jpg
    73.5 KB · Views: 66
  • WP_20140706_036.jpg
    WP_20140706_036.jpg
    74.3 KB · Views: 91
  • WP_20140706_035.jpg
    WP_20140706_035.jpg
    127.5 KB · Views: 78
  • WP_20140706_034.jpg
    WP_20140706_034.jpg
    89.9 KB · Views: 90
  • WP_20140706_032.jpg
    WP_20140706_032.jpg
    105.7 KB · Views: 89

Just_George

Well-known member
Joined
Nov 11, 2012
Messages
265
Location
Ypsilanti, MI
Still working on the Parker 272 - got it pretty much broken down into its constituent parts and cleaned everything in the parts washer, followed by a wire brush. Heres my question for yous smarter guys & girls: the jaw on the rotating jaw (is that redundant?) had somehow been wacked sideways hard enough to shear the pins that held it in place. I was able, fairly easily, to remove the jaw and punch out the broken pieces of the pins. I have a #4 drill rod ordered to make replacement pins. My question is, should I remove the jaw from the static jaw as well? Seems like it'd be easier to clean them up and paint the casting without the jaws on... Thanks all for any advice!
 
OP
D

drivesitfar

Well-known member
Joined
Oct 23, 2013
Messages
36,072
Location
Pacific Northwest
JG and All: posting pictures with your questions really helps those that know what the fix is so please post as many as you can with your questions.

JG: i'll have to wait and see what the Parker vise owners have to say because as i might have mentioned before i do not own one nor have i seen one in person in the flesh.

good luck

Mackay: nice job
 

Outlawmws

Well-known member
Joined
Aug 9, 2011
Messages
39,332
Location
The Badlands
Still working on the Parker 272 - got it pretty much broken down into its constituent parts and cleaned everything in the parts washer, followed by a wire brush. Heres my question for yous smarter guys & girls: the jaw on the rotating jaw (is that redundant?) had somehow been wacked sideways hard enough to shear the pins that held it in place. I was able, fairly easily, to remove the jaw and punch out the broken pieces of the pins. I have a #4 drill rod ordered to make replacement pins. My question is, should I remove the jaw from the static jaw as well? Seems like it'd be easier to clean them up and paint the casting without the jaws on... Thanks all for any advice!

Yes I'd remove and mask for painting.

That pin is likely to be either 5 deg or 6 deg, (Reeds are 6, someone else was 5...)

If you ARE making it from scratch, make a taper long enough for the business end, then leave a short straight section, then another short taper so when it's out, you can simply reverse it, and leave it in the jaw. No chance to lose it!
 

KMScott

Well-known member
Joined
Feb 14, 2012
Messages
4,643
Location
Daufuskie Island, South Carolina
Still working on the Parker 272 - got it pretty much broken down into its constituent parts and cleaned everything in the parts washer, followed by a wire brush. Heres my question for yous smarter guys & girls: the jaw on the rotating jaw (is that redundant?) had somehow been wacked sideways hard enough to shear the pins that held it in place. I was able, fairly easily, to remove the jaw and punch out the broken pieces of the pins. I have a #4 drill rod ordered to make replacement pins. My question is, should I remove the jaw from the static jaw as well? Seems like it'd be easier to clean them up and paint the casting without the jaws on... Thanks all for any advice!

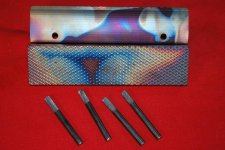
Outlaw, I think J-George is talking about the jaw pins, at least the Parker jaws I have made used the .203 pins and J-George is purchasing a little larger pin (.209). I have a 272 and if a drawing is needed for the Swivel Jaw pin I would be happy to measure and sketch it up to share. J-George I would be careful pounding in a pin that much larger then the hole, maybe run a reamer down the hole in the Static and Dynamic jaw support, could fracture the cast if to much of a press. Remember the pin holes are drilled at a angle, see my picture. I use pins like in the image for my jaw pins and notice I knurl the last part to press into the jaws and a little into the jaw support. Good luck on your restore and repairs, be sure to post pics, maybe share them on the thread Vises of Garage Journal. This thread is mainly for repairs.
 

Attachments

  • Ians Radius cutting and final drilling (22).jpg
    Ians Radius cutting and final drilling (22).jpg
    138 KB · Views: 144
  • Nicks 8 inch Parker (3).jpg
    Nicks 8 inch Parker (3).jpg
    146.5 KB · Views: 150
  • Toms 4 inch Chas Parker Jaws (3).jpg
    Toms 4 inch Chas Parker Jaws (3).jpg
    137 KB · Views: 152

McBrownie

Well-known member
Joined
Mar 27, 2014
Messages
1,827
Location
Cleveland, OH
Outlaw, I think J-George is talking about the jaw pins, at least the Parker jaws I have made used the .203 pins and J-George is purchasing a little larger pin (.209). I have a 272 and if a drawing is needed for the Swivel Jaw pin I would be happy to measure and sketch it up to share. J-George I would be careful pounding in a pin that much larger then the hole, maybe run a reamer down the hole in the Static and Dynamic jaw support, could fracture the cast if to much of a press. Remember the pin holes are drilled at a angle, see my picture. I use pins like in the image for my jaw pins and notice I knurl the last part to press into the jaws and a little into the jaw support. Good luck on your restore and repairs, be sure to post pics, maybe share them on the thread Vises of Garage Journal. This thread is mainly for repairs.

Outlaw, KM, an George,

My experience with Parker's is that sometimes the original pins are tapered, but the holes are not. .207" has worked for me on the replacement pins, but I'm sure you could muscle .209" in there as well. I use an angle grinder with a cutoff wheel to get them close to the right length and hand file them flush.
 

HairMetal

Well-known member
Joined
Jan 9, 2014
Messages
303
Location
Finland
I need to find a quality big heavy duty vise for next to nothing, i can't afford a new one right now, where should i look for one?
 

McBrownie

Well-known member
Joined
Mar 27, 2014
Messages
1,827
Location
Cleveland, OH
McB: does it look a little like this Prentiss i own? i do like Prentiss vise a lot and especially the swivel jaw and huge ones.

Drives, Yep, same swivel lock mechanism and graffiti lettering. But mine is a fair bit uglier than yours at the moment. My understanding is that the pull up lock swivel lock mechanism is the latest (newest) in the line of the dual swivelers. What do you guess the age to be? 1920's? 1930's?
 

autopts

Well-known member
Joined
Jul 4, 2009
Messages
2,268
The jaws are installed and the sides ground flat. I own one of these vises and will be finishing mine when I get more time. I am happy with this repair.

Kevin, I love your show and tells, with fab, as well as repairs. You bring so much to this site. Breaking it down with photos is great. Makes me feel like I'm there watching. Thanks
 
OP
D

drivesitfar

Well-known member
Joined
Oct 23, 2013
Messages
36,072
Location
Pacific Northwest
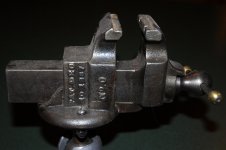
McB: sorry i haven't done my research on the Prentiss 19.5 vise yet. i think i remember my Prentiss #26 Coachmaker's vise being in a 1923 catalog and it has the pull pin swivel. i thought the flip lever swivel pins are a bit older, but like i say i'm not sure of that yet. i also have a Bulldog with a swivel jaw that has a wrench to loosen and tighten it up located at the base and not sure what date it was made. here is a picture of my Coachmaker's vise and the Prentiss bulldog.

I found this Prentiss Vise Company history which gives their locations over the years and then finally selling to Parker.

Prentiss Vise Company


This page is under development .. more soon!

» New York, NY, Headquarters locations (1880s-1940s)

PRENTISS VISE TIME LINE

1868, March 17 Patent issue date; issued to Mason Prentiss
1871, April 11 Patent dated
1872 EAIA "Directory of American Toolmakers" (DAT) start date for Watertown, NY factory. [1]
1876-1912+ Contracted with the Bagley & Sewall Company in Watertown, NY to produce vises
1877, Feb. 6 Patent dated
1877, Nov. 1 American Machinist article. Mfd by Hall Manufacturing Co. Office at 23 Dey St., NY
1883 Office at 23 Dey St., NY (dated receipt; "formerly Hall Mfg.")
1893 Office at 44 Barclay St., NY (postmarked envelope)
1903 Office at 44 Barclay St., NY (dated reciept)
1909 Office at 44 Barclay St., NY (magazine ad)
1910, Feb. Office at 44 Barclay St., NY (magazine ad)
1910, Nov. Office at 106-110 Lafayette Street, NY (magazine ad)
1912 Office at 110 Lafayette Street, NY (magazine ad)
1913, April 1 Office at 106-110 Lafayette Street, NY (magazine ad)
1941 Office at 302 Broadway, NY (loose leaf folder; mentions factory at Watertown)
1948 EAIA "Directory of American Toolmakers" (DAT) end date for Watertown, NY factory. [1]
1950s Chas. Parker Co. bought out Prentiss. For a few years, the Prentiss vises continued in production, as 'Prentiss Vise Co., a division of the Chas. Parker Co.'. [2]

References

1: Pracical Machinist Forum (2006-10-15)

2: Pracical Machinist Forum (2006-10-14)
John Ruth: - The EAIA "Directory of American Toolmakers" (DAT) gives dates of 1872-1948 for Prentiss of Watertown NY. "The New York City location was a headquarters or sales office; their factory was in Watertown" - Prentiss is credited with the tradenames Magic, Bull Dog, Rapid Transit, Monarch, Rex, Gipsy, Star, Yankee and Eclipse. They also used patent holder's names Shepard, Bingham, Blake, and Lewis as trade names.
 

Attachments

  • WP_20131130_004.jpg
    WP_20131130_004.jpg
    130.6 KB · Views: 70
  • WP_20131130_002.jpg
    WP_20131130_002.jpg
    135.9 KB · Views: 78
  • 00D0D_bTEHRZuwfs4_600x450.jpg
    00D0D_bTEHRZuwfs4_600x450.jpg
    21.1 KB · Views: 65
  • WP_20140122_024.jpg
    WP_20140122_024.jpg
    101.1 KB · Views: 72
  • 00i0i_9yEpVocu58k_600x450.jpg
    00i0i_9yEpVocu58k_600x450.jpg
    32.2 KB · Views: 76

mckay3d

Member
Joined
Aug 31, 2014
Messages
23
Location
Utah
I previously posted about rehabbing my old Wilton 4" vise and I bought a new set of jaws from Wilton. Big Mistake! While they fit all right and look OK I found that after reading KMScott's blog about how they are made I know I should have spent a few extra bucks and bought from him. The Wilton jaws are sintered and the cross hatch pattern is just pressed in. And they cost $36.00 including shipping! Dang! :(
 

Verg

Well-known member
Joined
Sep 10, 2014
Messages
106
Location
To close to DC
Hello Everyone,

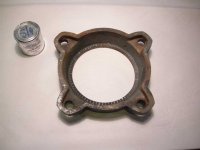
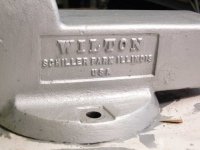
This is a recent Wilton find i procured. 99% sure its a C3 (6'' jaws); no markings or date stamps anywhere i can detect. I made some wire brush marks in a few spots Wilton usually puts markings. After pulling the beast apart i have a few questions for restoring:
1. Is there supposed to be a washer on the main screw in front of the Horseshoe screw retainer? none is present
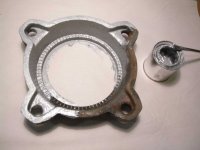
2. Would this swivel base assembly fit my vise?
http://www.ereplacementparts.com/wi...d-bench-vise-parts-c-32774_155485_155524.html

No affiliation with the site just had parts diagrams for vises. Wilton Part# 2900590 for above swivel base
3. If the above base would fit the vise are new bases worth buying? quality wise not price wise.
Sorry about the flash glare. I took the pictures at dusk.
Thanks in advance!
 

Attachments

  • P1020949 (Copy).jpg
    P1020949 (Copy).jpg
    94.5 KB · Views: 91
  • P1020952 (Copy).jpg
    P1020952 (Copy).jpg
    94.8 KB · Views: 82
  • P1020945 (Copy).JPG
    P1020945 (Copy).JPG
    117.6 KB · Views: 83
  • P1020948 (Copy).jpg
    P1020948 (Copy).jpg
    94 KB · Views: 80
  • P1020943 (Copy).jpg
    P1020943 (Copy).jpg
    113.1 KB · Views: 88
  • P1020942 (Copy).JPG
    P1020942 (Copy).JPG
    146.1 KB · Views: 105
  • P1020944 (Copy).jpg
    P1020944 (Copy).jpg
    100.6 KB · Views: 81
OP
D

drivesitfar

Well-known member
Joined
Oct 23, 2013
Messages
36,072
Location
Pacific Northwest
Verg: yes if you have 6 inch wide jaws on that combination C series type pipe jaws you do own a C3 which is probably Wilton's best vise. no there isn't usually a washer in front or in back of the horseshoe shaped holder that keeps the main screw in the dynamic jaw.

I'm not sure if that swivel base would fit the C3 so i'll let others that might have a C3 or bought a replacement swivel base to add their comments.

better pictures of your vise without the glare might help us see any flaws or #'s better when you get a chance. nice find. can you wipe the bottom of the dynamic jaw's slide clean and take another picture without the glare because maybe the cameral will pick up a date on there? it looks like an early 70's C3, but that is a guess.
 

Verg

Well-known member
Joined
Sep 10, 2014
Messages
106
Location
To close to DC
drivesitfar,

I greatly appreciate your input. New non glare pictures will be taken this afternoon. Along with some actual dimensions of the bottom. The parts website noted all year all production c2 and tradesmen 1780/2080 with pre 1984 C3: this almost seems too convenient. I found a post claiming the 3c has the same base as an 800s.
http://www.garagejournal.com/forum/showthread.php?t=44782&page=344

i am going to add some dimensions of the vise bottom with the new pictures.
 

McBrownie

Well-known member
Joined
Mar 27, 2014
Messages
1,827
Location
Cleveland, OH
In case you don't follow the Vises thread, I have gotten my hands on a Prentiss No 19 probably from the 1920's or 1930's. I stripped down the industrial gray paint and found a lot of old jappaning underneath. That lines up with some literature that I have found as well regarding Prentiss using jappaning on their vises. So, I am toying with the idea of following this process:

http://lumberjocks.com/JayT/blog/32411

Has anyone here tried this on a vise or anything else? I really like the gas grill idea. :D
 
Last edited:

Verg

Well-known member
Joined
Sep 10, 2014
Messages
106
Location
To close to DC
McBrownie,
Thats definitely a very interesting process. I have always enjoyed the nostalgia of replicating old processes; much more interesting then a rattle can.

More C3 Information,

New pictures of the slide posted with out glare + cleaned a bit. no date markings. next week i am going to bring it to work for a date in the caustic hot tank!

Measurements of vise base are:
8'' outter dia
close to 6-7/8'' inner base Dia with 3/32'' step
5/8'' bolt holes.
If some one has a C2, or 1780/1780a i would greatly appreciate if they could check if their vise bottom has similar dimensions.
 

Attachments

  • P1020954 (Copy).jpg
    P1020954 (Copy).jpg
    121.3 KB · Views: 55
  • P1020955 (Copy).jpg
    P1020955 (Copy).jpg
    137.4 KB · Views: 44
To avoid these ads, REGISTER NOW!
Top Bottom