Uncle_Charlie
Well-known member
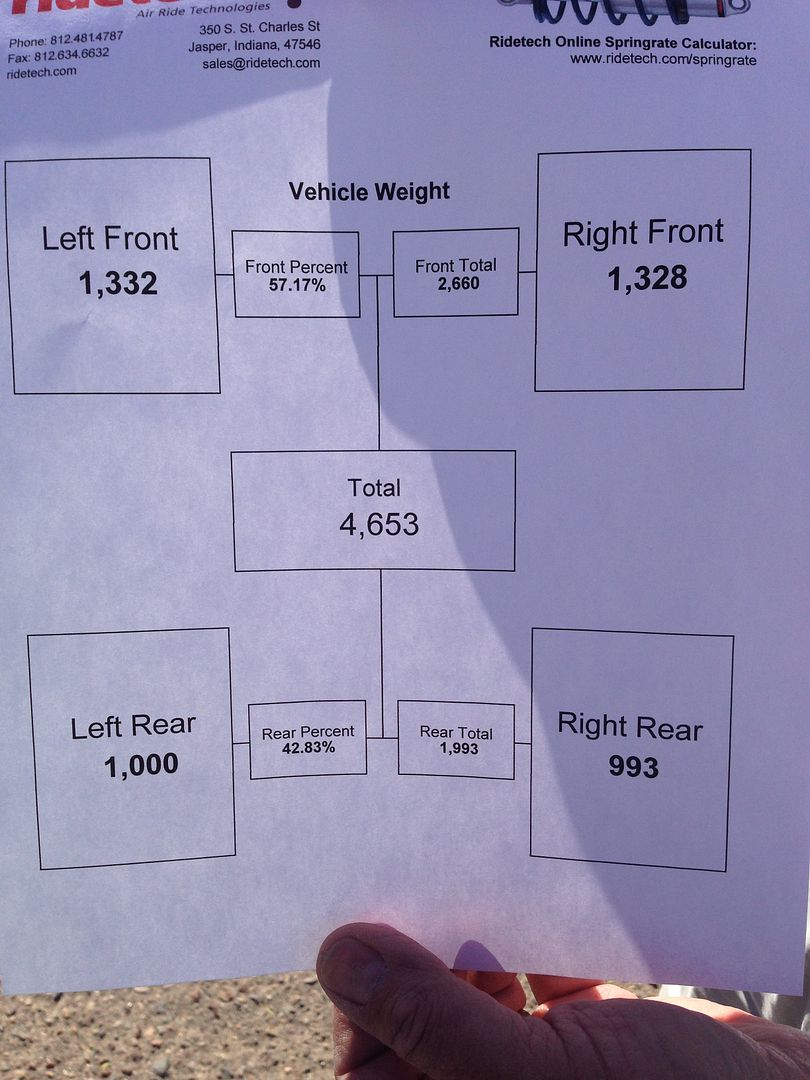
I learned how to drive on a 66 F100. Fond memories for me, not so much my dad. ") Anyhow, I imagine the 66 is signifcantly heavier than the modern F150. Have you calculated the impact of the heavier frame and body on payload and towing capacities? Just a thought...
Anyhow, I imagine the 66 is signifcantly heavier than the modern F150. Have you calculated the impact of the heavier frame and body on payload and towing capacities? Just a thought...
Anyhow, I imagine the 66 is signifcantly heavier than the modern F150. Have you calculated the impact of the heavier frame and body on payload and towing capacities? Just a thought...