To avoid these ads, REGISTER NOW!

1966 F100 EcoBoost Engine Swap (EcoBoosted)

Status
Not open for further replies.
OP
T

TimeWarpF100

Well-known member
Joined
Aug 21, 2010
Messages
6,784
Location
not here
101 on a normal tuned ecoboost? Why?

91 Octane see below . .

Because he's a bad *** and he can.

It should say the Can is bad *** . . .

I did that as a joke to see if someone would catch on.

101 was used in a diff veh. Empty can I thought would be fun to use as a joke. Fill it with 91 to see if someone would ask why 101 in a EcoBoost.

Good Eye! LOL

Here is can at pump after filling with 91 the highest avail here at pump.

I needed a 3rd can, it was clean and was marked 101 . . . Notice how I had to rotate the can to get the 101 sticker on top. Ha

I am sure someone would have caught the color of fuel coming out of can too. The 101 Octane is more of a purple. That was why I took picture of the fuel actually coming out of can . .

DA328FCF-73E7-4072-BD8A-91A6B8C3FD4A.jpg
:3gears::3gears::3gears:
 
Last edited:
To avoid these ads, REGISTER NOW!

bulletpruf

Well-known member
Joined
Nov 28, 2013
Messages
11,137
Location
San Antonio
My 418 FE should have final machine work done this week so I also need to get it together to sell so it will give funds to finish the Eco Project.

Have been waiting on the small end rod bushings from Crower. Undersized hole so we can get the rod lengths perfect. The crank was already indexed and now all the throws have proper and equal strokes too.

Decks will be squared and all pistons will have Zero deck. 9.87 to 1 Static compression and a 8.06 Dynamic should make this a nice 91 Octane street engine.

This engine will be used to also compare costs between building a basic American V-8 vs going to a late model EFI engine swap.

TW -

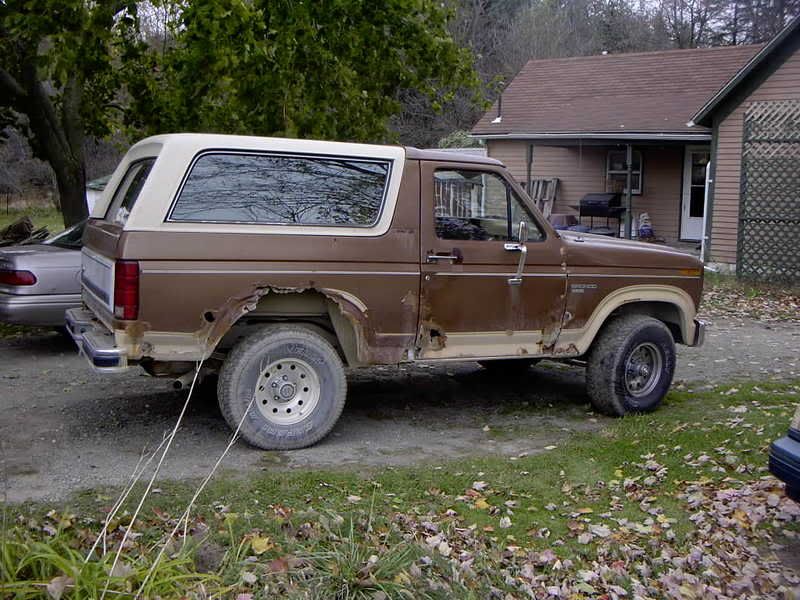
Thanks for the pics of the Bronco. I'm thinking it will be a pretty nice paint job when done.

As for the 418, let us know when and where you'll be listing it for sale. I know some folks who may be interested.

As for the undersized bushings for the small ends of the rods, is that overkill? Are you using OEM (capscrew Lemans?) or aftermarket rods? If OEM, have they already been re-sized or were they a mismatched set? If not, was the center to center length off enough to make a difference? Obviously, when you're working with a zero deck, you have less margin for error, but this is a new step for me and I've built a few motors with zero or near zero deck.

Thanks

Scott
 
OP
T

TimeWarpF100

Well-known member
Joined
Aug 21, 2010
Messages
6,784
Location
not here
TW -

Thanks for the pics of the Bronco. I'm thinking it will be a pretty nice paint job when done.

As for the 418, let us know when and where you'll be listing it for sale. I know some folks who may be interested.

As for the undersized bushings for the small ends of the rods, is that overkill? Are you using OEM (capscrew Lemans?) or aftermarket rods? If OEM, have they already been re-sized or were they a mismatched set? If not, was the center to center length off enough to make a difference? Obviously, when you're working with a zero deck, you have less margin for error, but this is a new step for me and I've built a few motors with zero or near zero deck.

Thanks

Scott

Scott,

The rods were not all from same engine. After resizing the large end and adding the ARP bolts and having the small end a bit too loose for pin we had to order new bushings anyway. Same cost for the bushings for std or undersize and it was a simple step to make them all the perfect length.

(just so its clear, the pin size will be standard)

It was just one of those just because we could and all about precision machine work.

In the past I had one of the "Pro's" who is very well known do machine work for me which I paid dearly for and pretty much all the machine work was a joke. There was very little we did not have to re-do. The deck heights were all over the map, the final compression was off well over a full point.

The decks were not at all square, pistons were supposed to be @ zero deck but were not close. His comment: "There are other things that will make more of a difference". When I purchased said parts I was told it was perfect, having paid the full cost for good machine work and finding it all a joke I decided on this engine to make it right the first time!

As most know it costs a BUNCH more for the step up in machine work vs the run of the mill get-er-done.

I still have no clue why I started this build as funds are very tight right now, Just to do one last FE maybe . . . . . Hard to explain really. I am not one to cut corners on whatever I do.

This 418 will be making it right without spending BIG $$ with basic parts.

At this HP level (hoping for 475hp)

Compression will be 9.86 with a Dynamic of 8.06

In other words no billet crank, no big $$ rods, no fancy roller rockers etc

Of course they can be added along with a larger bumpstick if someone so desires. (sorry for the long winded reply)

As of now the engine is for sale contact me by pm or email.

In my typical fashion the engine will also look nice with all plated bolts, base clear coat paint etc.


Carb to pan setup, It will be setup with a front sump pan, windage tray, good oil pump, bottom end as described.

Custom Flat tappet Hydraulic cam with non-adj rockers for ease of maintenance.

BBM Heads that flow 296 @ .600 Intake with very good low lift numbers

.220 @ .600 Exh

New QF 780 Carb, New Perf RPM Intake with a bit of "tweaking"

Very nice set of Cobra Jet ALuminum Valve Covers (original not repo)

I will drop in a vehicle to get a RWHP~TQ number and to make sure no leaks or issue's. (none expected)

I would estimate a good 100 HP loss as I have found in the past

So it should make 375 RWHP or close. Soon will find out I guess.

Not aware of a good engine dyno place close . .

Seeing as though so many Older Ford~Mercury vehicles are in the 4000lb range that is what the cam was made for. ALso a typical 3.50 rear gearing etc

And yes hoping the Bronco paint job turns out nice! Have not painted anything other than a bumper or fender since 2010.
 
Last edited:

walt460

Well-known member
Joined
Nov 8, 2014
Messages
79
Location
Nevada, Vegas area
TimeWarpF100,

One item to check if your Ecoboost cranks but does not start is the Grounds. Every ground connection in the wiring harnesses must be connected to a good ground. There are a lot of these grounds, but some are really critical for the PCM/PATS function.

Also there needs to be at least 2 ground straps from the body to the frame.

The one that bit me was the BCM (Body Control Module), which is located in passenger-side kick panel. Harness has two black wires that come from BCM and connect to body ground at the A pillar near floor. Make sure that this is a good solid ground.

The other really critcal one is back on the rear of the frame near the FPDM (Fuel Pump Driver Module). I know you painted that frame, but get to bare metal for this ground!

Fingers crossed here!

Walt
 
OP
T

TimeWarpF100

Well-known member
Joined
Aug 21, 2010
Messages
6,784
Location
not here
TimeWarpF100,

One item to check if your Ecoboost cranks but does not start is the Grounds. Every ground connection in the wiring harnesses must be connected to a good ground. There are a lot of these grounds, but some are really critical for the PCM/PATS function.

Also there needs to be at least 2 ground straps from the body to the frame.

The one that bit me was the BCM (Body Control Module), which is located in passenger-side kick panel. Harness has two black wires that come from BCM and connect to body ground at the A pillar near floor. Make sure that this is a good solid ground.

The other really critcal one is back on the rear of the frame near the FPDM (Fuel Pump Driver Module). I know you painted that frame, but get to bare metal for this ground!

Fingers crossed here!

Walt

Only thing I did to truck yesterday was dump the fuel in tank . .

I did replace the FPDM as the original was toast. Pretty sure all grounds are now connected. As you say there are a lot of them.

Because of no inner structure yet I still need to find a temp mount for the battery.

Today just may be the day I make a start attempt. Just so many other things that need to be done around here before I get back on the EcoProject.

Talk about a jungle of wires! I have the dash pad out with just dash frame work in place to make it easier to see and plug things in.

Most of the sheet metal is just tack welded in place now including floor and firewall and the kick panel area where a lot of the stuff mounts.

Seeing as though the truck has been apart for 3yrs now things got a bit scattered.

I do not have the intercooler mounted either as somehow the clamps and tube retainer clip grew legs and only way to get new is buy complete tubes which cost:

167.03
191.33
221.97

That is not going to happen . . I need to make my own tubes and cooler anyway. I need to figure out the cooler core size and buy some material to make one. Could be week's . .

In order for grille and front clip to fit I had to move the core support way back and down, just no room there. Now that is in ballpark area not enough room for the intercooler tubing . .
 
OP
T

TimeWarpF100

Well-known member
Joined
Aug 21, 2010
Messages
6,784
Location
not here
1966 F250~starts up makes it around yard!

2011 EcoBoost Extended cab powered by a FE Engine!

Video quality changed after upload . .

This is a reverse ecoboost into '66


Last edited:

bulletpruf

Well-known member
Joined
Nov 28, 2013
Messages
11,137
Location
San Antonio
Scott,

The rods were not all from same engine. After resizing the large end and adding the ARP bolts and having the small end a bit too loose for pin we had to order new bushings anyway. Same cost for the bushings for std or undersize and it was a simple step to make them all the perfect length.

(just so its clear, the pin size will be standard)

It was just one of those just because we could and all about precision machine work.

In the past I had one of the "Pro's" who is very well known do machine work for me which I paid dearly for and pretty much all the machine work was a joke. There was very little we did not have to re-do. The deck heights were all over the map, the final compression was off well over a full point.

The decks were not at all square, pistons were supposed to be @ zero deck but were not close. His comment: "There are other things that will make more of a difference". When I purchased said parts I was told it was perfect, having paid the full cost for good machine work and finding it all a joke I decided on this engine to make it right the first time!

As most know it costs a BUNCH more for the step up in machine work vs the run of the mill get-er-done.

I still have no clue why I started this build as funds are very tight right now, Just to do one last FE maybe . . . . . Hard to explain really. I am not one to cut corners on whatever I do.

This 418 will be making it right without spending BIG $$ with basic parts.

At this HP level (hoping for 475hp)

Compression will be 9.86 with a Dynamic of 8.06

In other words no billet crank, no big $$ rods, no fancy roller rockers etc

Of course they can be added along with a larger bumpstick if someone so desires. (sorry for the long winded reply)

As of now the engine is for sale contact me by pm or email.

In my typical fashion the engine will also look nice with all plated bolts, base clear coat paint etc.


Carb to pan setup, It will be setup with a front sump pan, windage tray, good oil pump, bottom end as described.

Custom Flat tappet Hydraulic cam with non-adj rockers for ease of maintenance.

BBM Heads that flow 296 @ .600 Intake with very good low lift numbers

.220 @ .600 Exh

New QF 780 Carb, New Perf RPM Intake with a bit of "tweaking"

Very nice set of Cobra Jet ALuminum Valve Covers (original not repo)

I will drop in a vehicle to get a RWHP~TQ number and to make sure no leaks or issue's. (none expected)

I would estimate a good 100 HP loss as I have found in the past

So it should make 375 RWHP or close. Soon will find out I guess.

Not aware of a good engine dyno place close . .

Seeing as though so many Older Ford~Mercury vehicles are in the 4000lb range that is what the cam was made for. ALso a typical 3.50 rear gearing etc

And yes hoping the Bronco paint job turns out nice! Have not painted anything other than a bumper or fender since 2010.


Sounds like a sweet build!

Now I understand what you're doing on the rods. Makes a lot of sense if they were mismatched, resized, ARP bolts, and small end bushed anyway. Of course, for what you have invested, you probably could have gone with a set of H-beam rods. These days, I rarely use OEM rods because good H-beam rods are often about the same price as refurbished OEM rods.

As for machine shop work and prices, try moving cross-country (or outside the country) every 2-3 years and having to find a new machine shop everywhere you go! I plan to start accumulating equipment so I can start doing the work myself -- expensive and you often get shoddy work.

I know exactly what you're saying on building the 418 with nothing to put it in. I recently built a stout pump gas 401 AMC; was going to put it in my Big Bad Green 69 AMX, but sold the AMX and the guy really didn't want to motor. I had already started building the motor when the car sold so I just finished it and sold it complete. Did almost exactly the same thing with a "stealth stroker" Pontiac Ram Air III 400. Was going in my 69 Ram Air III 4 sp Judge, but sold the Judge and buyer didn't want the motor. Was a really sweet 400 that looked stock, but had been poked and stroked to 462, ported Ram Air III iron heads, stout cam, etc. It went into a 69 Trans Am, I think.

Let me know if you have any more CJ valve covers. I need some for the 428 in my 66 Fairlane GT convt.

Great idea to break it in and get RWHP #'s. Is the 100 hp loss with a C6? Toploader shouldn't take as much, right?

I had a half *** dyno done on my 428 (wrong carb, wrong headers, no tuning whatsoever) and ended up with 425, I think. Should be close to 475 if/when optimized.

Scott
 
OP
T

TimeWarpF100

Well-known member
Joined
Aug 21, 2010
Messages
6,784
Location
not here
Update:

Soooooo many wires! LOL!

Do not have fuel pressure. Hooked up the laptop & using IDS software
Have 5 codes including 2 U codes

B1A89:13-2F ACM Which is Satellite Antenna (not yet hooked up)

U0256:00-2F ACM Lost Communication Front Control Interface Module
No clue what that means

U0256:002B APM Accessory Protocol Interface Module

B1A82:130A IPC External Trip Switch IPC is Instrument Control Panel
No clue what the external trip switch is

U0422-00-2F PCM Invalid Data Body Control Module


At first I did not have harness from fuel tank/pump to main harness plugged in. Still no power to fuel pump.

Still digging and looking

Do have a BUNCH of codes for Restraint system as no seats not plugged in. Not sure if that would feed back somehow . .
 
OP
T

TimeWarpF100

Well-known member
Joined
Aug 21, 2010
Messages
6,784
Location
not here
Sounds like a sweet build!

Now I understand what you're doing on the rods. Makes a lot of sense if they were mismatched, resized, ARP bolts, and small end bushed anyway. Of course, for what you have invested, you probably could have gone with a set of H-beam rods. These days, I rarely use OEM rods because good H-beam rods are often about the same price as refurbished OEM rods.

As for machine shop work and prices, try moving cross-country (or outside the country) every 2-3 years and having to find a new machine shop everywhere you go! I plan to start accumulating equipment so I can start doing the work myself -- expensive and you often get shoddy work.

I know exactly what you're saying on building the 418 with nothing to put it in. I recently built a stout pump gas 401 AMC; was going to put it in my Big Bad Green 69 AMX, but sold the AMX and the guy really didn't want to motor. I had already started building the motor when the car sold so I just finished it and sold it complete. Did almost exactly the same thing with a "stealth stroker" Pontiac Ram Air III 400. Was going in my 69 Ram Air III 4 sp Judge, but sold the Judge and buyer didn't want the motor. Was a really sweet 400 that looked stock, but had been poked and stroked to 462, ported Ram Air III iron heads, stout cam, etc. It went into a 69 Trans Am, I think.

Let me know if you have any more CJ valve covers. I need some for the 428 in my 66 Fairlane GT convt.

Great idea to break it in and get RWHP #'s. Is the 100 hp loss with a C6? Toploader shouldn't take as much, right?

I had a half *** dyno done on my 428 (wrong carb, wrong headers, no tuning whatsoever) and ended up with 425, I think. Should be close to 475 if/when optimized.

Scott

If you are interested in the nice pair of CJ Covers they surely do not need to go on the 418. Shoot me a email superdragpak-66f100 at yahoo dot com

The only cost to me on the rods was the rod bolts and the bushings.

For this HP level did not think It warranted the aftermarket rods, then it would have turned into a "might as well" and then It would have been a stroker crank and on and on . . . More camshaft, better rockers. It would be easy to sink in another 3-4000.00

Sounds like you had some interesting engines going there . .
It is difficult when one moves trying to find a good machine shop.

I sure do enjoy building the engines but I could never justify the cost of the equipment. Especially when a good friend owns prob the best machine shop in town.
 

walt460

Well-known member
Joined
Nov 8, 2014
Messages
79
Location
Nevada, Vegas area
U0422-00-2F PCM Invalid Data Body Control Module

At first I did not have harness from fuel tank/pump to main harness plugged in. Still no power to fuel pump.


Sounds like PATS did not sync up. Fuel pump will not be initialized until PATS is satisfied. Is the ignition key, PCM, and BCM all from the donar truck? If so, I'd double check that ground by the BCM that I noted before.

Walt
 
OP
T

TimeWarpF100

Well-known member
Joined
Aug 21, 2010
Messages
6,784
Location
not here
U0422-00-2F PCM Invalid Data Body Control Module

At first I did not have harness from fuel tank/pump to main harness plugged in. Still no power to fuel pump.


Sounds like PATS did not sync up. Fuel pump will not be initialized until PATS is satisfied. Is the ignition key, PCM, and BCM all from the donar truck? If so, I'd double check that ground by the BCM that I noted before.

Walt

Blown fuse to fuel pump relay.

Yes, ignition key, PCM, and BCM all from Donor Truck
 
Last edited:
OP
T

TimeWarpF100

Well-known member
Joined
Aug 21, 2010
Messages
6,784
Location
not here
it runs!

It blew a fuse a little 20 amp for fuel pump relay. All is well,
Replaced the fuse and turned key, heard the fuel pump run, cycled key a few times to build up fuel pressure and it fired instantly! soooooooooooooo EXCITED right now.
 
Last edited:
To avoid these ads, REGISTER NOW!
OP
T

TimeWarpF100

Well-known member
Joined
Aug 21, 2010
Messages
6,784
Location
not here
Great news! So satisfying when an engine starts n a project.

Sounds sweet.


Congratulations. Sounds awesome.

jhn9840
John


Thanks All! A few hours earlier when it did not start right away told my help I was ready to quit, LOL. 1st time that ever happened. So much $$ so much time with so much more time & $ left I was wondering if I would ever see the reward.

It feels even better when Ford Racing told me it could not be done & also on another EcoBoost forum said the same . .

"Mostly because when I started this project and was looking for standalone harness someone at ford Racing told me it could not be done . ."

"January 25, 2015, 01:46:27 PM »
Famous last words - "can't be done"!"


« Reply #10 on: January 25, 2015, 02:06:05 PM »
It can't be done, I'll second that opinion, however if you remove the DI setup and move to PFI you'll be able to do it pretty easily, just probably no VVT.


I had posted asking for "Tuning" help. Person with last quote did not ask any questions of what I was doing just that "it can't be done"

Looks like its time to actually hook up the steering column if I plan on going for a ride.

Anyone help with proper IC sizing? I would also need core material to make one out of.

I will give Geoff from Full Race a call as he may be able to help.

Now the chore will be trying to get it where there are no codes . . Not quite sure how but will plug away at it.


1) Figure out sizing and how to build a IC

2) Actually hook up steering column to steering rack

3) Figure out how to clear all the codes

4) Fill brake reservoir and use laptop to bleed brakes

5) Plug in the Satellite antenna to see if that code clears

6) Its a 6 spd transmission :3gears::3gears::3gears::3gears::3gears::3gears:

7) Actually mount the front clip so it does not fall off for test drive

8) Remove battery from temporary "sky hook" and properly fasten

9) Align Front End

10) Test Drive?

11) I should probably put bolts in cab mounts so when I floor it the first time the chassis does not leave me . . Not sure how I would explain that to a cop. Sitting in cab in middle of road hanging onto a steering wheel but no chassis underneath me .

I think we need the best phrase to tell the cop.

Mine will be "It had a EcoBoost" but only a '66 cab, it cannot keep up so follows behind, I will catch it at the next light"
 
Last edited:

8man

Well-known member
Joined
Oct 16, 2013
Messages
630
Location
Bryan, Texas
Timing is everything!

However, by the time I get there you will have me sanding for paint because everything else will be done.

For those that don't know, I scheduled a trip to Phoenix months ago and when I did TW said I could take a ride because it would be running by then. Then all the starts/stops and frustration and celebration on his part and he has met his goal of having it running by the first of April.
 

slickgt1

Well-known member
Joined
Oct 11, 2010
Messages
1,674
wow good job. I was sitting here biting my nails the past few months all nervous that you would give up. I now have a renewed ***** for this build. So cool. Don't slow down now, this is very cool.
 

galute

Well-known member
Joined
Jun 28, 2010
Messages
629
Location
Bald Knob AR
AWESOME!!! I must say, this is the first time I've watched someone eat an elephant. Just a few more bites and you will be picking the bones. Great job.
 

Todd.Brock

Well-known member
Joined
Jul 15, 2008
Messages
4,250
Location
Cincinnati
Re: 1966 F100 EcoBoost Engine Swap & 1966 427 Project

Nice Job, TW. I watched your video and it appears your tire pressure is low. Just something to watch out for. :)

I thought of this project when I was watching Trucks TV or whatever. They mentioned a stand alone harness from Ford Racing. I assume they have been watching your work here and taking notes on how to get it done! Nice job!
 

jayz66ragtop

Well-known member
Joined
Sep 11, 2009
Messages
1,534
Location
SoCal
All I have to say is BADASS!!! :bowdown:

You sir deserve a spot at SEMA with your bad self and the truck. Send a start up video to Ford with a print out of all the "cannot be done" posts and a response simply saying "**** it!"
 

Oggy

Well-known member
Joined
Jan 2, 2011
Messages
1,295
Location
Central New York
Re: 1966 F100 EcoBoost Engine Swap & 1966 427 Project

Nice Job, TW. I watched your video and it appears your tire pressure is low. Just something to watch out for. :)

I thought of this project when I was watching Trucks TV or whatever. They mentioned a stand alone harness from Ford Racing. I assume they have been watching your work here and taking notes on how to get it done! Nice job!

I immediately thought of TW when I saw that as well. I laughed, and said well I guess they figure someone without his ability would want one too. Anything with that harness won't hold a candle to what TW has done.
 
OP
T

TimeWarpF100

Well-known member
Joined
Aug 21, 2010
Messages
6,784
Location
not here
Timing is everything!

However, by the time I get there you will have me sanding for paint because everything else will be done.

For those that don't know, I scheduled a trip to Phoenix months ago and when I did TW said I could take a ride because it would be running by then. Then all the starts/stops and frustration and celebration on his part and he has met his goal of having it running by the first of April.

wow good job. I was sitting here biting my nails the past few months all nervous that you would give up. I now have a renewed ***** for this build. So cool. Don't slow down now, this is very cool.

AWESOME!!! I must say, this is the first time I've watched someone eat an elephant. Just a few more bites and you will be picking the bones. Great job.

Good news, I knew you could do it!

Nice Job, TW. I watched your video and it appears your tire pressure is low. Just something to watch out for. :)

I thought of this project when I was watching Trucks TV or whatever. They mentioned a stand alone harness from Ford Racing. I assume they have been watching your work here and taking notes on how to get it done! Nice job!

Congrats! A lot of work and a lot of time, but I know it all feels well worth-it now!

Walt

All I have to say is BADASS!!! :bowdown:

You sir deserve a spot at SEMA with your bad self and the truck. Send a start up video to Ford with a print out of all the "cannot be done" posts and a response simply saying "**** it!"

Awesome! Congrat's :beer:

I immediately thought of TW when I saw that as well. I laughed, and said well I guess they figure someone without his ability would want one too. Anything with that harness won't hold a candle to what TW has done.

Congratulations TW, this calls for a celebration :beer:

Now, get back to work. :lol_hitti


Thanks All!

I have been busy trying to get all codes to clear and just pickin' away at things that need to be done before I can "TestDrive"


I now have all codes clear except for the left steering wheel "OK" button.

No engine or drivetrain codes of any kind.

The tires were in fact low on air, I have aired them up and verified in PCM the pressure should be set at 35 psi. I think it will have to be driven for the TPS light to go out. If need be I do have a TPS learning tool.

I was able to Upgrade the PCM with the latest and greatest from Ford.
So neat to be able to do that wireless sitting at my desk on my laptop!


Using laptop I was also able to bleed the brakes so I now have the "perfect" feel brake pedal. Full operating brakes with no ABS or other braking warning lights.

I was also able to Sync my smart phone to the truck, but of course cannot hear anything because no speakers yet. lol

Only other codes now are for the Restraint system as only Steering Wheel airbag is hooked up.

I need to find out how to "close the back doors" SuperCab to Regular Cab

I ordered a new inside cab wiring harness for that. Hoping that works.

I plugged in the 3rd Brake Light and Box light combo and it works great!

The power seat works fine

Radio and the Satellite portion of radio work fine, Again need speakers.

Biggie now before testdrive is the mounting of front clip, battery and the IC.

I will have to Custom Build the IC which will be a chore.

Once I get battery off the "skyhook" I just may actually drive it a few feet to make sure the trans etc works. No codes so do not expect a problem.

Even the HVAC system, fans etc work fine.

Adding the stock F150 foam to seat took up a bit of space so getting in and out a bit tight so it needs a bit of tweaking.

So plan now over next week or so is actually making it driveable!

Still a lot to do and yet keep up with everything else around here.

Daughters Bronco has sat with primer a few days now so it needs the final blocking and paint.

My 418 FE Machine work should be done tomorrow . . .

My daughters put together a 26' Dia above ground pool so have spent a bit of time preparing a place for it, filling it . . .

Still need to find place for all the parts out of semi trailer, The '66 427 Truck needs attention, the Blue "farm Truck" needs the 418 installed once engine is together for a dyno session.

Other than that not much to do around here . . .
 
Status
Not open for further replies.
To avoid these ads, REGISTER NOW!
Top Bottom