To avoid these ads, REGISTER NOW!

My 50x72 shop, ( Rock shop)

country boy

Well-known member
Joined
Oct 26, 2011
Messages
99
Location
Birmingham Alabama
My 50x72 + 20x60 shop, ( Rock shop)

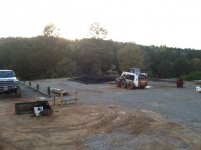
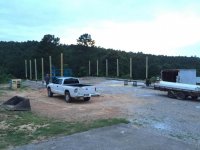
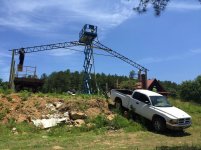
I have been itching to get this started. so here goes. 3 years ago my family was hit bye a tornado here in Birmingham Alabama so me and my wife bought a new to us log house on 10 ac. Been moving dirt for the past 2 years to make a spot level for the new shop.

The shop is for me and my toys i have built and will be building , Jeeps , rock crawler , cars , bobcat, tractor ect, both me and the wife have been doing the off road thing for many years. That is where we met. and now our 2 year old loves it also

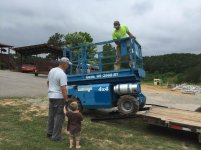
Bought some steel trusses from a guy never had been used just been sitting in the yard for a while so i got them home and painted them up black. i have 7 , 50 feet wide trusses .

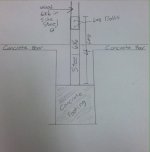
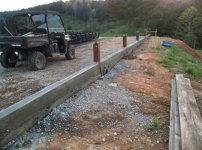
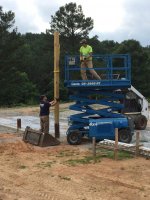
The past buildings i have built at dads we have just put treated 6x6 straight in the ground with concrete, i wanted to do a lil bit different 14 steel post was just to high of a price so . i bought 6x6 1/4 wall and cut them 4 ' long. they will set 2 feet in ground and 2 feet above the concrete floor . then the wood post will set about 18 '' inside them. ( pics should explan )

this is our house

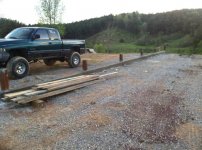
Just got this new truck wish i had had it 2 years ago dirt would have been moved a lot faster , just had a 1 ton befor


Last edited:
To avoid these ads, REGISTER NOW!
OP
C

country boy

Well-known member
Joined
Oct 26, 2011
Messages
99
Location
Birmingham Alabama
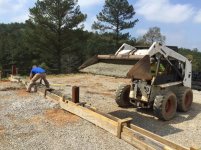
The past buildings i have built at dads we have just put treated 6x6 straight in the ground with concrete, i wanted to do a lil bit different 14 steel post was just to high of a price so . i bought 6x6 1/4 wall and cut them 4 ' long. they will set 2 feet in ground and 2 feet above the concrete floor . then the wood post will set about 18 '' inside them. ( pics should explan )


We put 61 bags of concrete in the holes for a footing for the steel to set on top of .

 
OP
C

country boy

Well-known member
Joined
Oct 26, 2011
Messages
99
Location
Birmingham Alabama
The red Building that looks like it got moved it did. it has no floor so it was not to hard to move . Picked it up with the bobcat and tractor and set it down on the trailer here is a vid of the move.


Joe_Lee

Active member
Joined
Aug 29, 2012
Messages
38
Location
Spanish Fort, AL, USA
Are you going to let the post go all the way down to the concrete inside the 6" square tubing? Or weld a plate in 12" or so from the top for it to sit on?
 
OP
C

country boy

Well-known member
Joined
Oct 26, 2011
Messages
99
Location
Birmingham Alabama
Are you going to let the post go all the way down to the concrete inside the 6" square tubing? Or weld a plate in 12" or so from the top for it to sit on?

my debate has been , fill it up with some concrete or rock.

My reason for the rock was if any water did get inside it would not sit in the wood. but after the siding goes up no water should get in .

So im leaning tords just putting in the concrete what yaw think ?
 

Joe_Lee

Active member
Joined
Aug 29, 2012
Messages
38
Location
Spanish Fort, AL, USA
I've been ready to build a pole barn for a few months but this issue has held me up. I've got great welding skills & the idea of poles in the ground in my area trouble me because of termites. So I've thought about doing what you are doing or even pouring concrete in sono tubes with a wet set bracket on top (bracket rebar in concrete)

You've probably seen the permacolumn brackets that bolt the post in the bracket - some say it creates a sheer point.

If you filled the tubing with concrete to above grade and then set the post in & bolted it it would be above grade but I guess it would be stronger if the 6x6 was inserted all the way to the bottom of the tubing?

Another thing to consider is to weld some rebar or angle on the outside of the tubing so it grabs the concrete.

Keep up the nice pics so we can see what you do.
 
OP
C

country boy

Well-known member
Joined
Oct 26, 2011
Messages
99
Location
Birmingham Alabama
Joe yes i looked into the permacolums but the price was kinda high.

And the wet set brackets are kinda high also and setting the post inside steel i think is much stronger.

With 6x6 1/4 '' wall filled with concrete i dont see how it could get any stronger. the price i paid for the steel was about the same as if i had to buy 16 ' 6x6 where now i can buy 12 ' wood. The cost jumps any thing over 12 '

i should have popped some holes in the steel for the rebar while i was cutting the steel up.

i am a little worried about only 8- 10 '' on concrete holding the steel in place so i am ordering a concrete truck this week if weather holds. Pics will be posted .
 

Joe_Lee

Active member
Joined
Aug 29, 2012
Messages
38
Location
Spanish Fort, AL, USA
The 6x6" steel tubing in concrete will be strong no doubt.

So how are you going to attach the 12' 6x6 wood posts to the 6x6" metal tubing?
Will the wood post go down into the metal tubing 8-12" & through bolted?
Or will you weld a bracket on the tubing to bolt the post to?

Keep the pictures & updates coming.
 
OP
C

country boy

Well-known member
Joined
Oct 26, 2011
Messages
99
Location
Birmingham Alabama
The 6x6 steel is 1/4 wall so ID is 5.5 and true dem. wood 6x6 is 5.5 , i will haft to route the corners on the 6x6 and it should slide right in, and go in about 12 '' and be bolted in.

Weather not been on my side to get a truck ordered for concrete this week dont look any better.

The 6x6" steel tubing in concrete will be strong no doubt.

So how are you going to attach the 12' 6x6 wood posts to the 6x6" metal tubing?
Will the wood post go down into the metal tubing 8-12" & through bolted?
Or will you weld a bracket on the tubing to bolt the post to?

Keep the pictures & updates coming.
 

Joe_Lee

Active member
Joined
Aug 29, 2012
Messages
38
Location
Spanish Fort, AL, USA
The 6x6 steel is 1/4 wall so ID is 5.5 and true dem. wood 6x6 is 5.5 , i will haft to route the corners on the 6x6 and it should slide right in, and go in about 12 '' and be bolted in.

Weather not been on my side to get a truck ordered for concrete this week dont look any better.

Got it - it should be strong for sure.
 

1949 caddyman

Well-known member
Joined
Oct 5, 2010
Messages
1,778
Location
Arizona
How about if you fill the steel up to the level you want & then drill a drain hole at the same level to give any water a way out?
 
OP
C

country boy

Well-known member
Joined
Oct 26, 2011
Messages
99
Location
Birmingham Alabama
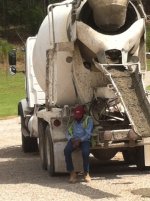
So i needed to order some concrete to get the steel in more concrete .
so i came up with this. Formed up a wall on both sides ( finish floor level ) doing this i can block up between post and build walls before i pour 50 yards of concrete.

here are the pics. And as you can see my driver was a bit sleepy lol
 

Attachments

  • IMG_0911.jpg
    IMG_0911.jpg
    87 KB · Views: 793
  • IMG_0909.jpg
    IMG_0909.jpg
    83.8 KB · Views: 684
  • IMG_0907.jpg
    IMG_0907.jpg
    94.3 KB · Views: 621
  • IMG_0901.jpg
    IMG_0901.jpg
    104.8 KB · Views: 675
OP
C

country boy

Well-known member
Joined
Oct 26, 2011
Messages
99
Location
Birmingham Alabama
My left over concrete i done me one more side walk bye the carport.
We have a 5 yard min. with out a fee so.
 

Attachments

  • IMG_0904.jpg
    IMG_0904.jpg
    120.8 KB · Views: 570
To avoid these ads, REGISTER NOW!

Cris B

Well-known member
Joined
Mar 21, 2011
Messages
416
Location
Lancashire, UK
House and plot looks amazing, a nice setting. Good luck with the build.

On the posts, you should find that kiln dried sand is suitable to raise the level to above grade as it doesn't compress under load and will be easier to deal with an accidental overfilling issues than a wet pour of concrete. It'd also reduce your costs a little.

If you wanted some peace of mind, I suppose you could opt for a dry mix of cement and sand? This however won't give you the same natural soak away of a pure sand fill.
 
OP
C

country boy

Well-known member
Joined
Oct 26, 2011
Messages
99
Location
Birmingham Alabama
I know yaw like pics here is a few more .

My 2 year old said it was hot lol
 

Attachments

  • (null) (5).jpg
    (null) (5).jpg
    148.5 KB · Views: 587
  • (null) (4).jpg
    (null) (4).jpg
    149.9 KB · Views: 552
  • (null) (3).jpg
    (null) (3).jpg
    151.4 KB · Views: 540
  • (null) (1).jpg
    (null) (1).jpg
    150.7 KB · Views: 533
OP
C

country boy

Well-known member
Joined
Oct 26, 2011
Messages
99
Location
Birmingham Alabama
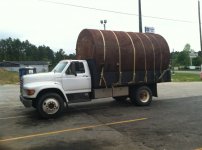
Something to stay tuned on is a 6500 gal fuel tank that i picked up yesterday .

I will clean it out and paint inside and out and put the tank under the office / man cave part . Im relay excited about this, going to have a tru man cave !!

We have been thru and seen so much Tornado damage here in Alabama this will be a nice piece of mind for us.
 

Attachments

  • IMG_0925.jpg
    IMG_0925.jpg
    119.1 KB · Views: 410

ADSR

Well-known member
Joined
Jan 12, 2013
Messages
10,713
Something to stay tuned on is a 6500 gal fuel tank that i picked up yesterday .

I will clean it out and paint inside and out and put the tank under the office / man cave part . Im relay excited about this, going to have a tru man cave !!

We have been thru and seen so much Tornado damage here in Alabama this will be a nice piece of mind for us.


Wow! So this will be a bunker?
 
OP
C

country boy

Well-known member
Joined
Oct 26, 2011
Messages
99
Location
Birmingham Alabama
Well been just doing a lot of small work but I did get all my 2x6 s painted .

This weekend I have called the force to come help me set the trusses.
 
OP
C

country boy

Well-known member
Joined
Oct 26, 2011
Messages
99
Location
Birmingham Alabama
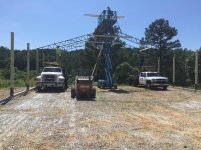
Got all the post set in the steel 6x6 my test 6x6 wood was dry and it worked great, but my new 6x6 was wet and would not fit so we planed a 1/16 off each side and thay went in with a little bit of help with a 5 LB sledge hammer.
 

Attachments

  • IMG_1209.jpg
    IMG_1209.jpg
    140 KB · Views: 545
  • IMG_1202.jpg
    IMG_1202.jpg
    142.8 KB · Views: 507
  • IMG_1201.jpg
    IMG_1201.jpg
    146.1 KB · Views: 553
  • IMG_1199 (1).jpg
    IMG_1199 (1).jpg
    145.3 KB · Views: 507
OP
C

country boy

Well-known member
Joined
Oct 26, 2011
Messages
99
Location
Birmingham Alabama
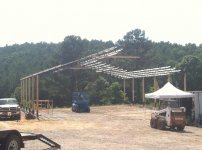
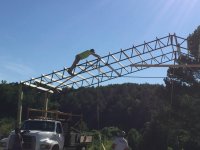
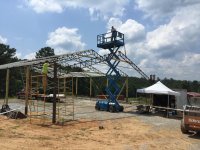
Well the first 2 trusses where a lot harder to get set than i thought thay was going to be. 50 ' wide sure does add some issues .

Got all 6 of them up tho. had to skip some of the 2 x 6 s due to time. but will come back in drop them in. I still have one more truss to set but its going on a steel post and will haft to dig the hole and set thos 2 post this week. now that i have my top post high.
 

Attachments

  • IMG_1037.jpg
    IMG_1037.jpg
    98 KB · Views: 713
  • IMG_1223.jpg
    IMG_1223.jpg
    129.8 KB · Views: 650
  • IMG_1221.jpg
    IMG_1221.jpg
    148.9 KB · Views: 636
  • IMG_1217.jpg
    IMG_1217.jpg
    148.3 KB · Views: 723
OP
C

country boy

Well-known member
Joined
Oct 26, 2011
Messages
99
Location
Birmingham Alabama
Been out of town, But got the last truss up, man that was a tough one, drilling into steel to bolt the truss took some time.

Got the Metal for the roof ordered should be ready in a cpl days.
 

Attachments

  • IMG_1264.jpg
    IMG_1264.jpg
    148.4 KB · Views: 444
OP
C

country boy

Well-known member
Joined
Oct 26, 2011
Messages
99
Location
Birmingham Alabama
Every truss had a bow tords the back of the shop from the pole to the center of the building so i had to do some rigging and pull the trusses .
 

Attachments

  • 11407192_10153351284226420_6498380425732975336_n.jpg
    11407192_10153351284226420_6498380425732975336_n.jpg
    135.1 KB · Views: 544
OP
C

country boy

Well-known member
Joined
Oct 26, 2011
Messages
99
Location
Birmingham Alabama
Boy it took a lot of work to put the bocking 2X6 '' in the middle of every perlin. but it sure does make it stronger.
 

Attachments

  • 10264280_10153360968576420_7011424354487184777_n.jpg
    10264280_10153360968576420_7011424354487184777_n.jpg
    102.6 KB · Views: 506
OP
C

country boy

Well-known member
Joined
Oct 26, 2011
Messages
99
Location
Birmingham Alabama
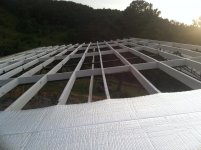
Been working on the metal last 3 days right at dark. it takes 4 people to carry the metal and i have been on the roof dropping screws in.

The wind last cpl days have put a challenge in laying the bubble wrap down under the metal.
 

Attachments

  • photo (4).jpg
    photo (4).jpg
    144.5 KB · Views: 549
  • 11535884_1147820925233192_7619841473145361197_n.jpg
    11535884_1147820925233192_7619841473145361197_n.jpg
    109.1 KB · Views: 615
  • 10934022_10153360967976420_1712037467675431241_n.jpg
    10934022_10153360967976420_1712037467675431241_n.jpg
    26.9 KB · Views: 576
  • 10455207_1147820971899854_2501214609383098843_n.jpg
    10455207_1147820971899854_2501214609383098843_n.jpg
    77.1 KB · Views: 537
OP
C

country boy

Well-known member
Joined
Oct 26, 2011
Messages
99
Location
Birmingham Alabama
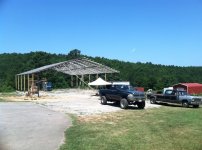
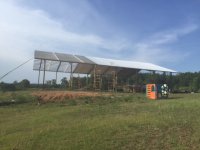
Well the roof of this part is Done !!!! Im loving this shade .

The front truss perlins are painted with the trip paint and the rest is all white.
 

Attachments

  • IMG_1128.jpg
    IMG_1128.jpg
    101.5 KB · Views: 429
  • IMG_1130.jpg
    IMG_1130.jpg
    116.8 KB · Views: 388
Last edited:
OP
C

country boy

Well-known member
Joined
Oct 26, 2011
Messages
99
Location
Birmingham Alabama
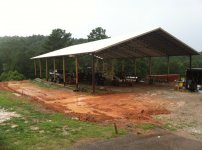
Having some washing issues so fixing this with putting a small rock wall between the carport and the shop. Using good old big free rocks .
 

Attachments

  • IMG_1132.jpg
    IMG_1132.jpg
    147 KB · Views: 509
OP
C

country boy

Well-known member
Joined
Oct 26, 2011
Messages
99
Location
Birmingham Alabama
The next big part on the list is to clean the storm shelter tank and dig the hole for it.

On the left side of the shop will be a lean to 16' wide for the man cave / storage. The storm shelter will be under this part of the shop.

The lean to will drop down 24'' from the top of the post. And i will cover the 24 '' with the Corrugated Polycarbonate Sidelight Panels the other side of the shop will also have a 24 '' tall panels the full length of the building.
 
To avoid these ads, REGISTER NOW!
Top Bottom