What did you use to make the paper towel holder? It looks like that 80/20 aluminum type extrusion.
yep, 80/20 bosch tubing.

What did you use to make the paper towel holder? It looks like that 80/20 aluminum type extrusion.
View media item 48872
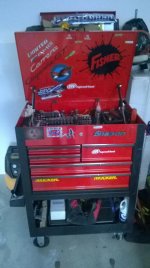
it holds all my tools no problem

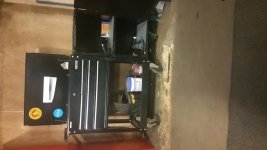
Has anyone repurposed one these carts into a welding cart? I have searched here, google, pinterest, etc. I am most curious if someone has built/integrated a c02 tank(s) holder and if the cart has the strength to retain that weight off the side.


Anyone know where to get those corner protectors?
Added folding shelf on one side, pegboard on the other. Thanks for all the great suggestions!
Added folding shelf on one side, pegboard on the other. Thanks for all the great suggestions!
 what do the undersides of the shelf look like? looks to be a bit long of a shelf for the supports...
dig the peg board man.
Anyone found a good use for the useless screw driver holder slots. Yea, 1-side of mine has all my extensions but the other side has nothing. Just throwing flash light, tape and misc junk in there.

Anyone found a good use for the useless screw driver holder slots. Yea, 1-side of mine has all my extensions but the other side has nothing. Just throwing flash light, tape and misc junk in there.
Anyone found a good use for the useless screw driver holder slots. Yea, 1-side of mine has all my extensions but the other side has nothing. Just throwing flash light, tape and misc junk in there.
Anyone found a good use for the useless screw driver holder slots. Yea, 1-side of mine has all my extensions but the other side has nothing. Just throwing flash light, tape and misc junk in there.
Yea, I put grommets in the holes and the screwdrivers still flop all over the place. Looking at using some type of sleeve to keep them in place.
Air gun, pry bars, pistol grip needle nose pliersAnyone found a good use for the useless screw driver holder slots. Yea, 1-side of mine has all my extensions but the other side has nothing. Just throwing flash light, tape and misc junk in there.
i stuck my prybars down one side and my screwdrivers down the other...
i've noticed the carts on counting cars too..
Yea, I put grommets in the holes and the screwdrivers still flop all over the place. Looking at using some type of sleeve to keep them in place.


Here's my "finished" tool cart., the one I push around the plant. Its been an evolution, through trial and error of what does and doesn't work for me. Keep in mind I made changes and additions over an 18 month period. Below is a list of changes/upgrades that help me be more efficient in my job as a multi-craft maintenance technician.
1. Built a frame for added strength, our floors a very rough with cracks.
2. Added a Craftsman folding side shelf that I already had.
3. Sprayed the top with bedliner for protection.
4. Added to the frame for the additional side cabinet. (never got around
to painting the frame).
5. Added the US General side cabinet.
6. Built a new frame for the addition of another side cabinet and vise.
7. Added a Craftsman side cabinet that I already had.
8. Relocated the cart's push handle to the Cman's side cabinet.
9. Mounted my USA made 4" Craftsman vise.
Along this journey I've also added things in the cart/boxes for tool organization. I won't go into that part, although I still need a good pliers rack.
Phase 1
Phase 2
Phase 3
I really need to build a frame for mine. I have the same problem with cracks in the plant.Here's my "finished" tool cart., the one I push around the plant. Its been an evolution, through trial and error of what does and doesn't work for me. Keep in mind I made changes and additions over an 18 month period. Below is a list of changes/upgrades that help me be more efficient in my job as a multi-craft maintenance technician.
1. Built a frame for added strength, our floors a very rough with cracks.
2. Added a Craftsman folding side shelf that I already had.
3. Sprayed the top with bedliner for protection.
4. Added to the frame for the additional side cabinet. (never got around
to painting the frame).
5. Added the US General side cabinet.
6. Built a new frame for the addition of another side cabinet and vise.
7. Added a Craftsman side cabinet that I already had.
8. Relocated the cart's push handle to the Cman's side cabinet.
9. Mounted my USA made 4" Craftsman vise.
Along this journey I've also added things in the cart/boxes for tool organization. I won't go into that part, although I still need a good pliers rack.
Phase 1
Phase 2
Phase 3