To avoid these ads, REGISTER NOW!

VISE REPAIR 101 all vise repairs, lubricants, sources for parts and the tricks to fix

bagged89s10

Well-known member
Joined
Mar 13, 2005
Messages
4,607
Location
CT
Bagged: some of us clean off the rear of the dynamic for a cleaner look with the bare steel sort of like you did with the side of the jaw. not always seen or necessary, but thought you might like to know.


nice work so far


Hmmm, polished might look nice. Do you paint the bottom of your vise bases? So far I've painted the bottoms of my Reed and Oswego..
 
To avoid these ads, REGISTER NOW!
OP
D

drivesitfar

Well-known member
Joined
Oct 23, 2013
Messages
36,047
Location
Pacific Northwest
Bagged: yes paint on bottom of bases or swivel bases and top of swivel base except there metal to metal will be happening. also don't paint inside swivel's area where the clamping occurs. polishing any bare steel is always a good idea.
 
OP
D

drivesitfar

Well-known member
Joined
Oct 23, 2013
Messages
36,047
Location
Pacific Northwest
Bagged: you mentioned a couple times about making an aluminum oven to put in or on your BBQ to bake and dry your paint on your vises. any chance you can post a few pictures of that and maybe a quick note on how you built it unless it is obvious? thanks and it sounds like a great idea to bake on the paint and give it a smoother finish.

one other note when painting the inside of the dynamic and static jaws is to maybe use a black primer instead of using the color like red, orange or green and it might look a bit better.

thanks for posting your vise restoration
 

vintage nut

Well-known member
Joined
Mar 17, 2015
Messages
1,272
Location
west coast of canada
I'm thinking of trying baking the mill vise I'm working on in my heat treating oven at a low (for it) temperature. I'll post pictures and report how it works

you can never have too many tools
 

vintage nut

Well-known member
Joined
Mar 17, 2015
Messages
1,272
Location
west coast of canada
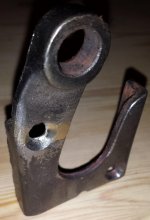
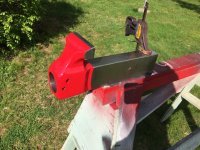
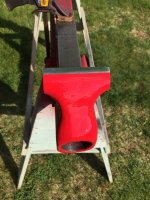
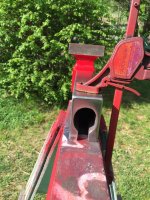
Heres the mill vise in progress
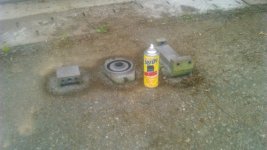
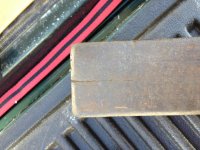
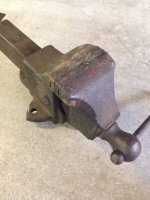
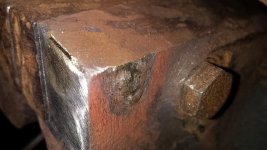
uploadfromtaptalk1431437532127.jpguploadfromtaptalk1431437563678.jpguploadfromtaptalk1431437581267.jpguploadfromtaptalk1431437609682.jpg
Before, after disassembly, oven cleaner, and wire wheeled. Primer is currently drying, and I'm picking up some gloss gray this afternoon so I can start painting.

you can never have too many tools
 

bagged89s10

Well-known member
Joined
Mar 13, 2005
Messages
4,607
Location
CT
Bagged: you mentioned a couple times about making an aluminum oven to put in or on your BBQ to bake and dry your paint on your vises. any chance you can post a few pictures of that and maybe a quick note on how you built it unless it is obvious? thanks and it sounds like a great idea to bake on the paint and give it a smoother finish.


one other note when painting the inside of the dynamic and static jaws is to maybe use a black primer instead of using the color like red, orange or green and it might look a bit better.


thanks for posting your vise restoration


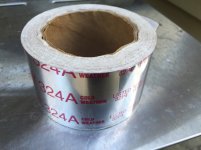
It's nothing special. Just threw some aluminum foil on the bottom and sit the vise on it. Then used foil tape to tape aluminum foil sides and top. I didn't completely seal it because I thought it would get too hot, and I wanted fumes to escape. I kept the grill top open as well.

I didn't take a picture because it was ghetto rigged, but it worked.
When I bake the dynamic jaw/slide, I will clamp in in my little 3.5" columbian and sit it on the grill.

I'll paint and bottom on the vise base last. I'm thinking I'll have to mostly assemble the vise and clamp a piece of steel between the jaws. Then rest it upside down.
 

Lu-Max

Well-known member
Joined
Jan 8, 2014
Messages
745
One of the vises I am cooking out in the electrolysis bath has a few pits that have appeared in the casting. They look like small voids that may have been bubbles when it was poured and I think they filled them in with something prior to painting (Bondo?) at the factory. The electrolysis process seems to have dissolved the filler.

Now I'm thinking about pointing a MIG wire into these and filling these half dozen holes with hot MIG wire & then grinding off any excess.

Good idea or bad?

Or, should I stick with body filler to fill the voids to make the paint look smooth?
 
OP
D

drivesitfar

Well-known member
Joined
Oct 23, 2013
Messages
36,047
Location
Pacific Northwest
Lu: PM Zkling if he doesn't see your post because he's done some amazing work fixing damaged vises with his welding. i think he uses nickel rod, but since i'm not a welder (yet) I'm not sure of the exact rod or percentage or #. you can use JB weld or Devcon to fill small holes if you don't want to bring out the welder. also KMScott has some amazing weld repairs if you might want another source if either one of those guys has a second to PM you or post here.

good luck and take and post lots of pictures if you would please here when you get time.
 
OP
D

drivesitfar

Well-known member
Joined
Oct 23, 2013
Messages
36,047
Location
Pacific Northwest
All: so i posted up a crack on the back of my dynamic slide on my big Monarch 223 and Vintage Nut offered to braze it for me next time he's at my shop which was more than generous. since i'm not a welder and he's coming from across the Canadian border i'll need to buy the tanks and welding supplies so here's what he said i'd need.

"You're going to want flux coated bronze brazing rods. I'll probably bring my torch handle, as it's freshly rebuilt, and I have the full set of welding tips, including real big ones like we'd need for the vise. We'd ideally also need a big propane torch (think harbor freight weed torch) and a fireproof blanket to make a nest for it to make preheating easier, and to slow cooling. If you have a good sized compressor, a die grinder would be really helpful. If not we could make do with an angle grinder. Depending just how big it is, we might actually want two of the fiberglass blankets. One to make something like a birds nest, and the other to cover it up. The better you tuck it in, the slower it will cool, and the less likely it is for something to go wrong.
This would be the biggest casting I'll have brazed, but I think it should all go pretty well.

Oh yeah, and we'd probably need pretty good sized tanks to run the size tip we would need. Acetylene tanks can only supply a certain volume of gas per hour depending on their size, and if you go over that it will **** acetone from the tank into the regulator, and destroy it. I'd say 150 cubic foot would be on the lower end. We might be able to manage with an 80, but it would definitely be pushing it."

my comments were:

Vintage: i'm moving your post over to the vise repair 101 thread if you have anything else to add and I like your thinking. i do have a lot of sand and a BBQ we can heat up. to keep the dynamic jaw from cooling down too fast. i own a brand new HF propane torch that i was going to burn some weeds with until i found out table salt works great. check out the salt kills weeds thread if you have any to get rid of because it even kills blackberries and that is in the general garage section. thanks

so now i sort of moved the brazing comments over here for us and others to talk about since brazing might be the best way to weld fix a vise that i know of. also here's a few pictures of the Monarch 223 100+ pound vise (made by Prentiss vise co.) we are talking about.
 

Attachments

  • IMG_7032.jpg
    IMG_7032.jpg
    140.7 KB · Views: 32
  • IMG_7035.jpg
    IMG_7035.jpg
    142.8 KB · Views: 30
  • 00t0t_7DSyn4H5Krn_600x450.jpg
    00t0t_7DSyn4H5Krn_600x450.jpg
    22.4 KB · Views: 31
  • 01313_4sGUnh4tbHz_600x450.jpg
    01313_4sGUnh4tbHz_600x450.jpg
    20.5 KB · Views: 37

zkling

Well-known member
Joined
Jan 23, 2007
Messages
16,939
One of the vises I am cooking out in the electrolysis bath has a few pits that have appeared in the casting. They look like small voids that may have been bubbles when it was poured and I think they filled them in with something prior to painting (Bondo?) at the factory. The electrolysis process seems to have dissolved the filler.

Now I'm thinking about pointing a MIG wire into these and filling these half dozen holes with hot MIG wire & then grinding off any excess.

Good idea or bad?

Or, should I stick with body filler to fill the voids to make the paint look smooth?

How big are these pits and what is your end goal for finish? Can you weld cast with standard mild steel ~E_70 filler? Sure, is it the best idea? No, will it work in non stressed applications? yes. Although in this case, especially if you plan on painting over the area I'd go with a lower temp solution or even a room temp solution such as an epoxy or bondo filler. Now if your end goal is a "naked" vise and color match is a high importance; then a welded solution will be your best bet.
 

vintage nut

Well-known member
Joined
Mar 17, 2015
Messages
1,272
Location
west coast of canada
Drives, the sand would work well also. Could even use the bbq to preheat if the vise fits. Then just close the lid after, and turn it down bit by bit until its off, then just let it cool with the lid closed. Shouldn't be too bad a repair, and I'm more than happy to help!

you can never have too many tools
 

Lu-Max

Well-known member
Joined
Jan 8, 2014
Messages
745
zkling: I can TIG or MIG them, I have both.

What rod would you recommend for TIG? I usually use 1.5% Lanthanated Tungsten with 100% AR for TIG steel.

I only have standard Hobart ER70S-6 .030 and .035 wire at the moment with a C25 bottle for my MIG.

I can fill them with JB Weld but would prefer to weld-fill the holes.

Thanks.
 
OP
D

drivesitfar

Well-known member
Joined
Oct 23, 2013
Messages
36,047
Location
Pacific Northwest
Lu: before ZK can answer you with the best options he could use and we could use some pictures of the holes and where they are on your vise if you are able.
 

vintage nut

Well-known member
Joined
Mar 17, 2015
Messages
1,272
Location
west coast of canada
I might be tempted to use a bronze rod, and tig braze it. If not, stainless filler should be successful. I have done a little tig, but I'm far from an expert, so I'd probably recommend waiting for someone who is.

you can never have too many tools
 

Lu-Max

Well-known member
Joined
Jan 8, 2014
Messages
745
drivesitfar: It's still cooking in the bath, I won't be able to post photos until later today or tomorrow.

The "holes" are no bigger than maybe 3-8mm across and maybe about as deep. They look like gas porosity (casting bubbles) that formed on the outside of the mold when it was cast.
 
Last edited:
OP
D

drivesitfar

Well-known member
Joined
Oct 23, 2013
Messages
36,047
Location
Pacific Northwest
Lu: so i guess these holes are in the "meaty" part of the vise and not on an edge, jaw or moving part?

i can certainly wait for pictures and just trying to help get you the best answers for your particular vise.

Vintage: do you have any pictures of your prior brazing work so we can see them even if they are not on a vise just for a post to show recent instead of 50 year old brazing?
 

vintage nut

Well-known member
Joined
Mar 17, 2015
Messages
1,272
Location
west coast of canada
I actually don't have any pictures of my brazing work. I have never tried tig brazing though, only oxy acetylene.
Brazing really looks the same whether its new or 50 years old. It just depends how much effort you put into cleaning it up.

you can never have too many tools
 
OP
D

drivesitfar

Well-known member
Joined
Oct 23, 2013
Messages
36,047
Location
Pacific Northwest
Vintage: thanks for the information

CW: thanks for the information and pictures. also nice repair on that prior owner's careless miss with his saw or grinder.
 

bagged89s10

Well-known member
Joined
Mar 13, 2005
Messages
4,607
Location
CT
VISE REPAIR 101 all vise repairs, lubricants, sources for parts and the trick...

It's nothing special. Just threw some aluminum foil on the bottom and sit the vise on it. Then used foil tape to tape aluminum foil sides and top. I didn't completely seal it because I thought it would get too hot, and I wanted fumes to escape. I kept the grill top open as well.

I didn't take a picture because it was ghetto rigged, but it worked.
When I bake the dynamic jaw/slide, I will clamp in in my little 3.5" columbian and sit it on the grill.

I'll paint and bottom on the vise base last. I'm thinking I'll have to mostly assemble the vise and clamp a piece of steel between the jaws. Then rest it upside down.


Was able to paint it today. Some dust got in it but what can I expect painting in my backyard. Darn pollen and wind bursts. I didn't have time to bake it yet. Ill bake it when I get back home.

ImageUploadedByTapatalk1431465924.071256.jpg
ImageUploadedByTapatalk1431465931.388302.jpg
ImageUploadedByTapatalk1431465942.527378.jpg
ImageUploadedByTapatalk1431465971.224905.jpg

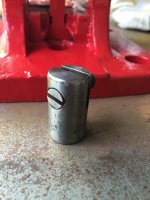
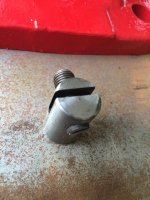
I also cleaned up the rear nut pin and bolt. I just didn't sand the bare metal parts too much since the vise was so nice and tight when I got it. I don't want to loosen things up by removing too much metal. The lead screw nut dovetail is so tight that I had to file off some paint to slide it in.
ImageUploadedByTapatalk1431466917.782449.jpg
ImageUploadedByTapatalk1431466707.264191.jpg
ImageUploadedByTapatalk1431466735.396291.jpg

The bolt is in the pin backwards from how I received the vise. Can anyone confirm the correct orientation of the pin and bolt? You can see the split is off center.
 
Last edited:
To avoid these ads, REGISTER NOW!

Lu-Max

Well-known member
Joined
Jan 8, 2014
Messages
745
Lu-Max's Pro Tip:

If you're going to use electrolysis to clean your vises, I highly recommend using pure Sodium Carbonate instead of "Soda Wash" along with some graphite instead of a scrap iron anode.

Why? I'm glad you asked.

The bucket you see below has been 'cooking' for ~30 hours and you'll notice the lack of a thick layer of brown sludge floating on the top. Graphite, unlike rebar (or other sacrificial material), does not put a bunch of gunk into the solution, and using 100% Sodium Carbonate vs laundry soap (which is what Soda Wash is), prevents the buildup of a thick layer of dirty suds that you see in most electrolysis buckets. This way the vise crud ends up at the bottom of the tub.

100% pure Sodium Carbonate can be purchased at any pool supply store, else Lowe's or H.D. It's usually referred to commercially as "Spa (or pool) Alkalinity Up", H.D. calls it "ph Plus Soda Ash".

Bars and sheets of graphite can be found for cheap on eBay. I got 4 of the thick sheets seen below for ~$12. Will probably last me forever.

electrol-1_zpsohyy0nao.jpg


You're welcome! :)

BTW the jug in the bath is there to keep the dynamic upright.
 

bagged89s10

Well-known member
Joined
Mar 13, 2005
Messages
4,607
Location
CT
It's nothing special. Just threw some aluminum foil on the bottom and sit the vise on it. Then used foil tape to tape aluminum foil sides and top. I didn't completely seal it because I thought it would get too hot, and I wanted fumes to escape. I kept the grill top open as well.

I didn't take a picture because it was ghetto rigged, but it worked.
When I bake the dynamic jaw/slide, I will clamp in in my little 3.5" columbian and sit it on the grill.

I'll paint and bottom on the vise base last. I'm thinking I'll have to mostly assemble the vise and clamp a piece of steel between the jaws. Then rest it upside down.


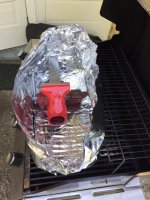
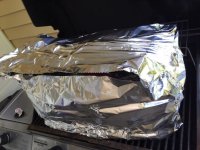
Here is the ghetto baking oven. Just aluminum foil and foil tape on a propane bbq grill set on low.

ImageUploadedByTapatalk1431468552.953908.jpg
ImageUploadedByTapatalk1431468562.056401.jpg
ImageUploadedByTapatalk1431468569.093040.jpg

Not pretty but it does the trick. The lid has a gauge which reads about 175-200F so I'm assuming the vise is baking at about 200F I need to go find a temp gauge. Maybe on trash day someone will be tossing an old grill and I'll go snag the gauge.
Or the whole grill
 

CwazyWabbit

Well-known member
Joined
Jan 9, 2015
Messages
1,189
Location
Surrey, UK
Lu-Max's Pro Tip:

If you're going to use electrolysis to clean your vises, I highly recommend using pure Sodium Carbonate instead of "Soda Wash" along with some graphite instead of a scrap iron anode.

Why? I'm glad you asked.

The bucket you see below has been 'cooking' for ~30 hours and you'll notice the lack of a thick layer of brown sludge floating on the top. Graphite, unlike rebar (or other sacrificial material), does not put a bunch of gunk into the solution, and using 100% Sodium Carbonate vs laundry soap (which is what Soda Wash is), prevents the buildup of a thick layer of dirty suds that you see in most electrolysis buckets. This way the vise crud ends up at the bottom of the tub.

100% pure Sodium Carbonate can be purchased at any pool supply store, else Lowe's or H.D. It's usually referred to commercially as "Spa (or pool) Alkalinity Up", H.D. calls it "ph Plus Soda Ash".

Bars and sheets of graphite can be found for cheap on eBay. I got 4 of the thick sheets seen below for ~$12. Will probably last me forever.

electrol-1_zpsohyy0nao.jpg


You're welcome! :)

BTW the jug in the bath is there to keep the dynamic upright.

Doesn't seem to be easy/cheap to get hold of sheet graphite in the UK so I just use steel as the sacrificial electrode.
I clean off the part after electrolysis with a pressure washer which does a quick and fairly effective job of cleaning it up ..... just recently I decided to try pressure washing the sacrificial electrode instead of wire wheeling or grinding as I had been and it's much more effective :)

Here's one of the electrodes from last time I did some
2015-05-04 09.58.43.jpg

2015-05-04 09.58.29.jpg

2015-05-04 09.58.24.jpg
 
OP
D

drivesitfar

Well-known member
Joined
Oct 23, 2013
Messages
36,047
Location
Pacific Northwest
Lu: your graphite in your E tank looks like it's working great. i'm looking forward to seeing how your vise comes out after using it and the spa chemical.

we have a thread on Electrolysis that could use your graphite pictures used in the E tank if you don't mind posting them over there and here's the link.

http://www.garagejournal.com/forum/showthread.php?t=237752&highlight=homemade+electrolysis

only thing i see that i would do different is to wrap a wire around the dynamic and put the negative clamp to that wire up out of the water. i know some guys like to just clamp the part and dunk it and if you want to do that it's your tank. plenty to read about that in the thread about Electrolysis and you can decide if you want to change.
 

Lu-Max

Well-known member
Joined
Jan 8, 2014
Messages
745
Lu: only thing i see that i would do different is to wrap a wire around the dynamic and put the negative clamp to that wire up out of the water.

That's actually what I do. The twisted black wire on the left is plain steel (stove pipe) wire that is attached to the dynamic. The negative clamp (not shown) is outside the tub to the left. I'll post my info once the dynamic is done to the electrolysis thread so I can also post photos. Thanks.
 

Lu-Max

Well-known member
Joined
Jan 8, 2014
Messages
745
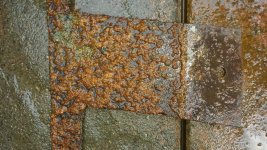
This is one of the larger ones, maybe 6mm across. This vise has never been restored which makes me think these are porosities. Plus that is the original paint in the divot. At least 6 of these on the vise.

I want to fill them in with steel if possible, just curious as to the preferred welding process?

20150513_102616_resize_zpsga8mtgz0.jpg
 

bagged89s10

Well-known member
Joined
Mar 13, 2005
Messages
4,607
Location
CT
So I am buttoning my Reed 104R but the lead screw has some rust on the back half. I was going to wire wheel it but decided to try evaporust that I bought but haven't used yet. I wrapped it in an evaporust soaked paper towel. Then wrapped press and seal around it to keep the evaporust from drying out. Hopefully it will be clean tomorrow and I can grease it up for the real final assembly.
ImageUploadedByTapatalk1431663886.545001.jpg

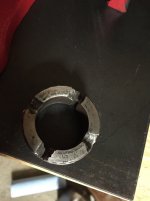
I have a question about vise grease. I used anti seize on the lead screw for the Wilton I restored. I am going to do the same on the lead screw for this vise as well. But the Reed has a unique split nut collar and a separate chamber where the center section of the lead screw sits. Should I be using a different grease or is anti seize fine?
ImageUploadedByTapatalk1431664131.966989.jpg
ImageUploadedByTapatalk1431664276.902062.jpg
ImageUploadedByTapatalk1431664284.990084.jpg
 
OP
D

drivesitfar

Well-known member
Joined
Oct 23, 2013
Messages
36,047
Location
Pacific Northwest
Lu: do you have a few more pictures you can post so Zkling or somebody else that welds can see where these holes are located on your vise? since i don't weld i'd probably use Devcon to fill the holes especially if i was going to paint the vise. i would bet Zkling will say use nickel rod, but i'm not sure of that or the type so i'll let him or others speak to that if they see your post. how did the E bath work and did you need to wire wheel off the crud or just wipe it down after removing the vise from the tank?

Bagged: you might be over thinking it a bit, but good question. i'd probably use the same grease and i'll let others say if they might use something different. Some of the smoothest operating vises I've owned were just packed with that old grease that came in 55 gallon barrels that looked like animal fat and those vises worked great for almost 100 years with that stuff.
 

jakemac

Well-known member
Joined
May 21, 2013
Messages
9,035
Location
New England
I never use anti-seize on moving parts. I don't like the thought of the grit in the anti-seize causing undue wear. I'll only use it on parts like screws or bolts, that may not be moved for years.
 

CwazyWabbit

Well-known member
Joined
Jan 9, 2015
Messages
1,189
Location
Surrey, UK
I'd agree with jakemac here, I was told by a toolmaker that you only oiled vices/vises, never grease them .... all of his vices were in lovely condition and not gummed up ;)
 

Lu-Max

Well-known member
Joined
Jan 8, 2014
Messages
745
Drivesitfar The 'divots' or porosities are on the outside of the casting, randomly scattered on the vise body, static, and a couple on the dynamic. I believe they are from poor casting technique or a dirty mold. Here is another picture. I just want to know if my standard MIG wire will work best or if I need to get a few special rods for my TIG. I just want to do what is the best option and also which technique will match the existing cast metal the best.

dynamic-tail_zps7hdvdbzg.jpg
 

dkroth

Well-known member
Joined
Mar 11, 2010
Messages
3,067
Location
Rochester, New York
So I am buttoning my Reed 104R but the lead screw has some rust on the back half. I was going to wire wheel it but decided to try evaporust that I bought but haven't used yet. I wrapped it in an evaporust soaked paper towel. Then wrapped press and seal around it to keep the evaporust from drying out. Hopefully it will be clean tomorrow and I can grease it up for the real final assembly.


Parts are supposed to be soaked in a bath of Evaporust. Evaporust works by chelation which implies you need a certain amount of the solution to convert the rust that's present. From their website:

"The recommended way, and the most effective way, of using Evapo-Rust® is through soaking the rusted surface. The liquid must remain in full contact with the rusted area for a period of time without evaporating."

Post up your results. If there isn't a lot of rust you may get good results anyway.
 

bagged89s10

Well-known member
Joined
Mar 13, 2005
Messages
4,607
Location
CT
Parts are supposed to be soaked in a bath of Evaporust. Evaporust works by chelation which implies you need a certain amount of the solution to convert the rust that's present. From their website:


"The recommended way, and the most effective way, of using Evapo-Rust[emoji768] is through soaking the rusted surface. The liquid must remain in full contact with the rusted area for a period of time without evaporating."


Post up your results. If there isn't a lot of rust you may get good results anyway.


Yeah I know but It also says you can soak a heavy duty paper towel and put that in contact with the rust. So before I left for work I unwrapped and rinsed it. It worked to remove the rust off the major parts of the threads but the minors didn't contact the paper towel enough so still some rust left. I only let it sit for 7 hours. I honestly just didn't have the right size container to soak it in. I need to find one to use.
 

bagged89s10

Well-known member
Joined
Mar 13, 2005
Messages
4,607
Location
CT
I never use anti-seize on moving parts. I don't like the thought of the grit in the anti-seize causing undue wear. I'll only use it on parts like screws or bolts, that may not be moved for years.


I'd agree with jakemac here, I was told by a toolmaker that you only oiled vices/vises, never grease them .... all of his vices were in lovely condition and not gummed up ;)


What do you guys use for oil on your vises?
 

CwazyWabbit

Well-known member
Joined
Jan 9, 2015
Messages
1,189
Location
Surrey, UK
Drivesitfar The 'divots' or porosities are on the outside of the casting, randomly scattered on the vise body, static, and a couple on the dynamic. I believe they are from poor casting technique or a dirty mold. Here is another picture. I just want to know if my standard MIG wire will work best or if I need to get a few special rods for my TIG. I just want to do what is the best option and also which technique will match the existing cast metal the best.

dynamic-tail_zps7hdvdbzg.jpg

If you want the best match texture wise then epoxy would be my choice and as it starts to harden press some emery cloth into the surface.

If we are set on welding it then you will have to grind each divot out till it's clean or you'll end up with a mess. My preference would be to use aluminium bronze rods with tig, however stainless steel (preferably 309 or 312) would be a cheaper option. If you go down the root of using a normal steel wire you will create a very hard spot as it absorbs the carbon from the molten cast iron and I would worry about it starting a crack where there wasn't one.

Choice of course is yours, but any repair that involves molten metal will be hard to match a cast finish.
 

dkroth

Well-known member
Joined
Mar 11, 2010
Messages
3,067
Location
Rochester, New York
Yeah I know but It also says you can soak a heavy duty paper towel and put that in contact with the rust. So before I left for work I unwrapped and rinsed it. It worked to remove the rust off the major parts of the threads but the minors didn't contact the paper towel enough so still some rust left. I only let it sit for 7 hours. I honestly just didn't have the right size container to soak it in. I need to find one to use.

Excellent. I did not know that. I try to keep several containers around for variously shaped items.

I will definitely try the wet paper towel in the future.
 

CwazyWabbit

Well-known member
Joined
Jan 9, 2015
Messages
1,189
Location
Surrey, UK
Drivesitfar The 'divots' or porosities are on the outside of the casting, randomly scattered on the vise body, static, and a couple on the dynamic. I believe they are from poor casting technique or a dirty mold. Here is another picture. I just want to know if my standard MIG wire will work best or if I need to get a few special rods for my TIG. I just want to do what is the best option and also which technique will match the existing cast metal the best.

dynamic-tail_zps7hdvdbzg.jpg

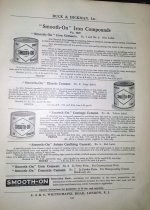
Shame this stuff from 1923 isn't still available ......

2015-05-15 18.20.48.jpg
 
OP
D

drivesitfar

Well-known member
Joined
Oct 23, 2013
Messages
36,047
Location
Pacific Northwest
CW: i bet i have seen those cans at some of my 95 year old client's shops or i'll keep on the lookout for them now.

thanks and your catalog inventory has no bounds and you seem to be able to grab them in an instant too. :bowdown:

DK and Bagged: good stuff about how to use evaporust
 
To avoid these ads, REGISTER NOW!
Top Bottom