To avoid these ads, REGISTER NOW!

Garage door weather seal adjustment

soonerbrink

Member
Joined
Jun 29, 2015
Messages
22
Alright, I checked out the board and saw that the best solution is to use the green hinges that adjust so my garage door seals better, however I would like to try to adjust the vinyl weather stripping first.

So, it sounds like the vinyl can break easily so I don't want to rush into this, however I have to clue how to get these small nails out that are below the face of the trim? Any suggestions how to properly remove the nails so I can adjust the trim?
 
To avoid these ads, REGISTER NOW!

Nowater

Well-known member
Joined
Nov 29, 2011
Messages
744
Location
Southwest Florida
You may not be able to do a neat job of this and you may have to just replace the trim with new. You can also adjust your door to close tighter to the trim by moving the track inside a small amount.
 

MikeF

Well-known member
Joined
Jan 3, 2008
Messages
164
adjust the track, should have 1/4-20 track bolts, 7/16ths wrench. close door, loosen nuts, push track in, tighten nuts. test, if its to tight, you may need to move the track back a little. is the weather strip worn or drying out? was it installed properly? pictures?
 
OP
S

soonerbrink

Member
Joined
Jun 29, 2015
Messages
22
Great suggestion! Sounds like track adjustment should be easy. My only concern is is the gap just appears at the middle (perhaps the weather stripping isn't even and there are gaps on the side, but the weather stripping addresses the issue there, but since it isn't even in the middle, moving the tracks will help close the gap without needing to move the weather stripping).

Weather stripping appears to be in good condition.

I believe it was a combination of the foundation moving and not installed with precision.

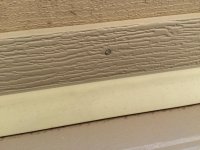
I included a few pics. The marks on the garage door was when the main gear broken on the opener and the chain rubbed while I replaced it.

That opening causes the garage to get really cold in the winter. Wind from the North hits the garage straight on and seeps right in.
 

Attachments

  • 2015-07-11 11.41.19.jpg
    2015-07-11 11.41.19.jpg
    154.5 KB · Views: 77
  • 2015-07-11 11.42.15.jpg
    2015-07-11 11.42.15.jpg
    128.2 KB · Views: 78
  • 2015-07-11 11.42.25.jpg
    2015-07-11 11.42.25.jpg
    141.2 KB · Views: 73

upndown

Well-known member
Joined
Dec 5, 2010
Messages
3,107
Location
Desert Hills/Peeples Valley AZ.
On your top moulding if that gap is consistent across the door, Adjust your top fixtures.
You can also adjust the vertical tracks with the door open! Just depends on your gap. That's usually a result of installing and nailing the stops down first, a common practice these days. Setting the stops should be the very last step on an installation.
Unfortunately wood can also warp.
 
OP
S

soonerbrink

Member
Joined
Jun 29, 2015
Messages
22
On your top moulding if that gap is consistent across the door, Adjust your top fixtures.
You can also adjust the vertical tracks with the door open! Just depends on your gap. That's usually a result of installing and nailing the stops down first, a common practice these days. Setting the stops should be the very last step on an installation.
Unfortunately wood can also warp.

Based on the light entering the garage, the gap is not consistent, so I should not adjust the top fixtures. (Are the fixtures that part that connects to the door by the rollers?

Since it sounds like the above does not apply, I need to adjust the vertical tracks. I assume I start adjusting those at the top, since that is where the gap is.

Thanks!
 

upndown

Well-known member
Joined
Dec 5, 2010
Messages
3,107
Location
Desert Hills/Peeples Valley AZ.
What you want to look at is the very top of your door at the corners, right and left, where the vertical and horizontal stops meet. That should be tight..if not then adjust your top fixtures. They hold the very last roller on your door.
There should be a nut in the bracket that holds the roller, 7/16" socket or wrench. Then slide the top of your door towards the stop...Done!
 
OP
S

soonerbrink

Member
Joined
Jun 29, 2015
Messages
22
Alright, I did some more observing.

I looked at the top left and top right corners. The garage door is flush with the side of the opening. There is no gap and no play. I put my hand along the top and side and verified this.

Moving to the middle of the garage door there is a gap along the top where I can put feel an opening. If I push on the garage door at the top of the middle, it presses against the edge and the light goes away. When I let loose of it, it opens back up

So It sounds like the garage door might bow in at the middle of the top, or the board along the edge at the middle of the top could be bowing up or out in the middle.

Not really sure where to go from here, as I don't see an easy fix to the door or the trim. Almost makes me think it might be easier to attach some type of seal on the inside of the garage along the top. Don't have to mess with the outside and it wouldn't be visible from the inside because of the height of the door and the angle they meet.
 

upndown

Well-known member
Joined
Dec 5, 2010
Messages
3,107
Location
Desert Hills/Peeples Valley AZ.
Try this, with the door closed, pull your manual disconnect rope. See if it releases easily or has pressure pushin down on the door. If it releases easily, you can adjust your down limit just a bit, that should push your top section tight.
When your door is closed, is your operator arm vertical? Or is it pointing toward the header or the motor end of the operator?

Sorry for all the questions, but this is alot easier than replacing stops or adding **** to your door! :thumbup:
 

MikeF

Well-known member
Joined
Jan 3, 2008
Messages
164
Might be limits or fatigue on the section/strut. May need heavier strut. The stop/seal is typically installed prior to door installation and the wood/vinyl patio flushes out with the jambs. The rubber then seals against the door. If it's flush all the way around, that's how it should be.
 
To avoid these ads, REGISTER NOW!

Dcampbell98xj

Well-known member
Joined
May 8, 2014
Messages
80
I'd say that if you don't have a strut on your top section to get one. Looks like your opener may be making your section bow. Also agree with checking the motor arm, may not be connected correctly. Arm should not be vertical when closed.
 
OP
S

soonerbrink

Member
Joined
Jun 29, 2015
Messages
22
Some very good ideas here lately!

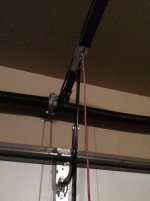
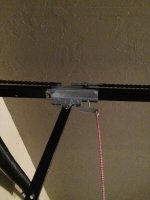
I took a few pictures and included them below.

When the cable is pulled and the door is released from the trolley, the door connector pushes closer to the opener. I would have thought it would have gone the other way if it was being pulled out, or perhaps it always moves this way when released.

If you need any more pics just let me know.

Based on these pics is is possible to tell if I need to set my lower limit lower or higher?
 

Attachments

  • 2015-07-12 21.10.36.jpg
    2015-07-12 21.10.36.jpg
    144.7 KB · Views: 51
  • 2015-07-12 21.10.44.jpg
    2015-07-12 21.10.44.jpg
    145.6 KB · Views: 43
  • 2015-07-12 21.11.07.jpg
    2015-07-12 21.11.07.jpg
    146.6 KB · Views: 39
OP
S

soonerbrink

Member
Joined
Jun 29, 2015
Messages
22
That appears to be installed correctly! You could try just a little adjustment on the down limit..not alot.

Is there a way to determine if I was it to close tighter again the ground or a little bit further away from the ground?
 

OJ Bartley

Well-known member
Joined
May 18, 2009
Messages
605
Location
Toronto, ON
I have a similar problem (slight bow in the door, visible when both open and closed), and I'll have to try some of the above. Thanks for the tips!
 

MikeF

Well-known member
Joined
Jan 3, 2008
Messages
164
Is there a way to determine if I was it to close tighter again the ground or a little bit further away from the ground?


To fix the bow, if you push the dorm into the floor, it puts pressure on the top section which pushes It against the seal. Not too much though or you risk damaging parts. Little bits at a time.
 
OP
S

soonerbrink

Member
Joined
Jun 29, 2015
Messages
22
To fix the bow, if you push the dorm into the floor, it puts pressure on the top section which pushes It against the seal. Not too much though or you risk damaging parts. Little bits at a time.

exactly what I was looking for! I'll give it a try!
 
OP
S

soonerbrink

Member
Joined
Jun 29, 2015
Messages
22
I adjusted the lower limit, then again, then again, and it finally pushed the top of the door flush and no light comes through!

Thanks for all of the help and assistance in resolving my garage door problem!!
 

upndown

Well-known member
Joined
Dec 5, 2010
Messages
3,107
Location
Desert Hills/Peeples Valley AZ.
Glad you got it resolved! Also thanks for posting your results. Too often guys will take information and suggestions and disappear. Sharing your results may just help someone out in the future. :thumbup:
 
To avoid these ads, REGISTER NOW!
Top Bottom