To avoid these ads, REGISTER NOW!

My 10x20 shed build

soapii

Well-known member
Joined
Nov 29, 2011
Messages
342
Location
SE Michigan
Started working on this last winter (planning, design, buying materials) and was able to get things wrapped up pretty quickly by early summer. The purpose of this shed is for all the outdoor "stuff".........lawnmower, shovels, gas cans, lawn furniture, etc. When my wife and I built our house a few years ago we had the contractor pour a 10x20 pad so that was all set ahead of time.

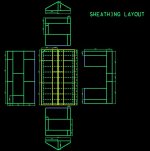
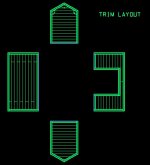
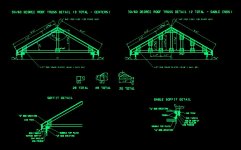
So with that, here we go. I started drawing up the plans during lunch at work in Jan-Feb of this year. I like doing this with my projects because it is a great way for me to envision how the project will come together and most importantly for me to see where I can save on materials and get an accurate material list together.

--Joe
 

Attachments
  • Details.JPG
    Details.JPG
    80.7 KB · Views: 74
  • Framing.JPG
    Framing.JPG
    40.2 KB · Views: 62
  • Sheathing.JPG
    Sheathing.JPG
    44 KB · Views: 53
  • Siding.JPG
    Siding.JPG
    33.6 KB · Views: 50
  • Trim.JPG
    Trim.JPG
    32.6 KB · Views: 49
Last edited:
To avoid these ads, REGISTER NOW!
OP
S

soapii

Well-known member
Joined
Nov 29, 2011
Messages
342
Location
SE Michigan
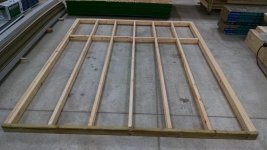
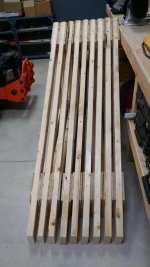
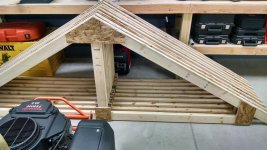
I made my trusses and the walls in the garage while it was still snowing outside. Trusses were glued and nailed at all gusset plates.

--Joe
 

Attachments

  • IMG_20150418_204017751.jpg
    IMG_20150418_204017751.jpg
    94.4 KB · Views: 64
  • IMG_20150417_221256238.jpg
    IMG_20150417_221256238.jpg
    87.4 KB · Views: 66
  • IMG_20150417_221240805_HDR.jpg
    IMG_20150417_221240805_HDR.jpg
    111.5 KB · Views: 79
  • IMG_20150410_212853644.jpg
    IMG_20150410_212853644.jpg
    99.1 KB · Views: 74
Last edited:
OP
S

soapii

Well-known member
Joined
Nov 29, 2011
Messages
342
Location
SE Michigan
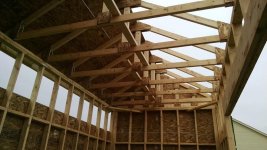
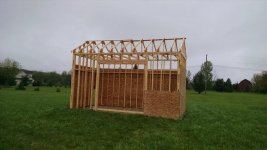
Come spring time and I was ready to start throwing up the walls and sheathing. Next came the trusses and OSB on the roof.

--Joe
 

Attachments

  • IMG_20150510_185537751.jpg
    IMG_20150510_185537751.jpg
    97 KB · Views: 69
  • IMG_20150510_144115819_HDR.jpg
    IMG_20150510_144115819_HDR.jpg
    101.7 KB · Views: 77
  • IMG_20150510_094219168.jpg
    IMG_20150510_094219168.jpg
    91.6 KB · Views: 80
  • IMG_20150510_094206801.jpg
    IMG_20150510_094206801.jpg
    77.8 KB · Views: 77
  • IMG_20150509_124114272_HDR.jpg
    IMG_20150509_124114272_HDR.jpg
    103.3 KB · Views: 75
  • IMG_20150509_124102877_HDR.jpg
    IMG_20150509_124102877_HDR.jpg
    99.2 KB · Views: 93
OP
S

soapii

Well-known member
Joined
Nov 29, 2011
Messages
342
Location
SE Michigan
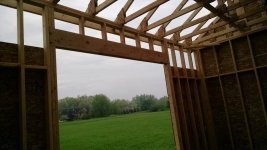
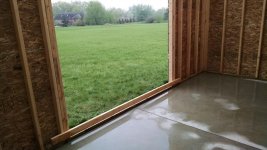
Couple shots of some details......anchor bolts, door framing etc. Red Head 4.5" long 1/2" diameter galvanized anchor bolts were used. Based on the specs from the website and the wind calculations I ran at work, these should be more than suffice.

--Joe
 

Attachments

  • IMG_20150510_185546666.jpg
    IMG_20150510_185546666.jpg
    116 KB · Views: 86
  • IMG_20150510_185602406.jpg
    IMG_20150510_185602406.jpg
    82.6 KB · Views: 71
  • IMG_20150510_185606284.jpg
    IMG_20150510_185606284.jpg
    97.5 KB · Views: 68
Last edited:
OP
S

soapii

Well-known member
Joined
Nov 29, 2011
Messages
342
Location
SE Michigan
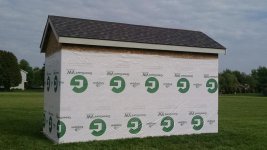
Next I finished up the roofing and wrapped the building. Shingles were by far the most difficult task on this build. Just very time consuming for the amount of work completed. I did a continuous ridge vent up top.

--Joe
 

Attachments

  • IMG_20150517_162702572.jpg
    IMG_20150517_162702572.jpg
    71.9 KB · Views: 39
  • IMG_20150517_162622578_HDR.jpg
    IMG_20150517_162622578_HDR.jpg
    85 KB · Views: 45
  • IMG_20150515_174850814.jpg
    IMG_20150515_174850814.jpg
    86.8 KB · Views: 47
  • IMG_20150515_174835323_HDR.jpg
    IMG_20150515_174835323_HDR.jpg
    93.6 KB · Views: 48
  • IMG_20150515_174819505_HDR.jpg
    IMG_20150515_174819505_HDR.jpg
    81.1 KB · Views: 46
Last edited:
OP
S

soapii

Well-known member
Joined
Nov 29, 2011
Messages
342
Location
SE Michigan
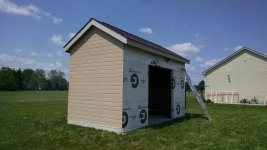
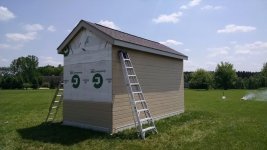
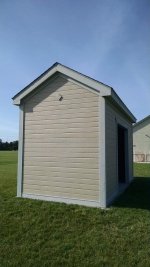
So onto the siding. I used LP Smartside which matches my garage......man did I go through a ton of nails installing this stuff.

--Joe
 

Attachments

  • IMG_20150528_142925286.jpg
    IMG_20150528_142925286.jpg
    86 KB · Views: 57
  • IMG_20150528_142945406.jpg
    IMG_20150528_142945406.jpg
    96 KB · Views: 51
  • IMG_20150528_143005511.jpg
    IMG_20150528_143005511.jpg
    89.8 KB · Views: 54
OP
S

soapii

Well-known member
Joined
Nov 29, 2011
Messages
342
Location
SE Michigan
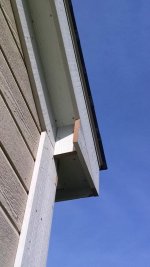
When the siding was all set I went onto the trim work. I used MiraTEC, again to match the house and garage. I used perforated Hardie board for the soffit vents. I stapled screen material inside to keep the bugs out.

--Joe
 

Attachments

  • IMG_20150603_174657549.jpg
    IMG_20150603_174657549.jpg
    85.3 KB · Views: 59
  • IMG_20150603_174648477.jpg
    IMG_20150603_174648477.jpg
    71.3 KB · Views: 60
  • IMG_20150603_174632240.jpg
    IMG_20150603_174632240.jpg
    92 KB · Views: 54
  • IMG_20150603_174615628_HDR.jpg
    IMG_20150603_174615628_HDR.jpg
    82.4 KB · Views: 56
  • IMG_20150529_210652940.jpg
    IMG_20150529_210652940.jpg
    45.9 KB · Views: 68
  • IMG_20150529_210618689.jpg
    IMG_20150529_210618689.jpg
    82 KB · Views: 52
  • IMG_20150529_210559269.jpg
    IMG_20150529_210559269.jpg
    81.5 KB · Views: 61
OP
S

soapii

Well-known member
Joined
Nov 29, 2011
Messages
342
Location
SE Michigan
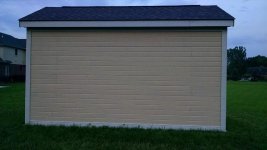
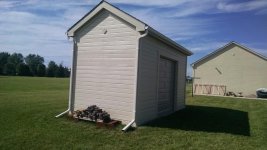
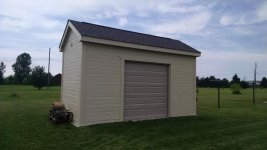
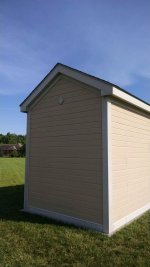
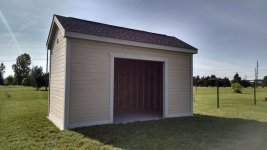
I wrapped up the last bit of trim and got the door up. I put in a Clopay 8'x8' door.......in hindsight I should have just got 7'x7'. Lastly I caulked and painted everything, nothing fancy just kept it all the same color to match the garage. When all that was done I put up a couple gutters to keep the splatter off the siding (and my head).

--Joe
 

Attachments

  • IMG_20150720_165202637.jpg
    IMG_20150720_165202637.jpg
    91.9 KB · Views: 55
  • IMG_20150703_165805373.jpg
    IMG_20150703_165805373.jpg
    70.5 KB · Views: 49
  • IMG_20150703_165749759.jpg
    IMG_20150703_165749759.jpg
    71.6 KB · Views: 49
  • IMG_20150603_174731161.jpg
    IMG_20150603_174731161.jpg
    75.3 KB · Views: 43
OP
S

soapii

Well-known member
Joined
Nov 29, 2011
Messages
342
Location
SE Michigan
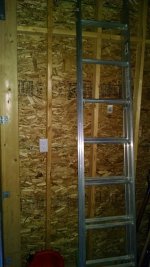
One final step was I wanted electrical in there. I keep my mower on a trickle charger in the winter and I really like having a set of lights when I go out there at night. I ran a single 20 amp circuit off a GFI breaker. Used 10 gauge THHN in conduit from the panel in my basement. I installed 4 outlets total (2 in the ceiling and one on each side of the door).

Since then I built in a bunch of shelves and hung all sorts of stuff on the inside walls.......hoses, tools you name it.

And with that the project was all done. It sure took a lot of dirty stuff out of my shop giving me a bunch more room :D

--Joe
 

Attachments

  • IMG_20150828_141636185.jpg
    IMG_20150828_141636185.jpg
    134.6 KB · Views: 104
  • IMG_20150828_141737468.jpg
    IMG_20150828_141737468.jpg
    144.7 KB · Views: 90
  • IMG_20150828_171821423.jpg
    IMG_20150828_171821423.jpg
    145.4 KB · Views: 91
  • IMG_20150830_202013027.jpg
    IMG_20150830_202013027.jpg
    101.4 KB · Views: 92
  • IMG_20150830_202031941.jpg
    IMG_20150830_202031941.jpg
    102.4 KB · Views: 86
To avoid these ads, REGISTER NOW!
OP
S

soapii

Well-known member
Joined
Nov 29, 2011
Messages
342
Location
SE Michigan
nice looking shed. I see you are from MI. I can never get used to your yards out there with no fences.

Thank you. Yup we love it. We have a few acres so a fence doesn't make much sense anyway. All the neighbors lots are similar size, we never worry about encroaching on each other.

--Joe
 

karlhungus

Well-known member
Joined
Nov 29, 2010
Messages
73
Location
Niwot, Colorado
Very nice work. I'm particularly impressed with your drawings. I spent a lot of time agonizing over how high to elevate my shed above the grade, would you have made the pad higher if you had to do it over again? I noticed the floor looks damp in some of the pictures. Any requirement for a permit? Noticed the indirect route, did you have to avoid an obstacle with your trench? You mentioned a 7x7, any reason on why you would prefer the smaller door? Thanks for sharing.
 
OP
S

soapii

Well-known member
Joined
Nov 29, 2011
Messages
342
Location
SE Michigan
Very nice work. I'm particularly impressed with your drawings. I spent a lot of time agonizing over how high to elevate my shed above the grade, would you have made the pad higher if you had to do it over again? I noticed the floor looks damp in some of the pictures. Any requirement for a permit? Noticed the indirect route, did you have to avoid an obstacle with your trench? You mentioned a 7x7, any reason on why you would prefer the smaller door? Thanks for sharing.

Thank you. My pad sits "high" relative to the adjacent ground. When we did final grading the dirt (and now grass) is sloped away from the pad, so there is no worries of water....so to answer your question, no I would not have gone any higher. The reason the pad was wet was because we chose a terrible weekend in the spring to start and it rained off and on all day while we were putting up the walls :(

No permit was required in my area for anything 200sf and under.......thus my shed being 10' x 20'.

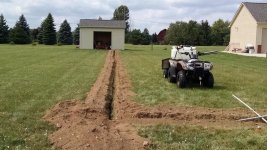
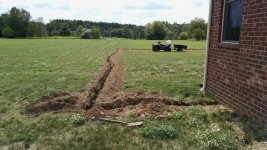
I made the trench "L" shaped because we will be putting a patio off the back of the house so I didn't want anything to ever be "on top" of where I put the conduit. Also the straight shot out from the shed makes it easy to remember where the conduit is in case we ever plant trees etc.

As for the door, the biggest issue was with the track. I forgot that with an 8 foot tall door that you also have the offset of the radius in the tracks as the door goes up. Once I looked at the directions CLopay sent with the track, they require 18" clearance from the rear wall........I ended up with about 3". It works and there are stops on the tracks so it isn't too big of a deal, but I am completely maxed out. To a lesser degree, the larger door just takes up that much more wall space that I could have utilized otherwise. I don't really need a door that big, although it does make taking my larger ladders in and out of the shed a lot easier, nice for pulling the zero turn in and out too.

--Joe
 
Last edited:

Kevin54

MEMBER EMERITUS
Joined
Jan 12, 2005
Messages
29,341
Location
Urbana, Ohio
Thank you. My pad sits "high" relative to the adjacent ground. When we did final grading the dirt (and now grass) is sloped away from the pad, so there is no worries of water....so to answer your question, no I would not have gone any higher. The reason the pad was wet was because we chose a terrible weekend in the spring to start and it rained off and on all day while we were putting up the walls :(

No permit was required in my area for anything 200sf and under.......thus my shed being 10' x 20'.

I made the trench "L" shaped because we will be putting a patio off the back of the house so I didn't want anything to ever be "on top" of where I put the conduit. Also the straight shot out from the shed makes it easy to remember where the conduit is in case we ever plant trees etc.


As for the door, the biggest issue was with the track. I forgot that with an 8 foot tall door that you also have the offset of the radius in the tracks as the door goes up. Once I looked at the directions CLopay sent with the track, they require 18" clearance from the rear wall........I ended up with about 3". It works and there are stops on the tracks so it isn't too big of a deal, but I am completely maxed out. To a lesser degree, the larger door just takes up that much more wall space that I could have utilized otherwise. I don't really need a door that big, although it does make taking my larger ladders in and out of the shed a lot easier, nice for pulling the zero turn in and out too.

--Joe

Joe......nice shed. Make sure that you put a set of pics in an envelope and put them somewhere so they don't get lost. The kitchen cabinets (overheads) is a good place. That way if you ever move, the next owners will know exactly where the electric has been ran. I failed to do it with my garage, but there is no chance of anyone digging it up or planting on top of it as it's under the sidewalk to the garage. On our previous house, I left a complete set of plans of the garage I designed along with interior pics showing the studs and wiring in the kitchen overhead cabinets. It just helps out the next owners.
 
OP
S

soapii

Well-known member
Joined
Nov 29, 2011
Messages
342
Location
SE Michigan
Joe......nice shed. Make sure that you put a set of pics in an envelope and put them somewhere so they don't get lost. The kitchen cabinets (overheads) is a good place. That way if you ever move, the next owners will know exactly where the electric has been ran. I failed to do it with my garage, but there is no chance of anyone digging it up or planting on top of it as it's under the sidewalk to the garage. On our previous house, I left a complete set of plans of the garage I designed along with interior pics showing the studs and wiring in the kitchen overhead cabinets. It just helps out the next owners.

Good idea, even for myself :eek:

--Joe
 

jarhead

Well-known member
Joined
Jul 9, 2006
Messages
705
Location
Colorado, near Morrison
Nice shed...

Any pictures of how you have it laid out?

I want to add a 10X20 tool room in my pole barn and am having trouble envisioning it.

Thanks, Joe T.
 
OP
S

soapii

Well-known member
Joined
Nov 29, 2011
Messages
342
Location
SE Michigan
Nice shed...

Any pictures of how you have it laid out?

I want to add a 10X20 tool room in my pole barn and am having trouble envisioning it.

Thanks, Joe T.

Thanks.

If you are referring to the layout inside, all I did was put shelves on the sides and a bunch of brackets on the walls to hang ladders and yard tools. No work bench or anything in my shed, it is just for cold storage.

--Joe
 
To avoid these ads, REGISTER NOW!
Top Bottom