To avoid these ads, REGISTER NOW!

VISE REPAIR 101 all vise repairs, lubricants, sources for parts and the tricks to fix

Joined
Feb 7, 2010
Messages
10
Hey thanks, what about the orientation of the slots on the spindle nut, it ok for them to rotate as well because the spindle nut that goes through the stationary jaw/base has a flat spot on one side, will it affect the function if the flat is out 180 degrees?
 
To avoid these ads, REGISTER NOW!

KMScott

Well-known member
Joined
Feb 14, 2012
Messages
4,642
Location
Daufuskie Island, South Carolina
Hey thanks, what about the orientation of the slots on the spindle nut, it ok for them to rotate as well because the spindle nut that goes through the stationary jaw/base has a flat spot on one side, will it affect the function if the flat is out 180 degrees?

The nut will be fine, it is made to be loose so the spindle aligns its self, keep the nut in the same groove, gotta drill the pin hole through both the nut and endcap support.
 

bagged89s10

Well-known member
Joined
Mar 13, 2005
Messages
4,607
Location
CT
I'm wondering how much of this braze job I can grind to smooth the repair out. I don't know how bad it was broken before repair and don't want to lose strength.
ImageUploadedByTapatalk1447181847.321367.jpg
ImageUploadedByTapatalk1447181867.197847.jpg
ImageUploadedByTapatalk1447181880.287769.jpg
ImageUploadedByTapatalk1447181889.575948.jpg
ImageUploadedByTapatalk1447181897.099025.jpg
ImageUploadedByTapatalk1447181913.202392.jpg
 

Bozer

New member
Joined
Oct 8, 2015
Messages
1
Picked up an old 3,5 inch bullet that has spent lots of time outside. Couldn't get the 3 "C" ring screws out of the dynamic jaw, so they got ground off after breaking. I have drilled the remainders of the broken screws leaving most or all of the threads in the jaw. I'm hoping to cut the old screw shell with a tap of the correct size. Does anyone know what type and size screws were used to hold the ring? I found screw kits on ereplacements but no size or pitch info is provided. I don't have a tap & die set so will be buying one or 2 tap of the correct size if I can find out what it is.
Thanks,
Bozer
 

Shiftless

Well-known member
Joined
Mar 9, 2014
Messages
14,553
Location
East Bay SFO
Those threaded holes are 10:32. The tap drill size is #21 drill (.159) but if it were me I would work my way up to it. Good Luck. Welcome to GJ.

:+1:
The only other thing I would mention is be sure to use some quality penetrating oil. I like Kroil or SeaFoam Deep Creep

Bozer: Welcome to GJ and the vise threads.
(I am still fighting with a bullet restoration. The guys here are full of great tips and will offer all the help you need...just ask!)
 
Last edited:

CwazyWabbit

Well-known member
Joined
Jan 9, 2015
Messages
1,189
Location
Surrey, UK
I'm wondering how much of this braze job I can grind to smooth the repair out. I don't know how bad it was broken before repair and don't want to lose strength.
.....

Very difficult question to answer without knowing how deep they grooved the crack first. I'd not remove any brass other than the booger hanging down that is clearly doing nothing.
 

KMScott

Well-known member
Joined
Feb 14, 2012
Messages
4,642
Location
Daufuskie Island, South Carolina
I've made a few handles lately, his method is how I do mine. I just add a little larger chamfer and use heat to peen in place. Videos are sure nice. Thanks for sharing Veeps.
 

Attachments

  • Old Handles.jpg
    Old Handles.jpg
    148.3 KB · Views: 92

Fretters

Well-known member
Joined
Jan 25, 2014
Messages
4,217
Location
South Yorkshire, England
Gave my stove black paste mix it's initial test today. I'm going to give it a few hours before buffing, but the before and during of the paste applied photo's are below. I'll post a buffed photo when I do that later. I've managed to get the consistency roughly right now, so just a case of seeing how well it holds/covers once buffed and what the final finish looks like. That mix has been remelted a good few times whilst trying to get the consistency and colour about right. :D


Just before the paste was applied.

guimage


One layer of paste applied.

guimage


Ended up going with the fingertip application method again. Not the fastest of methods, but it's by far the best method, IMHO. You can work it in far better that way than via applying by brush or cloth.
 
Last edited:
OP
D

drivesitfar

Well-known member
Joined
Oct 23, 2013
Messages
36,037
Location
Pacific Northwest
Fretters: I don't see any gratuitous ******* the tabloids so you must really like the vise and new finish. looks good so far.

Kevin: cool picture and maybe you can find some way to make some cool vise art piece out of those. maybe a huge cribbage board and use the cut off handles as the pegs??:thumbup:
 

Fretters

Well-known member
Joined
Jan 25, 2014
Messages
4,217
Location
South Yorkshire, England
Fretters: I don't see any gratuitous ******* the tabloids so you must really like the vise and new finish. looks good so far.

Have no fear; The lack of tabloid totty is only a temporary thing. :D I need to fetch a fresh stack of papers into the workshop as I've all abouts run out, so the totty meter will be fully loaded again shortly. :D

If it holds well on buffing and retains half the appearance it has now, I'll be chuffed. Plus, with it containing graphite & beeswax, it's a lubricant too, so can merrily be applied on any surface. It took me a good few days & attempts to get that jar of paste roughly how I wanted it, so I'm definitely hoping the finished effect is worth a jot. :D Another plus point is that it can be used on the wood stove too.
 

bagged89s10

Well-known member
Joined
Mar 13, 2005
Messages
4,607
Location
CT
VISE REPAIR 101 all vise repairs, lubricants, sources for parts and the trick...

Has anyone used penetrol as a metal finish? I'm giving it a shot on this Parker. It had slight flash rust in some parts because I didn't coat with anything after the etank. I will bake it later.
ImageUploadedByTapatalk1447867981.822058.jpg

Edit: I had time to find out more about penetrol and I think I need to put it on thicker and let it dry vs wiping off the excess. I will recoat tonight and then bake it

This this is from their website

Conditioning Bare or Rusted Metal
DIRECTIONS:
1. Remove loose rust, excess dirt, oil and grease.
2. Be sure surface is dry.
3. Saturate the metal with Penetrol.
4. Allow 12-24 hours for drying.

http://www.flood.com/TDS/664736.pdf
 
Last edited:

bagged89s10

Well-known member
Joined
Mar 13, 2005
Messages
4,607
Location
CT
I've made a few handles lately, his method is how I do mine. I just add a little larger chamfer and use heat to peen in place. Videos are sure nice. Thanks for sharing Veeps.


I like this method versus threaded ends. I just need to get a radius tool for my lathe.
 

Fretters

Well-known member
Joined
Jan 25, 2014
Messages
4,217
Location
South Yorkshire, England
Fretters: are you chuffed?? looks great from my chair. if you like the results how about sharing the recipe with a few more pictures. nice job.

Cheers. :) Must admit, I am quite chuffed with the finish, and it's growing on me even more each time I look at it. It's the closest I've come to what I class as a traditional style and looking finish so far. Mix wise: beeswax, linseed oil, gum turpentine and graphite powder. As you can guess from that list of ingredients, (not a single petro-chem or synthetic ingredient in sight :D), it'll never be a hard finish, but to say that vice above has only received one coating, it definitely seems a nice, thick finish, and easy to spruce up if needs be.

These were the parts beforehand, so you can see the difference a single application of that paste has made.

guimage


This was how the vice was when it came here.

guimage
 
Last edited:
OP
D

drivesitfar

Well-known member
Joined
Oct 23, 2013
Messages
36,037
Location
Pacific Northwest
Fretters: happy to hear you like it because it does look great in the picture. so what are the ratios of all the ingredients? i think i have everything on the shelf in my shop except maybe graphite powder. i might even have some of that in my box of locks or what would be a good source for that. also is turpentine the same as gum turpentine?

any more pictures of the vise on better tabloids is acceptable too if you have time. :beer:
 

Fretters

Well-known member
Joined
Jan 25, 2014
Messages
4,217
Location
South Yorkshire, England
I'll take some more photo's in a bit. :) Just in the process of fully reassembling it at the moment.

Turpentine substitute is different to gum/pure turpentine. Gum turpentine has a sharp pine aroma, so it's easy to tell which you have. You could probably use turpentine substitute or white spirit, (Stoddard solvent), as the solvent. I just personally prefer to use the natural turps. The graphite powder, I resorted to Ebay for that. Graphite powder/plumbago/black lead, it could be listed under any of those terms. I'll dig the recipe out for you. :)
 

Fretters

Well-known member
Joined
Jan 25, 2014
Messages
4,217
Location
South Yorkshire, England
I'm definitely liking this new finish. Finshed reassembling the vice, and I have to say that I am very pleased with the effect achieved. I might even go so far as to say that I prefer it over the shoe polish I used on the little BB vice. Before and after photo's of that vice.

guimage


Completed:

guimage


guimage


guimage


p.s: Yup, I know there's a small patch of the original paint left on the front of the vice. :) I always try to leave some trace of the original paint on everything I do, incase someone ever wants to try and find out the original colour in the future. No knowing where this stuff will end up when I pop my clogs, so I try to make a future owners task easier. :D
 
Last edited:
To avoid these ads, REGISTER NOW!

Shiftless

Well-known member
Joined
Mar 9, 2014
Messages
14,553
Location
East Bay SFO
Fretters:
Beautiful job!
I love that finish and look forward to learning the exact receipe...that is unless you decide to patent it! :evil:

Bagged:
The Penetrol idea is very interesting!
That is a VERY old time product.
I can remember my father using it as an additive to the old oil based house paint back in the early '60's
 
Last edited:

KMScott

Well-known member
Joined
Feb 14, 2012
Messages
4,642
Location
Daufuskie Island, South Carolina
p.s: Yup, I know there's a small patch of the original paint left on the front of the vice. :) I always try to leave some trace of the original paint on everything I do, incase someone ever wants to try and find out the original colour in the future. No knowing where this stuff will end up when I pop my clogs, so I try to make a future owners task easier. :D

Wow Fretters, came out very nice and a great idea leaving a little bit of paint just in case. It does not look like any finish is applied at all. The casting is almost perfect, no voids I can see in your vice. Not to many vises have a clean casting like yours. Nice job.

I have a Wilton that I will share later that is the worst casted vise I have seen so far. I'll share pictures in a later post.
 

GETRIDAONE

Well-known member
Joined
May 21, 2013
Messages
1,549
Location
Auburn, GA
Fretters, What brand of vise is it ? I can see something on the slide in the pictures above but can't make it out. I must have missed it in the other thread if you ID'd it. Nice finish by the way !

Kevin, you still have my Morgan jaws in the works ?
 

Fretters

Well-known member
Joined
Jan 25, 2014
Messages
4,217
Location
South Yorkshire, England
Cheers chaps. :) I'll post that recipe in a bit Shiftless. :) I honestly hadn't expected there to be much, if any, interest in this finish, hence why I haven't done so already. It's just a blend I've been meaning to make for a few years now, but only just got around to experimenting with. In all honesty, the thing I initially intended for it had nowt to do with vices. :D The main reason is for coating changewheels for the lathes, as I gradually clean up all of those. With them all being Drummond gears, hence having the same quirky tooth setup, I envisaged making & using this paste so that they would have a protective coating without painting them, so they could be swapped between machines without paint colour making them look misplaced, and it would also act as a dry lubricant for them to boot.

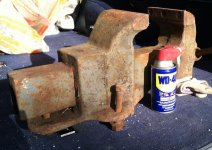
Aye Kevin, it is a very good quality casting. It probably is one of the closest to flawless that I've seen from a casting. On about you saying it looks like there's no finish there, I set myself off chuckling over just that same point after I'd done it, (yup, one of those old fart moments :D). Just had a vision of someone who didn't know it had already been fettled looking at it and saying that a quick scrub and a lick of paint would spruce it up nicely. :D It sounds like that Wilton must have had a fair bit of filler under the paint?

Get': It's a Scottish vice. Alexander Mathieson & Sons, Saracen Tool Works, Glasgow. They were a company renowned for woodworking equipment primarily.
 
Last edited:

Fretters

Well-known member
Joined
Jan 25, 2014
Messages
4,217
Location
South Yorkshire, England
Re: VISE REPAIR 101 all vise repairs, lubricants, sources for parts and the trick...

Has anyone used penetrol as a metal finish?

My memory might be a bit fuzzy, but I'm sure that Penetrol & Dinitrol are mainly linseed oil, (or similar), and solvent, with a few little extras thrown in. I'm almost certain it was the mention of one of those a good while ago which started me off again thinking of experimenting with the linseed and paint mixes, which I obviously did. My personal opinion would be to stick with what you already use.
 

bagged89s10

Well-known member
Joined
Mar 13, 2005
Messages
4,607
Location
CT
Re: VISE REPAIR 101 all vise repairs, lubricants, sources for parts and the trick...

My memory might be a bit fuzzy, but I'm sure that Penetrol & Dinitrol are mainly linseed oil, (or similar), and solvent, with a few little extras thrown in. I'm almost certain it was the mention of one of those a good while ago which started me off again thinking of experimenting with the linseed and paint mixes, which I obviously did. My personal opinion would be to stick with what you already use.


I bought penetrol to add to some paint which I want to apply with a brush to see if it helps keep a smooth finish. My Parker 975 was sitting there so I decided to throw penetrol on it to experiment.
 

Fretters

Well-known member
Joined
Jan 25, 2014
Messages
4,217
Location
South Yorkshire, England
Re: VISE REPAIR 101 all vise repairs, lubricants, sources for parts and the trick...

I bought penetrol to add to some paint which I want to apply with a brush to see if it helps keep a smooth finish. My Parker 975 was sitting there so I decided to throw penetrol on it to experiment.

It will help the paint flow. That's why I add linseed oil to my enamel these days. On rough cast, you'll barely note any difference if at all, unless it's a really thick paint, but where it comes in is on finished surfaces. That's where brush marks have always been a nightmare, and it does work a treat. I'd save yourself a few bob in future and just use linseed oil. :) Do a small test mix first of the paint you're planning on using and linseed oil, and leave it overnight to settle. If you note the oil and paint separating or clumping, it won't work, but if there appears to be neither of those, you should be good to go. I also thin the oil slightly with gum turpentine.
 

Pupuhd

Well-known member
Joined
Aug 18, 2011
Messages
346
Location
New Jersey
Shift: i'll post this Wilton bullet with the BLO on it and if you want more pictures of the cool welding table just ask and i'll email them to you. sadly the table didn't go home with me because a few years ago i didn't have the tools to move it. maybe my favorite vise is this Reed 4C that you might have seen me post a time or two with 3 coats of BLO.

good luck

Sorry if I ask this before. Off topic: what is the purpose of the articulated arm attached to welding table. I'm at the planning/material cut stage of fabricating a custom welding/multipurpose table and curious about add-ons/accessories I can plan during the the building stage. Thank you.
 
OP
D

drivesitfar

Well-known member
Joined
Oct 23, 2013
Messages
36,037
Location
Pacific Northwest
PUP: sorry i never did own that cool welding table so not 100% on the arm's use. guessing it was to hold maybe hoses for his tanks or welding rod wire. he had a nice grounding option to the table and his welding rod bin was huge. if i had a chance to buy it again for the $600 he offered it to me without the vise I'm sure i'd give him a different answer.

hope you are planning on starting a build thread on your welding table if you are going to build something close to the one i posted. take plenty of pictures and ask questions if you need to because with some of the builds i've seen here there are more than a few talented members to answer questions if they see them.

a few years ago i had no way to unload it other than by hand and now i have a few options. i still don't weld, but it's at the top of the bucket list.

Fretters: thanks again for showing that finish on that vise. I doubt a paint job on that vise would have done it justice. i also like the idea of using that finish to keep machine parts and tools from rusting. :thumbup:
 

Shiftless

Well-known member
Joined
Mar 9, 2014
Messages
14,553
Location
East Bay SFO
Re: VISE REPAIR 101 all vise repairs, lubricants, sources for parts and the trick...

I bought penetrol to add to some paint which I want to apply with a brush to see if it helps keep a smooth finish. My Parker 975 was sitting there so I decided to throw penetrol on it to experiment.

Yeah, as most of you that is the original purpose of the product. It acts by slowing down the drying process so that paint becomes more self leveling. The downside is that it also makes the paint more runny so that on vertical surfaces, drips, sags, and runs are a bigger risk.
For anybody using "water based" paint for house painting or even vise painting, there is a similar product for acrylic paint. I have used a proprietary Benjamin Moore Extender that works great. It better for $18/qt.
I have used an acrylic paint, Benjamin Moore DTM, on outdoor structural steel. Less than a year old but looks great so far. Gotta love the soap and water clean up!

BTW, Penetrol is illegal to sell in my zip code and neighboring counties. Air Quality concerns...:mad:
 
Last edited:

Fretters

Well-known member
Joined
Jan 25, 2014
Messages
4,217
Location
South Yorkshire, England
Fretters: thanks again for showing that finish on that vise. I doubt a paint job on that vise would have done it justice. i also like the idea of using that finish to keep machine parts and tools from rusting. :thumbup:

Hopefully it should be fairly bulletproof protection wise. Easy to pop a bit more on if there are any scratches or scrapes, and if beeswax and linseed oil combined don't protect something, nowt will. :D I couldn't envisage paint on this one either, even though I could see what the original colour was. As you say, paint wouldn't have done it justice.

Shiftless: This is the recipe and mixing method for that paste. Adjust according to your preferences: Graphite paste recipe. That's just the mix I've personally settled on after multiple failures, :D to get the colour and consistency I was looking for. If you do want to alter the mix afterwards, just remelt it in the saucepan and add whichever ingredient(s) you're altering the ratio of.

p.s: If anyone else does try it, I'd be grateful if you could let me know your opinion on the mix, and whether there might be some way to improve it. :)
 
Last edited:

Shiftless

Well-known member
Joined
Mar 9, 2014
Messages
14,553
Location
East Bay SFO
Fretters:
Thanks a lot for posting that receipe.
One question before I mix some up...
Instead of raw linseed oil wouldn't it be better to use boiled linseed oil so it has a chance to harden a bit after a week or two?
I plan to apply it to my big Columbian as soon as I finish that stuck Bullet I was working on which I intend to paint. (Had to walk away for a while on that one..it is now apart but still doesn't slide back in all the way. I am removing metal from the slide as well as the inside of the main body as you and others suggested. Full details and pics to follow in a few weeks.)
 

Attachments

  • image.jpg
    image.jpg
    144.7 KB · Views: 37
Last edited:

Pupuhd

Well-known member
Joined
Aug 18, 2011
Messages
346
Location
New Jersey
PUP: sorry i never did own that cool welding table so not 100% on the arm's use. guessing it was to hold maybe hoses for his tanks or welding rod wire. he had a nice grounding option to the table and his welding rod bin was huge. if i had a chance to buy it again for the $600 he offered it to me without the vise I'm sure i'd give him a different answer.

hope you are planning on starting a build thread on your welding table if you are going to build something close to the one i posted. take plenty of pictures and ask questions if you need to because with some of the builds i've seen here there are more than a few talented members to answer questions if they see them.

a few years ago i had no way to unload it other than by hand and now i have a few options. i still don't weld, but it's at the top of the bucket list.

drivesitfar: Just curious about the arm. Looked like a well thought out design, not to mention the hefty table it was attached to. I mig weld (not pro) for my rebuilds and projects around the shop. It's a 2'x3' table to hold underneath my Lincoln mig welder, plasma cutter. Off to one side my vintage PC metal cutting band saw and opposite side a slotted extension for plasma cutting. I'm incorporating a lifting mechanism using 1/2" all-thread to lift from 34" to around 44" high. So far I have taken photos of the material cutting process and have plenty of Sketchup images of it .

One other main reason for the welding table build is to relocate to this table my yard sale find Columbian (504 1/2 M2) 4-1/2" with swivel base vise for $12. I don't believe I have posted that here yet. Behind that I will be completing by rebuild of the circa 1900s Monarch Prentiss vise I send photos to you.

Btw, today I quickly scanned through all the pages here and only found maybe three vises other than the more common bench top vises posted here. One was a woodworkers vise and another one was a pattern makers vise. I just finished a rebuild/restore of a Heinrich Grip Master drill press vise. Any room to post the finish product here?
 

Fretters

Well-known member
Joined
Jan 25, 2014
Messages
4,217
Location
South Yorkshire, England
Fretters:
Thanks a lot for posting that receipe.
One question before I mix some up...
Instead of raw linseed oil wouldn't it be better to use boiled linseed oil so it has a chance to harden a bit after a week or two?

Well volunteered for testing that option out. :D No idea, to be honest. Raw is just my personal preference. That's the only reason I personally use that over boiled.

Btw, if your planning on applying the paste to a smooth or machined surface, don't try overly hard to remove any flash rust which may form after derusting. A gnats of well bonded rust will actually help no end on a smooth surface, for giving the paste something to bond to. Just wipe the loose flash rust off but leave any small, well bonded remainder there rather than scrubbing it off.


I plan to apply it to my big Columbian as soon as I finish that stuck Bullet I was working on which I intend to paint. (Had to walk away for a while on that one..it is now apart but still doesn't slide back in all the way. I am removing metal from the slide as well as the inside of the main body as you and others suggested. Full details and pics to follow in a few weeks.)

Is it looking like a key or keyway issue, or is there some problem with the slide or body?
 
Last edited:

Shiftless

Well-known member
Joined
Mar 9, 2014
Messages
14,553
Location
East Bay SFO
Fretters:
To be sure it was NOT a key or key way issue, I removed the key. The dynamic stops about 2 inches short of closed and gets jammed. Before I removed a few thousandths, it was 3 inches short of closing so I am making progress.
I decided to take a short break from working on vises and paint our kitchen instead. And build 6 new drawers to better organize 3 of the lower cabinets. Been living here for 30+ years.
 
OP
D

drivesitfar

Well-known member
Joined
Oct 23, 2013
Messages
36,037
Location
Pacific Northwest
Shift: sounds like you might have a Frankenvise Wilton because i've yet to hear or run across that issue. i'm planning on using Fretter's recipe on not only my vises, but cast iron stands and maybe some steel gym commercial weight plates. i have a huge rust issue potentially in my unheated storage areas, but I think that recipe might work for the items i store outside in the rain too. let us know what you think of it and if boiled might work too.

PUP: congrats if you read all 2,000 posts or looked at all the restorations here. feel free to post any and all of your restorations with plenty of before and after pictures. Also if you don't want to start a new thread on your welding table feel free to post some of those options you are making with yours on my welding table thread where there might be more pictures of that welding table you are asking about. here's the link

http://www.garagejournal.com/forum/showthread.php?t=280441&highlight=welding+table

ALL: in case you didn't know any of your simple to elaborate vise restorations and tips and tricks are Ok and would be appreciated if you post them here instead of the single restoration threads that get lost after a month or two.
 

Shiftless

Well-known member
Joined
Mar 9, 2014
Messages
14,553
Location
East Bay SFO
Drives:
Frankenvise or not, I will prevail!

On the subject of gym weights though... it seems to me that for something that gym rats handle regularly, you really need a hard finish. I haven't mixed up any of Fretters' graphite potion yet, but I'm betting that it will rub off on sweaty hands!

I will try his recipe first and then start experimenting. (some readers might remember that I am a retired High School Chemistry teacher)
I think Japan Drier might be one of my experimental extra ingredients.
 
Last edited:

Fretters

Well-known member
Joined
Jan 25, 2014
Messages
4,217
Location
South Yorkshire, England
On the subject of gym weights though... it seems to me that for something that gym rats handle regularly, you really need a hard finish. I haven't mixed up any of Fretters' graphite potion yet, but I'm betting that it will rub off on sweaty hands!

Just had visions of someone with waxy, graphite covered hands trying to lift a bar. :D If my original intent & purpose for this paste is anything to go by, it should, as the dry lubrication value was half of the intent for it.

A better mix for that purpose DIF would be just straight linseed oil with either graphite* or carbon** powder mixed in. That can be baked on whilst giving the same* or similar** colour effect.


I will try his recipe first and then start experimenting. (some readers might remember that I am a retired High School Chemistry teacher)
I think Japan Drier might be one of my experimental extra ingredients.

Japan drier would definitely help to cure the oil. Would it have any effect on the wax? One of the original aims for that mix was to give a covering which could be easily repaired and refreshed/renewed without looking as if it has been, (the wax should allow old and new to be thoroughly blended in), but that value isn't necessarily needed or desirable, depending on the type of finish required. If going for a harder finish, ditching the wax component altogether would probably be best.

It all depends on what the requirement is. If hardness is a must, wax will always be a bad choice. For something which is either lubricating or where some semblance of self healing of scratches and scuffs is handy, wax is good, as it will reform/flow/creep slightly when warm. Probably the best approach is to keep one of each mix handy, one with and one without wax. That way one can scratch the particular itch present at the time. :D
 
Last edited:
OP
D

drivesitfar

Well-known member
Joined
Oct 23, 2013
Messages
36,037
Location
Pacific Northwest
Fretters and Shift: I couldn't think of a couple better members to mix up something to make our naked metal shine. my thoughts were more for storing the gym plates in my unheated storage, but baking something on next summer either outside or in a shop oven or smoker might be even better.

would also like another option to BLO that i don't need to keep applying every few months to keep the rust off my vises and other tools.
 

Shiftless

Well-known member
Joined
Mar 9, 2014
Messages
14,553
Location
East Bay SFO
Drives:
Thanks for the compliment:)
You weren't really intending the waxy graphite coating to be the final finish for gym equipment. But it does sound like a good "temporary-long term" coating to keep the rust away during storage in your difficult conditions. Nobody as yet has mentioned the dreaded old Cosmoline that was used on metal parts to protect them during shipment by sea. And is still used today too.

What is that messy grease found on Harbor Freight machinery?
 
Last edited:
To avoid these ads, REGISTER NOW!
Top Bottom