To avoid these ads, REGISTER NOW!

Adding shelves, desk, and window seat to a kid's bedroom

Rileysan

Well-known member
Joined
Sep 11, 2015
Messages
4,298
Location
Milwaukie, Oregon
This past spring, my daughter approached me with a question: Can you build this for me?

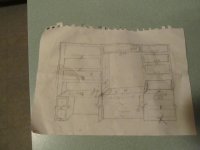
She had spent the day dreaming up and drawing plans for a built-in desk, book shelves, storage cabinet, dresser, and window seat for her bedroom.

My daughter knows I like to build things - I am a journeyman maintenance mechanic. I can fabricate with metal, weld, plumb, install electrical, repair all manner of industrial machinery, pour concrete, and even frame a house - but admittedly, I am not a good finish carpenter. Frankly, lumber pisses me off - as it is often twisted, warped, checked, knotted, splintered, and unpredictable.

I don't even own a table saw. Then the lights go on - I can buy more tools! :D
 

Attachments

  • Jan 2016 007.jpg
    Jan 2016 007.jpg
    139.2 KB · Views: 263
Last edited:
To avoid these ads, REGISTER NOW!

Cyberbear

Well-known member
Joined
Nov 23, 2013
Messages
1,524
Location
California
Yes, the perfect validation for acquiring more tools is always to help your family. Your daughter may have set your career onto a new path. It's never too late to learn new skills, while improving your resume as a mechanical maintenance mechanic.
As you've indicated, working with wood can be challenging, but once you learn the nature of the material and it's working limitations, doing so becomes an easy task. You can overcome the defects often found in wood by learning not to buy warped wood to begin with, thus making your task that much easier. Start small and buy a few basic tools and learn as you go, it's not that difficult and many have done this, the challenge is knowing how to work wood well. This comes with experience, like anything else. Good luck on your new adventure.
 
OP
R

Rileysan

Well-known member
Joined
Sep 11, 2015
Messages
4,298
Location
Milwaukie, Oregon
Fast forward 7 months. My wife reminded me that Christmas was fast approaching and I hadn't started on the project yet - save for the power tools I bought. So I took the week after Christmas off with the intentions of doing the entire project during that week. :lol_hitti

I don't have a lot of room in my garage, so I have to setup shop in my driveway. I live in the central Willamette valley in western Oregon - very close to the wettest area of the state. Through Christmas day, our area had experienced nearly 20 inches of rain for the month of December. Ugh

Then a break in the weather came! On Dec 28, I jumped at the opportunity and loaded my wife and daughter into the truck and headed to Portland. I could have gone to the local big-box building store, but Shur-way building centers in Portland has unbelievable deals on finish plywood. We settled on 10 3/4" sheets of paint grade plywood for $20/sheet, 1 x 2 MDF, and 1/2" quarter round for the trim. With gas, the price for the materials was ~$300.

Brian
 
OP
R

Rileysan

Well-known member
Joined
Sep 11, 2015
Messages
4,298
Location
Milwaukie, Oregon
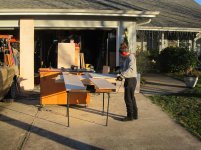
Dec 29 was setup day for the project. The weather was cold, but clear. I rolled my CL table saw out of the garage and made an out-table from a flimsy card table. The next three days will be spent measuring, cutting, and sanding plywood. So it begins!

Brian
 

Attachments

  • Jan 2016 3017.jpg
    Jan 2016 3017.jpg
    146.7 KB · Views: 198
  • Jan 2016 3020.jpg
    Jan 2016 3020.jpg
    147.8 KB · Views: 196
  • Jan 2016 3018.jpg
    Jan 2016 3018.jpg
    142.5 KB · Views: 195

captain14

Well-known member
Joined
Dec 19, 2012
Messages
7,067
Location
Near College Park Maryland 20740
You should get bonus points from your girls since you included them in the road trip to get the supplies.

Are either one of them going to help? Even the final stage of paint/ staining will get them the satisfaction of ownership of the project.

Please post your work and progress .
 
OP
R

Rileysan

Well-known member
Joined
Sep 11, 2015
Messages
4,298
Location
Milwaukie, Oregon
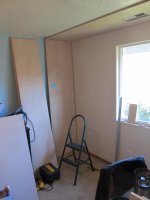
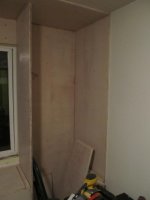
We got all the pieces cut and moved indoors prior to the weather changing. Competing with this project, is my daughter's basketball practice and games - which take an exorbitant amount of time during the holidays. We started working in her room on saturday the 2nd.

I decided to start with the top and sides. While checking for joist centers, I was surprised to learn that they were 24" apart. Why did I think roof joists were supposed to be 16" apart? C'est la Vie ...

Looking at my picture, does anyone think there will be any problem putting a shelf ~10" below the heating vent on the ceiling?
 

Attachments

  • Jan 2016 3025.jpg
    Jan 2016 3025.jpg
    128 KB · Views: 102
  • Jan 2016 3023.jpg
    Jan 2016 3023.jpg
    145.9 KB · Views: 81
Last edited:
OP
R

Rileysan

Well-known member
Joined
Sep 11, 2015
Messages
4,298
Location
Milwaukie, Oregon
You should get bonus points from your girls since you included them in the road trip to get the supplies.

Are either one of them going to help? Even the final stage of paint/ staining will get them the satisfaction of ownership of the project.

Please post your work and progress .

My wife and youngest daughter want to do the painting. My wife is a dedicated decorator and has big plans to "antique" the finished product. Here's an example of her work - inlcuding the repurposed cabinet with inlay, painted desk and chair and (barely visible) repurposed cabinet door on the right side of the window used as a bulletin board.
 

Attachments

  • Jan 2016 010.jpg
    Jan 2016 010.jpg
    134.3 KB · Views: 187
OP
R

Rileysan

Well-known member
Joined
Sep 11, 2015
Messages
4,298
Location
Milwaukie, Oregon
By the end of New Years weekend, I was only able to get a few more pieces installed. One of the things I had overlooked was having an accessible electrical outlet so I decided to add one above the desk (left side of window).

My daughter is mudding the sheetrock after I added the receptacle.

Brian
 

Attachments

  • Jan 2016 3026.jpg
    Jan 2016 3026.jpg
    129.7 KB · Views: 191
OP
R

Rileysan

Well-known member
Joined
Sep 11, 2015
Messages
4,298
Location
Milwaukie, Oregon
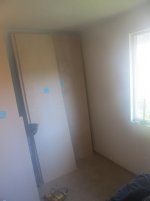
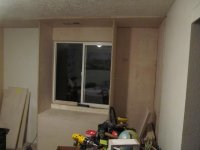
I wasn't able to resume work on the project until yesterday. I ran into some issues with the window not being square to the walls. Measuring from the right wall to the bottom corner and top corner of the window, the distant to the window changes by 1/4". I had to cut the piece of plywood above the window to allow the vertical leg (floor to ceiling) on the left side of the window to follow the frame of the window. I will have to make a correction to the shelves on the left side of the window but not until later.

For now, I left off with a nearly completed window seat/storage cabinet.

As an interesting sidenote, I had quite a battle with my daughter over the height of the window seat. I wanted to build a more conventional seat that was ~24" tall but she wanted it level with the window sill (about 35"). In the end, we compromised and agreed to making the window seat no higher than the desk height (30").

Brian
 

Attachments

  • Jan 2016 005.jpg
    Jan 2016 005.jpg
    146.4 KB · Views: 156
  • Jan 2016 004.jpg
    Jan 2016 004.jpg
    155.3 KB · Views: 149
  • Jan 2016 003.jpg
    Jan 2016 003.jpg
    166.6 KB · Views: 148
  • Jan 2016 001.jpg
    Jan 2016 001.jpg
    138.8 KB · Views: 200
  • Jan 2016 002.jpg
    Jan 2016 002.jpg
    142.6 KB · Views: 198

captain14

Well-known member
Joined
Dec 19, 2012
Messages
7,067
Location
Near College Park Maryland 20740
I wasn't able to resume work on the project until yesterday. I ran into some issues with the window not being square to the walls. Measuring from the right wall to the bottom corner and top corner of the window, the distant to the window changes by 1/4". I had to cut the piece of plywood above the window to allow the vertical leg (floor to ceiling) on the left side of the window to follow the frame of the window. I will have to make a correction to the shelves on the left side of the window but not until later.

For now, I left off with a nearly completed window seat/storage cabinet.

As an interesting sidenote, I had quite a battle with my daughter over the height of the window seat. I wanted to build a more conventional seat that was ~24" tall but she wanted it level with the window sill (about 35"). In the end, we compromised and agreed to making the window seat no higher than the desk height (30").

Brian

CAUTION with window seat. In my area an apartment complex has windows that are the same height of beds and kids will roll over in the bed and right out of the open window. Can this be discussed with her? I can imagine her relaxing on the window seat and ... You don't want to out a window guard up since that will distract from the view. I see it's a slider . Not sure how big she is or a future occupant of the room is.
 

captain14

Well-known member
Joined
Dec 19, 2012
Messages
7,067
Location
Near College Park Maryland 20740
CAUTION with window seat. In my area an apartment complex has windows that are the same height of beds and kids will roll over in the bed and right out of the open window. Can this be discussed with her? I can imagine her relaxing on the window seat and ... You don't want to out a window guard up since that will distract from the view. I see it's a slider . Not sure how big she is or a future occupant of the room is.

Yes multiple times and multiple kids from upper floors.
 
OP
R

Rileysan

Well-known member
Joined
Sep 11, 2015
Messages
4,298
Location
Milwaukie, Oregon
CAUTION with window seat. In my area an apartment complex has windows that are the same height of beds and kids will roll over in the bed and right out of the open window. Can this be discussed with her? I can imagine her relaxing on the window seat and ... You don't want to out a window guard up since that will distract from the view. I see it's a slider . Not sure how big she is or a future occupant of the room is.

I never even considered this. She's big enough (14) to not be too concerned about her safety and the drop to the lawn outside is only about 4' but I never thought about future owners. I'll have to talk with her about it.

Brian
 

spongerich

Well-known member
Joined
Apr 17, 2010
Messages
2,339
Location
Monroe, NY
It's a shame you had to resort to woodworking.

You could have welded that up out of 2" steel square stock and covered it with some sheet aluminum or diamond plate. And you would have gotten a nice bending brake instead of some woodchuck stuff. :rocker:
 

danfromsyr

Well-known member
Joined
Jan 1, 2009
Messages
11,754
Location
Cicero, NY
have you considered her Rapunzel may grow into Romeo and Juliet? :dunno:
I know many parents (not saying you) are unaware of the thinking and goings on of a teenage mind..
Ohh not m y little 'princess' (insert name here) :lol_hitti

I never even considered this. She's big enough (14) to not be too concerned about her safety and the drop to the lawn outside is only about 4' but I never thought about future owners. I'll have to talk with her about it.

Brian


rapunzel2.jpg


edl-22cliffnotes-t_CA0-blog480.jpg
 
To avoid these ads, REGISTER NOW!
OP
R

Rileysan

Well-known member
Joined
Sep 11, 2015
Messages
4,298
Location
Milwaukie, Oregon
have you considered her Rapunzel may grow into Romeo and Juliet? :dunno:
I know many parents (not saying you) are unaware of the thinking and goings on of a teenage mind..
Ohh not m y little 'princess' (insert name here) :lol_hitti

Already went through this with my (now) 19yo. She was 15 going on 30 and I nearly lost my mind. I'm a bit wiser now ...
 
OP
R

Rileysan

Well-known member
Joined
Sep 11, 2015
Messages
4,298
Location
Milwaukie, Oregon
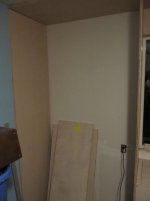
Time for an update! My daughter was gone for the weekend so I jumped at the opportunity to continue on with the project. As I stated in my first post, I am not a good finish carpenter, but I can build anything and I can build it to withstand almost anything (I am the oldest of 6 boys - we could break anything!) so this project will test my skill and patience.

I will take this opportunity to state up-front that I made a big mistake. I assumed that the walls, ceiling, and floor of this room were plumb and square. As such, I pre-cut everything for this project. :lol_hitti

It's ok, you can laugh.

Additionally, I mistakenly forgot to calculate the thickness of the 3/4" plywood against the wall when I cut my desktop, desk "legs", and shelves so all those things are now protruding 3/4" past the sides and top. Damn.

The good news is that all I have to do is re-cut the same pieces - sort-of.

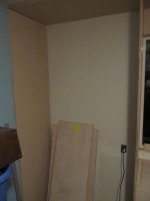
As you can see from the first picture, I have pre-cut pieces ready to be installed. The plywood backing ended up being 3/8" too narrow so I'll cover that later with cove molding. The desktop turned out to be a mess because it's square and is 1/2" too narrow at the front edge. I ended up cutting another piece that was trapezoidal in shape being 43 1/8" wide against the wall and 43 5/8" wide at the front.

Throw in lots of wood putty to cover counter-sunk screws and to fill in the seems around edges, and after paint, it will look like a pro job (I hope).

Pic 1: Before
Pix 2 & 3: After

Brian
 

Attachments

  • Jan 2016 3136.jpg
    Jan 2016 3136.jpg
    142.5 KB · Views: 98
  • Jan 2016 3134.jpg
    Jan 2016 3134.jpg
    140.5 KB · Views: 105
  • Jan 2016 003.jpg
    Jan 2016 003.jpg
    166.6 KB · Views: 86
Last edited:
OP
R

Rileysan

Well-known member
Joined
Sep 11, 2015
Messages
4,298
Location
Milwaukie, Oregon
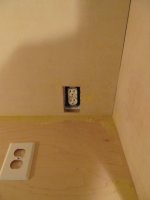
Final posting for this weeks installment. I have included a picture of the receptical I added. Something I didn't consider when I put the electrical box in was the 3/4" plywood covering the wall. Moving the box is now an impossiblity. It's my hope there exists a product that can space the receptical out so I can install the cover. If anyone can confirm (or deny) such a product exists, I would be grateful.

Brian
 

Attachments

  • Jan 2016 3137.jpg
    Jan 2016 3137.jpg
    166.5 KB · Views: 76
Last edited:
OP
R

Rileysan

Well-known member
Joined
Sep 11, 2015
Messages
4,298
Location
Milwaukie, Oregon
Looking good, keep up the good work! They do make outlet extenders, here is a quick example.

http://www.amazon.com/dp/B000GAQE9A/?tag=atomicindus08-20

One of those should do the trick, some people use them in kitchens when adding tile to a backsplash.

So THAT'S what they look like! I have a whole stack of those in a tote of supplies I got at a sale last summer. Not knowing what they were, I just ignored them.

Thanks for the link!

Brian
 

My Old Tools

Well-known member
Joined
Jun 4, 2014
Messages
5,447
Location
Hamrick Lake, TX
Time for an update! My daughter was gone for the weekend so I jumped at the opportunity to continue on with the project. As I stated in my first post, I am not a good finish carpenter, but I can build anything and I can build it to withstand almost anything (I am the oldest of 6 boys - we could break anything!) so this project will test my skill and patience.

I will take this opportunity to state up-front that I made a big mistake. I assumed that the walls, ceiling, and floor of this room were plumb and square. As such, I pre-cut everything for this project. :lol_hitti

It's ok, you can laugh.

Additionally, I mistakenly forgot to calculate the thickness of the 3/4" plywood against the wall when I cut my desktop, desk "legs", and shelves so all those things are now protruding 3/4" past the sides and top. Damn.

The good news is that all I have to do is re-cut the same pieces - sort-of.

As you can see from the first picture, I have pre-cut pieces ready to be installed. The plywood backing ended up being 3/8" too narrow so I'll cover that later with cove molding. The desktop turned out to be a mess because it's square and is 1/2" too narrow at the front edge. I ended up cutting another piece that was trapezoidal in shape being 43 1/8" wide against the wall and 43 5/8" wide at the front.

Throw in lots of wood putty to cover counter-sunk screws and to fill in the seems around edges, and after paint, it will look like a pro job (I hope).

Pic 1: Before
Pix 2 & 3: After

Brian

Brian, your rookie mistake was building it to the wall. Just like kitchen cabinets, build nice, square, solid boxes and set them in place, shim, tie it all together with trim or faces.
 

TK-421

Well-known member
Joined
Dec 29, 2015
Messages
1,398
Location
Pflugerville, TX
Looking pretty good so far. Don't worry about not factoring in the plywood thickness, you're not the first and you're not the last. If you're going to do multiple cuts, one right after the other, on the same piece of wood, don't forget to factor in the blade thickness, otherwise your pieces will get smaller and smaller. Don't ask me how I know that one. :eek:
 

Dave in Mass

Well-known member
Joined
Jan 29, 2013
Messages
635
Location
Massachusetts
Did you build on top of the carpet? Looks like you might have.

I did.

A couple of years ago I built a desk unit into my bedroom dormer window. Flash forward to last weekend when we decide to rip out the wall-to-wall and replace with laminate.

The desk is now raised slightly and it was a ***** to cut the carpet and pad back against the desk front and foot well.

Nothing the finish trim didn't cover but if I do another built in in the future, the carpet is coming out first.

Looks nice so far. Nice project.
 
OP
R

Rileysan

Well-known member
Joined
Sep 11, 2015
Messages
4,298
Location
Milwaukie, Oregon
Did you build on top of the carpet? Looks like you might have.

I did.

A couple of years ago I built a desk unit into my bedroom dormer window. Flash forward to last weekend when we decide to rip out the wall-to-wall and replace with laminate.

The desk is now raised slightly and it was a ***** to cut the carpet and pad back against the desk front and foot well.

Nothing the finish trim didn't cover but if I do another built in in the future, the carpet is coming out first.

Looks nice so far. Nice project.

Yes, I did. I wanted carpet under the desk, but was too lazy to remove it from under the rest. I may regret it later, but I really didn't want to remove any more carpet from my house. I did that last year when I put in Lego hardwood flooring and I found things about the underlayment I would have been happier not knowing.

Perhaps it's time for another signature saying ...

"Ignorance is bliss"

Brian
 
OP
R

Rileysan

Well-known member
Joined
Sep 11, 2015
Messages
4,298
Location
Milwaukie, Oregon
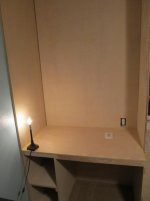
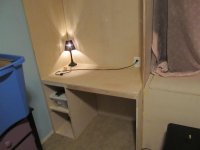
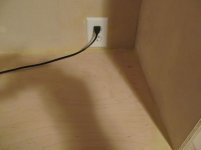
I worked on the desk and receptical for about an hour last night before running out of gas. First off, I can't believe I had the receptical spacers all along and didn't know it until a-bc pointed out the Amazon link to me. The install went easy and the outlet looks great. After a little sanding, the desk is usable until I can spend more time on it - probably in a couple of weeks from now.

As for the desktop, I am looking for ideas to seal and harden the surface. My wife and daughter are going to paint the whole thing "antique white" which, if memory serves me, is kind of chalky. I want the desktop to be hard enough to prevent pens and pencils from scoring it but they won't like a sealer that makes it shine.

Brian
 

Attachments

  • Jan 2016 3138.jpg
    Jan 2016 3138.jpg
    144 KB · Views: 125
  • Jan 2016 3140.jpg
    Jan 2016 3140.jpg
    164.1 KB · Views: 95
  • Jan 2016 3141.jpg
    Jan 2016 3141.jpg
    140 KB · Views: 95

lonestarky

Well-known member
Joined
Mar 28, 2011
Messages
367
Location
Lindenhurst IL
A self leveling, high gloss paint like sw proclassic may be hard enough and smooth enough, but a desk blotter would look nice too.

Sent from my XT1254 using Tapatalk
 

hobie1dog

Well-known member
Joined
Nov 21, 2007
Messages
2,833
Location
Cornelius,NC
Brian: That window seat reminds me of one that my son and I did a few years ago. We put (4) 12" subwoofers in the front for the home theater room.
 
To avoid these ads, REGISTER NOW!
Top Bottom