To avoid these ads, REGISTER NOW!

VISE REPAIR 101 all vise repairs, lubricants, sources for parts and the tricks to fix

Fretters

Well-known member
Joined
Jan 25, 2014
Messages
4,217
Location
South Yorkshire, England
Sometimes you got to fix them this way. I never used the stuff you guys talk about. My first choice is heat and if it does not work then I do it this way. Does Kroil melt rust?

Have you tried just drilling the heads off and then removing with Mole grips or similar Kevin? I've never found the actual thread portion to be rusted solid as yet. It's always the heads to the inserts which seem to rust solid. The threaded portion always comes out as easy as once the head is off and the insert removed, upto just. Could possibly save you a little time and effort going that route.
 
To avoid these ads, REGISTER NOW!

Evergreentree

Well-known member
Joined
Nov 24, 2015
Messages
452
Location
Montgomery County PA
Titan-my very first vise was my wife's grandfathers. I like vises for a few reasons.
1.i spend countless hours leaning over them hand filing chainsaw chains, so I learned to love them out of mental self preservation.
2.you can plainly see the history, and some of the work they've been used for(battle scars)
3. They are beautiful to me, though that's subjective.

What's wonderful about yours, is that your family members used them. Just imagine what they did with it! This is a visual part of their legacy left behind, and as long as it's in your hands, that will live on.

Give it new life, or turn it into an art sculpture at the least!
 

Fretters

Well-known member
Joined
Jan 25, 2014
Messages
4,217
Location
South Yorkshire, England
Everything mixes 100%, no seperation. I've used just straite mmo, which penetrates better then pb. Guess it's the wintergreen and solvents in it. I also like the smell!

That's something I've been meaning to try for a while, but never got round to it as yet. I have heard that wintergreen oil alone is very effective on rusted parts.
 

Evergreentree

Well-known member
Joined
Nov 24, 2015
Messages
452
Location
Montgomery County PA
That's what I hear to. I think you can buy wintergreen by itself. Really, my mix works good.

"Jack's Red"

Actually did a test yesterday against pb, for my friend who owns a body shop. He swears by it.
Crude, but we had a rusty piece of sheet metal 12"x6". We put 2 drops of jacks red on one side, a squirt of pb on the other. I went back today, and the pb made a wet area of about 3"x3". My mix was 6"x6", crept about 3" on the other side...and still creeping.
 
Last edited:

Fretters

Well-known member
Joined
Jan 25, 2014
Messages
4,217
Location
South Yorkshire, England
Is there any hope for this vise it used to be my grand paps on his farm in went to look at it today and wanted restore it for myself but found it like this kinda upsetting. Friend of mine said maybe it could be brazed. I don't wanna spend a lot of money on it but what's my options

Braze, plate and screw else drill through the base and screw are the simplest and cheapest options, and all should hold up fine as long as you don't wail away on it.
 

stitan06

Well-known member
Joined
Dec 31, 2012
Messages
154
Titan-my very first vise was my wife's grandfathers. I like vises for a few reasons.
1.i spend countless hours leaning over them hand filing chainsaw chains, so I learned to love them out of mental self preservation.
2.you can plainly see the history, and some of the work they've been used for(battle scars)
3. They are beautiful to me, though that's subjective.

What's wonderful about yours, is that your family members used them. Just imagine what they did with it! This is a visual part of their legacy left behind, and as long as it's in your hands, that will live on.

Give it new life, or turn it into an art sculpture at the least!

that is all try actually my mom was telling me bout using it to crack walnuts when she was a kid
 

KMScott

Well-known member
Joined
Feb 14, 2012
Messages
4,643
Location
Daufuskie Island, South Carolina
Have you tried just drilling the heads off and then removing with Mole grips or similar Kevin? I've never found the actual thread portion to be rusted solid as yet. It's always the heads to the inserts which seem to rust solid. The threaded portion always comes out as easy as once the head is off and the insert removed, upto just. Could possibly save you a little time and effort going that route.

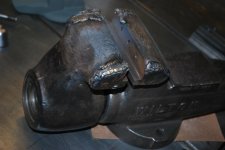
Fretters, what works best for me is to set up the vise in my milling machine because it is easier to drill out the screw head with a machine then using a hand drill. Once the head pops off and the jaw is removed then I do try to un screw the bolt with vise grips, 1/2 the time yes they do un screw but on this vise they did not, I already have my location to the threaded holes so for me it is pretty easy to drill out the stud and run a tap down to clean up the threads. I bet I had 15 -20 minutes in pulling these two jaws off. This vise has seen better days, when I am done I will share the repair and restore, you might say why are you repairing this vise.
 

Attachments

  • Wilton 500  12-2015 (17).jpg
    Wilton 500 12-2015 (17).jpg
    140.6 KB · Views: 30
  • Wilton 500  12-2015 (18).jpg
    Wilton 500 12-2015 (18).jpg
    129.1 KB · Views: 31
  • Welded up 500 (1).jpg
    Welded up 500 (1).jpg
    131.4 KB · Views: 31

Evergreentree

Well-known member
Joined
Nov 24, 2015
Messages
452
Location
Montgomery County PA
Ok guys, for anyone interested in leather jaw caps.

I decided to do a run at making leather jaw caps. I hand sharpen my chainsaw chains, and I have some big saws. Unless the jaws are perfect, the chainsaw can shift when getting into it. Its also hard on the chainsaw bar. I heard of guys using cutting boards for jaws, and yes the copper/aluminum/brass...but I want to use a particular Parker, and I want access to the regular jaws. Leather sounded perfect. Wound up being easy, and cheap, and they turned out good. There were some things I'd do different, and somethings made making them a breeze. They are grippy, both soft & hard, durable I'd guess, and make up for beat jaws.

I'm going to go over the steps I did, so bear with me the next few posts.
 

Attachments

  • image.jpg
    image.jpg
    22 KB · Views: 56
Last edited:

Evergreentree

Well-known member
Joined
Nov 24, 2015
Messages
452
Location
Montgomery County PA
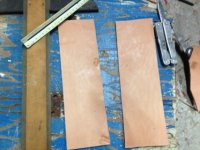
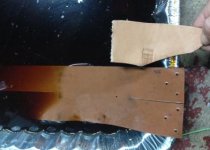
First I bought a bunch of scrap leather. I bought vegetable tanned leather 1/8" thick, which is considered 7-8oz when buying. For my 4" Parker, I cut a 8"x12" piece, and cut it in half length wise to 2 4x12" pieces.
 

Attachments

  • image.jpg
    image.jpg
    19.7 KB · Views: 20

Evergreentree

Well-known member
Joined
Nov 24, 2015
Messages
452
Location
Montgomery County PA
Then I put them in the vise where I wanted them, and I drilled 2 "relief holes at the top corners of the jaw in the leather. Then cut the leather out from there. I drilled some holes in the corners for pulling the leather tight.
 

Attachments

  • image.jpg
    image.jpg
    11.2 KB · Views: 17

Evergreentree

Well-known member
Joined
Nov 24, 2015
Messages
452
Location
Montgomery County PA
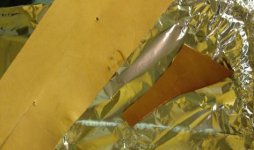
Then I soaked A tester piece in a batch of seeped oak bark, and a few rusty washers. This made the leather light oak colored, but not what I was looking for. Keep in mind, it dries much lighter so I found out.
 

Attachments

  • image.jpg
    image.jpg
    20.7 KB · Views: 22

Evergreentree

Well-known member
Joined
Nov 24, 2015
Messages
452
Location
Montgomery County PA
I wanted darker, so I added a really strong batch of coffee, and a few old blackberries. This made the leather darker.

So in the pieces went into decently hot water, and soaked for close to an hour. I don't think it has to be that long, as I've read 15ish minutes until the leather stops bubbling..
 

Attachments

  • image.jpg
    image.jpg
    15.7 KB · Views: 17

Evergreentree

Well-known member
Joined
Nov 24, 2015
Messages
452
Location
Montgomery County PA
Then I attached some rope (I used throw ball line), to the holes I drilled to pull the leather tight. Key to this is line that is used does not stretch, and knots well.

The vise I set up on an old metal dairy crate, which wound up really being the reason these came out so well. Plenty of tie down point options.

I set the leather in the jaws where I wanted them, and clamped them down nice and tight. Then I pulled the lower leather flaps down over the jaw ridge, and the top flaps straite down. Tied as tight as possible. Then I crisscrossed nylon straps over the top, and another around. Key is obviously setting the leather as tight as possible to the vise, everywhere you can.
 

Attachments

  • image.jpg
    image.jpg
    15.1 KB · Views: 25
Last edited:

Evergreentree

Well-known member
Joined
Nov 24, 2015
Messages
452
Location
Montgomery County PA
They took 2 days to dry in my cold basement.

They dried to a color I only could describe as "human flesh" color. Literally looks like I chopped off someone's arm, and mounted their skin on one of my prized vises.

I highly suggest either research staining, or vinegaroon (almost blackish, and what I'm going to do next).
 

Evergreentree

Well-known member
Joined
Nov 24, 2015
Messages
452
Location
Montgomery County PA
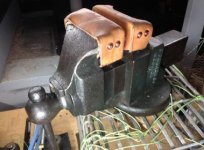
I untied the line, and the jaws didn't flinch. They really hold their shape perfect. I made some marks where I wanted to rivet them , took them off, and trimmed them up. Then used a rotary leather punch, and put in some copper rivets.

Word of advise-I had to set the rivets using a doorstop vise with 3 1/2" jaws. I don't have an anvil, just a hunk of railroad track. I just couldn't get a good base without crushing the leather. It worked well.

There's a shot of the human flesh leather...
 

Attachments

  • image.jpg
    image.jpg
    12.3 KB · Views: 40

Fretters

Well-known member
Joined
Jan 25, 2014
Messages
4,217
Location
South Yorkshire, England
Fretters, what works best for me is to set up the vise in my milling machine because it is easier to drill out the screw head with a machine then using a hand drill. Once the head pops off and the jaw is removed then I do try to un screw the bolt with vise grips, 1/2 the time yes they do un screw but on this vise they did not, I already have my location to the threaded holes so for me it is pretty easy to drill out the stud and run a tap down to clean up the threads. I bet I had 15 -20 minutes in pulling these two jaws off. This vise has seen better days, when I am done I will share the repair and restore, you might say why are you repairing this vise.

Was merely wondering about the drilling a re-tapping. Didn't know whether you just did that as a matter of course seeing as you had it mounted on the mill, or as to whether you tried the minimal option first. :D I know few if any are masochistic enough to use my approach, btw. :D
 
Last edited:

Evergreentree

Well-known member
Joined
Nov 24, 2015
Messages
452
Location
Montgomery County PA
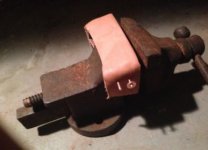
I then lightly coated the leather with olive oil. Wow, they look like a well cared for old baseball glove!

I read if you use extra virgin olive, nothing will get rancid. We will see. I have bark Tannins, coffee (with chikory in it), olive oil, oh yea...and a few blackberries soaked into my leather!
 

Attachments

  • image.jpg
    image.jpg
    13.1 KB · Views: 51

Evergreentree

Well-known member
Joined
Nov 24, 2015
Messages
452
Location
Montgomery County PA
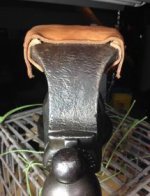
So there you have it. They are back on my Parker just in case they want to relax loose because of the oil.

Going over the jaw ridge really helps them lock down to the vise.
 

Attachments

  • image.jpg
    image.jpg
    12.6 KB · Views: 38
To avoid these ads, REGISTER NOW!

Evergreentree

Well-known member
Joined
Nov 24, 2015
Messages
452
Location
Montgomery County PA
The end.

I suggest researching staining further then I did. Scissors do NOT cut leather! Box cutter, and an x-acto knife work best.

Beyond that, the dairy crate was the most important factor as well as tying it all down right and tight, vegetable tanned leather 7-8oz leather molds well. Depending on vise weight, a plastic crate would work, and for smaller vises, slightly thinner leather (5-7oz) i'd guess would work better.

Thanks guys, hope someone could benifit from this trial run!
 

Attachments

  • image.jpg
    image.jpg
    18.4 KB · Views: 34
Last edited:

va.grouseman

Well-known member
Joined
Mar 26, 2011
Messages
4,965
Location
Southern-Central VA.
Evergreen, I feel your appreciation.---I spent 36 years sharpening chainsaws, bush axes, sling blades, limb loppers, bolt cutters, lawn mower blades.---Installed handles in every farm tool made.---And it's just hard to do those things without the aid of a third hand.---You really learn to respect the vise as a faithful friend.

I might add that when filing down the drags on a chain saw chain, (which one has to do occasionally), it's almost impossible without the bar pinched in a vise.

By the way, I still do all those things, but now I'm just doing them for me.
 

Evergreentree

Well-known member
Joined
Nov 24, 2015
Messages
452
Location
Montgomery County PA
Va-I just tighten the chain tightly to do the rakers, and hold the chain. Truth be told, I only take them down on my big saws, with really nice files.
 
Last edited:

CRSINMICH

Well-known member
Joined
Aug 15, 2015
Messages
2,414
Location
Southeastern Michigan
EG: Demoman just posted some catalog pages of Hollands vises on the regular vise thread. Post #41036. Joe had asked for them. A lucky coincidence for us.
 
Last edited:

Evergreentree

Well-known member
Joined
Nov 24, 2015
Messages
452
Location
Montgomery County PA
Anyone had luck or advise making replacement jaws for originally cast in place jaws?

My friend has an old sawyer with the jaws missing. No pin spot, no holes. Replacements would be U shaped like a prentiss if that makes sense. Any advise, or is this just not worth the trouble?
 
Last edited:

Off-Street Parking

Well-known member
Joined
Aug 1, 2015
Messages
351
Location
Midwest
Hemi: nice job on the Craftsman and thanks for sharing your process.

McB: i should start a thread about the Craftsman 519x series because I've been saying i would maybe a year ago now. no we don't know and we just have ideas. here's the thinking that i can remember without looking at my notes i can't find at the moment.

1) they are stamp dated like a Rock Island and Rock Island did make vises for Craftsman pre WWII.

2) they look like a Reed with the oil hole and vise nut holder

3) I was told by a 80 year old machinist that i bought my almost original condition 5196 that my vise was made by Starrett. if you look at the handles they do resemble Starrett.

4) they were made after WWII when Wilton was almost bankrupt, Rock Island was winding down to almost nothing and selling to Britman Electric, Starrett's history i'm not up to speed on yet and they were taking over Athol and putting their name on the vises they'd owned for many years before WWII and some say Columbian made them because Columbian was making the less expensive Craftsman models.

5) My 2 cents.


cheers


Pssst... seven month bump... How is that new thread coming along? :beer:
 
OP
D

drivesitfar

Well-known member
Joined
Oct 23, 2013
Messages
36,042
Location
Pacific Northwest
OSP: i guess i was hoping somebody would start one that has all the Craftsman catalogs and the vises to post more pictures. as you can tell i do start a few threads and i'd be happy to be the one asking all the questions.

so my best idea on who made those AWESOME Craftsman 519x's is Rock Island, but Starrett is another possibility. i know some think Reed and others Columbian. with a lot of vise companies going out of business around that time i wonder if Sears might have just set up a plant and hired their own workers.

have you been catching up a little on your Vise Repair 101 reading today? if you have the time i'd help as much as i can if you started the thread and i'm sure others would enjoy helping too.

ALL: anybody restoring a vise today? take plenty of pictures as you are doing it and then some evening when you have time post them up with your remarks. there was a great Parkinson 7 vise restore just posted by a member from across the pond on the main vise thread and hope he posts those pictures here too.

cheers all
 

Off-Street Parking

Well-known member
Joined
Aug 1, 2015
Messages
351
Location
Midwest
have you been catching up a little on your Vise Repair 101 reading today? if you have the time i'd help as much as i can if you started the thread and i'm sure others would enjoy helping too.

Haha, no, not catching up... I just happened to pick up a Craftsman 05191 vise last weekend, and found your old post in a search. :thumbup:

I don't have much info myself, but the research is fun. And it looks like the 05191 in particular isn't very common, and I can clear up a lot of open questions just with pictures and measurements of mine. :thumbup:

I'll start a 0519x vise thread tonight, and give a heads-up here with the link and we can get the ball rolling. :beer:
 
OP
D

drivesitfar

Well-known member
Joined
Oct 23, 2013
Messages
36,042
Location
Pacific Northwest
OFS: i've owned a 5191 and didn't think it was rarer than the 5195, 5196's. the 5197's and 5198's seem to be a bit more rare.

maybe you could start the thread in Vintage and post a link in the main vise thread with pictures of your new Craftsman for the guys to join us.

thanks
 

Outlawmws

Well-known member
Joined
Aug 9, 2011
Messages
39,305
Location
The Badlands
The catalogs have already been posted in the thread I made on Craftsman Vises.

I know of no time that Sears actually manufactured a tool. In bed with many many Mfg's.? Yes, as a buyer and providing specifications for what they wanted to sell.

Did Starrett EVER have a contract with Sears? Not that Im aware of, and Sears sold a fair number of precision measuring tools. By the looks of them, Brown and Sharp was supplying Mics to Sears in this time frame. Moreover, that tapered knob design was used by several companies,and the Starrett differs considerably on the end being more rounded that the 51xx series. Is Starrett a possibility? A very, very remote one.

I still think Reed is the most likely Mfg., since besides the commonalities, Reed has been positively ID'd as making the predecessor "best vise" for Sears. (Internal main nut found in a CM vise with Reed markings).

A key question is who was still making vises until at least 1957? Reed still does today. Was RI still in the game? Britman electric took over RI in 1930. Britman merged with Whirlpool-Seeger Corp. in 1957 Britman closed the Vise operations in 1959. Not likely candidate IMO.
 

McBrownie

Well-known member
Joined
Mar 27, 2014
Messages
1,827
Location
Cleveland, OH

stitan06

Well-known member
Joined
Dec 31, 2012
Messages
154
went and rescued my great grandpaps handed down to my grandpaps hollands vice after work thats the big one and my dad had told me he had a vise i could that one is a cleveland no 44 so now i have 3 vices not sure what im gonna do with them all other than refinish them and hopefully fix the broken hollands
 

Attachments

  • 2016-02-10 17.31.45.jpg
    2016-02-10 17.31.45.jpg
    141.6 KB · Views: 54

Outlawmws

Well-known member
Joined
Aug 9, 2011
Messages
39,305
Location
The Badlands
My notes on "391" prefix:

Made in Japan (Vises) (I don't think so for this one, this was after the 51XX series stopped. and IIR well into the 60's for the much smaller shop vise that is so common)


(Probably/possibly transferred from this): Warren Tool company? Not sure where I found this reference. OR that Japanese Co. may have bought Warren? have to look latter I have to re-boot...
 
Last edited:

Outlawmws

Well-known member
Joined
Aug 9, 2011
Messages
39,305
Location
The Badlands
McB, I can't find either 391 or Adjustable Clamp on that VM page?

391 was definitely used for those Made in Japan Craftsman vises.
 

Shiftless

Well-known member
Joined
Mar 9, 2014
Messages
14,557
Location
East Bay SFO
Outlaw:
You are again correct.

I remember a Craftsman vise that I gave to a deserving fellow last year. It was a 391.something and was clearly marked on the bottom of the swivel base JAPAN!
 

mroneeyedboh

Well-known member
Joined
Dec 30, 2011
Messages
459
Hey guys I've got an old Wilton here with seized up jaw Phillips. I tried many methods to removing them. They are soaking in PB blaster now. Tomorrow I'll try another attempt at shocking them loose, if not I guess it's off to drill them out.

Is there something else I should try? Heat? Drill and remove with ez out?


Thanks
 

Outlawmws

Well-known member
Joined
Aug 9, 2011
Messages
39,305
Location
The Badlands
What you are doing; some heat can't hurt... Then get a GOOD FITTING driver bit and a box wrench to fit it and use the vise jaws to apply a little pressure so it won't cam out. maybe a piece of ply to allow a little movement....

Then go after that wrench and see if you can break it loose; sometimes its worth it to try tightening a tiny bit more to crack it loose and then back it out.
 
To avoid these ads, REGISTER NOW!
Top Bottom