To avoid these ads, REGISTER NOW!

VISE REPAIR 101 all vise repairs, lubricants, sources for parts and the tricks to fix

jakemac

Well-known member
Joined
May 21, 2013
Messages
9,035
Location
New England
My understanding is that you can filter the simple green through coffee filters or similar and reuse it just like evapo-rust.

Yup, some of the SG that I'm still using is from 2 yrs ago. I just add fresh stuff to it every now and then as needed.

Remember to label the jugs with the used stuff in them as "dirty" so that no-one in the house tries to use it to clean the kitchen counter.
 
To avoid these ads, REGISTER NOW!

Outlawmws

Well-known member
Joined
Aug 9, 2011
Messages
39,308
Location
The Badlands
Another way to salvage SG is to let it settle and pour it off the top. I have saved house paint brushes that were solid paint soaking in SG, and after it was all done I let it settle and pour the "good stuff" off the top to another container. You can do the same with Paint thinner.
 

bagged89s10

Well-known member
Joined
Mar 13, 2005
Messages
4,607
Location
CT
Another way to salvage SG is to let it settle and pour it off the top. I have saved house paint brushes that were solid paint soaking in SG, and after it was all done I let it settle and pour the "good stuff" off the top to another container. You can do the same with Paint thinner.


So you're saying if you do that, you can use the simple green just like it was new again?
 

Outlawmws

Well-known member
Joined
Aug 9, 2011
Messages
39,308
Location
The Badlands
Like new? No. Even filtering won't do that; but it is plenty good for more paint soaking. As Jake mentioned, you don't wan't to use the used stuff in the kitchen like it was fresh from the bottle.
 

bagged89s10

Well-known member
Joined
Mar 13, 2005
Messages
4,607
Location
CT
Like new? No. Even filtering won't do that; but it is plenty good for more paint soaking. As Jake mentioned, you don't wan't to use the used stuff in the kitchen like it was fresh from the bottle.


Ok that's what I would think.
 

Outlawmws

Well-known member
Joined
Aug 9, 2011
Messages
39,308
Location
The Badlands
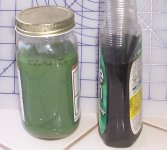
Here is my brush cleaning jar awaiting the next round of brushes to clean, vs. virgin SG in a spray bottle. Clean? No, Usable for more of the same? Sure!

attachment.php
 

Attachments

  • SG.jpg
    SG.jpg
    89 KB · Views: 370

jakemac

Well-known member
Joined
May 21, 2013
Messages
9,035
Location
New England
You can keep using it over and over until it gets too saturated to work anymore. Filtering out the solids will help extend it's usefulness. It's the same with ER as well.

If you can extend the cost over a few years, rather that one or two uses, then it doesn't seem as expensive to use. I started out by buying a gallon of each every two weeks when I got paid. Now I have 5 or 6 gallons of each on hand, and haven't had to buy any more for almost a year.

As it gets saturated, it's work time may get longer, but I just work on other projects while I'm waiting. I try to plan on soaking items in the evening, then let them sit overnight while I sleep. They're usually ready to go when I can get to them the next day (old evaporust can sometimes take longer depending on the results you're looking for).

In addition, since my shop is dry, I empty the basement dehumidifiers into 5 gallon buckets in my shop and use the distilled water for rinsing and washing. If you're running air conditioners, you could put a bucket under the drips and save water that way as well.

Here's how I mark the bottles so they don't get used in the house. (I do the same with CLR as well)
 

Attachments

  • 100_1868.jpg
    100_1868.jpg
    131.9 KB · Views: 36
Last edited:

bagged89s10

Well-known member
Joined
Mar 13, 2005
Messages
4,607
Location
CT
VISE REPAIR 101 all vise repairs, lubricants, sources for parts and the trick...

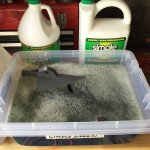
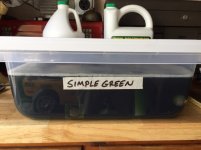
Here is my first attempt at using simple green to strip paint off a vise. Actually off anything.

You just need a few gallons of simple green and a container. I used a little under 2 gallons this time. I could have used more but for $10 a gallon, I will just flip the parts around. My understanding is that you can filter the simple green through coffee filters or similar and reuse it just like evapo-rust.

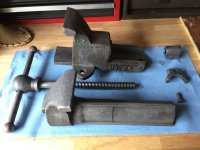
Parker no. 33 disassembled and in the container
ImageUploadedByTapatalk1434312664.483627.jpg

Poured about 2 gallons of simple green in the container.
ImageUploadedByTapatalk1434312721.797436.jpg

Covered the container and letting it soak
ImageUploadedByTapatalk1434312761.169311.jpg

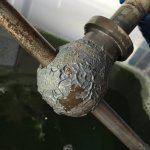
The paint is bubbling after only soaking for a little less than 2 hours.
ImageUploadedByTapatalk1434312817.771187.jpg

It pretty much falls right off
ImageUploadedByTapatalk1434312888.457625.jpg

The paint is coming off easily. I will let it soak overnight and see what happens.
ImageUploadedByTapatalk1434312920.206353.jpg


Had the day off with my son today so had a chance to check out the progress this morning. Quick wire brush while in the simple green bath took off 99% of the paint and grease. I will go over everything once with the wire wheel before I prep to paint it. I much rather have simple green drip down my arm than toxic paint stripper. :thumbup:
ImageUploadedByTapatalk1434394633.930259.jpg
ImageUploadedByTapatalk1434394666.963042.jpg

I will filter out the simple green one day this week and toss my athol 623 in next. I could probably use the same filter fabric I use to filter dirt out of house paint.
 

bagged89s10

Well-known member
Joined
Mar 13, 2005
Messages
4,607
Location
CT
VISE REPAIR 101 all vise repairs, lubricants, sources for parts and the trick...

What's the trick to removing this stubborn bolt that holds the swivel base onto this Athol 623.
ImageUploadedByTapatalk1432922746.611768.jpg

I tried a piece of 1/8" steel that fit and an adjustable wrench and the steel just bends.


How about clamping the 1/8 steel between two bits of thicker steel so just enough is sticking out to fit into the screw?


You can get driver bits with a 1/2" square shank, if I recall. One of those should easily be sturdy enough for the task.


The other option, (CW's method would likely do the job well too), would be to weld the steel strip to the inside, (else slit the sides of the socket with a grinder or hacksaw and drop the strip in), of a socket which is large enough to slip over the head. That should reinforce the steel strip enough to do the job.


Weld a bar that fits the slot to a cheap hand impact driver and start playing Whack-A-Mole.


I like that idea. I can just weld it up I steal of clamping. Thanks for helping the brain fart


Slipping a steel strip in an old socket is a good idea too.


Jeremy: i know you've been working on getting that nice old Walker Turner Drill Press with the XY table vise to do some serious work for a while now. it almost looks like you made the new jaws from scratch and in any case that was an awesome post and even a better job.


that DP and vise set up should last you until you meet our maker. very nice. :thumbup::thumbup::thumbup::thumbup::thumbup::thumbup:


Bagged: someone made a tool sort of like a big screwdriver and i haven't found it yet. CW's fix sounds like it might work. do you have a vise grip with the wide welding jaws on it to hold the piece of 1/4 inch plate?


So I bought a drive link socket off eBay but the seller misinformed me of the sockets too thickness. It was thicker than 1/8", which is the size i need for the athol screw/bolt. I was going to return it, but today When I got home from work, I decided to just grind/file it down to fit. Finally got the bolt loose. I really thought it was going to crack. I got it loose and let it sock in more penetrant while I ate dinner.
ImageUploadedByTapatalk1434501451.956959.jpg
ImageUploadedByTapatalk1434501734.913529.jpg
ImageUploadedByTapatalk1434501794.703822.jpg

and I got to use one of my newest block grinders.
ImageUploadedByTapatalk1434501853.613971.jpg

I'm just going to toss the athol in simple green now.!
 
Last edited:

bagged89s10

Well-known member
Joined
Mar 13, 2005
Messages
4,607
Location
CT
I Also had a little time this weekend to work on my Parker No. 2. I probably spent and hour or 2
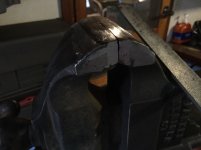
Total on it this weekend. I didn't take many pictures but here is a picture of how bad the jaws were when I got the vise. You can see the dip/valley on top.
ImageUploadedByTapatalk1434504276.607617.jpg
ImageUploadedByTapatalk1434504327.349762.jpg
So I borrowed my father small hand held belt sander to level it out. I didn't measure it but it was probably about a 1/16" dip that I had to smooth out.
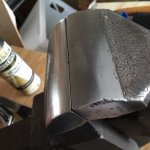
So I hit it with 80 grit on the belt sander and leveled most of it out. I was afraid to take too much off so I stopped. I used a black sharpie as my guide to see the high spots(I don't have any of the good dykem blue right now) and started hand filing the top with a big as file. I still have a little more to go but it's a looking pretty good. Sorry about the bad pics.
ImageUploadedByTapatalk1434504479.940372.jpg
ImageUploadedByTapatalk1434504700.908154.jpg
You can see the low spots where the black sharpie still shows.
ImageUploadedByTapatalk1434504743.146406.jpg
The edges have some wear marks but I don't think I'm going to sand them out and take that much metal off.

I will go up in grit and polish up the jaws after i finish leveling it.
 

McBrownie

Well-known member
Joined
Mar 27, 2014
Messages
1,827
Location
Cleveland, OH
I Also had a little time this weekend to work on my Parker No. 2. I probably spent and hour or 2
Total on it this weekend. I didn't take many pictures but here is a picture of how bad the jaws were when I got the vise. You can see the dip/valley on top.

So I borrowed my father small hand held belt sander to level it out. I didn't measure it but it was probably about a 1/16" dip that I had to smooth out.
So I hit it with 80 grit on the belt sander and leveled most of it out. I was afraid to take too much off so I stopped. I used a black sharpie as my guide to see the high spots
The edges have some wear marks but I don't think I'm going to sand them out and take that much metal off.

I will go up in grit and polish up the jaws after i finish leveling it.

Bagged,

That's one of the good things about Parker jaws. They aren't very hard and have enough extra material to allow for refinishing. Yours should clean up nicely
View media item 42929
 

bagged89s10

Well-known member
Joined
Mar 13, 2005
Messages
4,607
Location
CT
VISE REPAIR 101 all vise repairs, lubricants, sources for parts and the trick...

Bagged,


That's one of the good things about Parker jaws. They aren't very hard and have enough extra material to allow for refinishing. Yours should clean up nicely

View media item 42929


Yes absolutely right McB. I actually like the idea of semi smooth softer jaws so you don't mark up the part you have clamped. They will be good for another 100 years+, as long as the bottoms don't wear. Luckily my Parker No. 2 slide is very tight, unlike my Parker 22x. The 22x might need some copper shims like you used on your Parker.
 

Fretters

Well-known member
Joined
Jan 25, 2014
Messages
4,217
Location
South Yorkshire, England
Re: VISE REPAIR 101 all vise repairs, lubricants, sources for parts and the trick...

Good to hear you finally managed to get that screw out. :)


I actually like the idea of semi smooth softer jaws so you don't mark up the part you have clamped.

I've got to the point where I rarely if ever use standard jaw inserts without something between them and the workpiece nowadays. Smooth and/or soft inserts, else covers for standard inserts, are a blessing.
 
Last edited:

bagged89s10

Well-known member
Joined
Mar 13, 2005
Messages
4,607
Location
CT
Re: VISE REPAIR 101 all vise repairs, lubricants, sources for parts and the trick...

Good to hear you finally managed to get that screw out. :)


I've got to the point where I rarely if ever use standard jaw inserts without something between them and the workpiece nowadays. Smooth and/or soft inserts, else covers for standard inserts, are a blessing.


Agreed, it seems like sharp serrations are almost unnecessary for most work. I'm going to purchase some smooth plastic grooved inserts soon.
 

bagged89s10

Well-known member
Joined
Mar 13, 2005
Messages
4,607
Location
CT
Had an hour to play with this today.
ImageUploadedByTapatalk1434571081.722974.jpg
ImageUploadedByTapatalk1434571232.928864.jpg
The top left of the dynamic jaw has a little high spot which I still need to knock down a bit. But it looks pretty good I think. The wear marks/nicks will add some character once I paint it with oil rubbed bronze.
ImageUploadedByTapatalk1434571242.351048.jpg
ImageUploadedByTapatalk1434571259.658754.jpg

I hand sanded with 150 and 220 grit quickly to see how it looked. I'll keep going up in grit to polish them up once I smith out that little high spot I mentioned.
 

scooternut

Well-known member
Joined
Jul 31, 2013
Messages
684
Location
Pittsburgh, PA
littlestown 112 vise broken.

I'm either parting out or accepting main screw. Lets get this little guy, or your little guy back in action either way. Let me know what parts you need to finish OR, let me know how I can get your littlestown main screw.

Cheers
 
To avoid these ads, REGISTER NOW!
OP
D

drivesitfar

Well-known member
Joined
Oct 23, 2013
Messages
36,047
Location
Pacific Northwest
Mark: until one of the real experts chimes in because I've yet to set mine up i'll let you know what I've read. if you use an old style charger that has a 6 or 12 amp setting they don't need a battery in the loop because the newer chargers have a smart type feature built in so you'd have to use a battery with them to keep it charging. I've heard the lower setting works great especially if you are not in a hurry and can let it cook for a day or two or three.

if you haven't already read the thread we made last year here's the link and you might see that i'm one of the members asking a ton of questions. i'm pretty confident now that i can do it fairly easily and just trying to get a spot where i can set the tank. i originally was going to put in a garage i lease, but leaving it on more than 24 hours without being there to check on it has be re thinking that so i'm putting it in my home's garage now.

http://www.garagejournal.com/forum/showthread.php?t=237752&highlight=homemade+electrolysis

I've also seen and heard where some of the guys are using their old CPU's and other things for a power source and even getting the power down in the 1.5-3 amp range to cook slower.

don't put any stainless or chrome or nickel or copper or those type of metals in the soup and try to keep your charger's wires up out of the water too and you should be fine.

i was going to use a Costco storage tub until i found a sort of heavy duty plastic horse trough that will hold some of my big vises. a lot of guys use the 5 gallon buckets and if you have something bigger and use a bigger Rubbermaid make sure to support it across the top because that amount of water tends to split some of them.

good luck

Scooter: this is a good place to put up a parts vise or ask for parts and pictures would help so we can see what good parts you have or what you might need. there is also a vise parts thread in the general parts section if you want to post there too.
 
Last edited:

Fretters

Well-known member
Joined
Jan 25, 2014
Messages
4,217
Location
South Yorkshire, England
One for the E-Tank experts.

What is the best type of battery charger or power supply to use for electrolysis?
I will be using a 5 - 7 gal. bucket.

The perfect choice is a variable voltage bench top power supply with current limiting. Second would be either a battery charger or an old computer PSU. The PSU will have a smoother, regulated output, (they also have both 5V and 12V outputs), but an old style TX based battery charger is more reliable longterm, as the PSU is a switchmode, which aren't as robust as a transformer.
 

Tacoma bo

Well-known member
Joined
Dec 15, 2013
Messages
49
littlestown 112 vise broken.

I'm either parting out or accepting main screw. Lets get this little guy, or your little guy back in action either way. Let me know what parts you need to finish OR, let me know how I can get your littlestown main screw.

Cheers

Hey scooter,

I just picked up a littlestown not too long ago that is missing a swivel base. I could go either way with it. Here's a look at it. It's a no. 81.
 

Attachments

  • image.jpg
    image.jpg
    144.6 KB · Views: 44

Hemi49

Well-known member
Joined
Feb 13, 2015
Messages
282
Location
Rush (Rochester), NY
Trijeff and Vintage nut: Thanks for the info and the offer to make jaws! I have contacted KMS

For now I plan to clean up the vise to see if any major issues. I do know 1 of the jaw screw holes is stripped out, has anyone ever repair with a helicoil?

Also, to remove the spindle shaft. Looks like the nut has 2 tangs that need bent upwards-- is this correct? First image

Not sure how old vise is but I do see a C12 on the base of the housing.

Thanks all! Will be in NYC for a few days- chat later

The C12 is actually 6 42.........Look closely at your picture and you'll see it....The vise was made June 1942....
 

BFBOB

Well-known member
Joined
Sep 20, 2011
Messages
5,073
One for the E-Tank experts.

What is the best type of battery charger or power supply to use for electrolysis?
I will be using a 5 - 7 gal. bucket.

FLAME SUIT=ON
What has worked for me is the cheapie from Harbor Freight, the older one that's nearly perfectly rectangular. Has 6 & 12 Volt settings, an ammeter, 2A and 10A charge settings and a 50A start setting. On sale they were only $25, so I got several, figuring I'd blow 'em up in short order. Nope. The first one is still working close to a year and many weeks worth of e-tanking later. The 6-volt setting lets you set a very low current level if you like for delicate things. I've used the 50A setting for kind of kickstarting some really heavily rusted things that didn't want to percolate at all at first. Of course, you can't go off and leave it like that, just a minute or so to get the ball rolling.

I think the current version doesn't have a 6V setting, but I've used it so rarely it hardly matters. The current setting doesn't seem to matter much. I just set it so the water doesn't get more than lukewarm. If I had finer control, I wouldn't know what to do with it; just toss it in the tank and inspect for progress every so often works for me. Sometimes it takes an hour, sometimes it takes a week.

I've only used it on tools of various sizes, ranging from sockets to vises. Don't sweat it - just hook up something, toss stuff in the bath and see what happens. My tank is a24" tall plastic trash can, probably 10-15 gallons

You want to start doing whole cars, we may have to reexamine the issue.:shocking:
 

Lu-Max

Well-known member
Joined
Jan 8, 2014
Messages
745
I mentioned this in the "Vises" thread, but if you are looking for a great way to move your heavy vises around it is hard to beat a hydraulic lift table.

There are some really nice ones out there, but they come with a price tag to match. I found one at Harbor Freight on sale for $260, then combined it with a 25% off coupon and walked out the door at under $200.

Rated capacity is 1000 pounds, and today I tested it by lifting 612 pounds of vises to the maximum height which is ~36". Didn't even break a sweat. Trigger release allows for a slow descent, or you can squeeze it hard and drop it quickly. It does not have an uplock like the more expensive models, but I plan to add one of my own. Harbor Freight item #60438.

20150625_133027_resize_zpsnjncgs0s.jpg
 

Hemi49

Well-known member
Joined
Feb 13, 2015
Messages
282
Location
Rush (Rochester), NY
I recently bought a 5191 Craftsman vise built in May 1952.....After disassembly it was evident that only a cosmetic freshening was needed.....Mechanically it is pristine with virtually no noticeable wear....After teardown I dunked it in Simple Green for about 24 hours......I rinsed all the components off with water and then dried them with towels....Once dry I continued the cleaning using picks, wire brushes and Q-loc pads on a 2" angle die grinder....
 

Attachments

  • IMG_20150619_085514_hdr.jpg
    IMG_20150619_085514_hdr.jpg
    144.3 KB · Views: 69
  • IMG_20150619_085121_hdr.jpg
    IMG_20150619_085121_hdr.jpg
    136.3 KB · Views: 56
  • IMG_20150619_084942_hdr.jpg
    IMG_20150619_084942_hdr.jpg
    147.2 KB · Views: 53
  • IMG_20150619_085104_hdr.jpg
    IMG_20150619_085104_hdr.jpg
    131.1 KB · Views: 55

Hemi49

Well-known member
Joined
Feb 13, 2015
Messages
282
Location
Rush (Rochester), NY
I painted the Craftsman 5191 vise with the Rust Oleum paint shown in the photo....Overall I am very pleased with the vise and the cleaning after 63 years of service....
Brent
 

Attachments

  • IMG_20150625_114815_hdr.jpg
    IMG_20150625_114815_hdr.jpg
    132.7 KB · Views: 54
  • IMG_20150625_110316_hdr.jpg
    IMG_20150625_110316_hdr.jpg
    141.7 KB · Views: 54
  • IMG_20150624_105141_hdr.jpg
    IMG_20150624_105141_hdr.jpg
    136.4 KB · Views: 51
  • IMG_20150624_105322_hdr.jpg
    IMG_20150624_105322_hdr.jpg
    142.1 KB · Views: 57
  • IMG_20150625_115037_hdr.jpg
    IMG_20150625_115037_hdr.jpg
    141.5 KB · Views: 73
  • IMG_20150624_105103_hdr.jpg
    IMG_20150624_105103_hdr.jpg
    144.2 KB · Views: 68
  • IMG_20150625_101431_hdr.jpg
    IMG_20150625_101431_hdr.jpg
    143.3 KB · Views: 62

McBrownie

Well-known member
Joined
Mar 27, 2014
Messages
1,827
Location
Cleveland, OH
I painted the Craftsman 5191 vise with the Rust Oleum paint shown in the photo....Overall I am very pleased with the vise and the cleaning after 63 years of service....
Brent

Hemi, nice job on a great vise. Has anyone figured out who made the 519x series for Craftsman?
 
OP
D

drivesitfar

Well-known member
Joined
Oct 23, 2013
Messages
36,047
Location
Pacific Northwest
Hemi: nice job on the Craftsman and thanks for sharing your process.

McB: i should start a thread about the Craftsman 519x series because I've been saying i would maybe a year ago now. no we don't know and we just have ideas. here's the thinking that i can remember without looking at my notes i can't find at the moment.

1) they are stamp dated like a Rock Island and Rock Island did make vises for Craftsman pre WWII.

2) they look like a Reed with the oil hole and vise nut holder

3) I was told by a 80 year old machinist that i bought my almost original condition 5196 that my vise was made by Starrett. if you look at the handles they do resemble Starrett.

4) they were made after WWII when Wilton was almost bankrupt, Rock Island was winding down to almost nothing and selling to Britman Electric, Starrett's history i'm not up to speed on yet and they were taking over Athol and putting their name on the vises they'd owned for many years before WWII and some say Columbian made them because Columbian was making the less expensive Craftsman models.

5) My 2 cents.


cheers

Lu: thanks for sharing you HF deal and reminding me i need one. i have a Jet pallet jack lift that is too big for moving a vise and my pallet jack doesn't get me near the right level to move some of my monsters. i just saw my local Jet dealer has a scratch and dent sale on a 1200 model of your lift for $400, but $200 does sound better. i just don't know how to walk in the front door of that place without breaking out in hives yet. i bought a propane torch for weeds about 3 months ago and haven't opened it yet because i found out salt works great. maybe i'll take the weed burner in for a credit toward your lift and how do i get a coupon since i don't open their emails? or do i just need to open one?
 

biowrench

Well-known member
Joined
Dec 25, 2013
Messages
100
Cross post from the "Everything you need to know about bench vises" thread, which seems to be a dead zone.

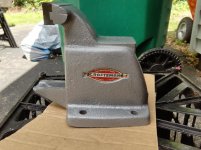
Anyway, the swivel lock bolt assembly being sold on eyba as a "Wilton Vise Lock Bolt & Nut 604-512 10203-51" fits an old Columbian 604 adequately. Casting isn't very sharp but then neither am I.

How such things get lost I dunno, the PO didn't miss it, but glad to find a replacement that didn't cost more than the vise itself.
 
OP
D

drivesitfar

Well-known member
Joined
Oct 23, 2013
Messages
36,047
Location
Pacific Northwest
Lu: if you happen to see another one or a special feel free to PM me or post here. thanks and again nice looking group on the lift.

Bio: thanks for posting. it looks like you are a fairly new member, but you have a good sense of humor and you know how to make a good post. are you a member of other forums and do tell if you want to.

some of these old vises are always needing parts and i tend to pick up as many parts and broken vises as i can if in the room with other tools i'm buying. only thing is organizing them so i can find them later which i'm working on.
 

Lu-Max

Well-known member
Joined
Jan 8, 2014
Messages
745
Drives: Try HERE


Today I decided to use the 90 degree plus, very dry weather to spray paint some parts outside using the sun to help cure the paint. I also learned that if you want to create a very effective bug repellant spray, you might want to make it smell the exact opposite of spray paint. Sheesh!
 

bubinga

Well-known member
Joined
Jul 26, 2014
Messages
12,744
Location
Bridgeport Ohio. (Across River From Wheeling WV)
Drives: Try HERE


Today I decided to use the 90 degree plus, very dry weather to spray paint some parts outside using the sun to help cure the paint. I also learned that if you want to create a very effective bug repellant spray, you might want to make it smell the exact opposite of spray paint. Sheesh!
Ya want a nice shine, and l think it helps the cure, bake it at 200* for about a half hour-45 minuets. Wait till the wife goes out.
or be single like me, do what you want, nd have a grinder in the kitchen.
 

bagged89s10

Well-known member
Joined
Mar 13, 2005
Messages
4,607
Location
CT
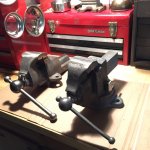
2 vises after a simple green bath. The athol 623 was sitting in simple green for probably a week since I didn't have time to take it out and since it. The paint rinsed right off!

ImageUploadedByTapatalk1435409211.438169.jpg
 

Lu-Max

Well-known member
Joined
Jan 8, 2014
Messages
745
So if I want to just get the layered gunk off the outside of a fairly nice vise while keeping the original paint in as good of condition as possible, it sounds like Simple Green is not a good choice.

What's your go-to cleaner that won't damage paint?
 
To avoid these ads, REGISTER NOW!
Top Bottom