To avoid these ads, REGISTER NOW!

What did you do "IN" your garage today?

crewchief888

Well-known member
Joined
Dec 3, 2009
Messages
13,750
Location
NW indiana
last sunday the front brakes on the wifes saturn vue decided to not release...

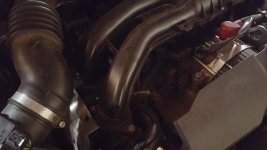
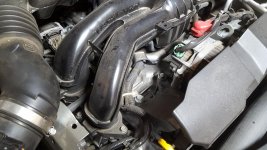
talked to my GM tech buddy on sunday, and we pinpointed it to the front brake hoses

of course we got slammed with a snowstorm mid-week, 10"-12" of heavy wet snow, and i'm still in "clean-up mode" here finally got around to ordering the hoses on friday night.

picked them up this morning, both both front hoses replaced, brakes bled, and back on the road by late this morning.

for once i actually worked inside the garage...:bounce:

too bad it was colder inside than it was outside :(


:beer:
 
To avoid these ads, REGISTER NOW!

vartz04

Well-known member
Joined
Feb 17, 2009
Messages
1,882
Location
LaSalle County IL
Cleaned up the shed (garage) Flipped my air hose reel around and sat and watched some shows on Netflix and smoked a cigar. Bunch of estrogen in the house for my sister in laws "diaper shower" so me and the dog hid in the shed.
 

bodyguy16

Well-known member
Joined
Nov 8, 2009
Messages
1,016
Location
QC, Canada
Ripped some osb to make "mouldings" for the attic access door in the garage. I camt wait to start painting! uploadfromtaptalk1456614028059.jpg

Sent from my SM-G903W using Tapatalk
 

PCustoms

Well-known member
Joined
Jul 23, 2011
Messages
23,172
Location
VT
Took down the "Paint Booth" (3-mil plastic stapled to ceiling and cardboard on the floor) and swept up a bit.

Did one last test fit and photo shoot before boxing it up for shipment:

25317587695_6386f9538c_b.jpg
 

steveivy

Well-known member
Joined
Jan 20, 2016
Messages
150
Location
Gilbert, AZ
Friend came over and we installed two exterior doors in the new shop:

Shop side:

ImageUploadedByTapatalk1456619861.929098.jpg

ImageUploadedByTapatalk1456619884.493164.jpg

Garage side:

ImageUploadedByTapatalk1456619917.812254.jpg

About 5 hours of work for two amateurs.
 

pepi

Well-known member
Joined
Mar 27, 2013
Messages
2,883
Location
Woodstock, GA
I dig the hell out of finding ideas that make so much sense it is nuts. This will work on any raw steal table or tool table surface. The Scotch-Brite pad will not harm the surface or distort it.

Tools required jitter bug, Scotch-Brite pad, wd40, and lacquer thinner, or wax and oil remover, if the lacquer is to strong for ya.

Have a look how these turned out, must have pushed that jitter bug around a whopping 20 minutes. It took longer to wipe down the surface.

attachment.php


attachment.php


It was just way to easy, the jitter bug was the unknown, not thought of before.
 

Attachments

  • IMG_1212.jpg
    IMG_1212.jpg
    108.7 KB · Views: 922
  • IMG_1213.jpg
    IMG_1213.jpg
    103.7 KB · Views: 924
Last edited:

jpickar

Well-known member
Joined
May 21, 2010
Messages
964
OH, man do I feel dumb. I have one I just never heard it called that before! Where Have I been? Thanks
John
 

rayra

Well-known member
Joined
Dec 1, 2014
Messages
4,724
Location
Escaped from Los Angeles
So last night and today I built a new set of tent / awning poles, using EMT metal conduit. I'd previously made a set out of PVC -
http://www.expeditionportal.com/for...compact-flexible-design?p=1864380#post1864380
and while those worked great, their overall volume was more than I wanted. I'd only made the PVC set because I couldn't find an affordable set of the old Coleman-style metal poles. I found some online but their pricing + shipping etc was just ridiculous.
The other day while cleaning up and re-arranging my garage workspaces I was messing with some conduit scrap and a subsequent discussion with my electrician-neighbor gelled the idea to make a set out of EMT.

The idea uses 3/4" ID EMT for the lower / outer half and 1/2" ID EMT as the upper / inner half, the riser. I found a variety of pipe-end plastic guard (meant to keep the raw pipe from chewing thru wiring) which fit close with the inner pipe in place. This was mostly to limit rattle and noise. The nice finished look is a happy byproduct.

EMTawningpoles10_zps6pxjiwjq.jpg


I swiped the link-pins from the fatter PVC set mostly as a cost savings, but the larger size also provides a big hoop you can hang things from, like a wet towel, etc. They have a 5/16" dia steel pin, so I drilled all the holes at 11/32" to give me a little play for misalignments and such.

I used a V-notch block in my cheap drill press to help me center the holes in the pipes. I also center-punched the drilling locations to help start the 1/8" pilot holes. Stacked up some scrap to support the other ends of the poles as I did the drilling. Took some work with a ******* file afterwards to clean up all the flash and raised lips in the drilled holes.

EMTawningpoles01_zps0fqqqdwe.jpg
EMTawningpoles02_zpsdl47js1q.jpg
EMTawningpoles03_zpslgewrvry.jpg


To make a protruding pin at the top of the pole, I used some 1/2" OD wood dowel in 1" lengths to fashion end plugs and drilled their centers to pass thru a 1/4"-20 carriage bolt, 2-1/2" long. Gives me a pin that sticks up about 1-3/8". These were glued in place w/ caulk. I was going to use epoxy, but held off in case I figure something better to use for a pin. All manner of things would work.

EMTawningpoles05_zpsg0j7pho1.jpg
EMTawningpoles06_zpsjhrhvsli.jpg
EMTawningpoles07_zps0abaqbbl.jpg


Then ends of the 1/2" pipes were wrapped in masking tape to bring them up to the inner diameter of the 3/4" pipe. Also to control rattle / noise.

EMTawningpoles04_zpsio47elko.jpg


The 1/2" pipes were drilled with a hole near the top, as were the 3/4" pipes, so the sets can be pinned in the 'closed' position. Then the 1/2" pipes were drilled in 6" increments for variable height settings for the poles. Down to about 9" from the bottom.

I sized my sets to 48" for the 3/4" pipe and 51" for the 1/2". About 52-1/2" overall, collapsed. Which will fit fine in my future 54" drawer platform. Fully extended they're a little over 7' tall, just fine for my vehicle awning project. Total cost for this set of 4 poles is about $33 and half a day of fooling around.

EMTawningpoles08_zpsincn9yhl.jpg
EMTawningpoles09_zpsadhfordn.jpg
 

bmxdad

Well-known member
Joined
Feb 18, 2014
Messages
2,539
Location
Puyallup, WA
Started fabbing up a band-saw stand, made room for the new lathe that i pickup tomorrow, rewired my trailer, and hung a 25' air reel .... good day today
 

Attachments

  • lathe1.jpg
    lathe1.jpg
    86.8 KB · Views: 89
  • bandsaw_stand4.jpg
    bandsaw_stand4.jpg
    142 KB · Views: 92

firworks

Well-known member
Joined
Jun 29, 2015
Messages
4,080
Location
IL
Tools got a bath today. On that CV I replaced, it tore and then spun and so everything behind the rotor was covered in green CV grease with black dirt in it. All the tools I used for the job were disgusting.
IGpXIE7.jpg


They're all shiny and nestled back in their toolbox now.
 

Outlawmws

Well-known member
Joined
Aug 9, 2011
Messages
39,285
Location
The Badlands
So last night and today I built a new set of tent / awning poles, using EMT metal conduit. I'd previously made a set out of PVC ]

Nice job on the poles! did you use the same blue needs on the bottom (leaving it open) or did you use some cane tips for that? (closes it and it is less likely to sink into dirt, - less of a concern if you just use them on hard surfaces)
 

ambenz

Well-known member
Joined
Dec 12, 2010
Messages
4,237
Location
NW Chicago Suburbs
Okay, checking lug tightness on my pony since I got to drive it around today (it was 60F here today!) and I couldn't find my lug key!
Well I eventually did find it and noticed I never registered my key number!
So if I lost it, I could never get a new key...so as a Public Service Notice...
Check and register your wheel lug keys people!!
lug%20regr_zps8v3ueqyt.jpg


After that was done, I had a "catch all box" that was failing next to my toolbox so I had some rearranging to do...cleaned up around my toolbox.
cleanup_zpsmvwe36x1.jpg


box1_zpslkolujcx.jpg


got rid of the cardboard box and used a bucket I had until I can figure out a better solution.
toolbox_zpst843cecb.jpg


I worked on the second body of my RC car as I did a lot of tape and pin stripe work to get it to look like my human size Mustang.
I use the RC car for car shows, the kids really get a kick out of seeing my mini me.
rc2_zpshh6cqiyy.jpg


More to come next weekend on that...

I got burned on a flea Market find and bought a Fender 10G amp for the same price as a new one, and this one had an issue!
Usually when I got something like this, I bench test it first and open it up.
fender28w_1_zpsi6drcder.jpg

Maybe it was good I got a used one, now I know the issues with this.

Opening the back, I notice broken plastic parts...
fender28w_5_zpssgn2wfay.jpg


Noticed the gig plug was busted and that's where the plastic parts came from...
fender28w_4_zps3vjvp2tv.jpg


So I fixed it with some plastic and a zip tie...worked great! These plugs are so cheap, you would think they would make it out of metal as these plugs get yanked out a lot.
Well, I cleaned up the potentiometers and switches and it tested out great!
fender28w_3_zpsi0axygrh.jpg


Last time I buy something on a whim....*sigh*
I suppose in the end, it all worked out and I have a better than new amp.
 
To avoid these ads, REGISTER NOW!

rayra

Well-known member
Joined
Dec 1, 2014
Messages
4,724
Location
Escaped from Los Angeles
Nice job on the poles! did you use the same blue needs on the bottom (leaving it open) or did you use some cane tips for that? (closes it and it is less likely to sink into dirt, - less of a concern if you just use them on hard surfaces)

same fittings on the bottom. Most of my stomping grounds are in the high deserts in SoCal. But a closed cap would be better in damp dirt
 

kaymccampbell

Well-known member
Joined
Feb 27, 2015
Messages
29,582
Location
Upstate New York
Went down and started chopping up steel studs for the soffit framing to wrap the ducts and plumbing. LOVE steel studs for this purpose. No splits or tons of screws or nails and the whole thing jiggling apart. Got a whole bunch of it done and sheetrocked. Ran out of corner bead and studs. And my angle widget for getting in tight corners died, too. The gears stripped.
 

ckadams00

Well-known member
Joined
Sep 12, 2011
Messages
1,273
Location
Seattle, WA
Pulled out the mower and got it ready for spring. Pulled out the snow blower and got it ready to put away. Stripped all the paint off of a little Wilton 2" baby with powrarm, cleaned it up and hit it with a coat of self etching primer - almost ready for paint.
 

copperbob

Member
Joined
Feb 7, 2016
Messages
6
Location
Chicago burbs
Well...i am rebuilding a 350 transmission for my '71 Buick skylark convertible. This is my first time doing a transmission. I have it stripped out, clean and painted. Started the rebuild and wish I knew more....hahhaa
 

kaymccampbell

Well-known member
Joined
Feb 27, 2015
Messages
29,582
Location
Upstate New York
Well...i am rebuilding a 350 transmission for my '71 Buick skylark convertible. This is my first time doing a transmission. I have it stripped out, clean and painted. Started the rebuild and wish I knew more....hahhaa

Transmissions aren't hard, just complicated. Make sure everything is extra clean and remember or write down where everything goes. One little ball on the wrong side of the plate or in the wrong channel and you get to take it down and do it over. If you can swing it, get a good rebuilt or new converter. Trying to flush one on the cheap will just fill your fresh rebuild with **** at best.
 

Ping Pong

Member
Joined
Feb 20, 2016
Messages
7
Location
Denton Maryland
Put the blower back on the race car and fired it up before heading to Gainesville. Planning on doing the points race and the National. Wife is looking forward to 2 weeks without her resident whack job.
 

NICKS

Well-known member
Joined
Nov 11, 2015
Messages
90
Location
IOWA
2003 BMW X5.
Debadged with 2 stage paint correction using HD cut and HD Polish on microfiber pads, topped off with Meguiars M21 paint sealant
 

Attachments

  • 20160228_112924.jpg
    20160228_112924.jpg
    142.2 KB · Views: 147
  • 20160228_112829.jpg
    20160228_112829.jpg
    142.5 KB · Views: 158
  • 20160228_112818.jpg
    20160228_112818.jpg
    145.8 KB · Views: 150
  • 20160228_110241.jpg
    20160228_110241.jpg
    131.9 KB · Views: 146
  • 20160227_131929.jpg
    20160227_131929.jpg
    148.1 KB · Views: 163
  • 20160226_200107.jpg
    20160226_200107.jpg
    132.5 KB · Views: 154

NewShockerGuy

Well-known member
Joined
Oct 12, 2010
Messages
2,481
Location
Northern Virginia / DC
I had a spare set of hella super tones from when I had them on my WRX... I since bought new ones for my STi, thinking these were bad, when in reality it was the relay that was bad...

Re-painted the grills bright red, and installed them on the truck. Now I have the two stock horns and the two front facing supertones.... it's LOUD AF!

I'll get better pictures, these are ******.

Really simple to wire up, incase anyone needs the info or it helps someone:

Relay:

Pin 30: + battery
Pin 86: blue signal wire of exsiting horn wire (There was black and blue wires)
Pin 85: Ground
Pin 87: + wire going to horns.

(Then just ground each horn to the body/frame/metal on metal..etc.)

Works with my keyless entry/panic and pressing the horn switch.

-Nigel
 

Attachments

  • 1.jpg
    1.jpg
    84.3 KB · Views: 92
  • 2.jpg
    2.jpg
    99.7 KB · Views: 83
  • 3.jpg
    3.jpg
    78.6 KB · Views: 84
  • 4.jpg
    4.jpg
    74.9 KB · Views: 81

Jazz1

Well-known member
Joined
Jan 3, 2016
Messages
4,188
Location
Thunder Bay On.
Glued top rail of this interior frame for my car. I will start installing if i can stay focused. Cleaned up a 6/12v battery charger that someone destined for the dump..Charger works, ordered amp gauge from China for $3.99. These old chargers are handy as a low amp power source for projects,,
 

Attachments

  • IMG_3088.jpg
    IMG_3088.jpg
    145.7 KB · Views: 98
  • IMG_3087.jpg
    IMG_3087.jpg
    147.1 KB · Views: 95
  • IMG_3089.jpg
    IMG_3089.jpg
    143.8 KB · Views: 93
Last edited:

NUTTSGT

Super Moderator
Staff member
Joined
Sep 14, 2009
Messages
51,038
Location
Northern Central Ohio
Unloaded some "new to me" stuff, including an older than me drill press. I'll get some pics up tommorrow.


My apologies to anyone waiting on the pictures. I got way too busy this weekend. The local volunteer FD is clearing out a house for a possible training fire. The house belonged to a hoarder, she passed away and the township ended up with it. We started cleaning it out. We filled a 20 yd dumpster with scrap metal, filled a 40 yd with trash, another 20 yd with trash on Saturday. On Sunday, they came out, picked up the scrap metal, weighed and dumped it, brought it back out. We started on the garage, had another pile of scrap and filled that 20 yd dumpster about 3/4 with trash, still have a back corner of the garage and another back room to clear out.

The scrap metal dumpster weighed 6k lbs and there is more.
 

exranger06

Well-known member
Joined
Aug 9, 2015
Messages
1,686
Location
CT
I decided to see what all the hubbub is with those Costco LED lights that everyone here loves so much. Picked one up at BJ's yesterday, and hung it up today. This is my new "underhood" light. It illuminates the engine bay when I'm working on cars. I realized how badly I needed one after replacing the thermostat and radiator in my truck a few months ago. I need a permanent outlet to plug into; that's on my list of electrical upgrades that I'm working on. You can see some comparison pics with the light on and off. I'm pleased with it.
 

Attachments

  • 20160229_190402.jpg
    20160229_190402.jpg
    133.4 KB · Views: 151
  • 20160229_190414.jpg
    20160229_190414.jpg
    150.3 KB · Views: 152
  • 20160229_190729.jpg
    20160229_190729.jpg
    147.1 KB · Views: 141
  • 20160229_190737.jpg
    20160229_190737.jpg
    157 KB · Views: 154
  • 20160229_190457.jpg
    20160229_190457.jpg
    144.4 KB · Views: 141
  • 20160229_190507.jpg
    20160229_190507.jpg
    151.8 KB · Views: 150
To avoid these ads, REGISTER NOW!
Top Bottom