To avoid these ads, REGISTER NOW!

1966 F100 EcoBoost Engine Swap (EcoBoosted)

Status
Not open for further replies.

walt460

Well-known member
Joined
Nov 8, 2014
Messages
79
Location
Nevada, Vegas area
So in that box of wires for Eco 2 I found the three harnesses below.

IMG_20160229_143354517_zpssvidxwf4.jpg


Top left harness is the engine compartment harness, (base part number 12A581). This harness runs completely around the engine compartment and goes through the firewall just below the A pillar on both sides. It contains all the PCM wiring and connects to the engine as well as supplying electrical power for everything in the truck.

Top right is the chassis harness that runs right down the left side frame rail to the back of the truck (14405) and has all the fuel pump wiring plus rear ABS and all rear lighting.

Bottom right harness is the dash harness (14401) which has Ignition switch and PATS wiring and connects to the trans floor shifter (or column shifter if so equipped)

They look nice on my kitchen floor, no?
 
Last edited:
To avoid these ads, REGISTER NOW!

walt460

Well-known member
Joined
Nov 8, 2014
Messages
79
Location
Nevada, Vegas area
So, moving the 12A581 harness to my dinning room floor, just pretend the blue tape is the truck's firewall.
IMG_20160229_144346323_zpsl3t3nmkm.jpg

The big lump in the middle just below my fan is the fuse box. It mounts just in front of the radiator.
 
Last edited:

rmalkow2

Well-known member
Joined
Jun 26, 2009
Messages
4,087
Location
Brighton, MI
14401 should be connecting through the firewall to that large engine harness. Also in addition to the things you named it has connections for cluster, audio, infotainment, climate control, IP lighting, IP sensors, air bags, power points, ground eyelets to provide stable grounding to all the aforementioned and more. Lots of fun stuff in that harness to deal with. Get yourself a good wiring manual if you don't already have one.
 

walt460

Well-known member
Joined
Nov 8, 2014
Messages
79
Location
Nevada, Vegas area
Now if I add the Chassis harness, it connects on the far left and runs towards the back of the truck, or in this case, into my living room floor.
IMG_20160229_144348238_zpsdmfkhrgz.jpg

and as you can see that 14405 harness is really long, like 16 feet!
IMG_20160229_145742524_zpsnsd6tksc.jpg

It really helps to have an empty house available it you want to lay out some 2015 F150 wiring!
 
Last edited:

walt460

Well-known member
Joined
Nov 8, 2014
Messages
79
Location
Nevada, Vegas area
And finally, if you add in the dash harness (14401) it would fit about like this, and the black module on the far right is the BCM (body control module) which connects to both the 14429 and 14401 harnesses.
IMG_20160229_151135876_zpssv6p7ujl.jpg

and the 14401 also connect directly to the 14429 engine harness.

As a next step I will taking the 14A005 chassis apart and stripping out just the wires we need to control the fuel pump, monitor the fuel line pressure, and get the fuel level info. I will take some pics as I go so you can see how to strip a harness without damaging the wires you really want. Tomorrow maybe.

Walt
 

walt460

Well-known member
Joined
Nov 8, 2014
Messages
79
Location
Nevada, Vegas area
14401 should be connecting through the firewall to that large engine harness. Also in addition to the things you named it has connections for cluster, audio, infotainment, climate control, IP lighting, IP sensors, air bags, power points, ground eyelets to provide stable grounding to all the aforementioned and more. Lots of fun stuff in that harness to deal with. Get yourself a good wiring manual if you don't already have one.

Thanks for responding! Will take all the help I can get!

Well, 12A581 comes through the firewall and connects to the 14401, and yes there are a ton of things that the 14401 connects to, most of which we will not need. We are going to keep the Cluster, the ignition wiring, and the trans shifter wiring.

I have done harnesses for 2011-2014 Ecoboost swaps several times now. This is my first 2015, but everything looks about the same. I do have manuals and I may post some documents that help others identify which connectors you need to keep and which you can cut off and strip out. The whole idea here is to instruct others so they can do this themselves if they want to do an Ecoboost swap themselves.

Walt
 
Last edited:

rmalkow2

Well-known member
Joined
Jun 26, 2009
Messages
4,087
Location
Brighton, MI
I commend you Walt. That's an awesome task ahead and one that I'm sure will benefit many as they start using this Ecoboost drive train.
 

walt460

Well-known member
Joined
Nov 8, 2014
Messages
79
Location
Nevada, Vegas area
Walt, do you do this for a living or is it a side type of thing? (sorry if I missed it earlier)

Me? No I am retired, from Ford Motor after 32+ years, most of which I sent in Powertrain Electronics including Control System Design and PCM design. I see the recent PCM systems as puzzles that I like to solve to allow people to install late-model Ford Powertrains into older Ford cars and trucks.

I have done modified production harnesses for several 5.0L/6R80 and 3.5L EB/6R80 applications, some for friends and some for money, but I am trying like heck to get Ron Francis Wiring or other quality wiring suppliers to step up and provide NEW harnesses, and I know some progress is being made in this area.
 
OP
T

TimeWarpF100

Well-known member
Joined
Aug 21, 2010
Messages
6,784
Location
not here
Me? No I am retired, from Ford Motor after 32+ years, most of which I sent in Powertrain Electronics including Control System Design and PCM design. I see the recent PCM systems as puzzles that I like to solve to allow people to install late-model Ford Powertrains into older Ford cars and trucks.

I have done modified production harnesses for several 5.0L/6R80 and 3.5L EB/6R80 applications, some for friends and some for money, but I am trying like heck to get Ron Francis Wiring or other quality wiring suppliers to step up and provide NEW harnesses, and I know some progress is being made in this area.

Looking good Walt!

I have been very sick since monday. Laid down for a rest Tuesday 3pm Just got up now . . . My time clock is pretty messed up. Do not dare take any antibiotics as afraid what will happen if I do.


Update: EcoBoost 1 My wheels will be in production soon!
 

brittf

ALLIANCE MEMBER
Joined
Jun 19, 2014
Messages
91
Walt

Where do you source your plugs, sockets, terminals, connectors, etc. when you modify a late model Ford harness? I'm putting a Ford Coyote engine in my 1967 Ford Mustang Fastback build and I suspect I'll need to modify the harness to be able to route the harness so it is hidden. I hate to cutoff and splice the existing connectors. I'd rather use new connectors and terminals. I built a harness from scratch for the Ford 4.6 DOHC I installed in my Factory Five Racing Cobra to connect up a F.A.S.T engine management unit. I found most of the connectors needed for the coils, injectors, sensors, etc. but don't recall where I found them.

TimeWarpF100 is doing a great build. :thumb: While not intimidated by most of what I do I think I would be intimidated by what he is doing.

Thank you.


Britt
 

nonhog

Well-known member
Joined
Nov 6, 2007
Messages
2,449
Location
Arizona (Tucson)
Me? No I am retired, from Ford Motor after 32+ years, most of which I sent in Powertrain Electronics including Control System Design and PCM design. I see the recent PCM systems as puzzles that I like to solve to allow people to install late-model Ford Powertrains into .

:thumbup: Very cool. My buddy TestPoint on Volvo forums figured out the wiring Ford to Volvo while I bought a Converse kit. We both put 5.0 Explorer engines into 240 series Volvo's. Both had James Henson tune as needed.

Glad to see you like that stuff, not my thing. :)
I am close but still have a few loose ends. MIL, O/D switch and such.

OK back to the regularly scheduled thread. Very entertaining one at that! :thumbup:
 

walt460

Well-known member
Joined
Nov 8, 2014
Messages
79
Location
Nevada, Vegas area
OK, today I stripped out one of three harnesses that re needed for Eco 2. I started with the easy one, 14405, which is the chassis harness that runs from left side of engine compartment to the back of the truck, it runs right along the driver's side frame rail.

14405 contains the fuel pump wiring and the fuel tank sender wiring that we need, along with a whole bunch of ABS, lighting, evap emissions, and even the back up camera, trailer lighting and electrical locking diff.

The basic process I will list out here for 14405 will work for all the harnesses. Just take your time and be careful, it is not easy to make corrections.
1. Cut off all the clips used to secure the harness to the vehicle
IMG_20160303_124004657_HDR_zpsu6vvmvpw.jpg

I use a razor blade knife to cut the tape along one side of the clip, and then peal it off.

2. After all the clips are cut off, start at one end of the harness and remove all the sleeving used to protect the wiring. You are reversing the process that was used t make the harness, and you will find that inside the sleeving the wires are taped together at every connector and about every 9-10 inches.
IMG_20160303_142750119_zpsiyg22dpn.jpg

Keep going until you have stripped all the sleeving off the harness completely.
IMG_20160303_135409498_zpstkfid6hl.jpg
 

walt460

Well-known member
Joined
Nov 8, 2014
Messages
79
Location
Nevada, Vegas area
3. Now find the connectors for the components that you want to keep and use. In our case that is the Fuel pump driver module (Black 8-pin connector), the fuel pump and sender connector (Gary 4-pin connector), and the Fuel Tank Pressure sensor (Black 3-pin connector). Find those connectors and mark them, I used 3/8" label gun to make labels.
IMG_20160303_144931810_zpsrbwqs1uc.jpg


4. Then, start at one of those connectors and start following the wires, keeping just the ones you need separate as you go.
IMG_20160303_143909272_zpsnagtyytz.jpg


I use tie wraps to keep the wires that I want together as I go. You have to cut the tape that holds all the wires together every time you get to one, but just keep going and add a tie wrap every 8-9" as you go.
 

walt460

Well-known member
Joined
Nov 8, 2014
Messages
79
Location
Nevada, Vegas area
5. when you get to the other end of the harness there is a large black 34-pin connector, this is what connects 14405 to the engine compartment harness 12A581.
IMG_20160303_150202472_zpszglb7fxq.jpg


I took the connector apart and removed the wires that I did not want, which requires some special tools. You can just cut off those unwanted wires, but be careful not to cut the wrong wires!
IMG_20160303_150220123_zpswbto3ui9.jpg


IMG_20160303_152209794_zpsgphiroo2.jpg


When we put this harness into Eco 2 I want to keep that big 34-pin connector in-place until we know the engine runs correctly, then I likely will replace it and put those 9 wires into a smaller connector for both harnesses. That will be a good time to adjust the length of the harness to better fit Eco 2, and then wrap it securely with tape and sleeving so it again looks like a factory harness.


6. Trim the tie straps, label the ********* 34-pin connector, and you are done with 14405. This harness took me 2-1/2 hours to complete.
IMG_20160303_152318498_zpsu4gklifu.jpg
 
Last edited:

walt460

Well-known member
Joined
Nov 8, 2014
Messages
79
Location
Nevada, Vegas area
Tomorrow I will start on the dash harness 14401. That is a far more complicated harness, with about 30 connectors, but my process will be the same. In 14401 we only need the ignition switch, the cluster, trans shifter, and the OBDII port, but it contains a lot of interconnects that I will need to deal with to maintain the integrity of the CAN bus, and system grounds. This will likely take a whole day.

Walt
 
Last edited:

rmalkow2

Well-known member
Joined
Jun 26, 2009
Messages
4,087
Location
Brighton, MI
Nice careful work Walt. I like your process and I totally agree to make or buy some small picks/tools so you can take those connector locks out and actually remove the extra wires with terminals intact. Much cleaner than cutting the wires off and if you ever need to make a repair you have the exact factory terminal with a wire already crimped.
 
OP
T

TimeWarpF100

Well-known member
Joined
Aug 21, 2010
Messages
6,784
Location
not here
Tomorrow I will start on the dash harness 14401. That is a far more complicated harness, with about 30 connectors, but my process will be the same. In 14401 we only need the ignition switch, the cluster, and the OBDII port, but it contains a lot of interconnects that I will need to deal with to maintain the integrity of the CAN bus, and system grounds. This will likely take a whole day.

Walt

Incredible stuff Walt!

Pretty much bed ridden. Cannot talk but can still type . .

I can only dream of being able to work again.
 
To avoid these ads, REGISTER NOW!

sxk122

Well-known member
Joined
Sep 19, 2011
Messages
400
Location
Dallas, TX
I haven't been around since Valentine's day due to work.
Ho-lee ****. You've done alot.
Congrats, hope you are feeling better soon.
 

walt460

Well-known member
Joined
Nov 8, 2014
Messages
79
Location
Nevada, Vegas area
I started the second of the 3 three harnesses for Eco 2 today. This is the dash harness, 14401. I followed the same process as with the first harness. First I cut off all the mounting clips that were on the harness, then I cut off all the sleeving from the main body of the harness. So it looked like this.
IMG_20160304_120705542_zpstwkltlax.jpg

This took me about 1-1/2 hours, being very careful not to nick any wires.


If you notice, this harness has a lot of connectors, 49 connectors to be exact.

On the first harness we selected some connectors we needed and just followed those wires, banding them as we went along. This second harness is a lot more complicated. So what I did was I stuck some blue tape on the connects that are for the features I want to keep; OBDII port, Cluster, Speed Control switch, Ignition switch, and Trans shifter. Then I also tagged the connectors that connect to the BCM and that connect to 12A581 engine compartment harness.

Then I started at one end of the harness and started separating out the wires going to each connector on the harness, using tie straps to keep the wires for each connector separated. I got about 1/3 done with this step today before I decided to quit and enjoy the day.
IMG_20160304_130950004_zpsjcqzj1gj.jpg

IMG_20160304_132058737_zps1si6mtwg.jpg


Tomorrow I will tell you how to identify each connector and decide if you need it or not.
 
Last edited:
OP
T

TimeWarpF100

Well-known member
Joined
Aug 21, 2010
Messages
6,784
Location
not here
As Walt is busy on the wiring.

I am finally up and around a bit after getting the worse flu I have ever had. Wiped me out all week. Now, where did I leave off?

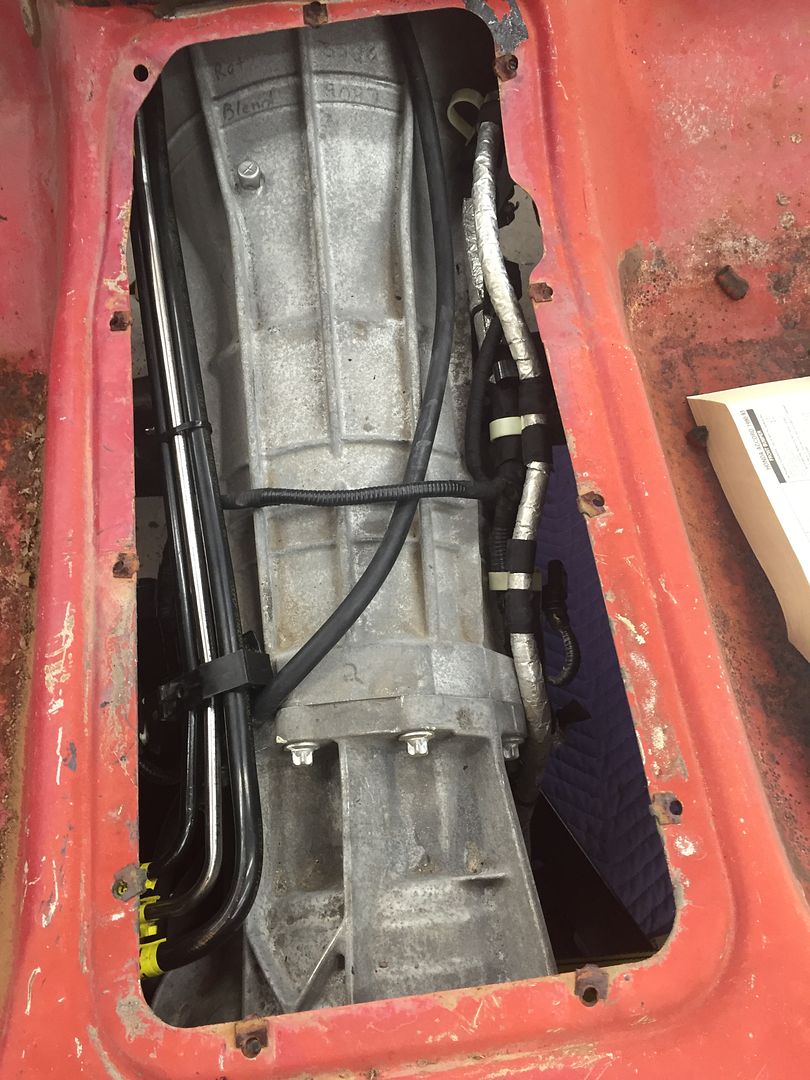
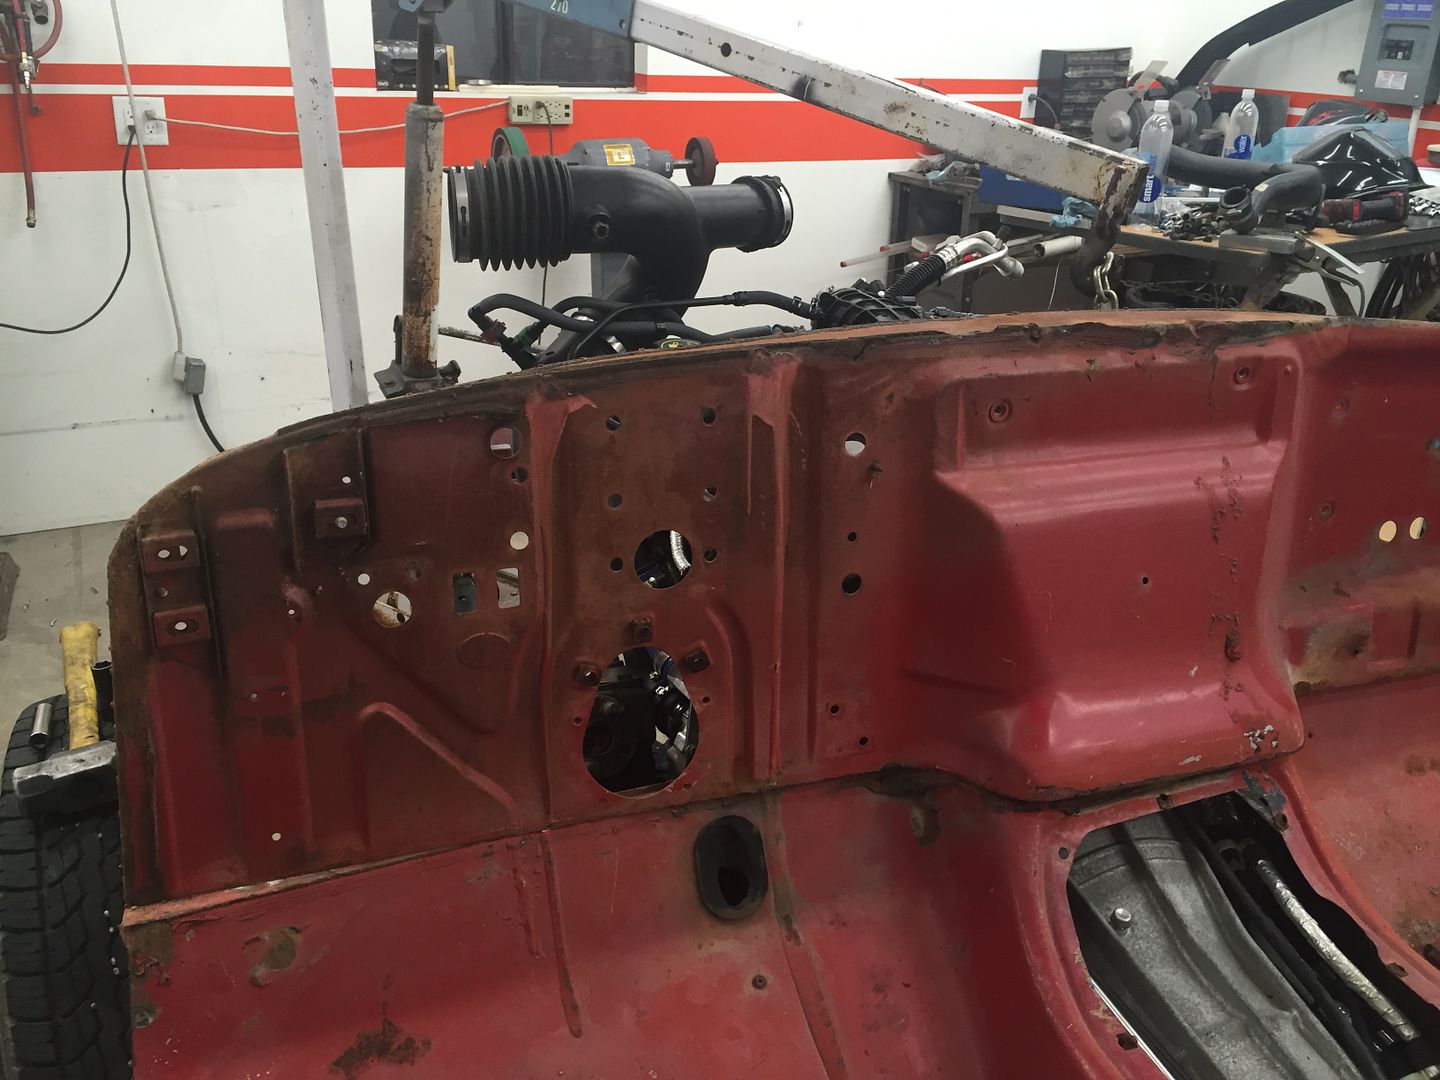
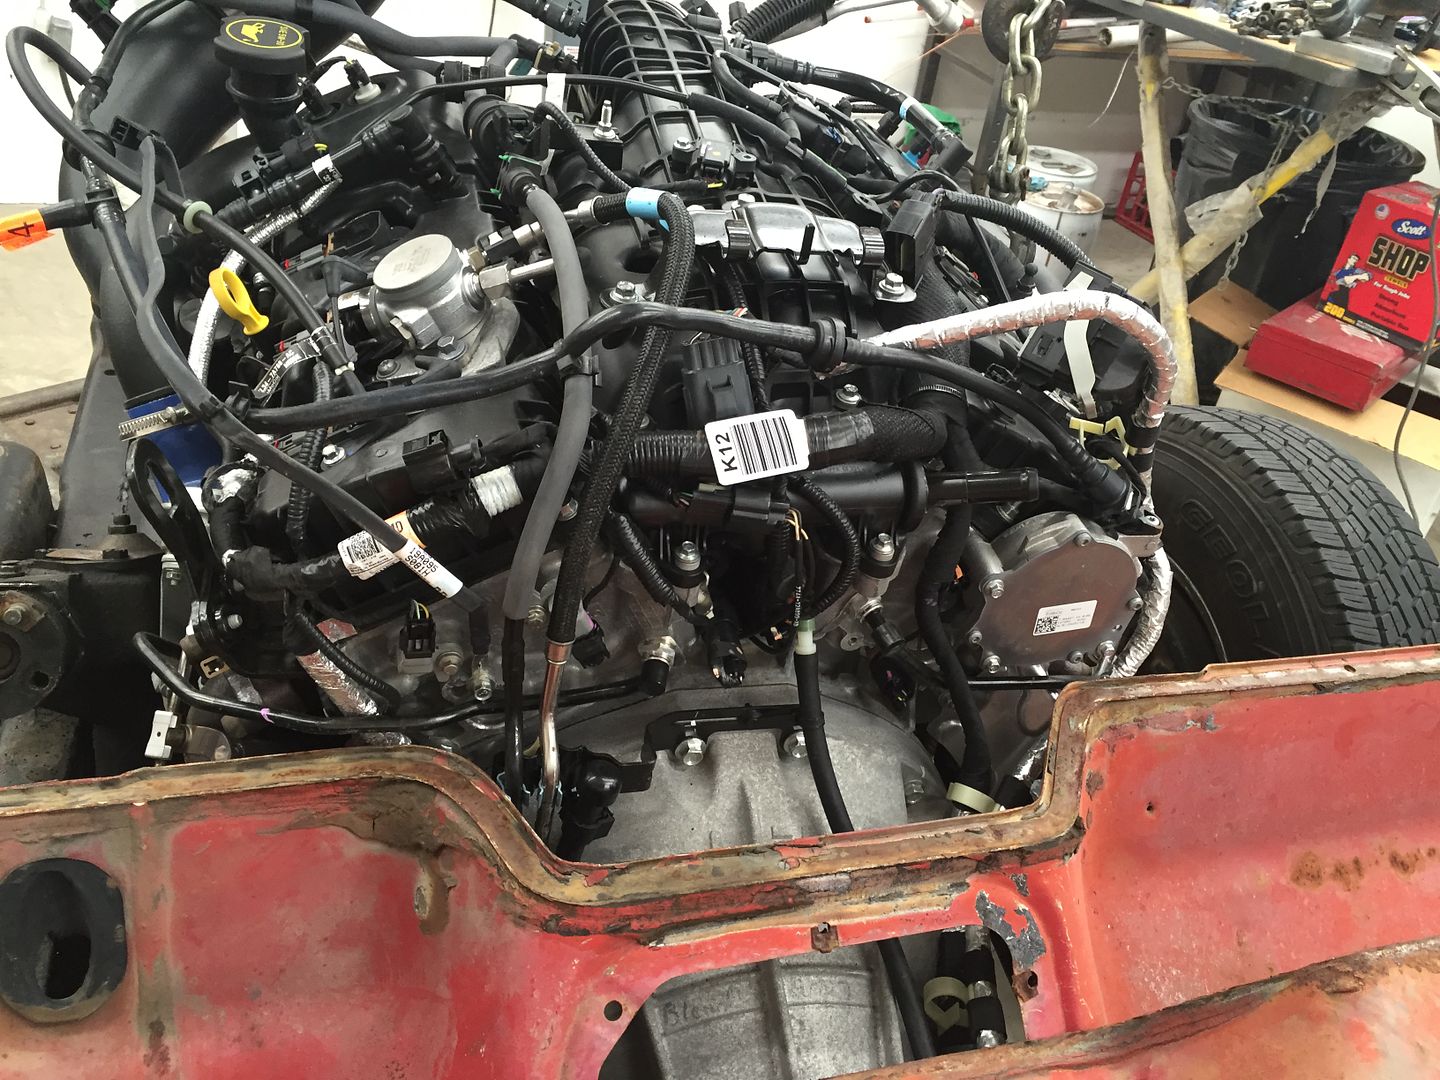
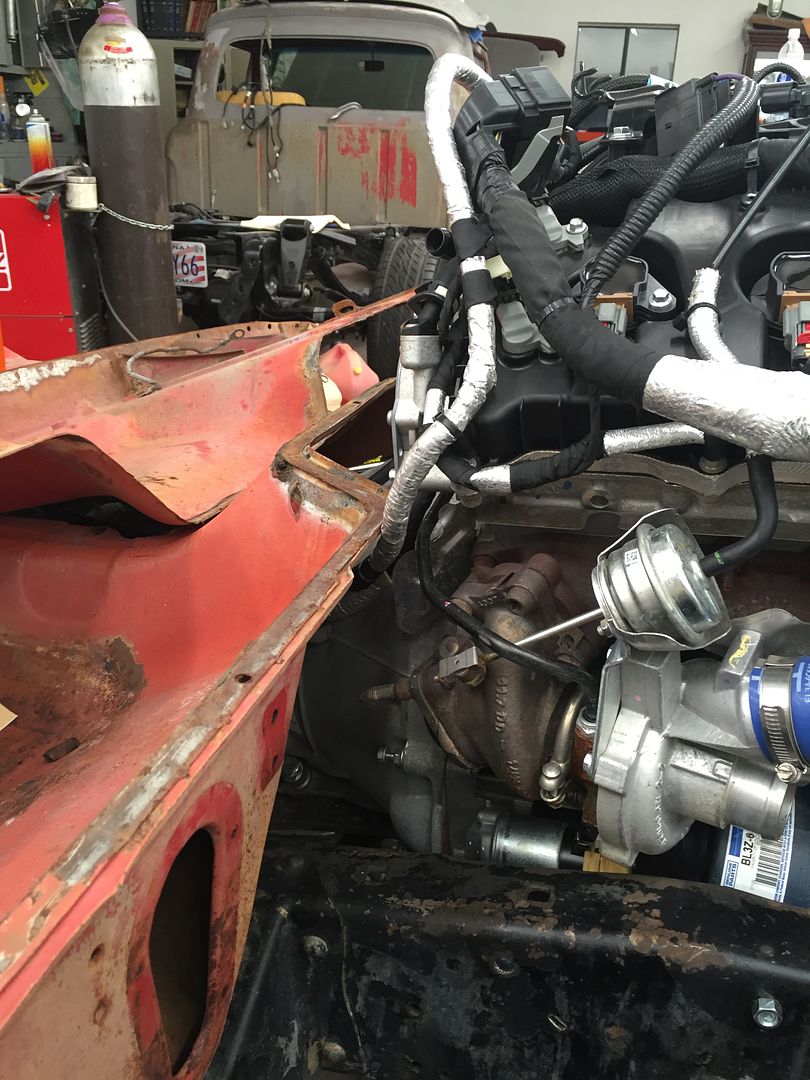
I took the floor pan and firewall from the Eco 1 Project to use as a guide exactly where things had to be. I ended up going back with engine another 1/2" Better fitment yet to chassis but now very close to firewall. A fair amount of room floor to trans. Perfect fit would mean using a 4x2 transmission but wanted to worst case scenario.

1C77A612-4D1F-41B2-AF2F-7CA09CC0394D.jpg


C3210BAC-55AC-44F9-A99C-D49CCE3C4937.jpg


9A409D81-6920-4F85-82A2-424CD746E3A5.jpg


Fuel lines at back of engine will have to be re-routed slightly. Probably just tweak the bracket a bit.

5762C67D-7A43-4F2D-9043-1232BEB65DEF.jpg


EFD6EFC7-2FC0-46F8-B8A4-0346E56642AD.jpg


2015 Vacuum pump will almost touch the firewall.

8348D130-8CD5-434A-95B4-E88E574F82C4.jpg


7AD73FD6-D6D6-455A-9DD3-1C8501FB88D4.jpg
 
Last edited:
OP
T

TimeWarpF100

Well-known member
Joined
Aug 21, 2010
Messages
6,784
Location
not here
I swung by my local Ford Parts store and picked up a "few" needed items. It was I will take one of each everything forward of engine . . I knew this fitting perfect stuff could come to a screeching halt soon. It did not take long to realize the 2015 Radiator was a mile wider than the '66 engine bay. Ford chose to go with a very very thin radiator but a mile wide. I guess that was to fit 2 super large cooling fans. Dont know the logic but this is surely not meant for fitting into a '66 Truck.

I was hoping to do the swap without cutting anything up. I "will not" cut up and Ranger sheet metal but have some pieces left from the Eco 1 project I can cut. There are such great differences between the '11-14 Eco Trucks vs the '15 truck. Total redesign for sure.


D217AF2C-3E29-49BF-BDDB-40C1391E3611.jpg


67547a65-5220-4e1a-b3d9-c84a8156e73b.jpg


4F1B70C0-0DD9-4329-9748-4C9A9F922B38.jpg


Intercooler is a total and complete redesign but getting it to fit is going to be not so fun . .

B447A77F-1651-4D32-A377-A4EE2370B9AF.jpg


Even the cooler mounting brackets are aluminum vs the steel on '11-'14.

999DCDEA-7422-492E-A00B-59B1FB7CE428.jpg


The shop is now packed full of stuff with little room to move!

C02B3DE9-D6EB-4A77-950B-8A56B4CF950F.jpg
 
Last edited:
OP
T

TimeWarpF100

Well-known member
Joined
Aug 21, 2010
Messages
6,784
Location
not here
Mounting bracket for transmission cooler.

9D30F9EC-B8DE-4F54-9776-AAFABBF5EA1C.jpg


Looks like I will be using a new Floor shifter vs the very high cost of a column shift

863B8C5C-0D40-484F-9455-C9A5B3CDA53E.jpg


Go figure!

With my weakened immune system I was one of the unfortunate to get hit with the latest nasty flu bug. Arizona happens to be the worst in the country, top of scale.


A3789C3C-4650-4B72-AC57-544E8F7AFAE2.png
 

walt460

Well-known member
Joined
Nov 8, 2014
Messages
79
Location
Nevada, Vegas area
TW,

Looking at your new floor shifter, I guess we should keep Tap UP/DN shift function in the wiring. What is T/S switch? 2011 had Tow/Haul switch which cancelled OD.

Walt
 

BBChevro

Well-known member
Joined
Jan 24, 2014
Messages
2,235
Location
Brisbane, Qld., Australia
I've had very limited GJ time for the last week or so, so I've been playing catch-up - it looks like Walt's been doing all the work while you take it easy in bed. :lol_hitti

I'm only joking TW, I know it's no fun being laid up with the flu - I'm glad you're on the mend again.

Not to devalue Walt's incredible job with those harnesses though. :thumbup:
 
OP
T

TimeWarpF100

Well-known member
Joined
Aug 21, 2010
Messages
6,784
Location
not here
TW,

Looking at your new floor shifter, I guess we should keep Tap UP/DN shift function in the wiring. What is T/S switch? 2011 had Tow/Haul switch which cancelled OD.

Walt

Yes, It has both the M Manual and Tow/Sport shift options.

The Sport Mode actually provides additional grade engine braking, holds gears longer at higher rev's shifts are quicker etc. Hit button once for Tow and Twice for Sport. Hope there will be a light on dash to let me know what mode its in . . I would assume after engine shutdown and a restart it would be in standard mode.


Tow or sport?
YEP!

TW, good to see you are on the mend!

Thanks! Still under the weather but up and around a bit. After waking up more than 6 times last night decided will just go out to shop around 4:45 am as could not sleep anyway. Not better just moving. No "work" getting done quite yet.

I've had very limited GJ time for the last week or so, so I've been playing catch-up - it looks like Walt's been doing all the work while you take it easy in bed. :lol_hitti

I'm only joking TW, I know it's no fun being laid up with the flu - I'm glad you're on the mend again.

Not to devalue Walt's incredible job with those harnesses though. :thumbup:

For some reason when I bury my head under the pillow, wait a few days, look in garage window, the truck is not fixing itself, but somehow the wiring is getting done?

Yet, Once again I am thinking I bit off a bit more than I can chew with yet another project . . Doc says, no cure or relief from this disease!

Should be able to wrap this up in 3 weeks to a month was my initial thought,

I have 3 pickup's current none run and drive, big $$ in all of them now. Should'a just bought a new Kenworth or Peterbuilt . .

Did anyone catch the 3 Pickup line? LOL


bulletpruf

Well-known member
Joined
Nov 28, 2013
Messages
11,140
Location
San Antonio
For some reason when I bury my head under the pillow, wait a few days, look in garage window, the truck is not fixing itself, but somehow the wiring is getting done?

That's a pretty neat trick! Maybe if you get the flu again the powertrain fairies will show up to finish the install? ;)
 
OP
T

TimeWarpF100

Well-known member
Joined
Aug 21, 2010
Messages
6,784
Location
not here
TW,

Looking at your new floor shifter, I guess we should keep Tap UP/DN shift function in the wiring. What is T/S switch? 2011 had Tow/Haul switch which cancelled OD.

Walt

What about the brake/shift interlock? Is that switch there or will I need to buy one? I guess we could disable that feature in the shifter itself.

I am most likely going to have to build my own fuel tank. No much luck in finding one that will fit. What all will I need to have on tank, other than fuel sending unit? Can we bypass the capless fill system?

 
OP
T

TimeWarpF100

Well-known member
Joined
Aug 21, 2010
Messages
6,784
Location
not here
That's a pretty neat trick! Maybe if you get the flu again the powertrain fairies will show up to finish the install? ;)

I was told if I use more pillow's, waited a few days someone from Italy would be here to help . . Works on all kinds of neat stuff.

All I need to do is step outside for a few minutes here and am sure I can get the "flu bug" re-energized .
 
OP
T

TimeWarpF100

Well-known member
Joined
Aug 21, 2010
Messages
6,784
Location
not here
I heard a faint mention that maybe if I kicked the bucket people would show and finish up these 3 remaining trucks so each of my girls would get one . .

Tell ya what, I have been kicking a bucket around the yard all morning and nobody has showed to help yet! How many times do I have to kick the bucket? Is it a special kind of bucket I gotta kick?


Edit Add: My youngest daughter just told me I simply had he wrong thought for "kicking the bucket"

What? Home Depot buckets are no good? Off to buy a Lowe's . .


Might as well pick up more Pillow's while I am there!
 
Last edited:

bulletpruf

Well-known member
Joined
Nov 28, 2013
Messages
11,140
Location
San Antonio
TW -

Don't mean to pry, but I'm a bit confused about which daughter is which. I know one of them drove the F250 Ranger for a while (leading suspect for "remodeling" the front fender a bit).

And then there's the daughter who was going to get the Bronco, but she had to leave before the Bronco was sorted out.

For all I know, Ranger daughter and Bronco daughter are one and the same. Or maybe not?

Maybe that's it - Ranger/Bronco daughter prefers trucks and SUV's. And the other two prefer pony cars (Boss 429 daughter) and musclecars (R Code Fairlane daughter).

Again, I don't mean to pry, but after following along for a few years and 2955 posts, I think we are as close to family as you're going to get on the internet!

Scott
 

walt460

Well-known member
Joined
Nov 8, 2014
Messages
79
Location
Nevada, Vegas area
"What about the brake/shift interlock? Is that switch there or will I need to buy one? I guess we could disable that feature in the shifter itself.

I am most likely going to have to build my own fuel tank. No much luck in finding one that will fit. What all will I need to have on tank, other than fuel sending unit? Can we bypass the capless fill system?"


For Brake shift interlock feature, which I recommend you do keep, all you need is the F150" brake pedal switch.

Your gas tank can have open filler, all you need to do is mount the F150's fuel pump & reservoir assembly.

Regarding the transmission mode, that indicator is built into the cluster, I think info comes over CAN bus from PCM, so when talking with your cluster vendor, ask them if they can detect that CAN signal and provide the indicator light(s). And yes, default to normal mode happens when vehicle is restarted.

Walt
 
Last edited:

walt460

Well-known member
Joined
Nov 8, 2014
Messages
79
Location
Nevada, Vegas area
TW,

Just FYI, I am leaving the factory cluster wiring in-place initially. When I come to verify the wiring, I will bring a F150 Cluster so that we can verify that all the cluster display items are working correctly. Then, if you are converting to another cluster, we can modify the wiring accordingly.

Walt
 
OP
T

TimeWarpF100

Well-known member
Joined
Aug 21, 2010
Messages
6,784
Location
not here
TW -

Don't mean to pry, but I'm a bit confused about which daughter is which. I know one of them drove the F250 Ranger for a while (leading suspect for "remodeling" the front fender a bit).

And then there's the daughter who was going to get the Bronco, but she had to leave before the Bronco was sorted out.

For all I know, Ranger daughter and Bronco daughter are one and the same. Or maybe not? BINGO! Yep, 1 and the Same.

Maybe that's it - Ranger/Bronco daughter prefers trucks and SUV's. And the other two prefer pony cars (Boss 429 daughter) and musclecars (R Code Fairlane daughter).

Again, I don't mean to pry, but after following along for a few years and 2955 posts, I think we are as close to family as you're going to get on the internet!

Scott

Yep, Tight knit family, no pry bar's needed.

Middle daughter finished high school in december, the day after Christmas she was on her way on her dream trip up the California coastal highway 1, she then spent a week or so in Spokane when I flew up to help her drive back,

A week or so after she offered to help a family drive to Saskatoon, home for a bit and started her own daycare. Last week she drove Grandma & Grandpa
(on her mothers side) Back up to Minnesota. She will stay with Big Sis In MN. For close to a week then fly home. She tells me its time to "change oil again" before I get the oil changed on my own veh.

Youngest daughter is 15, just got her drivers permit a week or so ago.

When I ask her if she had a pick of trucks which would it be, with ZERO hesitation she says F250 Ranger. Asked her if she would drive it to school, Oh YEAH! I told her if I could drive that to high school I may just go back to school for a bit . .

Dont think I have ever gone to point of posting any family pics here are the daughters . . With the '65 F250 of course. All three girls learned how to drive in that truck.

IMG_0046_zps1bc1b220.jpg


Middle daughter was bummed when I sold it. She is on far left..

Daughter in the Middle is one who has laughed at every joke I have ever told.

Here are the older 2 when I had the 427 Comet apart.

2012_07_07_23_53_020001_zpsd402baf6.jpg
 
Status
Not open for further replies.
To avoid these ads, REGISTER NOW!
Top Bottom