To avoid these ads, REGISTER NOW!

VISE REPAIR 101 all vise repairs, lubricants, sources for parts and the tricks to fix

Shiftless

Well-known member
Joined
Mar 9, 2014
Messages
14,553
Location
East Bay SFO
csaws:
I would suggest starting with electrolysis. Violence has irreparably damaged many vintage vises. Be careful and ask us for help with any unknown or unfamiliar procedures.
 
To avoid these ads, REGISTER NOW!

CRSINMICH

Well-known member
Joined
Aug 15, 2015
Messages
2,411
Location
Southeastern Michigan
CUTAWAY VIEW OF A PRENTISS SWIVEL JAW I found this while doing some early morning research. (Insomnia can be put to use.) It shows an interior view of a Prentiss swivel jaw vise. I thought it might be helpful to someone who was trying to free a stuck pin.
 

Attachments

  • Prentiss swivel jaw cut away view close-up.jpg
    Prentiss swivel jaw cut away view close-up.jpg
    73.1 KB · Views: 80
Last edited:
OP
D

drivesitfar

Well-known member
Joined
Oct 23, 2013
Messages
36,034
Location
Pacific Northwest
CRS: thanks for posting that Prentiss swivel jaw picture with useful information. if I recall correctly because I read it a while ago you posted up some cool vise history on the main vise thread and if you have time can you post it on the vise history thread I started that the members are adding stuff too? thanks
 

CRSINMICH

Well-known member
Joined
Aug 15, 2015
Messages
2,411
Location
Southeastern Michigan
CRS: thanks for posting that Prentiss swivel jaw picture with useful information. if I recall correctly because I read it a while ago you posted up some cool vise history on the main vise thread and if you have time can you post it on the vise history thread I started that the members are adding stuff too? thanks

Drives: I'd be happy to post that. I'm sure I have it saved somewhere. You don't happen to remember the brand do you? I have bits of stuff about a lot of vises. I don't know if you looked at the main thread this a.m. but I posted a little bit of Prentiss history there. It identified one of Prentiss' contractors who manufactured vises for them from 1876 until at least 1912. Bagley & Sewall. I'll post that on the history thread too.

UPDATE: I found it. It was about Walworth Anvil & Vise. Now I just need to find the history thread you mentioned.
 
Last edited:
OP
D

drivesitfar

Well-known member
Joined
Oct 23, 2013
Messages
36,034
Location
Pacific Northwest
CRS: I was mentioning the one you just posted for Prentiss and you can post any more you might have handy or find in your early morning searching on this thread.

http://www.garagejournal.com/forum/showthread.php?t=283430&highlight=vise+history

it's beginning to be a pretty good read and I almost forgot I started it until BB posted up another company's information this or last week.

cheers and thanks
 

Lyndon

Well-known member
Joined
Aug 11, 2014
Messages
2,535
Location
Sydney, Australia
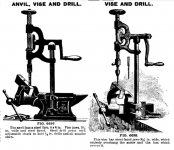
OK, so I've been promised by Drives that if I don't visit his threads he'll boycott mine, and I can't have that...... :eyecrazy:

Drives, I hope this is the right thread...

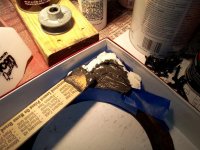
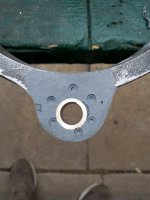
Here's a Woden A130 Wood Working vise from around 1960 that my FIL had bolted to an old table out in the elements at his place. It was heavily rusted. I have pulled it apart, soaked it in CLR then Simple Green for 2 weeks, then hit with the Dremel and a wire wheel, and am getting close to painting it :

View media item 60085
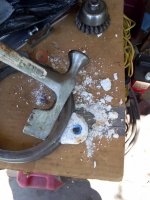
I don't quite know what to do with the handle yet - I've WD40'd it, polished it with various grades of Steel wool, hit it with the wire wheel but it still looks like ****....:dunno: :dunno:

This is how it currently stands on my workbench. I'm hoping to get it a bit cleaner before painting..... I don't quite know what to do with it after that, as my workbench wasn't constructed in such a way as to be able to mount it with the top level with the top of the workbench, without chewing a big lump out of the major front support rail. In fact, I may just build a new workbench for woodwork, and build it to suit the vise......... Mmmmmmm? :headscrat

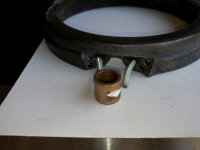
Here's my Record number 5, that I sort of bought off Flea Bay.

View media item 60090
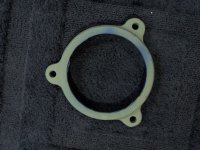
The guy selling it had it on for $130, but it didn't sell, so I made him and offer of $80 which he accepted. He was about an hour away, so I went and picked it up one afternoon after work. It was in quite good nick, and just needed some paint to be cleaned up off it, and them I mounted it. :thumbup:

I know, I could have used new bolts..... but it is a working thing, and, well, I might be shamed into changing them. :eek:

I have 2 other vises, that I might post about later if Drives says this is the right place (ones a very large, but unbranded old lump of a thing (with a previously broken and badly re-welded main arm), and the other is a disappointing swiveling (that won't lock in place) Flea Bay purchase . :bowdown:

Lyndon
Keeping the customers happy....
 
Last edited:
OP
D

drivesitfar

Well-known member
Joined
Oct 23, 2013
Messages
36,034
Location
Pacific Northwest
Lyndon: thanks for stopping in and taking the time to write a post and post up pictures. i'm sure there are some posts on here that mention how to shine up a handle if you find any time to read some. I personally don't go for the blinding mirror finish and like mine to just work and not get too rusty. that said I think most of the guys use different grits of sandpaper or emery cloth or a combination of wire wheeling and buffer. there are some AMAZING restorations and i'm sure somebody will stop by eventually and post up how they do handles and post up some pictures.

also if you are just posting vise finds you can post them up on the main vise thread and your Record 5 is a top vise and will last you many years with rusty or new bolts holding it on your bench. some guys use 12 point shiny bolts and if you are happy with rusty ones then that's good enough reason to have them. by the way you might see a few of my posts over on the main vise thread because I do have a vice for vises, but have been SELLING (I know i'm trying) a few more than I buy lately.

http://www.garagejournal.com/forum/showthread.php?p=5711706&posted=1#post5711706

cheers
 

CRSINMICH

Well-known member
Joined
Aug 15, 2015
Messages
2,411
Location
Southeastern Michigan
1894 VISE & DRILL COMBO: This is an excerpt from the 1894 Illustrated Catalogue Of Railway and Machinists Tools and Supplies. I've already posted it on the main vise thread. I remember that a few times members have posted pictures of vises with extra holes. This is one explanation for that.
 

Attachments

  • 1894 Vise and drill combo.jpg
    1894 Vise and drill combo.jpg
    143.7 KB · Views: 28

Mark in Indiana

Well-known member
Joined
Aug 11, 2010
Messages
3,057
Location
Southern Indiana
FPU VISE BASE REPAIR POST: 1 of 2

Hello Vise Friends,

I bought a 1950s, 3" FPU vise. This is a "challenged" vise because it needed more than cleaning, painting and polishing. It had a broken base foot and it's missing the swivel base lock nut handle.

I wanted to mold a prosthetic foot for it using Devcon Liquid Steel. Although I could make a foot out of cast iron and braze it on, I wanted to perform a repair that didn't require any special equipment.

I used to make repairs to thermoforming molds and motor end bells using Devcon. It worked well. Will my repair last under normal use? It should, giving that the vise is small and the base is oversized for a 3"vise. I wouldn't try it with a large vise that would see an infinite amount of stress compared to my little FPU.

Below are pictures of the repair:

1. The vise.
2. The missing foot. Make a plaster cast using a good foot.
3. Drill & tap a couple of holes for the studs. Use thread lock on the studs. Drill some blind holes to help anchor the Devcon.
4. Grind some notches in a 1/2" ID bushing. The studs will rest in the notches. Apply some Devcon to the places where the bushing meets the studs to hold it all straight when you pour the rest of it.
5. Measure where you want to locate the bushing so it will match the other feet.
6. Here's the Devcon product that I used. Be sure to use it in a ventilated room. The stuff smells like rotten gym socks.
7. Attach the plaster mold, tape it well to prevent leaks, mix and apply the Devcon.

More pictures in my next post.
 

Attachments

  • BASE FIX6.jpg
    BASE FIX6.jpg
    147.2 KB · Views: 52
  • BASE FIX5.jpg
    BASE FIX5.jpg
    143.7 KB · Views: 48
  • BASE FIX4.jpg
    BASE FIX4.jpg
    126.7 KB · Views: 50
  • BASE FIX3A.jpg
    BASE FIX3A.jpg
    144.3 KB · Views: 51
  • BASE FIX3.jpg
    BASE FIX3.jpg
    139.2 KB · Views: 39
  • BASE FIX2.jpg
    BASE FIX2.jpg
    125.4 KB · Views: 40
  • FPU1.jpg
    FPU1.jpg
    147.3 KB · Views: 54
Last edited:

Mark in Indiana

Well-known member
Joined
Aug 11, 2010
Messages
3,057
Location
Southern Indiana
FPU VISE BASE REPAIR POST: 2 of 2
All,

From my previous post, I poured the Devcon into my plaster mold. Here are more pictures of what I did since then:

1. Break and scrape the plaster off. I forgot to mention that I taped up the bushing to keep the inner diameter clean. After that, I did a lot of hand sanding and filing on the top side, to get the new foot to look as close as I can to the others.
2. On the bottom side, the original feet had pads cast into them. I sanded down the bottom of the new foot and drilled some blind holes to anchor a new molded pad.
3. I cut a piece of cardboard to the shape of the foot pad and placed a 1/2" bolt in the bushing. I applied a thin coat of grease to the bolt and the top of my cardboard mold to keep the Devcon from sticking to them.
4. I mixed & poured in the Devcon on the bottom of the foot to make the pad.
5 & 6. After removing the cardboard mold & bolt, I sanded & filed the foot pad to get it to look as close as I can to the other feet. These 2 pictures are how the base looks after priming.

Summary: I hope that these posts were informative. Was this financially responsible? NO. However, it was cheaper and less frustrating than a golf outing.;)

Along with being unique, this is an extremely well engineered vise. When I'm finished with the restoration, I'll create a thread to show all of the inner components and the restoration. I plan to mount this vise on my Kennedy Versa-Cart.

In the near future, my next post will be about making the swivel lock nut handle.
Happy Trails!
 

Attachments

  • BASE FIX14.jpg
    BASE FIX14.jpg
    82 KB · Views: 51
  • BASE FIX13.jpg
    BASE FIX13.jpg
    82.3 KB · Views: 54
  • BASE FIX10.jpg
    BASE FIX10.jpg
    147.9 KB · Views: 44
  • BASE FIX9.jpg
    BASE FIX9.jpg
    148.4 KB · Views: 49
  • BASE FIX8.jpg
    BASE FIX8.jpg
    141.9 KB · Views: 49
  • BASE FIX7.jpg
    BASE FIX7.jpg
    144.9 KB · Views: 48
Last edited:

Mark in Indiana

Well-known member
Joined
Aug 11, 2010
Messages
3,057
Location
Southern Indiana
All,
Thank you for the kind words.
When I stated that this restoration wasn't financially responsible, I meant that the amount of labor & materials put into it would be a loss, if I tried to resell it.
Vise purchase: $50
Devcon: $45
Paint & misc supplies: $10
Rewarding feeling after the restoration: Priceless!

I plan to wait until some hot, sunny days before I paint it. I understand that Rustoleum Hammered paint will dry to a more pronounced texture when applied to a hot surface. The closest paint color to original that I can find is Verde Green (see picture).


Maybe some of our European Vise Experts can answer this about FPU and Leinen vises:
The REAR jaw (farthest away from the handle) is the one that moves. What is the advantage to that design over the traditional FRONT moving jaw (at the handle)?
Comments?

One disadvantage to this design is that it can't be mounted in a way where the jaws would hold a very long workpiece, vertically.
 

Attachments

  • FPU9 COLOR.jpg
    FPU9 COLOR.jpg
    146.8 KB · Views: 40

CwazyWabbit

Well-known member
Joined
Jan 9, 2015
Messages
1,189
Location
Surrey, UK
I have an FPU, a Leinen, and a Berjo. They all have a rear dynamic jaw and I've yet to see any advantage to that aspect of them.
 
OP
D

drivesitfar

Well-known member
Joined
Oct 23, 2013
Messages
36,034
Location
Pacific Northwest
Mark: the main advantage I see with the moving static is it doesn't encroach into the garage floor space. not a big deal in the US because most of us have 2 car garages. in Europe and Asia that's not always the case and let the guys over there correct me if i'm wrong. I've seen garages in Europe that a Cushman golf cart can't drive into. cars barely fit and to drive one in you have to cut the house door so the car door opens up into the house. or climb out the sun roof.

other than that having your work over the bench might be another reason.

I can tell you I've only owned a couple static moving jaw vises and I still have the first one that is a 3 inch FPU Bison like yours and the other was a 6 inch Leinen that weighed 112 pounds and I wish I wouldn't have sold it. It made the deal when I sold a 1500 pound surface plate that was too big for my space, but I really wish I had both of them back if I move or build a big shop. these moving static jaw vises move with AWESOME precision.

NICE WORK on the FPU and I like the Master Card comparison too.
 

HCNDM

Well-known member
Joined
Oct 20, 2015
Messages
682
Location
Netherlands (tiny little country in western Europe
Mark: the main advantage I see with the moving static is it doesn't encroach into the garage floor space. not a big deal in the US because most of us have 2 car garages. in Europe and Asia that's not always the case and let the guys over there correct me if i'm wrong. I've seen garages in Europe that a Cushman golf cart can't drive into. cars barely fit and to drive one in you have to cut the house door so the car door opens up into the house. or climb out the sun roof.

other than that having your work over the bench might be another reason.

I can tell you I've only owned a couple static moving jaw vises and I still have the first one that is a 3 inch FPU Bison like yours and the other was a 6 inch Leinen that weighed 112 pounds and I wish I wouldn't have sold it. It made the deal when I sold a 1500 pound surface plate that was too big for my space, but I really wish I had both of them back if I move or build a big shop. these moving static jaw vises move with AWESOME precision.

NICE WORK on the FPU and I like the Master Card comparison too.


Correct. I have a Large Shop By dutch city standards yet almost more bench space than floor space.

4.5 meters by 3.5 meters. Or roughly 15x 10 ft.

A garage on the same site as the house would mean I'm in the top income 2%.

I don't own any, but immediately saw the value of a vice that extends over the bench rather than the floor.

By the same logic I reckon this is the reason tool carts and boxes are a lot rarer here. Especially in home shops. There simply isn't space. It's easier to hang everything on the wall.

Even at pro shops most boxes are closer to 26 inch units than 44 or larger.

I have to mention holland (the Netherlands) is one of the more densely inhabited bits of Europe. As soon as you go rural or to Germany or France space is more readily available. Yet nowhere in the amounts I see in posts about US garages. At least not for the lower 98 percent of the incomes.
 
Last edited:

Mark in Indiana

Well-known member
Joined
Aug 11, 2010
Messages
3,057
Location
Southern Indiana
I googled the rear moving jaw vise. I found the advantage was saving space in front of the bench. Another advantage is the adjustable dovetail slide, which makes for more of a precise movement and alignment.
 
To avoid these ads, REGISTER NOW!

CwazyWabbit

Well-known member
Joined
Jan 9, 2015
Messages
1,189
Location
Surrey, UK
But you could have the dovetail arrangement and still have the front jaw as the moving jaw.
I find the idea of saving space in front of the vice a strange concept, we aren't talking about vices that open 15" or the like and to me bench space is more important ..... there's always too much stuff piled on my bench and the rear jaw would crash into it. Also my main workshop is very small so I know how precious space is.
 

Mark in Indiana

Well-known member
Joined
Aug 11, 2010
Messages
3,057
Location
Southern Indiana
Cwazy,

Although the Googled advantage on a rear moving jaw vise was to save space in front of the bench, There will always be the need for bench top space for the rear jaw opening movement. Seems like it would need more space than its front jaw counterpart.

Perhaps in a manufacturing process control work cell arrangements, a rear moving jaw may be preferred?
 

CwazyWabbit

Well-known member
Joined
Jan 9, 2015
Messages
1,189
Location
Surrey, UK
Perhaps, although I'm happy to put it down to one of those unexplained things about vices from different countries.

You know like the other unanswered questions.

Why are quick release vices far more common in England?
Why are swivel vises far more common in America?
Why does Australia have the monopoly on offset vices?

So we can now add 'Why do European vices have a moving rear jaw?'

:)
 
OP
D

drivesitfar

Well-known member
Joined
Oct 23, 2013
Messages
36,034
Location
Pacific Northwest
CW & MARK: so I think there was maybe only 1 guy that wrote the BIBLE about anvils and i'm not aware of such a book for old vises around the world. I'd nominate the 2 of you to begin one with just the thinking you've mentioned on this page. GOOD STUFF

cheers and i'll be the comic relief for the book or the questions guy since i'd be happy to be involved too.
 

1969

Well-known member
Joined
Jan 8, 2010
Messages
1,412
Location
East Coast
I just bought a Parker 49 and have a question or two. First, how thick should the washer be located between the dynamic jaw and the screw mechanism? 2nd, I need to weld spot on the static jaw, what rod should be used? The area where the pin holds the jaw to the casting has been damaged. This spot has NO negative impact on the function or strength of the vice whatsoever. Thank you for any and all help.
 

KMScott

Well-known member
Joined
Feb 14, 2012
Messages
4,642
Location
Daufuskie Island, South Carolina
I just bought a Parker 49 and have a question or two. First, how thick should the washer be located between the dynamic jaw and the screw mechanism? 2nd, I need to weld spot on the static jaw, what rod should be used? The area where the pin holds the jaw to the casting has been damaged. This spot has NO negative impact on the function or strength of the vice whatsoever. Thank you for any and all help.

The thickness of the washer sets the backlash or gap. The larger the gap the more you have to turn the handle before the dynamic jaw support moves. Most Parkers use hard shim stock to adjust the backlash between the meatball end and the inside of the collar. I have seen up to 6 shims used. Each vise is different since the areas that are cast are not machined and pretty rough.

If I had to drill out the holes for the jaws after being welded I would use either Inconel or Silicon Bronze with a TIG welder. The reason is this rod sticks very well and stays soft after welding. Nickel would also work too but TIG is the best method in my opinion. Good luck and pictures of the weld area wold be nice to see.
 

1969

Well-known member
Joined
Jan 8, 2010
Messages
1,412
Location
East Coast
Thank you KM, I don't have a TIG, but I know a chap that does. I will speak to him with your recommendations in mind. My Parker has only one washer and it is very thin. I have the vice in pieces at this time and honestly have no idea as how much play there is..... backlash. Is there an accepted thickness for backlash? Again, thanks for your response.
 

KMScott

Well-known member
Joined
Feb 14, 2012
Messages
4,642
Location
Daufuskie Island, South Carolina
That comes down to how much backlash you want and what thread pitch you have. Example: if your threads are a 4tpi. then every 1/4 inch is one revolution. I personally like from noon to 1:30 or 2 oclock of handle movement before the dynamic jaw support moves. That is around .03 to a .040 gap. To tight causes wear and too loose is bad. That is where the shims come in. I personally make a custom washer out of a Bronze material and get the thickness I want.
 

GETRIDAONE

Well-known member
Joined
May 21, 2013
Messages
1,549
Location
Auburn, GA
I knew Kevin would answer your question. Just to add that the main nut not being snug in the track will cause play in the gap adjustment. The pin that retains the nut needs to be snug against the rear of the main nut. The nut needs to be able to move around slightly or it can cause binding with the threads.
 

Fretters

Well-known member
Joined
Jan 25, 2014
Messages
4,217
Location
South Yorkshire, England
I find the idea of saving space in front of the vice a strange concept, we aren't talking about vices that open 15" or the like and to me bench space is more important ..... there's always too much stuff piled on my bench and the rear jaw would crash into it. Also my main workshop is very small so I know how precious space is.

Our European counterparts are renowned for being tidier with their workspaces than us though, remember. The pile it high on the bench and have to walk sideways through your shed/workshop does seem to be an English thing more than any other. :D

A rear moving jaw is good for things like cutting, filing etc. A lot easier to clean the bench of swarf/filings than to clean the floor. That's why I have that little shelf protruding underneath the Handy, to catch the **** before it hits the floor.
 

Carla

MEMBER EMERITUS
Joined
Nov 27, 2010
Messages
672
That comes down to how much backlash you want and what thread pitch you have. Example: if your threads are a 4tpi. then every 1/4 inch is one revolution. I personally like from noon to 1:30 or 2 oclock of handle movement before the dynamic jaw support moves. That is around .03 to a .040 gap. To tight causes wear and too loose is bad. That is where the shims come in. I personally make a custom washer out of a Bronze material and get the thickness I want.

Yes, using a bronze thrust washer of the correct thickness (with neatly done oil-grooving) is an excellent example of 'doing it right' or 'making a proper job of it', and there are some makes of vises for which this is the only practical way to fit up the clearance nicely.

For some other makes, a worthwhile improvement is to fit a ball-thrust bearing to the main screw, and, on the screw, inside the movable jaw, fit the usual collar, but with a fibre washer (as sold for adjusting the end-play of small electric motor shafts, or similar uses) and a short coil spring, not very strong, bearing against the inside of the jaw casting.

This reduces back-lash to nil, for all practical purposes. (its one of the 'old toolmakers tricks' of many years ago) It wasn't only a 'field mod', tho, the anti-backlash spring was a standard fitment in the old Athol make of vises.

cheers

Carla
 

Carla

MEMBER EMERITUS
Joined
Nov 27, 2010
Messages
672
Our European counterparts are renowned for being tidier with their workspaces than us though, remember. The pile it high on the bench and have to walk sideways through your shed/workshop does seem to be an English thing more than any other. :D

A rear moving jaw is good for things like cutting, filing etc. A lot easier to clean the bench of swarf/filings than to clean the floor. That's why I have that little shelf protruding underneath the Handy, to catch the **** before it hits the floor.

In American shops, a more usual custom is for the machinists and toolmakers to be responsible for brushing chips, filings, bits of scrap, etc., off the benches, to the floor, with the idea that a cleanup worker will be along to sweep up the floor later. (the harsh truth of the small private experimental or restoration shop is that there is no dedicated cleanup worker, so the owner really should have good intention to do a 'clean sweep-down', say, once a year, or so.)

cheers

Carla
 

Outlawmws

Well-known member
Joined
Aug 9, 2011
Messages
39,275
Location
The Badlands
Our European counterparts are renowned for being tidier with their workspaces than us though, remember. The pile it high on the bench and have to walk sideways through your shed/workshop does seem to be an English thing more than any other. :D

A rear moving jaw is good for things like cutting, filing etc. A lot easier to clean the bench of swarf/filings than to clean the floor. That's why I have that little shelf protruding underneath the Handy, to catch the **** before it hits the floor.

In American shops, a more usual custom is for the machinists and toolmakers to be responsible for brushing chips, filings, bits of scrap, etc., off the benches, to the floor, with the idea that a cleanup worker will be along to sweep up the floor later. (the harsh truth of the small private experimental or restoration shop is that there is no dedicated cleanup worker, so the owner really should have good intention to do a 'clean sweep-down', say, once a year, or so.)

cheers

Carla

I used to have "dedicated cleanup workers" but they grew up and went to collage... :dunno:

Back to a one man shop.. (and no one to blame but my self...) :evil:
 

KMScott

Well-known member
Joined
Feb 14, 2012
Messages
4,642
Location
Daufuskie Island, South Carolina
Carla's post reminds me of when I was a apprentice in the late 70's. I was grinding in mold inserts for one of the Moldmaking Leaders and watched as one of the top moldmakers put his tag on a Bridgeport to claim as his machine for the day. The machine was a mess. He grabbed a cardboard box and carefully cleaned the mill with a chip brush, gently cleaning the tee slots and brushing everything into the box. Swept the floor and wiped down the Bridgeport till it was clean and shiny. This toolmaker was very intimating, scared me even if he looked at me and I stayed away from him since I have seen him get very angry if someone made a mistake on one of his tasks dealt out to assistants. He worked all day and cleaned up his mill when he was finished and put all his chips from the machine and floor in the waste basket, wiped down the machine till it shined. When he was done he then picked up the box of chips and dirt from earlier and aggressively pored the chip box all over the machine and floor just like it was when he started. Well that left a impression on me to this day. Every Toolmaker/Machinist has his or her's way of doing a project, there is no wrong way if the results do work.
 

Shiftless

Well-known member
Joined
Mar 9, 2014
Messages
14,553
Location
East Bay SFO
It is very interesting to hear stories from the experienced members who contribute so much to this thread. Thank you Carla, KMScott as well as all the others who add to it. :thumbup: :beer:
 

J.B.

New member
Joined
May 6, 2016
Messages
1
Location
Camarillo, California
Has anyone used POR 15 on a restored vise? I have used it on several home projects (old tool chest) and it kills the rust. It takes a little extra work but it's almost like power coat.
 
OP
D

drivesitfar

Well-known member
Joined
Oct 23, 2013
Messages
36,034
Location
Pacific Northwest
JB: I haven't heard of anybody using Por15 on a vise, but I bet somebody has. i'm sure it would work great and just make sure not to put it on anything that needs to move. thanks for joining GJ just to ask the question and hope you stick around to ask more or share your pictures of a vise painted with Por15 because i'd certainly like to see it.

just and FYI that might be easier and a bit cheaper. some of the guys have been buying smokers or using ovens they have in their shops to just cook on the spray painted vises and some just use BLO and cook it. I hear the cooked BLO (boiled linseed oil) vises tend to give off a not so nice odor though so might need a fan to keep smell out of house. also DON'T USE YOUR OVEN THAT YOU COOK YOUR FOOD IN TO DO THIS.

ALL: I've been reading and LURKING so to speak and enjoying everything even though I don't totally understand it all or have the ability to do some of those amazing fixes.

HAPPY MOTHER'S DAY ALL
 
Last edited:

Outlawmws

Well-known member
Joined
Aug 9, 2011
Messages
39,275
Location
The Badlands
JB:

just and FYI that might be easier and a bit cheaper. some of the guys have been buying smokers or using ovens they have in their shops to just cook on the spray painted vises and some just use BLO and cook it. I hear the cooked BLO (boiled linseed oil) vises tend to give off a not so nice odor though so might need a fan to keep smell out of house. also DON'T USE YOUR OVEN THAT YOU COOK YOUR FOOD IN TO DO THIS.


HAPPY MOTHER'S DAY ALL

:+1: on the "shop oven" or smoker. I just picked up a "remodel" cast off electric wall oven for this purpose. (SWMBO thought it was nuts, even though I told her that it was in the plan a LONG time ago)

I'll frame in a spot or a box (and sit it on a shelf) for it and wire it to a 220 plug, and only plug in when I need to. Heck if you have space one of those old "Media carts" companies used for TV's in conference rooms would be a great stand for a boxed oven.
 

reivertom

Well-known member
Joined
Jun 11, 2015
Messages
70
Location
Eastern Kentucky
Carla's post reminds me of when I was a apprentice in the late 70's. I was grinding in mold inserts for one of the Moldmaking Leaders and watched as one of the top moldmakers put his tag on a Bridgeport to claim as his machine for the day. The machine was a mess. He grabbed a cardboard box and carefully cleaned the mill with a chip brush, gently cleaning the tee slots and brushing everything into the box. Swept the floor and wiped down the Bridgeport till it was clean and shiny. This toolmaker was very intimating, scared me even if he looked at me and I stayed away from him since I have seen him get very angry if someone made a mistake on one of his tasks dealt out to assistants. He worked all day and cleaned up his mill when he was finished and put all his chips from the machine and floor in the waste basket, wiped down the machine till it shined. When he was done he then picked up the box of chips and dirt from earlier and aggressively pored the chip box all over the machine and floor just like it was when he started. Well that left a impression on me to this day. Every Toolmaker/Machinist has his or her's way of doing a project, there is no wrong way if the results do work.

That guy knew human nature very well. He knew if it looked nice early before he got there, someone would claim it. If it was a total mess, most folks wouldn't touch it with a 10 foot pole because they would have to clean it up before they could use it. That's some psychology right there! He must have really liked that machine!
 
To avoid these ads, REGISTER NOW!
Top Bottom