To avoid these ads, REGISTER NOW!

What did you do "IN" your garage today?

Outlander

Well-known member
Joined
Jul 30, 2010
Messages
5,154
Location
Quebec, Canada
Did 3 jobs simultaneously as I had down time to deal with.

First, got a trolling motor ready for my nephew. It is an older one (17 lbs thrust) going on his first rowboat. Replaced the propeller (had to order via Amazon from the US, cost me an arm and a leg). Changed the battery clips and cleaned it all up. This was one 2 of my boats and was gathering dust. Glad it is going to a new home (and Mrs Outlander is pleased I am doing it for her nephew!)

Built a flower box for Mrs Outlander. She wants to grow herbs at the cottage. Still need to finish staining it.

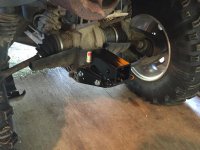
Put a receiver hitch onto the Outlander. Previous one was held on by a single bolt and it was never straight when I was pulling something. This was 5 times the price but 1000 times more useful. Yes, muffler is fugly - I have a new one, just need to find time to install it.

Also finished cutting the grass before it gets too hot and my nap / cigar smoking gets interrupted.
 

Attachments

  • 2016-06-19 10.58.31.jpg
    2016-06-19 10.58.31.jpg
    142 KB · Views: 79
  • 2016-06-19 10.57.44.jpg
    2016-06-19 10.57.44.jpg
    148.9 KB · Views: 89
  • 2016-06-19 11.37.58.jpg
    2016-06-19 11.37.58.jpg
    138.2 KB · Views: 104
To avoid these ads, REGISTER NOW!

jumpstart

Well-known member
Joined
Jan 11, 2009
Messages
401
Location
Central MA
Rebuilt the carbs and loaded up for a nostalgia drag event.
20160611_111722.jpg

20160617_194709.jpg
 

LAROKE

Banned
Joined
Jul 30, 2010
Messages
1,790
Location
Boca Raton, Florida
Back to BillyBob's master cylinder conversion. New 5/16"-18 x 1" bolts arrived from McMaster-Carr during the week and I was able to continue the mock up. The holes in the adapter bracket are just a smidgen off and I will have to drill them out but they were close enuf for the mock up. The old saying "I'd rather be lucky than smart" applies here. I've seen two different brackets for this conversion and when I ordered the kit from Chevs of the forties, there was no picture of what I was getting. Both the kits I'd seen locate the master cylinder further back from its original location. The kit I received keeps it in the original location which is what I want. Too far back will interfere with the transmission cross member I have to install for the Muncie rockcrusher. That won't be an issue with this bracket.

Shift linkage interference may be a problem, however. There is only about three inches between the new master cylinder (a '75 Chevy half ton truck master cylinder) and the side of the ****** where the shifter mechanism goes. It's time to get that mocked up to see if I'm in trouble.

bb061816am.JPG


bb061816bm.JPG
 

Outlawmws

Well-known member
Joined
Aug 9, 2011
Messages
39,292
Location
The Badlands
Gave the trailer a badly needed scrub brush bath. I'd given it a basic hose off after it came home, and this was above that, but detailing comes later... I still have some fab work to do, and to paint the frame...

After it dries I'l stick the Lic. plate on it..
 

GTA Matt

Well-known member
Joined
Aug 30, 2010
Messages
3,148
Location
Zebulon, NC
I have three 9" center sections to build this week. Still waiting on parts for 2 of them but I removed all the sharp edges off the gears and fully assembled one.


Civilian

Member
Joined
Jun 12, 2016
Messages
18
Location
PA
Pics?

Sent from my LG-D801 using Tapatalk

Sorry for the delay. Picked up three more Channellocks from Home Depot on my morning errands run, and then changed the oil in the Edge.

Looks like GJ doesn't auto resize pics. I had to resize this before linking.

tuGc


Guess I'll add "Changed the oil in my wife's Ford Edge" to the list. I'll be back out there shortly.
 

kaymccampbell

Well-known member
Joined
Feb 27, 2015
Messages
29,583
Location
Upstate New York
Cleaned and serviced the deck pins for the pool cover. Made a new winter stand for the diving board. Dragged airhoses and tools out and back in again for late pool opening due to roof work.
 

rayra

Well-known member
Joined
Dec 1, 2014
Messages
4,724
Location
Escaped from Los Angeles
last few weeks I've been in 'woodworking' mode.

We have a large dated 5-piece oak wall / entertainment unit in the living room. The biggest tube TV that would fit in it was 27". A few years ago when that finally crapped out, we finally got a 40" flat screen. My short term ghetto solution was to rig a 'diving board' sort of shelf, counterweighted with cinder blocks, with the flatscreen perched in front of the 'TV' space. This also blocked the vertical drawer VHS tape storage cabinet.

So my master plan was to deconstruct both the TV and VHS cabinets, re-configure the pieces and add some new wood, and create a new wider cabinet sized to the TV, which included DVD storage drawers and ultimately only added about 3" more width to the entire arrangement.

I took the vertical sides of the VHS cabinet and chopped them down to be two new 43" wide shelves, the 'beauty' shelves adjacent to the TV section. The lower AV equipment shelf and upper cabinet roof are made from the old narrower shelves, **** / spline -jointed together. The joints are in deep shadow or under equipment and not visible. The drawers re-used the VHS drawer slides and handles.

Overall the goal was to make a piece that matched the others, that looked original. I think I accomplished it, with the exception of the stainign of the new fascias and drawer fronts. Just a little too light on the staining. They need to be darker. But I reached the 'abandonment' stage of the project, so there it is.

The original pieces as I chopped them up. No turning back now.

TVcabinet01_zpscoxpnahd.jpg


A pic of the skeleton / fixed pieces in place. I built the middle pillar out of 3/4 ply then skinned it with offcuts of the original wood pieces. There's a joint about halfway up, which is hidden by the TV.

TVcabinet03_zpsujfij52z.jpg


here you see what one of the ****/spline-jointed pieces looks like

TVcabinet04_zpshgvdw08g.jpg


A view of the shelves and fascias installed. The shelf part way up the pillar is removable. Just pluck it out and have total access to all the video equipment wiring.

TVcabinet08_zps3zh9daw5.jpg


The drawer boxes were fabricated to the max available space and JUST accommodated DVD / VHS in a double row, spines up. about a 1/4" to spare.

TVcabinet10_zpsrgy07li8.jpg


Here it is in place. It will do nicely for a few years / until we can eject from CA. The TV is hung on a wall bracket, which is attacked to the pillar. The sound bar is likewise hung from an oak crosspiece. Both TV and sound bar 'float' in the space.

TVcabinet14_zpsd1abmbx7.jpg
TVcabinet15_zpsuqgpnj3h.jpg
TVcabinet16_zpswjchjhqo.jpg


Total cost was about $100 in new plywood and oak planks and some staining stuff. Not a bad bargain.
 

rayra

Well-known member
Joined
Dec 1, 2014
Messages
4,724
Location
Escaped from Los Angeles
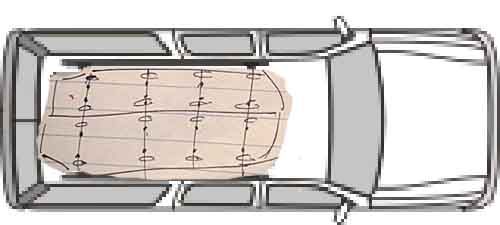
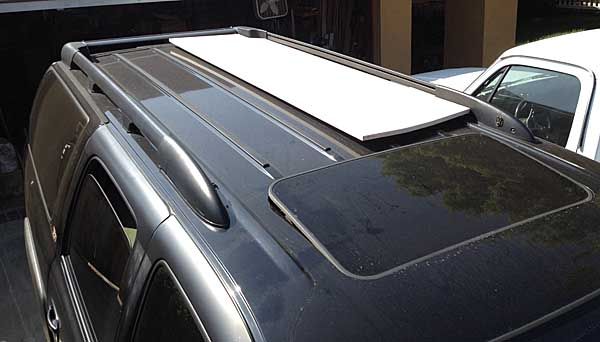
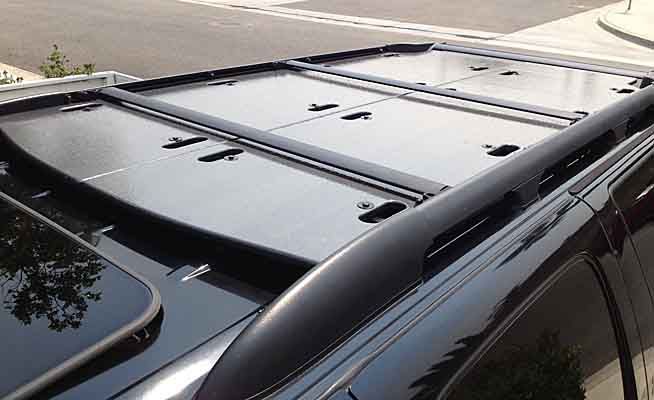
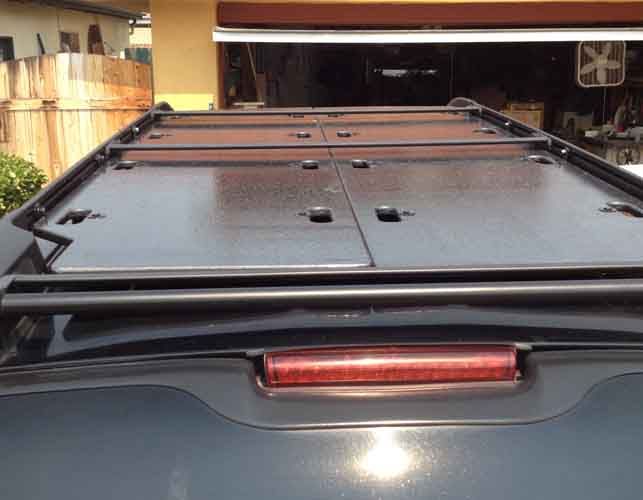
My other recent woodworking project was adding a plywood deck to the roof rack on my Suburban. I wanted it in part to provide some protection to the roof itself when camping gear etc is slung up there. But I mostly wanted it as a shade for the vehicle. Damned all black Suburban is an oven, here in SoCal.

Initially planned as one piece, I wanted to add some cutouts to it so the crossbraces I was adding could be used as anchor points for tie-downs. Once I sketched that, I decided it sort of looked like backboards / stretchers, so I made them that in fact. Now two separate boars, with four handholds down each side of each. Remove a few bolts and they can be used in an emergency.

cargotray03._zps5nbbtp6y.jpg
roofrackdeck27_zps0plwinaj.jpg
roofrackdeck21_zpssfpjixr7.jpg
roofrack23_zpsygrttar9.jpg
roofrack26_zpsvd1xhcwo.jpg
roofrack31_zpsymshxzik.jpg
roofrack36_zpsyyu9fsdz.jpg
roofrack39_zpsybep95ox.jpg
roofrack44_zpsejofsxrz.jpg
roofrack55_zpstb5vjfbu.jpg
roofrack52_zpsuhptawqv.jpg


It's described in detail over at the Expedition Portal -

http://www.expeditionportal.com/for...ng-a-roof-rack-deck-on-a-GMT800-Suburban-Z-71
 

rayra

Well-known member
Joined
Dec 1, 2014
Messages
4,724
Location
Escaped from Los Angeles
Re: What did you do "IN" your garage today?

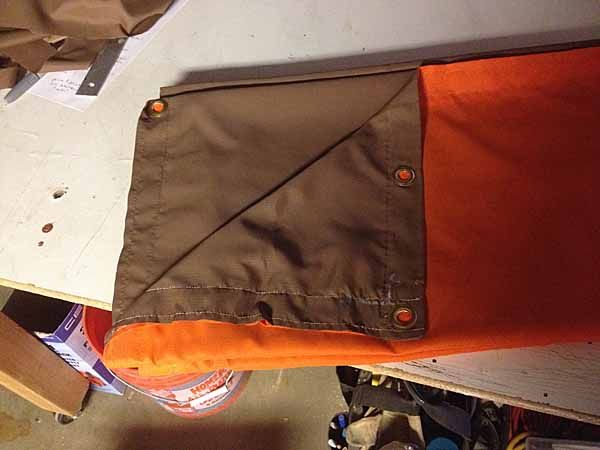
Sewing machines are machines, not tampons, I dont see the big deal. Anyone that thinks sewing is just for women, I challenge them to try some auto upholstery or saddle making, actually anything requiring a sewing machine. A sewing machine is no different than a milling machine, drilling machine or driving machine.

Great job on the apron!

Sent from my SM-T230NU using Tapatalk


harrumph harrumph


awning33_zpshviaoc1e.jpg
awning34_zpse0320znc.jpg

awnings106_zpslrjmy6c5.jpg


http://www.expeditionportal.com/for...eas-for-a-lightweight-compact-flexible-design
 

bmxdad

Well-known member
Joined
Feb 18, 2014
Messages
2,539
Location
Puyallup, WA
The center tube sits in a bushing (similar to brass) on each end. Those bushings are pressed into the end piece and it allows the center tube to pivot up and down.


I see it now ... looks mighty stiff. Any thing for the front? Seems a bar that stiff is going to give you some over steer ....

Is this SOLO?
 

nine4gmc

Well-known member
Joined
Mar 24, 2012
Messages
14,357
Location
Dallas
LAROKE, mmb617, Crazyjake8493, Guster, FiguredItOut, rayra and any/everyone else with sewing projects or questions, I just started a "show your sewing projects" thread in the Fabrication section. Hope to see you guys posting there!

Sent from my SM-T230NU using Tapatalk
 

Outlander

Well-known member
Joined
Jul 30, 2010
Messages
5,154
Location
Quebec, Canada
LAROKE, mmb617, Crazyjake8493, Guster, FiguredItOut, rayra and any/everyone else with sewing projects or questions, I just started a "show your sewing projects" thread in the Fabrication section. Hope to see you guys posting there!

Sent from my SM-T230NU using Tapatalk

Cool. I miss my mom being close. She was always sewing something for me.
 

Allgonquin

Well-known member
Joined
May 5, 2012
Messages
59
Location
MD
Pulled the flaking/peeling roof rack off my '98 Land Cruiser and repainted it using bedliner. Came out really well, very happy with the results. Much easier to pull than I anticipated!
 

FigureItOut

Well-known member
Joined
Sep 14, 2015
Messages
3,267
Location
Bentonville AR
LAROKE, mmb617, Crazyjake8493, Guster, FiguredItOut, rayra and any/everyone else with sewing projects or questions, I just started a "show your sewing projects" thread in the Fabrication section. Hope to see you guys posting there!

Sent from my SM-T230NU using Tapatalk
Cool, I'm gonna have to step it up. Thursday I'm looking at a long arm machine that my cobbler is putting out of service due to an upgrade. I hope we're on the same planet in price, apparently he's just been letting it collect dust for a year with no thought of selling it until I asked about it.

Sent from my SAMSUNG-SGH-I337Z using Tapatalk
 

nine4gmc

Well-known member
Joined
Mar 24, 2012
Messages
14,357
Location
Dallas
Good luck FIO, I picked up a consew dual needle not too long ago for $500 and the seller mentioned that he just sold a 24" (iirc) long arm consew the week before for $600... I wanted to puke missing out on that deal...

Sent from my SM-T230NU using Tapatalk
 

andys

Well-known member
Joined
Apr 14, 2010
Messages
1,663
Location
Bucks County, PA
I got my tractor up and running again. This is a 1992 Simplicity 16GTH. It was my grandfather's and it sat in his shed for a few years after he died. My grandmother asked me if I wanted it and. Of course!

It needed some carb cleaning, the PTO clutch was locked up from sitting and I did belts and blades on the deck. It ran like a champ and cut some serious time from my push mowing routine.

Somewhere I have a picture of me sitting on this tractor when I was 10 or so. I hope one of my kids will be using it some day.
 

Attachments

  • IMG_20160618_142435.jpg
    IMG_20160618_142435.jpg
    148.6 KB · Views: 80
To avoid these ads, REGISTER NOW!

rayra

Well-known member
Joined
Dec 1, 2014
Messages
4,724
Location
Escaped from Los Angeles
Cool. I miss my mom being close. She was always sewing something for me.

Nice. lol


I'll be there, I've done several sewing projects the last couple years, and one of the next is going to be a partition curtain for my GARAGE, rigged like an ER curtain, so I can isolate my woodworking mess from the rest of my suburban attached garage.
 

countryroad82

Well-known member
Joined
Mar 18, 2011
Messages
3,447
Location
Kentucky
Have had the fun of posting on this thread in awhile. Pulled a brand new truck in the shop for me to ruin the factory paint in the bed and applied a spray in bedliner. I love doing these things. Quick fast and easy money!
 

Mr. Roboto

Well-known member
Joined
Dec 11, 2012
Messages
2,160
Location
New Hampshire
Cut the notches in the 6x6 posts that will be holding up the main beam for the deck I'm building. the doubled up 2x12 will sit in the notch. Need to pick up some wood preservative tomorrow to treat the cut ends of the PT prior to installation. I only have a 6" circular saw, so I had to start the cuts as deep as I could with that, and then finish them up with the sawzall.
F21002A5-9AE3-4161-BBBA-A5DDD6209D65_zpsdagrzmyd.jpg
 

wdrumheller

Well-known member
Joined
Nov 15, 2012
Messages
198
Location
Virginia
Fixed my kids bike that got run over last weekend *kid was not on the bike*. Having a nice organized shop with the right tools in place made the repair a 4 minute task instead of a 1 hour task fighting with the wrong tools and trying to find things.
 

stioc

Well-known member
Joined
May 2, 2005
Messages
1,317
Location
SoCal
Profusely sweated even at 9am (and got itchy arms from the insulation) while installing this thermostat controlled attic fan. Just in time too because we had a major heat wave (106F) the last two days in a row.

ffd260fe-e63d-48a8-ad90-266e9c3a1e06_400.jpg


Used a dual switch to convert a single switch in the bedroom below so as to act as the master on/off for the attic fan.

3985d371-80c7-4ea4-9bb5-698fb492d008_400.jpg
 

Colin Len

Well-known member
Joined
Jan 30, 2013
Messages
1,233
Location
Long Beach CA
Profusely sweated even at 9am (and got itchy arms from the insulation) while installing this thermostat controlled attic fan. Just in time too because we had a major heat wave (106F) the last two days in a row.

ffd260fe-e63d-48a8-ad90-266e9c3a1e06_400.jpg


Used a dual switch to convert a single switch in the bedroom below so as to act as the master on/off for the attic fan.
I'm interested to hear how well this works for you. My home has an old attic fan (belt driven) that I use occasionally but haven't been able to tell if it actually does anything to help keep the house cooler. If it does work I'd consider replacing it with a more efficient (and quieter) fan).
 

zmotorsports

ALLIANCE MEMBER
Joined
Oct 20, 2009
Messages
21,436
Location
Northern Utah
Started fabricating some argon purge and backer boxes for TIG welding. I have quite a few pictures of the progress in my shop projects thread, link in my signature.

Mike.
 

jfull

Active member
Joined
Mar 30, 2010
Messages
44
Profusely sweated even at 9am (and got itchy arms from the insulation) while installing this thermostat controlled attic fan. Just in time too because we had a major heat wave (106F) the last two days in a row.

ffd260fe-e63d-48a8-ad90-266e9c3a1e06_400.jpg


Used a dual switch to convert a single switch in the bedroom below so as to act as the master on/off for the attic fan.

3985d371-80c7-4ea4-9bb5-698fb492d008_400.jpg

Let us know if this works. A review of sorts. I havent installed one yet, but am considering. My logic is the attic air temperature is higher than the outside, so I want to vent the entire attic air by pulling/pushing it out with a fan like this. I am hoping this would keep the upstairs rooms cooler.
 

bsg1

Well-known member
Joined
Sep 3, 2015
Messages
303
Location
so cal
i avoided my garage today. i need to go through everything in the garage and get rid of at least 50% of the stuff that's in there.
 

Outlawmws

Well-known member
Joined
Aug 9, 2011
Messages
39,292
Location
The Badlands
Let us know if this works. A review of sorts. I havent installed one yet, but am considering. My logic is the attic air temperature is higher than the outside, so I want to vent the entire attic air by pulling/pushing it out with a fan like this. I am hoping this would keep the upstairs rooms cooler.

It works. Been using one for 5+ years

I've had an attic fan for probably 20 years, it's got a built in thermostatic switch, so it takes care of itself.

And yes, it does work.
 

GTA Matt

Well-known member
Joined
Aug 30, 2010
Messages
3,148
Location
Zebulon, NC
Put together center section #2 on the week. This one is a Strange nodular case with a 31 spline truetrac. Used my press to put pressure on the pinion bearings while setting up the solid spacer so I didn't have to run the pinion nut in and out a bunch of times before getting the proper preload.


I'm too cheap to buy an expensive pinion depth checker so I'm forced to do some careful math. My math told me I needed an .031 shim, good enough place to start.


I heat up the carrier bearings and ring gear on a hot plate to make installation easier. They literally drop on, no hammering or pressing.


Dropped it in, took an initial reading, near perfection on the first shot. Its hot and humid, I'll leave all the final torqueing for tomorrow...


stioc

Well-known member
Joined
May 2, 2005
Messages
1,317
Location
SoCal
I've had an attic fan for probably 20 years, it's got a built in thermostatic switch, so it takes care of itself.

And yes, it does work.

It works. Been using one for 5+ years

Let us know if this works. A review of sorts. I havent installed one yet, but am considering. My logic is the attic air temperature is higher than the outside, so I want to vent the entire attic air by pulling/pushing it out with a fan like this. I am hoping this would keep the upstairs rooms cooler.

I sure hope so! The reviews on Amazon looked favorable so I went for it. I don't know how to test its effectiveness though. Observation wise I left the master switch on this morning when I left for work (it didn't kick in because the thermostat on the fan itself is set to 90F). When I came home at 5:30pm it was on. The outside ambient temp at 5:30pm was 85F so the attic is definitely hotter than the outside temp.

I might install a second one above the garage attic and close off the access panel from the house attic to the garage attic. I think one fan is too small for the attic size.
 

PassnThru

Well-known member
Joined
Jan 5, 2010
Messages
6,512
Location
Bowling Green KY
I sure hope so! The reviews on Amazon looked favorable so I went for it. I don't know how to test its effectiveness though. Observation wise I left the master switch on this morning when I left for work (it didn't kick in because the thermostat on the fan itself is set to 90F). When I came home at 5:30pm it was on. The outside ambient temp at 5:30pm was 85F so the attic is definitely hotter than the outside temp.

I might install a second one above there garage attic and close off the access panel from the house attic to the garage attic. I think one fan is too small for the attic size.

Buy a thermometer with an outside sensor. Mount the outside sensor in your attic. The simple ones are cheap enough. When your done with it this summer put it the crawl space this winter to see how cold it gets and maybe prevent some pipes from freezing.
Those things are really handy.

Edit - Oops - I see you are in SoCal now. No freezing problem there - just keep it in the attic. You'll always know what the temp is.
 
To avoid these ads, REGISTER NOW!
Top Bottom