Now on to the restoration.
This vise is no different to disassemble than an Athol, or any other domestic vise with a spring loaded lead screw. I didn't take very many pictures of the disassembly/rework/reassembly because this vise only needed to be cleaned, polished and painted. However, there are some interesting points about this vise that I did photograph:
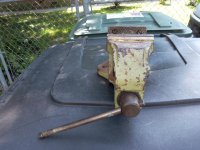
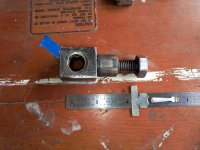
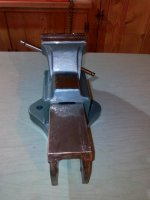
1st. Picture: Here's the underside. I wanted to show the spring loaded spindle. All that needs to be done is to straighten out the cotter pin.
***WARNING*** Wear safety glasses when bending a cotter pin. While I was straightening out this one with a screwdriver, part of it broke off and hit me on the forehead.
2nd. Picture: In order to remove the cotter pin, you need to compress the spring, thus relieving the pressure on the pin. Thanks to Drives for reminding me about this awhile back, I notched the end of a piece of 3/4” thin wall conduit to do the job.
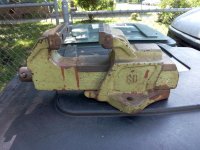
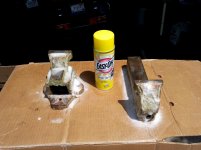
3rd. Picture: Since there was a lot of paint to remove (including a couple of coats of 70s green interior latex) I decided to spray it down with EZ Off and let it sit for 8 hours. This saves a lot of time with the wire wheel. While cleaning the jaw bodies, I noticed evidence of gray and red paint. Red may have been the original color?
4th. Picture: I thought that it would be interesting to show the spindle nut. The rounded end fits into a nest that is cast into the inside of the stationary jaw body.
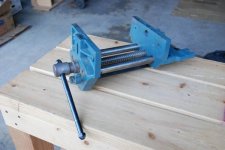
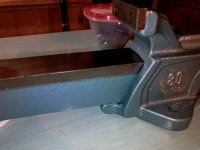
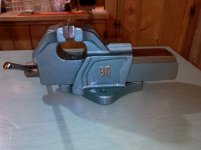
5th. Picture: Painting is all done. Again, there is nothing different about painting this vise compared to domestic vises. Time for a test fit.
I only had one problem while test fitting the dynamic jaw slide into the stationary jaw body. Since my intentions for this vise is to be an ornamental vise, I clear coated the bare metal areas of the slide. I discovered that the tolerances between the slide and the stationary jaw body were so close that the thickness of a single coat of lacquer would not allow for movement of the slide through the stationary jaw body. So I had to clean off the lacquer and apply furniture paste wax to the bare metal areas of the slide.
6th. Picture. These are the pads that are cast in the stationary jaw body that hold the dynamic jaw slide in place.
7th. Picture: Here's the finished spindle spring assembly
My next post will show the finished restoration.


 ---I knew that was going to be a good show, but didn't think it would shoot that high.
 ---Glad I got one back when you could still buy one with a working man's salary.


