To avoid these ads, REGISTER NOW!

4x8 Trailer Mod's -- Hydraulic Tilt & Extendable Tongue

bimmer1980

Well-known member
Joined
Feb 5, 2009
Messages
2,105
Location
York, PA
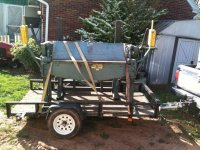
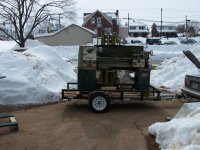
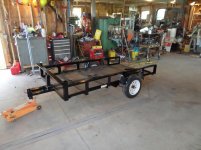
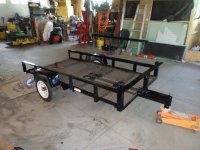
I've enjoyed the variety of trailer builds and modifications, so I thought it was time to post pictures of mine.

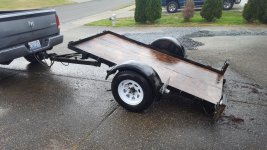
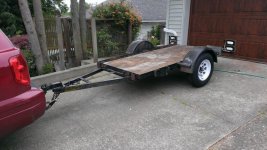
I have the Carry-On brand 4x8 utility trailer. It has served me well. I think I paid less than $400 back in SD in 2006. I used it to move to PA and then it has hauled a variety of building materials and equipment over the years.

It has been used and abused, but still works great!

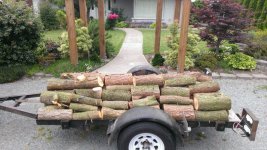
Here's a few pictures of it in service over the last few years.....

and yes, many of those loads were pulled with a '87 BMW 325is......... :willy_nil
 

Attachments

  • 100_0273.jpg
    100_0273.jpg
    149.4 KB · Views: 196
  • 100_0315.jpg
    100_0315.jpg
    153.2 KB · Views: 200
  • 102_6752.jpg
    102_6752.jpg
    149.3 KB · Views: 241
  • photo (18).jpg
    photo (18).jpg
    149.3 KB · Views: 215
  • 100_8392.jpg
    100_8392.jpg
    146.8 KB · Views: 210
  • 100_8371.jpg
    100_8371.jpg
    144.2 KB · Views: 211
  • 100_9280.jpg
    100_9280.jpg
    149.4 KB · Views: 196
To avoid these ads, REGISTER NOW!
OP
B

bimmer1980

Well-known member
Joined
Feb 5, 2009
Messages
2,105
Location
York, PA
A few more of some of the materials I've hauled....

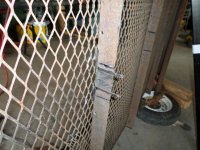
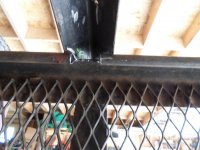
Notice the 3" angle iron that is bolted to the top rails. This is an extremely handy modification. It allows for easy loading at the lumber yard by a forklift and then easy unloading at home with either the forklift or the skid steer.

When I need to haul something on the deck, I just unbolt the angle irons (6 bolts -- 1/2") and then I can use the angle iron for addition support in the bed if need be to spread the load out.
 

Attachments

  • 100_9281.jpg
    100_9281.jpg
    147.9 KB · Views: 200
  • 100_9508.jpg
    100_9508.jpg
    148.5 KB · Views: 186
  • 100_9507.jpg
    100_9507.jpg
    148.8 KB · Views: 185
  • 100_9509.jpg
    100_9509.jpg
    148.4 KB · Views: 199
OP
B

bimmer1980

Well-known member
Joined
Feb 5, 2009
Messages
2,105
Location
York, PA
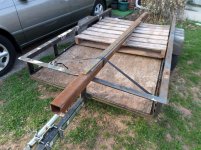
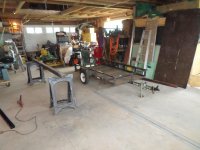
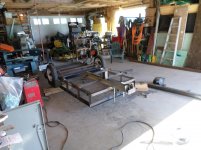
With all of the loads that the trailer had been hauling, I was noticing that over time the cross member at the rear of the tongue was starting to show some permanent bending. I was stating to be concerned that it could ultimately fail under load if I let it go....

Therefore, that cross member needed to be replaced. While I'm in there I might as well make a few other modifications as well.

A few times I had hauled some mulch or dirt and it would have been nice to be able to dump the bed. When I was hauling some steel from the steel supplier, it would have been handy to have a longer tongue or to have it extendable......

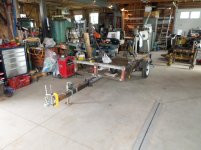
Well, before we blow the trailer apart, better get some steel. I picked up a length of 3" tube with 1/4" wall for the new tongue at the scrap yard. Paid about $.55 per pound, but oh well....

I already had some **** 3.5" tubing. I needed to prep the ends of that....

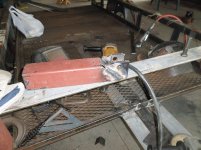
Notice the small 2x3 tube for the existing hitch and small 2x3 angle on either side that was welded to 2" x 1/8" angle cross member. That was the cross member that was starting to bow...

I got the Stihl demo saw fired up and went to work cutting. Some the areas I finished up with the 9" dewalt grinder and the air cut off tool.

Notice the notches on the other cross member as well....
 

Attachments

  • SAM_5897.jpg
    SAM_5897.jpg
    152.2 KB · Views: 187
  • SAM_5921.jpg
    SAM_5921.jpg
    146.6 KB · Views: 165
  • SAM_5919.jpg
    SAM_5919.jpg
    148.6 KB · Views: 175
  • SAM_5917.jpg
    SAM_5917.jpg
    146 KB · Views: 182
  • SAM_5911.jpg
    SAM_5911.jpg
    140.3 KB · Views: 167
  • SAM_5906.jpg
    SAM_5906.jpg
    145.6 KB · Views: 172
  • SAM_5903.jpg
    SAM_5903.jpg
    136.2 KB · Views: 173
OP
B

bimmer1980

Well-known member
Joined
Feb 5, 2009
Messages
2,105
Location
York, PA
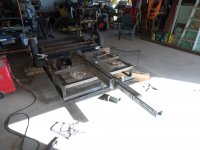
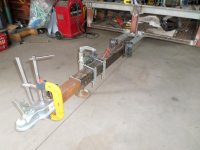
I needed room for the new extendable hitch tongue. That would be 3.5" tube with a 3" tube slid into it. The tongue assembly would be supported by two 3" angles on each side and would have the cross members attached to them.

The end of the 3" angles would terminate at a new 2x3" tube that would be right in front of the axle spring brackets.

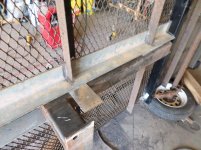
I created some L-shaped notches in the 2" angle cross members for the 3" angle....

BTW--the 3" angle was from an auction sale where I got four 10' lengths of it for $5 total...... :thumbup:
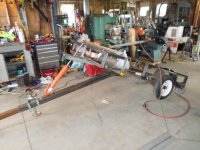
The 3.5" tube I bought from work that salvages off a piece of equipment that was being scrapped. about ten pieces of 9' long tubes for $20. :thumbup:
 

Attachments

  • SAM_5931.jpg
    SAM_5931.jpg
    146 KB · Views: 159
  • SAM_5932.jpg
    SAM_5932.jpg
    142.8 KB · Views: 143
  • SAM_5930.jpg
    SAM_5930.jpg
    146.2 KB · Views: 149
  • SAM_5927.jpg
    SAM_5927.jpg
    143.6 KB · Views: 148
  • SAM_5926.jpg
    SAM_5926.jpg
    149 KB · Views: 144
  • SAM_5925.jpg
    SAM_5925.jpg
    147.1 KB · Views: 147
  • SAM_5924.jpg
    SAM_5924.jpg
    147.9 KB · Views: 149
OP
B

bimmer1980

Well-known member
Joined
Feb 5, 2009
Messages
2,105
Location
York, PA
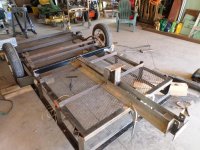
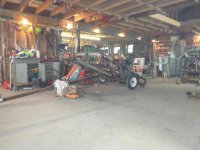
As I was mocking up the 3" angle onto the trailer, I used some scrap pieces of 3.5" tube and some metal connector plates to build in some adequate clearance. Good thing that I did....

Then I started welding it up with 7018 stick.

I was then able to get the 3.5" tube cut to length and then drilled in the pivot point.

Then I could get it flipped over and back on the wheels for the next step....
 

Attachments

  • SAM_5936.jpg
    SAM_5936.jpg
    138.1 KB · Views: 152
  • SAM_5935.jpg
    SAM_5935.jpg
    132.2 KB · Views: 145
  • SAM_5934.jpg
    SAM_5934.jpg
    147.7 KB · Views: 161
  • SAM_5933.jpg
    SAM_5933.jpg
    137.6 KB · Views: 135
OP
B

bimmer1980

Well-known member
Joined
Feb 5, 2009
Messages
2,105
Location
York, PA
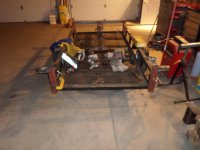
With the trailer back on it's wheels, it was time to start mocking up the extendable hitch tongue and the hydraulic ram.

Where the end of the hydraulic would attached to the front top cross member, I knew that I would need some addition strength from a larger cross member.

So I got out the demo saw again and started cutting. After lots of grinding dust, the front verticals and top cross member was pulled off.

Then I started mocking in the new 3" angle and 2.5" tube.
 

Attachments

  • SAM_5960.jpg
    SAM_5960.jpg
    143.5 KB · Views: 134
  • SAM_5959.jpg
    SAM_5959.jpg
    134.5 KB · Views: 142
  • SAM_5958.jpg
    SAM_5958.jpg
    135.9 KB · Views: 142
  • SAM_5955.jpg
    SAM_5955.jpg
    139.1 KB · Views: 146
  • SAM_5953.jpg
    SAM_5953.jpg
    137.9 KB · Views: 155
  • SAM_5950.jpg
    SAM_5950.jpg
    138.2 KB · Views: 155
  • SAM_5948.jpg
    SAM_5948.jpg
    138.5 KB · Views: 160
OP
B

bimmer1980

Well-known member
Joined
Feb 5, 2009
Messages
2,105
Location
York, PA
Yeah, the BMW did get it's work out.... To it's credit, it pulled it like a dream. I was really surprised. It had plenty of power for towing. I always gave myself plenty of room for stopping, but even that wasn't too much of an issue...

I did eventually sell the BWM to a young kid. It was originally a MN car and the rust rot was working on it... PA inspections are a ****** and I just did not have the time to work on patching a bunch of rust. I did like the car and it was sad to see it go.....

I'm now using a 2002 4Runner to pull the trailer.....
 
OP
B

bimmer1980

Well-known member
Joined
Feb 5, 2009
Messages
2,105
Location
York, PA
Anyhow, back the trailer... Let's get the top cross member welded on.... I also needed a robust pivot point for the end of hydraulic jack...

Then I welded everything up with some 7018.
 

Attachments

  • SAM_5970.jpg
    SAM_5970.jpg
    137.3 KB · Views: 154
  • SAM_5967.jpg
    SAM_5967.jpg
    136.2 KB · Views: 134
  • SAM_5965.jpg
    SAM_5965.jpg
    138.2 KB · Views: 130
  • SAM_5963.jpg
    SAM_5963.jpg
    143.2 KB · Views: 118
  • SAM_5962.jpg
    SAM_5962.jpg
    142 KB · Views: 123
OP
B

bimmer1980

Well-known member
Joined
Feb 5, 2009
Messages
2,105
Location
York, PA
Then I was ready to cut the salvage 3" tube to length. I wanted it long enough that I could fit a 20' or 24' stick of steel on the trailer when I was extended out. I also did not want the retracted length to stick too far out of the receiver 3.5" tube.

I forget what length I cut it at, but I think I would have a 2' remaining in the 3.5' tube when it was extended out.
 

Attachments

  • SAM_5975.jpg
    SAM_5975.jpg
    143.1 KB · Views: 121
  • SAM_5974.jpg
    SAM_5974.jpg
    136.4 KB · Views: 117
  • SAM_5973.jpg
    SAM_5973.jpg
    139 KB · Views: 113
  • SAM_5972.jpg
    SAM_5972.jpg
    141.3 KB · Views: 109
OP
B

bimmer1980

Well-known member
Joined
Feb 5, 2009
Messages
2,105
Location
York, PA
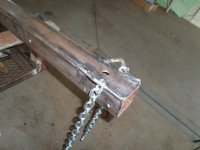
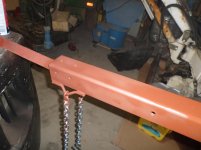
Next I needed to make the safety chains attachment points. There are a variety of ways I could have done this, but I wanted it to look somewhat "factory" or nicely customized.....

I found that you can buy preformed rod for safety chain mounting points, but when I was ready to do this, I was not ready to wait on a mail order.... so let's make them....

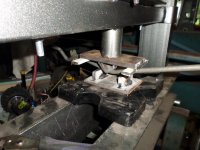
I cobbled together a rough bending jig for the press. Sometimes good enough is good enough.... I did not want to burn a lot of time making a nice brake attachment as I have some plans for that down the road...... :thumbup:

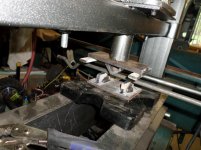
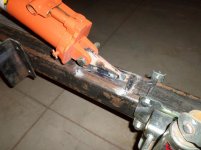
Finally, I needed a front pivot point for the hydraulic ram. I wanted it easy to mount to the tube. I only welded it at the front and back. More than sufficient.
 

Attachments

  • SAM_6179.jpg
    SAM_6179.jpg
    144.3 KB · Views: 120
  • SAM_6180.jpg
    SAM_6180.jpg
    141.5 KB · Views: 115
  • SAM_6181.jpg
    SAM_6181.jpg
    134.8 KB · Views: 117
  • SAM_6184.jpg
    SAM_6184.jpg
    139 KB · Views: 123
  • SAM_6185.jpg
    SAM_6185.jpg
    140.1 KB · Views: 135
  • SAM_6198.jpg
    SAM_6198.jpg
    137.1 KB · Views: 151
  • SAM_6196.jpg
    SAM_6196.jpg
    139.7 KB · Views: 140
OP
B

bimmer1980

Well-known member
Joined
Feb 5, 2009
Messages
2,105
Location
York, PA
Then I needed to shift my focus to the rear end.... :eyecrazy:

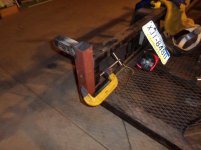
Specifically the tail lights and the license plate mounting bracket. The existing configuration had the tail lights mounted low and the license plate would hit the ground and bend when the trailer was tipped up. Not good.

I had some ideas for some vertical tubes at the rear of the trailer to facilitate some future plans, however, I ended up punting on that.....

Ended up just making a super simple angle bracket for the license plate and some simple angle brackets for the lights, just moved them up.

At this point, I needed the trailer done and out of the shop......

I also notched into the existing 1/2" tube for the wiring. I had to reroute the wiring a slightly different way due to the new pivot point. I also welded back on some 1/2" tubes for routing wire under the trailer. These had be cut off the old cross member.

I will say that the old wiring was a ****** to pull out of the tubes. Some factory paint had gotten in there and "glued" the wire to the tube... What a pain.

I had debated about reusing the existing wire, but ultimately just bought a new wire and light kit from HF and installed that....
 

Attachments

  • SAM_6199.jpg
    SAM_6199.jpg
    141.2 KB · Views: 100
  • SAM_6200.jpg
    SAM_6200.jpg
    140.2 KB · Views: 98
  • SAM_6251.jpg
    SAM_6251.jpg
    143.7 KB · Views: 101
  • SAM_6248.jpg
    SAM_6248.jpg
    131.2 KB · Views: 99
OP
B

bimmer1980

Well-known member
Joined
Feb 5, 2009
Messages
2,105
Location
York, PA
Then it was onto cleaning and prep'ing the trailer for paint. Some time with the wire wheel on the grinder and die grinder to clean the welds up.... ug...not my most favorite time.

Then a wipe down with mineral spirits and time to slap some primer on.... I used some Rustolem primer and black top coat.... Used a brush in most areas and used a spray can for a few tough to get parts....

I'm glad that part is done!!!
 

Attachments

  • SAM_6259.jpg
    SAM_6259.jpg
    141.1 KB · Views: 122
  • SAM_6257.jpg
    SAM_6257.jpg
    137.9 KB · Views: 116
  • SAM_6189.jpg
    SAM_6189.jpg
    134.3 KB · Views: 103
  • SAM_6253.jpg
    SAM_6253.jpg
    138.3 KB · Views: 102
  • SAM_6247.jpg
    SAM_6247.jpg
    138.5 KB · Views: 93
  • SAM_6245.jpg
    SAM_6245.jpg
    143 KB · Views: 96
  • SAM_6243.jpg
    SAM_6243.jpg
    139.2 KB · Views: 98
OP
B

bimmer1980

Well-known member
Joined
Feb 5, 2009
Messages
2,105
Location
York, PA
Finally it was time for assembly and wiring.

Getting the 3.5" tube to fit back between the 3" angle iron was a bit of a treat.....

Then I lubed up the 3" tube with grease before getting that ready to slide into the 3.5" tube.

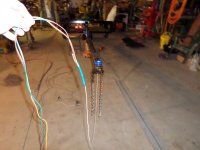
I also started running the new wiring. I fished that into the hitch tongue tube. I taped a plastic bag to the end of some string and then used the air blower to blow the string into the tube. Then I taped on the wire and used the string to pull it into the tube assembly. It worked quite well.
 

Attachments

  • SAM_6309.jpg
    SAM_6309.jpg
    138.2 KB · Views: 97
  • SAM_6308.jpg
    SAM_6308.jpg
    141.1 KB · Views: 82
  • SAM_6307.jpg
    SAM_6307.jpg
    153.1 KB · Views: 84
  • SAM_6306.jpg
    SAM_6306.jpg
    138.7 KB · Views: 90
  • SAM_6305.jpg
    SAM_6305.jpg
    140.1 KB · Views: 93
OP
B

bimmer1980

Well-known member
Joined
Feb 5, 2009
Messages
2,105
Location
York, PA
Finally it was done!!!
 

Attachments

  • SAM_6765.jpg
    SAM_6765.jpg
    150.5 KB · Views: 174
  • SAM_6764 - Copy.jpg
    SAM_6764 - Copy.jpg
    160 KB · Views: 170
Last edited:
OP
B

bimmer1980

Well-known member
Joined
Feb 5, 2009
Messages
2,105
Location
York, PA
Shortly after it was done, I used it to haul a load of remodeling debris to the town garbage facility. I thought I was going to able to use the hydro dump.... nope, because they have a massive curb in front of the dumpster that prevents dumping, so everything had to be hand unloaded.....

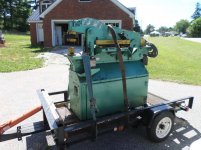
A few weeks later, I found this iron worker on craigslist.... I was really glad I had the upgraded cross members.... I thought it was about 1800lbs based on some literature, but then after I got it home and I looked at the specific literature, I determined it actually weighed in about 2600 lbs...... :eyecrazy:
 

Attachments

  • SAM_6945.jpg
    SAM_6945.jpg
    150.1 KB · Views: 170
  • SAM_6944.jpg
    SAM_6944.jpg
    145.9 KB · Views: 186
To avoid these ads, REGISTER NOW!

Crusarius

Well-known member
Joined
Aug 22, 2013
Messages
383
Location
Upstate NY
think you will need grease zerks on the tongue at all? Could make your life alot easier. Especially since PA is using salt now :(
 
OP
B

bimmer1980

Well-known member
Joined
Feb 5, 2009
Messages
2,105
Location
York, PA
think you will need grease zerks on the tongue at all? Could make your life alot easier. Especially since PA is using salt now :(

I did think about that..... however, I wanted to get it done and back on the road. It is greased up quite well. When I do slide it, I'll check the situation and either drill and tap the 3.5" tube for grease zerks or just reapply the grease....

Good idea tho!

Thanks for checking it out.
 

rslaback

Well-known member
Joined
Jul 24, 2010
Messages
4,083
Location
Westcentral Wisconsin
I did something similar with my tilt, but I used an air shock. That allows me to still tip it rapidly without lots of pumps. I can't lock mine up with weight on it like you can but I like that I can drive my tractor up on it and not have to worry about stopping on the angle and safely getting off.

Trailer007.jpg
 
Last edited:

kent_323is

Well-known member
Joined
Nov 13, 2009
Messages
274
Location
South Dakota
Nice work Bro! :thumbup::thumbup: You've sent me a few of those pics along the way, but it's nice to see the full summary of the build.
Now it's all ready for some more equipment hauling... I can't wait to see what you buy next!
 
OP
B

bimmer1980

Well-known member
Joined
Feb 5, 2009
Messages
2,105
Location
York, PA
I did something similar with my tilt, but I used an air shock. That allows me to still tip it rapidly without lots of pumps. I can't lock mine up with weight on it like you can but I like that I can drive my tractor up on it and not have to worry about stopping on the angle and safely getting off.

Trailer007.jpg

That's a slick idea as well. Do you have to air up the shock to get it to tip?

I had thought about using some airbags, but the hydraulic ram from HF was the easiest route for me.

My main reason for the tilt was for dirt or mulch, so I needed the higher force available from a hydraulic ram.
 
OP
B

bimmer1980

Well-known member
Joined
Feb 5, 2009
Messages
2,105
Location
York, PA
Nice work Bro! :thumbup::thumbup: You've sent me a few of those pics along the way, but it's nice to see the full summary of the build.
Now it's all ready for some more equipment hauling... I can't wait to see what you buy next!

Thanks Bud! Now you just need to come out here for a visit!! :beer:
 

rslaback

Well-known member
Joined
Jul 24, 2010
Messages
4,083
Location
Westcentral Wisconsin
That's a slick idea as well. Do you have to air up the shock to get it to tip?

I had thought about using some airbags, but the hydraulic ram from HF was the easiest route for me.

My main reason for the tilt was for dirt or mulch, so I needed the higher force available from a hydraulic ram.


It doesn't require air to be added or released. The air in the shock is balanced to the empty trailer so that it just holds it tilted when empty. My trailer is balanced heavy to the front which makes it pull great but means that it wouldn't stay tilted on it's own. That is the problem I was trying to solve.

The air shock makes the tilt down when I load something less violent too which was a nice added bonus.
 
OP
B

bimmer1980

Well-known member
Joined
Feb 5, 2009
Messages
2,105
Location
York, PA
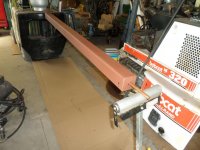
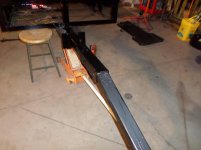
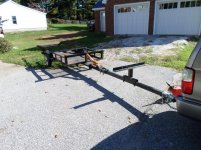
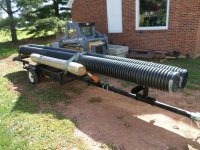
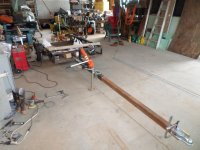
I had opportunity to use the extended hitch on the trailer. I was planning to haul some 20' drain pipes.

I fabricated a material rest for the tongue and also a rear extension on the trailer. The front tongue rest can slide anywhere on the tongue.

The rear extension was simply made out of angle iron and bolted on.

When I was at the paving contract supplier to pick up the tube, I also purchased a 30" x 3" red reflector to go on the rear extension to ensure I was road legal with the length.
 

Attachments

  • SAM_7710.jpg
    SAM_7710.jpg
    148.2 KB · Views: 102
  • SAM_7714.jpg
    SAM_7714.jpg
    151.4 KB · Views: 106
  • SAM_7704.jpg
    SAM_7704.jpg
    152.5 KB · Views: 89
  • SAM_7705.jpg
    SAM_7705.jpg
    152.8 KB · Views: 85
OP
B

bimmer1980

Well-known member
Joined
Feb 5, 2009
Messages
2,105
Location
York, PA
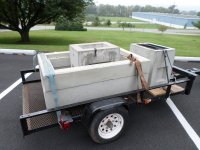
I also had to make two different trips to pick up some concrete drain basins for a project..... Not sure what the weight of the first load was, but the axle was nearly bottomed out.....
 

Attachments

  • DSC07931.jpg
    DSC07931.jpg
    144.5 KB · Views: 98
  • SAM_7658.jpg
    SAM_7658.jpg
    142.9 KB · Views: 102

f150skidoo

Well-known member
Joined
Dec 29, 2012
Messages
1,206
Location
Ontario, Canada
looks good but a good chunk of the pictures you posted you might be a little bit overweight, Whats that trailer rated for #2000.
 

SteveH-CO

Well-known member
Joined
Aug 29, 2014
Messages
283
Location
Southern Colorado
It doesn't require air to be added or released. The air in the shock is balanced to the empty trailer so that it just holds it tilted when empty. My trailer is balanced heavy to the front which makes it pull great but means that it wouldn't stay tilted on it's own. That is the problem I was trying to solve.

The air shock makes the tilt down when I load something less violent too which was a nice added bonus.


That's a really slick solution for an irritating problem. I may steal your idea!
 

rslaback

Well-known member
Joined
Jul 24, 2010
Messages
4,083
Location
Westcentral Wisconsin
It doesn't require air to be added or released. The air in the shock is balanced to the empty trailer so that it just holds it tilted when empty. My trailer is balanced heavy to the front which makes it pull great but means that it wouldn't stay tilted on it's own. That is the problem I was trying to solve.

The air shock makes the tilt down when I load something less violent too which was a nice added bonus.


That's a really slick solution for an irritating problem. I may steal your idea!
Go for it. I hope it works for you.

Sent from my VS986 using Tapatalk
 

Will S.

Well-known member
Joined
Apr 15, 2010
Messages
446
Location
The First State
Impressive job on the trailer rebuild, and you are an inspiration to many of us who have trailers similar to your original. I most definitely would love to have those capabilities.

One concern that I would have, is that I think you are using the original axle, wheels & bearings, springs and clamps. I would have upgraded the axle to add another 1000' capacity, as that seems to be the weak point now.

Great ideas, beautifully executed.
 
OP
B

bimmer1980

Well-known member
Joined
Feb 5, 2009
Messages
2,105
Location
York, PA
Impressive job on the trailer rebuild, and you are an inspiration to many of us who have trailers similar to your original. I most definitely would love to have those capabilities.

One concern that I would have, is that I think you are using the original axle, wheels & bearings, springs and clamps. I would have upgraded the axle to add another 1000' capacity, as that seems to be the weak point now.

Great ideas, beautifully executed.

Thanks for the compliments, I appreciate that.

It did turn into a longer project than I had originally planned, but it was worth it. The cross member where the end of the hitch ties in was getting too much permanent deflection.

Yes, I have thought about upgrading the axle. We'll see what happens there.

When I am hauling something that is pushing the limit, I monitor and adjust tire pressure. At those weights, I also keep an eye on the speed and watch for adverse conditions in the road.... The frequency of those high loads is pretty low over the 10 years that I've owned the trailer.

Regardless, I would like to upgrade to a better axle, suspension and tires.....
 

drivesitfar

Well-known member
Joined
Oct 23, 2013
Messages
36,075
Location
Pacific Northwest
Bimmer: i need to hurry and get ready to help my BIL put in my new front door so will read up on your trailer rebuild later tonight or as soon as i can and wanted to bookmark it so to speak.

i love the garage you built and also like that you hauled all that stuff behind your BMW. i had an aluminum 4x8 that i hauled tons of stuff behind my Honda CRV and some lady T boned it so now i have a temporary 4x8 i'm going to spiff up and could use some tips from you and the members.

here's mine and i only hauled this wood from across the street, but worked better than my wheelbarrow.

cheers
 

Attachments

  • WP_20160525_011.jpg
    WP_20160525_011.jpg
    137.8 KB · Views: 42
  • 20160524_174619.jpg
    20160524_174619.jpg
    145 KB · Views: 45
  • WP_20160526_005.jpg
    WP_20160526_005.jpg
    150 KB · Views: 41
  • WP_20160526_009.jpg
    WP_20160526_009.jpg
    155.6 KB · Views: 46
Last edited:
OP
B

bimmer1980

Well-known member
Joined
Feb 5, 2009
Messages
2,105
Location
York, PA
Thanks Drives! That is a beefy little trailer you have.

Trailers--handy tools to have. Not sure what I would do without one....

The BMW is on to a new owner, now I use a Gen3 4Runner. I was resourceful with what I had.
 
To avoid these ads, REGISTER NOW!
Top Bottom