To avoid these ads, REGISTER NOW!

Above 1200 Sq/FT The Lone Beech Garage (60x46x16)

Wokspaces above 1200 squarefeet.
OP
S

sbosecker

Well-known member
Joined
Sep 25, 2012
Messages
3,539
Location
Peachtree City, GA
Re: The Lone Beech Garage Build Thread (60x46)

You will get to the festoon cable soon enough and will not think about how long it took to get to it. As for the fridge leak, I had water pooling on the floor 8' from the fridge, turns out there was a very small pin hole in the plastic line going to the fridge. This meant the water had been leaking for a long time and ruined the drywall and molding. All in all the fix for the leak was a couple dollars but lots of repair work for such a simple problem. Hopefully it isn't too major for you.

JB

JB,

I, like you, suspect this problem may have existed for a while. I'm fairly sure it is only leaking when the dispenser is actually dispensing water. Not using the dispenser (sign on the fridge) and I intend to pull the fridge out from the wall and face the situation after Christmas.

Best regards,

Scott
 
To avoid these ads, REGISTER NOW!
OP
S

sbosecker

Well-known member
Joined
Sep 25, 2012
Messages
3,539
Location
Peachtree City, GA
Re: The Lone Beech Garage Build Thread (60x46)

It could likely be the master cylinder. Once the seals around the piston start leaking, the fluid ends up in the power booster. If you see any wetness under the master cylinder where it meets the booster, there's the problem.
A certain amount of brake fluid will be sucked into the engine via the vacuum hose, but a lot of it will remain in the booster, sort of sloshing around. :)

C_F,

That's good information - Thanks!

I'll be checking the booster for evidence of leaking in the near future.

Best regards,

Scott
 
OP
S

sbosecker

Well-known member
Joined
Sep 25, 2012
Messages
3,539
Location
Peachtree City, GA
Re: The Lone Beech Garage Build Thread (60x46)

Tuesday - December 6, 2016

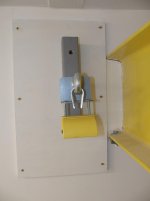
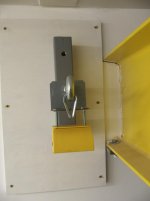
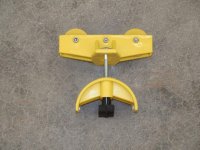
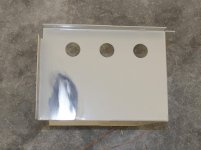
Today I found a bit of time to work on getting the Festoon Trolley Brackets mounted.


20161206-01.jpg 20161206-02.jpg

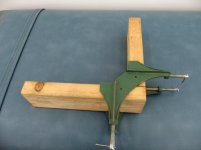
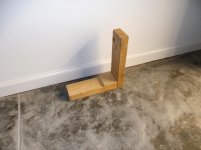
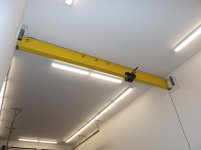
The first order of business was building a little jig to help locate the brackets relative to the Yellow Beam.


20161206-03.jpg

I used a large clamp to secure the jig in position and placed the Bracket on the jig.


20161206-04.jpg 20161206-05.jpg

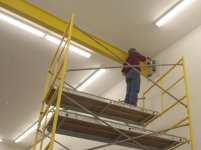
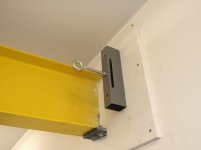
An Impact Driver with a 6-inch long star bit was used to drive the 1-1/4" deck screws. It was a little tricky to place the screw through the access hole and then drive it though the small mounting hole on the other side but, with the jig stabilizing everything, I was able to mount the Bracket.


Continued in next post...
 
Last edited:
OP
S

sbosecker

Well-known member
Joined
Sep 25, 2012
Messages
3,539
Location
Peachtree City, GA
Re: The Lone Beech Garage Build Thread (60x46)

Continued...


20161206-11.jpg

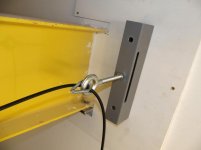
To mount the Eye Bolt to the Bracket, I used a bit of painter's tape to hold the 1/2-inch nut in position on the wrench. This allowed the nut inside the Bracket to be threaded onto the Eye Bolt.


20161206-12.jpg 20161206-13.jpg 20161206-14.jpg

The Eye Bolts were mounted on the Brackets.


20161206-15.jpg

Now I've got to get the cable mounted and tensioned between the Eye Bolts. The Eye Bolts are "closed" so the cable cannot be clamped prior to threading it though the Eye Bolt. I can probably get one cable end mounted on an Eye Bolt but the opposite side will require at least some tensioning before that end can be threaded through the Eye Bolt and clamped. This isn't going to be easy and will probably require another person to get the job done.

I clamped this end of the cable to see how hard it was to do and also to try to instill a little "memory" in the cable on this end.


20161206-16.jpg 20161206-17.jpg

As I finished the Bracket project I heard a vehicle drive down my driveway. It was a U-Haul Truck ...odd.

A man in a FedEx uniform got out of the truck with a package for me. It was the front Shock Absorbers for my pickup.

I thanked the driver but I didn't ask what was up with the U-Haul truck.

Ha!


Scott
 
Last edited:

jbmatth

Well-known member
Joined
Jun 3, 2013
Messages
5,692
Location
Northern Ok.
Re: The Lone Beech Garage Build Thread (60x46)

Will you be able to use the Eye bolt to tension the cable on the other end if it isn't tight enough or is it mounted like the one in your 3rd picture above. Getting the proper tention on a cable is not easy even if you have a helper as when you tighten the locks it torques the cable causing it to slide some more. Let me know how you accomplish this task.

Maybe FedEx is out of trucks with all of the holiday deliveries?

JB
 

shortykorte

Well-known member
Joined
Sep 1, 2014
Messages
8,039
Location
Tallahassee, Fl
Re: The Lone Beech Garage Build Thread (60x46)

They say Mom's are like Superman and I believe it. Glad the Mrs. is taking care of all the hard work for you. :lol_hitti
 

C_F

ALLIANCE MEMBER
Joined
Jan 21, 2005
Messages
9,675
Location
Utah...SNOW BLOWS!
Re: The Lone Beech Garage Build Thread (60x46)

Maybe FedEx is out of trucks with all of the holiday deliveries?

That's likely the answer. In years past, we've had both Fedex & UPS show up at my work in rental trucks a week or two before Christmas. So far this year, both companies seem to be driving their official trucks.
 
OP
S

sbosecker

Well-known member
Joined
Sep 25, 2012
Messages
3,539
Location
Peachtree City, GA
Re: The Lone Beech Garage Build Thread (60x46)

Will you be able to use the Eye bolt to tension the cable on the other end if it isn't tight enough or is it mounted like the one in your 3rd picture above. Getting the proper tention on a cable is not easy even if you have a helper as when you tighten the locks it torques the cable causing it to slide some more. Let me know how you accomplish this task.
JB

JB,

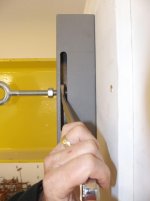
Both Brackets have an access slot in the side that allows an open end wrench to be able - after the exterior nut is backed off the Bracket - to turn the interior nut and draw the Eye Bolt into the Bracket. This takes up the slack in the cable.

Best regards,

Scott
 
OP
S

sbosecker

Well-known member
Joined
Sep 25, 2012
Messages
3,539
Location
Peachtree City, GA
Re: The Lone Beech Garage Build Thread (60x46)

Maybe FedEx is out of trucks with all of the holiday deliveries?
JB

That's likely the answer. In years past, we've had both Fedex & UPS show up at my work in rental trucks a week or two before Christmas. So far this year, both companies seem to be driving their official trucks.

When the driver handed me my package, I nodded towards the U-Haul Truck and said with a grin, "Not what I was expecting."

The driver replied with a laugh, "Yeah, I've been getting that a lot."

Best regards,

Scott
 
OP
S

sbosecker

Well-known member
Joined
Sep 25, 2012
Messages
3,539
Location
Peachtree City, GA
Re: The Lone Beech Garage Build Thread (60x46)

Wednesday - December 7, 2016

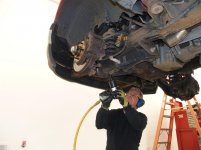
I had done a little research on YouTube - and what have you - regarding changing the front Shock Absorbers on my 2000 Ford F150. It looked like it shouldn't take more than an hour so I decided to knock that out first thing this morning.


20161207-01.jpg 20161207-02.jpg

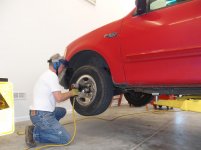
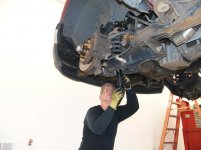
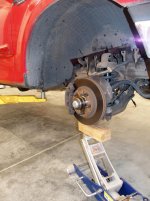
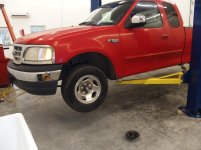
I got the truck on the 2-Post Lift and took the front tires off.


20161207-03.jpg 20161207-04.jpg

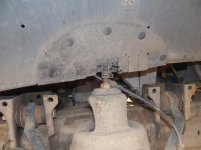
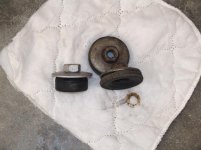
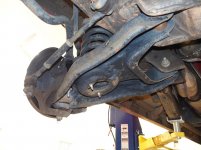
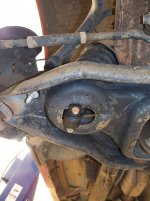
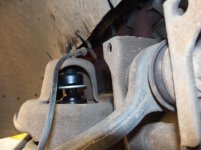
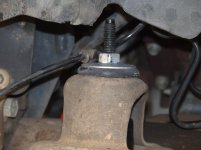
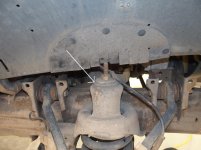
As I was removing the hose bracket that threads onto the top of the old Shock Absorber I noticed the bushing the upper nut and flat washer was compressing. (White Arrow) I didn't recall anything other than the shock absorber in the box when I emptied it.


20161206-17.jpg

Sure enough, a close inspection of the boxes the Shock Absorbers had arrived in revealed nothing else had been included.

Phooey.

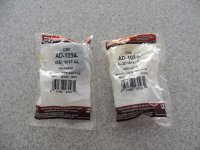
I came into the house, did a little research on a Ford Parts website, and discovered I needed a Shock Absorber Insulator Assembly (Bushing, Washer & 12mm Nut). That has been ordered and I hope it will be at my local Ford Dealership tomorrow morning.


With the F150 sitting on the Lift, I moved on to the Festoon Trolley Cable.


Continued in next post...
 
Last edited:
OP
S

sbosecker

Well-known member
Joined
Sep 25, 2012
Messages
3,539
Location
Peachtree City, GA
Re: The Lone Beech Garage Build Thread (60x46)

Continued....


20161207-11.jpg

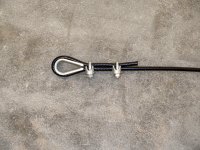
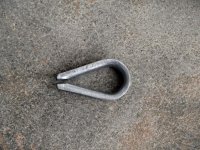
This is a Thimble. It needs to be opened up in order for it to fit onto the closed Eye Bolt. I did quite a bit of futile Google searching last night trying to see if there were any tricks to opening the Thimble. Mostly I spent a lot of time looking at information about sewing.


20161207-12.jpg

Since I didn't find any help online, I clamped the Thimble in a Vise and got a Chisel. A few taps on the chisel with a hammer and the Thimble was opened up.

It was absolutely glorious morning here today - a bright sun and not a cloud in the very blue sky. This was welcome after several days of grayness and rain. However, the glaring morning sun was coming right in the window and unevenly lit up the Vise and the Thimble when I took the picture.


20161207-13.jpg 20161207-14.jpg 20161207-15.jpg

I slid the Thimble on the Eye Bolt and then used a Long Nose Vise Grip to compress it.


20161207-16.jpg 20161207-17.jpg

I used the Vise Grip to hold the Cable and Thimble while I installed the Cable Clamps.

One end done!


Continued in next post...
 
Last edited:
OP
S

sbosecker

Well-known member
Joined
Sep 25, 2012
Messages
3,539
Location
Peachtree City, GA
Re: The Lone Beech Garage Build Thread (60x46)

Continued...


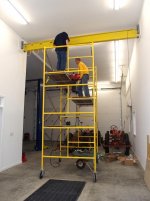
I moved the scaffolding to the other side of the long bay and started working on the other Eye Bolt.


20161207-21.jpg 20161207-22.jpg

I got the Thimble onto, and the Cable through, the Eye Bolt. I then took all the slack I could out of the Cable, clamped the Cable with the Vise Grip and installed the Cable Clamps. Even though I was doing this by myself it wasn't nearly as hard as I thought it would be.


20161207-23.jpg

At this point there was some slack in the Cable.


20161207-24.jpg

I got an 3/4-inch Open End Wrench into the Bracket's access slot and began to take up the slack by drawing the Eye Bolt into the Bracket. This worked great!


20161207-25.jpg

I thought I might run out bolt length and have to do this procedure on both Brackets but it didn't take that much tightening to get the slack out of the Cable.


20161207-26.jpg 20161207-27.jpg

Flush with success I grabbed the Festoon Trolleys to string them on the now taunt Cable ...and I got my second setback for the day.

I guess I should have looked at these things more closely but who would design something like this. It appears that these Trolleys have to be strung onto the Cable BEFORE the Cable is fastened to both Eye Bolts.

I'll return to this tomorrow. I think that I'll knock this out pretty quick but I'm not happy that I have to redo the Cable stringing procedure again.


Scott
 
Last edited:
OP
S

sbosecker

Well-known member
Joined
Sep 25, 2012
Messages
3,539
Location
Peachtree City, GA
Re: The Lone Beech Garage Build Thread (60x46)

Thursday - December 8, 2016


A high broken layer of grey clouds and cooler temperatures greeted me this morning as I drove up to a local Starbucks to swap lies with some friends.

When I got back to my house at about 9:30 I found an email from Ford indicating that my parts had arrived at the Newnan Georgia Ford dealership. I hopped into the SUV again and drove to Newnan. The parts department had my order sitting on the counter when I walked in. I spent about 5 minutes on the property. I was very impressed since I had ordered the parts only about 18 hours earlier. (The Ford Part# for the Shock Absorber Insulator Assembly is 6C3Z-18197-AA should anyone be wanting to have that information.)


20161208-01.jpg

When I got home I pulled one of the Insulator Assembly out of its bag and checked to see that it fit on the Shock Absorber. It threaded on nicely. The truck was still on the lift; The Cars Heartbeat City CD was inserted into the music box; time to get to work!


20161208-02.jpg 20161208-03.jpg 20161208-04.jpg

I took the old Insulator Assembly off the top first. Then I raised the lift to make getting to the lower nuts easier. With the lower nuts removed the old Shock Absorber came out easily.


20161208-05.jpg 20161208-06.jpg

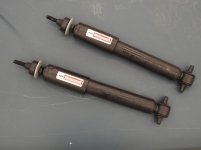
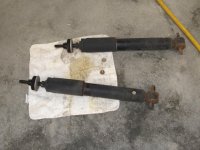
The first picture shows the 2 old Insulator Assembly's with one of the new ones. The second picture is of the old Shock Absorbers - they really look pretty good for being 17 years old.


Continued in next post...
 
Last edited:
OP
S

sbosecker

Well-known member
Joined
Sep 25, 2012
Messages
3,539
Location
Peachtree City, GA
Re: The Lone Beech Garage Build Thread (60x46)

Continued...


20161208-11.jpg 20161208-12.jpg 20161208-13.jpg

The Shock Absorbers were each placed into position from the bottom and the nuts torqued to 25.5 Ft-lbs.


20161208-14.jpg 20161208-15.jpg

However, after tightening the lower nuts the upper part of the Shock Absorber was short of being located properly. Thanks to YouTube, I was aware of this and didn't think I had gotten the wrong Shock Absorber.


20161208-16.jpg 20161208-17.jpg

I lowered the truck on the lift to the lowest Safety Stops. A Floor Jack and a couple of 2x4's allowed me to - carefully - apply a bit of compression to the front spring. This brought the shock into position for the Insulator Assembly to threaded on and secured.


Continued in next post...
 
Last edited:
OP
S

sbosecker

Well-known member
Joined
Sep 25, 2012
Messages
3,539
Location
Peachtree City, GA
Re: The Lone Beech Garage Build Thread (60x46)

Continued...


20161208-21.jpg

The right Shock Absorber Insulator Assembly was torqued to 40.5 Ft-lbs.


20161208-22.jpg

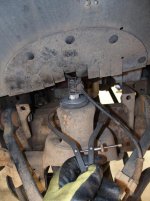
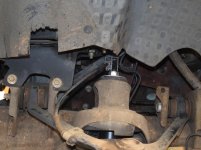
However the left side had a bracket (White Arrow - motor mount? I didn't waste time analyzing the issue) that interfered with getting a deep socket onto the Insulator Assembly. I learned at this point that I have a couple of holes in my tool collection as I don't have a 21mm Crow Foot which might have allowed me to torque this properly. What to do?


20161208-23.jpg

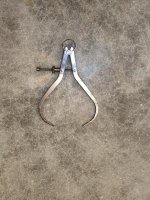
I got my outside calipers from the tool box.


20161208-24.jpg

The act of torqueing the Insulator Assembly compresses the rubber bushing significantly. I had gotten the right side torqued correctly so I decided to measure the width of the compressed bushing. I would then tighten the left assembly with an 21mm offset ratcheting box wrench until the bushing was compressed to the same diameter as the right side.


20161208-25.jpg 20161208-26.jpg

This was accomplished and then the Hose Bracket was reinstalled on the Shock Absorber's stud.


20161208-27.jpg

The front wheels were remounted and torqued to 100 Ft-lbs.

A test drive followed with no issues noted. The truck's handling and ride were a bit "tighter". Nothing dramatic but an improvement.


Continued in next post...
 
Last edited:
OP
S

sbosecker

Well-known member
Joined
Sep 25, 2012
Messages
3,539
Location
Peachtree City, GA
Re: The Lone Beech Garage Build Thread (60x46)

Continued...


Now I climbed the scaffolding to the Festoon Trolley Cable. I took the tension off the Cable via the Eye Bolt Nut and then removed the clamps from one side of the Cable.

I threaded the Trolleys onto the Cable and redid the clamping and tensioning. This all was accomplished without any difficulty at all!


20161208-31.jpg 20161208-32.jpg 20161208-33.jpg

For the time being, I have left the extra Cable attached. I will trim it with a Bolt Cutter once I'm confident that I haven't missed another detail that would require bringing down the Cable again. I believe the extra length of Cable would make it much easier to tension than if it was trimmed to only what is needed when it is taunt.


Scott
 
Last edited:

Bib Overalls

Well-known member
Joined
Dec 4, 2006
Messages
3,318
Location
Jonesboro, Arkansas
Re: The Lone Beech Garage Build Thread (60x46)

Hopefully you have some threads left on your eye bolts. Over time your cable will stretch under load and sag (or maybe not).
 

matt_i

Well-known member
Joined
Mar 14, 2008
Messages
10,758
Location
SE Michigan
Re: The Lone Beech Garage Build Thread (60x46)

Looks like a good setup on the cable, Many times a turnbuckle will be used but that sacrifices some of the travel. It looks like you did the u-bolt installation properly following the "dont ever saddle a dead horse" meaning place the cast "saddle" on the live cable and the u-bolt on the "dead" whip-end. Always a good idea to tape or heat-shrink the cut wires as those things are deadly. I am not sure if bolt cutters will do the job. Proper cable shears are made by Knipex or Felco to name a couple of manufacturers and have pretty sharp hooked blades, as opposed to a bolt cutter which is pretty dull comparatively. I have seen cables cut with oxyacetylene torch, it has the advantage of fusing the fiber ends together so they don't fray but could be detrimental to the plastic jacket.

I don't believe the cable will stretch unless plastically deformed or the u-bolts slip on the plastic jacket, in my opinion it would take a very great overload, sideways on the cable to actually stretch it further than the existing taut condition.

Great repair on the F150, by repairing it you can hopefully keep it many years in the land of "no salt" :)
 
Last edited:
OP
S

sbosecker

Well-known member
Joined
Sep 25, 2012
Messages
3,539
Location
Peachtree City, GA
Re: The Lone Beech Garage Build Thread (60x46)

Hopefully you have some threads left on your eye bolts. Over time your cable will stretch under load and sag (or maybe not).

Bib Overalls,

Quite a bit of thread left on the one side I tightened and the other hasn't been touched. So maybe an inch or so on one and well over 2 inches on the other.

I do think I will need to tighten it a bit when it is carrying the weight of the electrical cable.

Best regards,

Scott
 
OP
S

sbosecker

Well-known member
Joined
Sep 25, 2012
Messages
3,539
Location
Peachtree City, GA
Re: The Lone Beech Garage Build Thread (60x46)

Looks like a good setup on the cable, Many times a turnbuckle will be used but that sacrifices some of the travel. It looks like you did the u-bolt installation properly following the "dont ever saddle a dead horse" meaning place the cast "saddle" on the live cable and the u-bolt on the "dead" whip-end. Always a good idea to tape or heat-shrink the cut wires as those things are deadly. I am not sure if bolt cutters will do the job. Proper cable shears are made by Knipex or Felco to name a couple of manufacturers and have pretty sharp hooked blades, as opposed to a bolt cutter which is pretty dull comparatively. I have seen cables cut with oxyacetylene torch, it has the advantage of fusing the fiber ends together so they don't fray but could be detrimental to the plastic jacket.

I don't believe the cable will stretch unless plastically deformed or the u-bolts slip on the plastic jacket, in my opinion it would take a very great overload, sideways on the cable to actually stretch it further than the existing taut condition.

Great repair on the F150, by repairing it you can hopefully keep it many years in the land of "no salt" :)

matt_i,

Thanks for the kind words on the truck! It may not be the land of "no salt" but it certainly is the land of "very little salt".

Also thanks for all the info on the cable. I got the "dead horse" info from a YouTube video otherwise how the clamps were oriented would have been a random event.

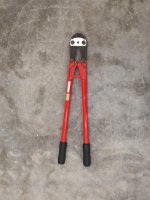
Since you had concerns about bolt cutters being up to the task of cutting this cable I decided to experiment with the bolt cutter that I have.


20161209-01.jpg

I got this Craftsman beauty from Sears MANY years ago. It must have been on sale at a store because I don't know why else I would have bought it.


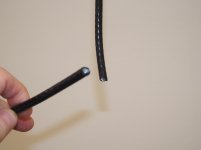
20161209-02.jpg

Since the cable is dangling freely from above, I really needed a third hand but I did manage to get the cable cut with my bolt cutter. Looks like it should do the job OK.


Best regards,

Scott
 
To avoid these ads, REGISTER NOW!
OP
S

sbosecker

Well-known member
Joined
Sep 25, 2012
Messages
3,539
Location
Peachtree City, GA
Re: The Lone Beech Garage Build Thread (60x46)

Friday - December 9, 2016

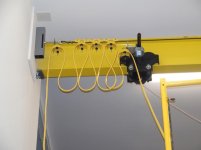
I got a bit of time today to work with the electrical Festoon Cable and see how it was going to work with the Festoon Trolleys I just installed.


20161209-11.jpg 20161209-12.jpg

The electrical Festoon Cable is flat and stranded which allows it to flex easier than normal Romex.


20161209-13.jpg

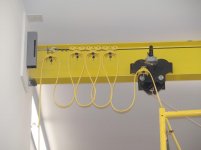
I threaded the electrical Festoon Cable through the Trolleys and tried to get the length correct for my situation.


20161209-14.jpg 20161209-15.jpg

I still need to tweak it a bit but I think I'm pretty close to having the Festoon Cable correct. I also need to construct some sort of Bracket on the Electrical Box that travels with the Hoist Trolley. At the moment I just have a Vise Grip holding the Festoon Cable Clamp to the Electrical Box.


Scott
 
Last edited:

matt_i

Well-known member
Joined
Mar 14, 2008
Messages
10,758
Location
SE Michigan
Re: The Lone Beech Garage Build Thread (60x46)

Looks like a nice job! You might want to consider putting some trolley stops on the I-beam for 2 reasons, 1) to keep from damaging the drywall and 2) the trolley doesn't play nice if its goes too close to the end where the festoon trolleys will be all bunched up solid. Usually the main load trolley which is much bigger and heavier wins while the little plastic guys lose.

It could be permanently done by drilling the center web of the beam and thru-bolting a vertical angle iron, but an easier solution would be to create a horizontal, perpendicular angle iron which touches the bottom flange surface of the beam and is "clipped" or "pinched" on the bottom flanges with bolts.

Here is sort of the concept but replace the lower of the I-beams with an angle iron, and just 2 bolts intead of 4.
typical-i-beam_300.png
 
Last edited:
OP
S

sbosecker

Well-known member
Joined
Sep 25, 2012
Messages
3,539
Location
Peachtree City, GA
Re: The Lone Beech Garage Build Thread (60x46)

Looks like a nice job! You might want to consider putting some trolley stops on the I-beam for 2 reasons, 1) to keep from damaging the drywall and 2) the trolley doesn't play nice if its goes too close to the end where the festoon trolleys will be all bunched up solid. Usually the main load trolley which is much bigger and heavier wins while the little plastic guys lose.

It could be permanently done by drilling the center web of the beam and thru-bolting a vertical angle iron, but an easier solution would be to create a horizontal, perpendicular angle iron which touches the bottom flange surface of the beam and is "clipped" or "pinched" on the bottom flanges with bolts.

Here is sort of the concept but replace the lower of the I-beams with an angle iron, and just 2 bolts intead of 4.

matt_i

Trolley stops are a great idea. I'll be putting something - don't know what yet - to limit the travel of the hoist trolley and protect the walls ...and other stuff.

Best regards,

Scott
 

1/2 Cup

Member Emeritus
Joined
Apr 28, 2012
Messages
19,283
Location
Shepparton. Victoria. Australia
Re: The Lone Beech Garage Build Thread (60x46)

Scott, great work on the festoon cable.:thumbup:

All our cable is multi stranded out here now, I can't get over the fact that you guys are still using solid cables in Romex.
We have a number of cranes and gantries at work, the flat multi stranded cable works a treat in those applications..

Looking good..:thumbup:

Regards
 
OP
S

sbosecker

Well-known member
Joined
Sep 25, 2012
Messages
3,539
Location
Peachtree City, GA
Re: The Lone Beech Garage Build Thread (60x46)

Scott, great work on the festoon cable.:thumbup:

All our cable is multi stranded out here now, I can't get over the fact that you guys are still using solid cables in Romex.
We have a number of cranes and gantries at work, the flat multi stranded cable works a treat in those applications..

Looking good..:thumbup:

Regards

1/2 Cup,

Thanks!

Regarding stranded wire vs. solid...

I haven't done the research but I would assume that stranded costs more produce. Do your codes require the use of stranded wire?

Best regards,

Scott
 

camarosrus69

Well-known member
Joined
Aug 7, 2013
Messages
243
Location
South central Kansas
Re: The Lone Beech Garage Build Thread (60x46)

I have forgotten what your hoist looks like. Does it have remote control or a long hanging cord? If it's a cord, are you planning on stowing it at the outside or inside position. It doesn't look like the festoon cable will like it stowed along the inside wall.
 

1/2 Cup

Member Emeritus
Joined
Apr 28, 2012
Messages
19,283
Location
Shepparton. Victoria. Australia
Re: The Lone Beech Garage Build Thread (60x46)

1/2 Cup,

Thanks!

Regarding stranded wire vs. solid...

I haven't done the research but I would assume that stranded costs more produce. Do your codes require the use of stranded wire?

Best regards,

Scott

Scott, the solid and stranded are about the same cost.

Typically there were two sizes on the market 1.00 mm2 used for lighting and had an 8 amp rating. The 2.5 mm2 was use for power points an was rated for 16 amps.

http://www.rexel.com.au/products/CA...-BLACK-EARTH-WHITE-SHEATH_2-5TEWH_552054.html

Either can be used, but most wholesales do not stock the solid now..

Regards
 
OP
S

sbosecker

Well-known member
Joined
Sep 25, 2012
Messages
3,539
Location
Peachtree City, GA
Re: The Lone Beech Garage Build Thread (60x46)

I have forgotten what your hoist looks like. Does it have remote control or a long hanging cord? If it's a cord, are you planning on stowing it at the outside or inside position. It doesn't look like the festoon cable will like it stowed along the inside wall.

camarosrus69,

It has the long, dangling, control cord.

The outside wall is where I had planned for it to be stowed.

Best regards,

Scott
 
OP
S

sbosecker

Well-known member
Joined
Sep 25, 2012
Messages
3,539
Location
Peachtree City, GA
Re: The Lone Beech Garage Build Thread (60x46)

Scott, the solid and stranded are about the same cost.

Typically there were two sizes on the market 1.00 mm2 used for lighting and had an 8 amp rating. The 2.5 mm2 was use for power points an was rated for 16 amps.

http://www.rexel.com.au/products/CA...-BLACK-EARTH-WHITE-SHEATH_2-5TEWH_552054.html

Either can be used, but most wholesales do not stock the solid now..

Regards

1/2 Cup,

So much for assumptions. Ha!

I figured twisting the copper "threads" would be an additional manufacturing step that would increase the cost of production.

Would the solid wire product be configured the same as the stranded product (3 wires side by side)?

Best regards,

Scott
 
Last edited:

AZpilot

Well-known member
Joined
Sep 29, 2012
Messages
413
Location
Mesa, AZ
Re: The Lone Beech Garage Build Thread (60x46)

Not good business to own the many trucks it takes to fulfill deliveries during the holidays. We also lease 747-400's for some routes. The same for our competition.
 
OP
S

sbosecker

Well-known member
Joined
Sep 25, 2012
Messages
3,539
Location
Peachtree City, GA
Re: The Lone Beech Garage Build Thread (60x46)

Friday - December 16, 2016

Holidays: Good grief!

After several social events this week, I finally got a chance to get back out to the Lone Beech Garage today and make a bracket to hold the Festoon Cable Clamp that travels with the Hoist Trolley.


20161216-01.jpg

I had the furnaces in my house replaced a couple of years ago. I saved some of the sheet metal and other odds & ends. This was a bracket that was in the old furnace. It's about 15 gauge steel and would make a good starting point for my Festoon Bracket.


20161216-02.jpg 20161216-03.jpg

With the odd shape of the existing bracket, I decided to use my Plasma Cutter to cut it to a size that would work for the current project. This required using the wire wheel on the Pedestal Grinder to remove a bit of paint to allow a good ground for the Plasma Cutter.


20161216-04.jpg

I removed an appropriate piece from the existing bracket to be used for my Festoon Bracket.


20161216-05.jpg

With the piece removed from the existing material, I now needed to drill a few holes for the various fasteners.


20161216-06.jpg 20161216-07.jpg

The finished Bracket seems to do the job! I may take it apart and give it a coat of paint but this project is essentially complete.


Scott
 
Last edited:

250

Well-known member
Joined
Oct 16, 2014
Messages
537
Location
West of the Sierras
Re: The Lone Beech Garage Build Thread (60x46)

:thumbup: on the moosejaw shirt!

I've enjoyed watching the build and everytime I think about purchasing something heavy, I wish for some sort of over head crane. Keep up the good work.
 
OP
S

sbosecker

Well-known member
Joined
Sep 25, 2012
Messages
3,539
Location
Peachtree City, GA
Re: The Lone Beech Garage Build Thread (60x46)

:thumbup: on the moosejaw shirt!

I've enjoyed watching the build and everytime I think about purchasing something heavy, I wish for some sort of over head crane. Keep up the good work.

250,

Thanks for the kind words and for coming along for the ride!

Moosejaw shirt - Ha! I've had that for at least 13 years. If you like that, you'll probably like this.


20161217-01.jpg

Taken at Kootenai Lake, Glacier National Park, MT - July 2007.


Best regards,

Scott
 
OP
S

sbosecker

Well-known member
Joined
Sep 25, 2012
Messages
3,539
Location
Peachtree City, GA
Re: The Lone Beech Garage Build Thread (60x46)

Sunday - December 18, 2016

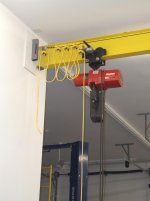
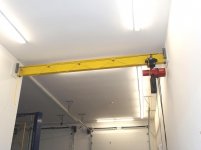
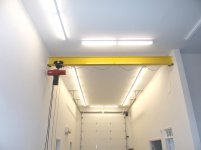
My son finished his final exams on Friday so today I asked him to help me get the Electric Chain Hoist back on the Beam Trolley.


20161218-01.jpg

While I waited for my son to come out to the Lone Beech Garage, I climbed the scaffolding and tried out a Smartphone App that allows me to control my camera with my smartphone. No more sprinting up the scaffolding for me! The Electric Chain Hoist has been living in the wheelbarrow for the past few months, waiting for this moment.


20161218-02.jpg 20161218-03.jpg

I'm glad my son was here to help with this project. It's not easy to manhandle the Electric Chain Hoist's Hook into position on the Beam Trolley.


20161218-04.jpg 20161218-05.jpg

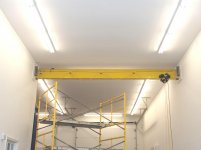
The scaffolding was moved out of the way and the Electric Chain Hoist was traversed from one end of the Yellow Beam to the other.


20161218-06.jpg 20161218-07.jpg

Everything seems to be in order! I've got one little project to get done yet but we're getting very close to being able to call in the Electrician to finish all the 240 volt electrical hookups.


Scott
 

shortykorte

Well-known member
Joined
Sep 1, 2014
Messages
8,039
Location
Tallahassee, Fl
Re: The Lone Beech Garage Build Thread (60x46)

You know using a hoist would have made that job easier. :bounce:

That's a milestone getting that hoist up there. How much does that hoist weigh?
 
OP
S

sbosecker

Well-known member
Joined
Sep 25, 2012
Messages
3,539
Location
Peachtree City, GA
Re: The Lone Beech Garage Build Thread (60x46)

You know using a hoist would have made that job easier. :bounce:

That's a milestone getting that hoist up there. How much does that hoist weigh?

shortykorte,

Ha!
My son suggested using the Beam Trolley and some rope to get the Electric Chain Hoist as high as we could - and then setting it on the Scaffolding's Upper Platform. I didn't have a pulley to hang from the Beam Trolley so we resorted to brute force.

The weight of this particular Electric Chain Hoist is pretty close to 125 pounds.


Best regards,

Scott
 
OP
S

sbosecker

Well-known member
Joined
Sep 25, 2012
Messages
3,539
Location
Peachtree City, GA
Re: The Lone Beech Garage Build Thread (60x46)

Monday - December 19. 2016


Today I moved the scaffolding away from the Yellow Beam and over to the BendPak 2-Post Lift. The purpose of this was to allow me to examine the 2-Post Lift's Safety Bar system - specifically, the Safety Bar's Switch.

The fellows that installed the 2-Post Lift would do nothing associated with electricity. OK, maybe running the line voltage to the Lift should be done by an electrician but not hooking up this bit of wire and a switch seemed chicken-bleep to me.

Regardless of my opinion, the task of wiring the Safety Switch has not yet been accomplished. Today I had the time to go out to the Lone Beech Garage, find the appropriate parts, and see if the manual and the parts made sense.


20161219-01.jpg 20161219-02.jpg

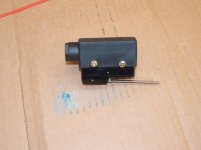
The Safety Switch fits into a weldment that holds & protects the switch.


20161219-03.jpg

Once the Safety Switch is mounted in the weldment, this bottom cover is screwed into place.


20161219-04.jpg

This 4-wire cable, about 14 feet long, seems like overkill for this application. Looking at the wiring diagram provided in the manual, it seems to me a 2-wire cable would suffice and would be easier to work with.

I'll sleep on it and look at it again tomorrow. The good news is that, after an examination by a person that really doesn't know what he's looking at [that would be me], all the needed parts seem to be there. I did some research tonight and at one time there was an issue with the provided switch not being correct for the wire to connect to it - terminals were not big enough for the gauge of wire being used. I'll check that tomorrow.

Once I'm sure that I've got everything the Electrician needs, I'll give him a call and see if we can schedule a day of work for him.


Scott
 
OP
S

sbosecker

Well-known member
Joined
Sep 25, 2012
Messages
3,539
Location
Peachtree City, GA
Re: The Lone Beech Garage Build Thread (60x46)

Tuesday - December 20, 2016

After a marathon session of stamping Christmas Card envelopes, I was able to get out to the Garage today and check out the BendPak's Overhead Safety Switch. As mentioned earlier, on some of these switches from a few years ago the terminals were undersize for the wire.


20161220-01.jpg 20161220-02.jpg

I climbed up on the scaffolding and took out the switch. It looks like these terminals are large enough for the job. While I had the switch down on the floor, I checked it for functionality with a multi-meter. It all checked out.

Time to call the Electrician.


Scott
 

drivesitfar

Well-known member
Joined
Oct 23, 2013
Messages
36,077
Location
Pacific Northwest
Re: The Lone Beech Garage Build Thread (60x46)

Scott: you've been making steady progress almost daily and i've been lurking and learning cause most of the stuff you've been doing i've never done before. also wanted to wish you and your family a Merry Christmas and even though 2016 was awesome for you i bet 2017 will be even better as you get set up in your new shop/garage.

cheers
 
OP
S

sbosecker

Well-known member
Joined
Sep 25, 2012
Messages
3,539
Location
Peachtree City, GA
Re: The Lone Beech Garage Build Thread (60x46)

Scott: you've been making steady progress almost daily and i've been lurking and learning cause most of the stuff you've been doing i've never done before. also wanted to wish you and your family a Merry Christmas and even though 2016 was awesome for you i bet 2017 will be even better as you get set up in your new shop/garage.

cheers

DrivesItFar,


I'm learning also as I've never done it before either. Ha!
Thanks for the very kind words!

...and a Merry Christmas to you and yours!


Best regards,

Scott
 
To avoid these ads, REGISTER NOW!
Top Bottom