To avoid these ads, REGISTER NOW!

My 1975 Chevy Dually Build

bimmer1980

Well-known member
Joined
Feb 5, 2009
Messages
2,104
Location
York, PA
I've been following this thread along.....

Are you going to shoot a base coat before you lay down the vinyl wrap?

I get a newsletter that talks about vehicle wraps...here are a couple of links...

https://sdgmag.com/node/6818?utm_so...0&spJobID=941650884&spReportId=OTQxNjUwODg0S0

https://sdgmag.com/features/vintage...0&spJobID=941650884&spReportId=OTQxNjUwODg0S0

NOTE--I have never done a vehicle wrap, but I do find the process intriguing....

I'm be curious to see how this turns out... my brother has an '88 chevy dually that needs some work......
 
To avoid these ads, REGISTER NOW!
OP
7

75Dually

Well-known member
Joined
Dec 5, 2013
Messages
444
Location
Lubbock, TX
So you're pretty good with a paint gun, from what I can see. Is the wrap that much cheaper than DYI paint?

The 100' x 5' roll of wrap, which is more than enough to do my entire truck, cost $460 delivered. The PPG paint I wanted to use (very similar color to what I picked for the vinyl) was $491 a gallon. That was at a reduced cost because a friend who owns a hot rod shop here in town was letting me use his account number. Oh BTW that did not include any other chemicals, reducer, thinners, and did not even include any clear coat. I was going to need at least 2 gallons of everything, so my bill before I even shot the first layer was going to be around $2000 in just materials.

Now don't get me wrong I have been painting my own vehicles for close to 20 years now, I knew the cost of this going in, and I wanted top level materials. In paint you get for the most part what you pay for. Want a show quality finish you gotta pay for a show quality finish. This is not an area where you get to skimp in my opinion.

OK so why wrap and not paint. First of all I wanted to try this for a long time. I like to expand my knowledge base in my hobby when I can. The quality of the product has come way up. The finishes and the materials are really high tech. Plus in 3 years (or maybe less) I will want something different, so all I have to do is remove the old wrap and install a new color scheme. One other important point, and this is one of my biggest gripes about paint, if it gets damaged, gets a chip, or gets a bunch of rocks hitting it from road construction the cost of repair is high, and the repair rarely looks as good as the original. With wrap you simply take off the damaged sheet and place a new one down, which is why I ordered excess length.

I hope that not only answers your questions, but I am sure other questions the other guys are thinking about.
 
OP
7

75Dually

Well-known member
Joined
Dec 5, 2013
Messages
444
Location
Lubbock, TX
I've been following this thread along.....

Are you going to shoot a base coat before you lay down the vinyl wrap?

I get a newsletter that talks about vehicle wraps...here are a couple of links...

https://sdgmag.com/node/6818?utm_so...0&spJobID=941650884&spReportId=OTQxNjUwODg0S0

https://sdgmag.com/features/vintage...0&spJobID=941650884&spReportId=OTQxNjUwODg0S0

NOTE--I have never done a vehicle wrap, but I do find the process intriguing....

I'm be curious to see how this turns out... my brother has an '88 chevy dually that needs some work......

A very good question. I'm going to lay down a final primer coat (as soon as the weather cooperates) and lay the wrap on top of that as soon as it dries. I did some tests with the samples I purchased and it lays down and pulls up the same as it does on paint. Obviously I have not done long term testing on pulling it up. But let's say that I am totally wrong on my assumptions and in 12 months it all goes bad. What am I out? Well if you see my response above less than a gallon of paint. My feeling right now is that the tests I have done have been on dried and cured smooth primer coat. With that being said I very much doubt that this is going to be any different than applying it over paint.

No matter what surface you apply this material over it needs a smooth and dust free substrate. Every mistake that is on the surface will show up in the vinyl to some degree. The same as with paint.

So like you I am excited to see the outcome. There are going to be new things to learn and hurdles to overcome. That's why I like this hobby so much!:D
 
OP
7

75Dually

Well-known member
Joined
Dec 5, 2013
Messages
444
Location
Lubbock, TX
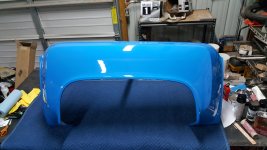
Here is the 2 end caps on the stainless trim that goes around the back of the cab. I redid them last night because the first time I did them was more practice than anything else. Now they look pretty good.
 

Attachments

  • 16402684_1330845776975936_7034104081914010444_o.jpg
    16402684_1330845776975936_7034104081914010444_o.jpg
    37.6 KB · Views: 67
OP
7

75Dually

Well-known member
Joined
Dec 5, 2013
Messages
444
Location
Lubbock, TX
So tonight was not as late in the shop as yesterday was, yesterday lasted until 11:30! So far I have wrapped the front panel for the bed, and as you can see below the tailgate is done. Now don't forget the stainless trim is also done in that grey wrap too. I really like this blue color, and I think the accent grey works well with the blue.

I am learning a ton with the first few pieces. First you have to keep everything as clean as possible, just like you would with window tint. If you keep that sort of thought process in mind it will be a big help if you try this in the future. This is such a cool material to work with. If you mess up and wrinkle the film you just simply heat it up and it will flatten right back out. I'm using a heat gun and I am using only the low setting because you can burn this stuff. If you do that you have to start all over again. Second be patient because if you rush this you results will suffer.

I'll keep the pics coming as I get parts completed. Tomorrow night I am going to try and tackle the dually fenders. That is going to be one of the hard parts to cover. I just hope it is not too hard...

Stay tuned!;)
 

Attachments

  • Tailgate 1.jpg
    Tailgate 1.jpg
    115.9 KB · Views: 112
OP
7

75Dually

Well-known member
Joined
Dec 5, 2013
Messages
444
Location
Lubbock, TX
Round 2! The passenger dually fender is done!! I knew this would be hard from the outset, but I'm a patient guy so I just worked on it little by little and it came out better than I thought it would. Once I did one side of the fender I figured out how to do the other side a little bit easier. Typical... Oh well... Tomorrow night is the drivers side dually fender. This weekend I hope to have the bed sides completed. That way at least the bed would be done.

I have some holes to weld up where the old trim went, and then I will primer the cab. Then the real fun begins!

Lots to do!:thumbup:

Stay tuned!!
 

Attachments

  • Dually fender 1.jpg
    Dually fender 1.jpg
    139.9 KB · Views: 99
OP
7

75Dually

Well-known member
Joined
Dec 5, 2013
Messages
444
Location
Lubbock, TX
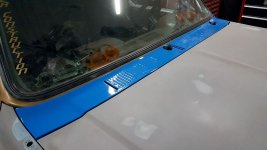
So I started on the cowl tonight, but it simply got too cold to work the material. Plus I don't want to rush this cowl because if I do it will turn out ugly for sure.

So tomorrow it is supposed to be a lot warmer. Perfect time to get some serious work done on this super sized girl.

Stay tuned!
 

Attachments

  • Cowl.jpg
    Cowl.jpg
    50.4 KB · Views: 74

Strouty

Well-known member
Joined
Mar 21, 2010
Messages
38,218
Location
Southern Maine
Does the vinyl stretch or do you shrink it? In other words, how in the heck did you get those curves so nice???
 

nyy845

Well-known member
Joined
Feb 10, 2012
Messages
477
Location
CT
I think it looks awesome. I am a big fan of the vinyl wraps, most that I've seen are matte finish. This looks to be semi-glossy, it looks great.

Just out of curiosity, there is a plasti-dip thread that I just looked through. Did you give any thought to that route since you obviously have the painting skills?
 
OP
7

75Dually

Well-known member
Joined
Dec 5, 2013
Messages
444
Location
Lubbock, TX
How hard was it to do the Handle?

It's not overly hard, but you just have to keep everything clean as possible and be patient.

Does the vinyl stretch or do you shrink it? In other words, how in the heck did you get those curves so nice???

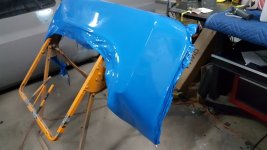
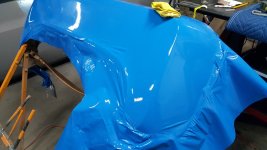
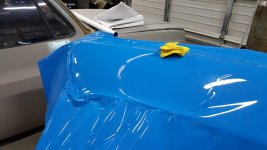
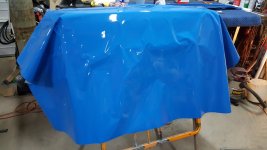
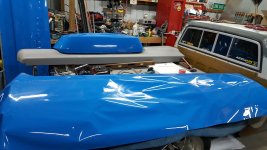
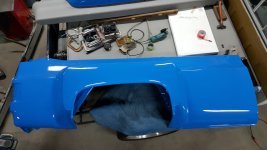
Great question! It actually does both. Basically you have to deal with the excess material by doing both procedures. Sometimes you shrink and sometimes you stretch it. Trust me when I say these dually fenders are one tough puzzle to solve. Hopefully the pics I'm about to post will show you some of what it takes.

I think it looks awesome. I am a big fan of the vinyl wraps, most that I've seen are matte finish. This looks to be semi-glossy, it looks great.

Just out of curiosity, there is a plasti-dip thread that I just looked through. Did you give any thought to that route since you obviously have the painting skills?

This is a full gloss. I thought about Plasti dip, but if I was going to paint it I would have just gone and done a normal paint job. The prep and time is the same. Plus there are some things I don't like about plasti dip. It damages too easy for me.
 
OP
7

75Dually

Well-known member
Joined
Dec 5, 2013
Messages
444
Location
Lubbock, TX
Part 1: I worked most of the day in the shop, OK after I went and got some donuts! First was the dually fender and then on to the big passenger fender. I wanted to give you guys an idea the process of doing the dually fender. It is a ****** to do! Saying that it can be done you just have to play with it a bunch. I think I have it down now...

Part 2 will be the rest of the pictures I took today working on the big blue beast.

I'm tired, but satisfied on what I got done today.

Stay tuned!!!;)
 

Attachments

  • 20170204_202504.jpg
    20170204_202504.jpg
    149.2 KB · Views: 71
  • 20170204_194306.jpg
    20170204_194306.jpg
    113.5 KB · Views: 67
  • 20170204_191300.jpg
    20170204_191300.jpg
    117.7 KB · Views: 65
  • 20170204_170657.jpg
    20170204_170657.jpg
    122 KB · Views: 65
  • 20170204_170611.jpg
    20170204_170611.jpg
    117 KB · Views: 69
  • 20170204_133320.jpg
    20170204_133320.jpg
    115.7 KB · Views: 67
  • 20170204_131230.jpg
    20170204_131230.jpg
    116.8 KB · Views: 69
OP
7

75Dually

Well-known member
Joined
Dec 5, 2013
Messages
444
Location
Lubbock, TX
Part 2! Here are the rest of the pics I took today. Still not done with the big passenger fender as you can see, but it got late and we got church tomorrow.

Enjoy the pics!
 

Attachments

  • 20170204_212341.jpg
    20170204_212341.jpg
    145.6 KB · Views: 58
  • 20170204_231130.jpg
    20170204_231130.jpg
    113 KB · Views: 70
OP
7

75Dually

Well-known member
Joined
Dec 5, 2013
Messages
444
Location
Lubbock, TX
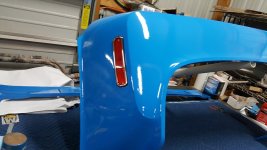
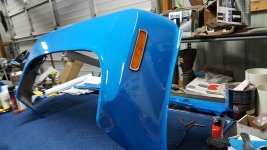
I did a bunch of small jobs cleaning up the parts I have already wrapped. However I did get to install the new marker lights. Shinny!
 

Attachments

  • 20170205_143802.jpg
    20170205_143802.jpg
    121.5 KB · Views: 55
  • 20170205_143813.jpg
    20170205_143813.jpg
    145.1 KB · Views: 52
To avoid these ads, REGISTER NOW!
OP
7

75Dually

Well-known member
Joined
Dec 5, 2013
Messages
444
Location
Lubbock, TX
So in typical West Texas fashion the weather today was 90 degrees, and tomorrow we are expecting a winter storm!

So I busted a hump today getting the truck in primer. I will have to wet sand the roof, and a couple of small spots, but it is now really coming along. I also got the rear panel covered today. In that pic you can see some wrinkles at the very top, don't worry about those because they will be under the stainless rear cab wrap around trim. You can also see in that shot where I used the knifeless tape on the outer edge. Man that stuff is amazing! I still have a couple of air bubbles to chase down, but it is maybe 2 to 3 of them. Let me tell you this panel was no fun at all. I still have to finish the bottom, but that is for tomorrow!

Stay tuned!;)
 

Attachments

  • 20170211_213513[1].jpg
    20170211_213513[1].jpg
    119.9 KB · Views: 89
  • 20170211_142343[1].jpg
    20170211_142343[1].jpg
    144.3 KB · Views: 82
  • 20170211_142254[1].jpg
    20170211_142254[1].jpg
    113.5 KB · Views: 80

bigpokie

Well-known member
Joined
May 25, 2013
Messages
438
You finally got it almost on one color to add yet another color !!! Hahaha. Looking good though.
 
OP
7

75Dually

Well-known member
Joined
Dec 5, 2013
Messages
444
Location
Lubbock, TX
Looking good so far. I'm really interested in how you're going to finish out the cab.

I'm going to work on the roof next and layer everything to hide any seams. I'll take some shots as I progress and hopefully it will all work out. What is funny about the rear panel is that I did all that work to make it look good, and it will almost never be seen by anyone... :willy_nil

You finally got it almost on one color to add yet another color !!! Hahaha. Looking good though.

I thought the very same thing last night! LOL! Yeah here it has been in those multi colors for a couple of years now, and in one day I get it a single color... Then I gotta go mess it all up again! That's my life in a nut shell...:thumbup:
 
OP
7

75Dually

Well-known member
Joined
Dec 5, 2013
Messages
444
Location
Lubbock, TX
Y'all know how much I like to sand, if you don't let me tell you... So tonight I got half of the roof wet sanded (the hard part, the very middle!), and I got the complete hood done too. I will get the rest of the truck wet sanded early this week and then I will start the wrapping process. I wanted the truck as mirror smooth as possible in order to give the best possible finish for the wrap.

Stay tuned! ;)
 
OP
7

75Dually

Well-known member
Joined
Dec 5, 2013
Messages
444
Location
Lubbock, TX
LST Crunch! The pain is real!!:lol:

So tonight I got the whole passenger side and most of the roof wet sanded. Tomorrow is the drivers side.

No slacking at this point. Every hour counts!

Stay tuned;)
 

Attachments

  • 20170213_214618[1].jpg
    20170213_214618[1].jpg
    122.1 KB · Views: 43
OP
7

75Dually

Well-known member
Joined
Dec 5, 2013
Messages
444
Location
Lubbock, TX
Boss don't make me sand no more! :waah:

The drivers side is done! One little spot on the lower part of the front fender. I laid down some filler, and I will wet sand it out tomorrow. You know you go over these panels hundreds of time, and you will still miss something! ARG!:lol: Oh well... Such is life...

Tomorrow the wrapping begins! Most likely I am going to start with the roof and work my way down.

Stay tuned!;)
 

Attachments

  • 16664907_1347075912019589_4539500719557095260_o.jpg
    16664907_1347075912019589_4539500719557095260_o.jpg
    70.9 KB · Views: 41
OP
7

75Dually

Well-known member
Joined
Dec 5, 2013
Messages
444
Location
Lubbock, TX
Now the wrapping starts, and I catch a cold! Crud!!:lol:

Oh well I'm going to see the doctor tomorrow and see what they can do for me...

This roof section was actually not that bad. I'm glad I started off with the harder parts because I now know how to handle items like the roof ribs. I have the knifeless tape laid down on the very edges under the blue you see here (you can just see the light green tape if you look closely at the corners), so that when I lay down the side parts and they are in place I will make a **** joint and hopefully it will be very hard to see the seam. That's my plan at this point...

Hopefully tomorrow I will feel better because I need everyday to get this thing done. 7 more days until we leave!
 

Attachments

  • 16797098_1347992515261262_4229698406671319647_o.jpg
    16797098_1347992515261262_4229698406671319647_o.jpg
    54.9 KB · Views: 69
OP
7

75Dually

Well-known member
Joined
Dec 5, 2013
Messages
444
Location
Lubbock, TX
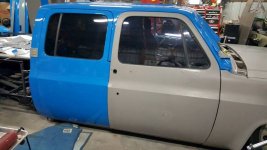
So here are some update pics. I really like the grey with the blue, in person it really pops!

Stay tuned!
 

Attachments

  • 16831026_1350221985038315_7277772020657276000_n.jpg
    16831026_1350221985038315_7277772020657276000_n.jpg
    41.8 KB · Views: 68
  • 16832006_1350222015038312_2934784732516266155_n.jpg
    16832006_1350222015038312_2934784732516266155_n.jpg
    31.6 KB · Views: 66
OP
7

75Dually

Well-known member
Joined
Dec 5, 2013
Messages
444
Location
Lubbock, TX
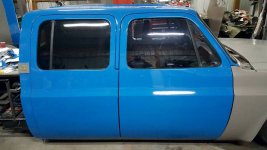
A couple more pics for tonight. Got the passenger door done. Tomorrow it's the front end and the drivers side rear fender. So much to do! So little time!

Stay tuned!
 

Attachments

  • 16832395_1350408775019636_7202675915564668840_n.jpg
    16832395_1350408775019636_7202675915564668840_n.jpg
    43.1 KB · Views: 56
  • 16730508_1350408755019638_2154512582599506273_n.jpg
    16730508_1350408755019638_2154512582599506273_n.jpg
    56 KB · Views: 51
OP
7

75Dually

Well-known member
Joined
Dec 5, 2013
Messages
444
Location
Lubbock, TX
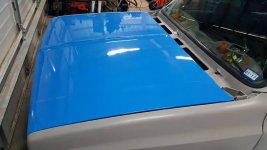
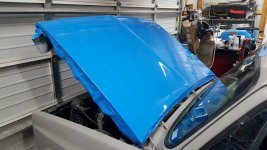
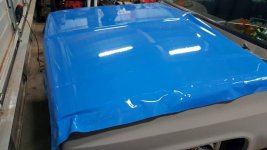
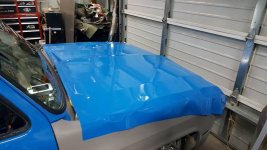
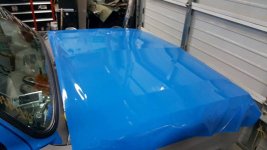
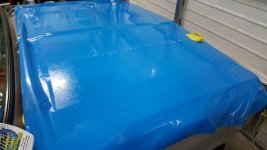
So I thought I would show the hood being done tonight. It took me 1 1/2 hours from start to finish. It came out great. Now I'm tired again and it's off to bed!

Stay tuned...
 

Attachments

  • 16807745_1351517291575451_7817557553877340456_n.jpg
    16807745_1351517291575451_7817557553877340456_n.jpg
    36.4 KB · Views: 53
  • 16864322_1351517311575449_5532984691319508522_n.jpg
    16864322_1351517311575449_5532984691319508522_n.jpg
    50.2 KB · Views: 54
  • 16640921_1351517341575446_5556357998367105444_n.jpg
    16640921_1351517341575446_5556357998367105444_n.jpg
    51.4 KB · Views: 48
  • 16806951_1351517354908778_5998740589980757266_n.jpg
    16806951_1351517354908778_5998740589980757266_n.jpg
    34.5 KB · Views: 46
  • 16806993_1351517534908760_4265934303779304880_n.jpg
    16806993_1351517534908760_4265934303779304880_n.jpg
    47.2 KB · Views: 47
  • 16807155_1351517504908763_1286510043707395916_n.jpg
    16807155_1351517504908763_1286510043707395916_n.jpg
    36.6 KB · Views: 47
  • 16649526_1351517474908766_6093940111851510898_n.jpg
    16649526_1351517474908766_6093940111851510898_n.jpg
    34.1 KB · Views: 46

RivennHewn

Well-known member
Joined
Jun 4, 2011
Messages
10,376
Location
PNW
I know for sure that I'll never match this thread, but you've been a great inspiration for my '78 Dually thread.

Great work, on a great truck!
 
To avoid these ads, REGISTER NOW!
Top Bottom