To avoid these ads, REGISTER NOW!

Craftsman 103.23640 drill press restoration

rrich1

Well-known member
Joined
Oct 7, 2015
Messages
793
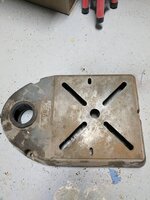
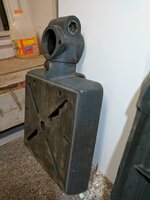
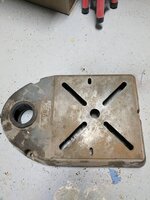
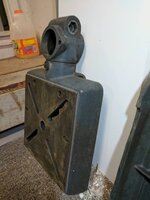
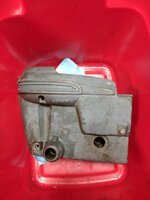
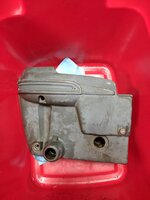
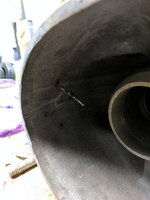
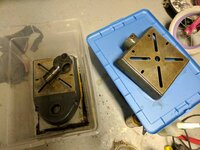
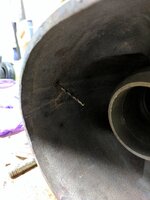
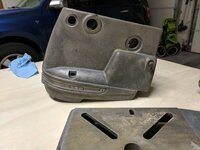
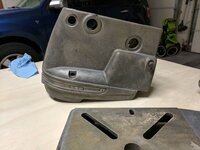
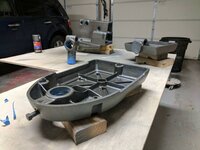
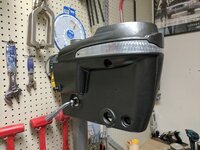
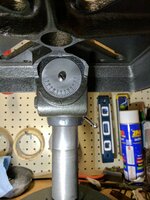
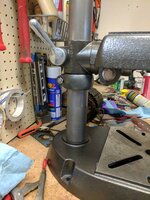
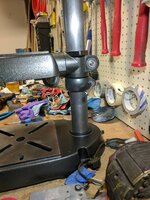
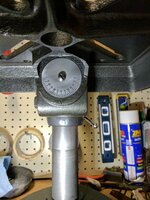
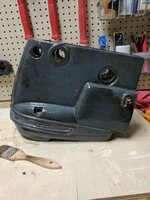
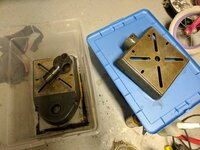
I purchased this drill press a few months ago for $50. I brought it home and it purred like a kitten when I turned it on. The cord was in rough shape and it showed the second time I turned it on by sparking. My initial plan was to replace the cord and just clean it up leaving the patina. Now taking it apart I am going to repaint it as well. Here is the progress so far.
bce778681f075f8a0fef9b03a55883bb.jpg16b7cda9cc573949a3e931222870a085.jpg02ec5c2c9db7c0e83fd2cc6ae5d231e7.jpg9295f625989beb4eca8196d79c96fb4b.jpg

6321e063ce861761516cfe2bbb87d23e.jpg42cbd7184b432b91ed980f6e6df1e532.jpg
9fdd1b7f42ced895c06ff81cd8c7479e.jpg9871f79cfa381d3ff095d2c263ceb67f.jpg923a0976ffcc2567e933fe6a34be03fe.jpg
Sent from my Pixel XL using Tapatalk
 

Attachments

  • 42cbd7184b432b91ed980f6e6df1e532.jpg
    42cbd7184b432b91ed980f6e6df1e532.jpg
    90.3 KB · Views: 1
  • 6321e063ce861761516cfe2bbb87d23e.jpg
    6321e063ce861761516cfe2bbb87d23e.jpg
    85.2 KB · Views: 1
  • 9295f625989beb4eca8196d79c96fb4b.jpg
    9295f625989beb4eca8196d79c96fb4b.jpg
    43 KB · Views: 1
  • bce778681f075f8a0fef9b03a55883bb.jpg
    bce778681f075f8a0fef9b03a55883bb.jpg
    67.7 KB · Views: 2
  • 16b7cda9cc573949a3e931222870a085.jpg
    16b7cda9cc573949a3e931222870a085.jpg
    72 KB · Views: 2
  • 02ec5c2c9db7c0e83fd2cc6ae5d231e7.jpg
    02ec5c2c9db7c0e83fd2cc6ae5d231e7.jpg
    65.7 KB · Views: 4
  • 9fdd1b7f42ced895c06ff81cd8c7479e.jpg
    9fdd1b7f42ced895c06ff81cd8c7479e.jpg
    97.8 KB · Views: 2
  • 923a0976ffcc2567e933fe6a34be03fe.jpg
    923a0976ffcc2567e933fe6a34be03fe.jpg
    69.6 KB · Views: 3
  • 9871f79cfa381d3ff095d2c263ceb67f.jpg
    9871f79cfa381d3ff095d2c263ceb67f.jpg
    94.3 KB · Views: 4
Last edited:
To avoid these ads, REGISTER NOW!
OP
R

rrich1

Well-known member
Joined
Oct 7, 2015
Messages
793
5f756777c600e0f62e86f43ec8630bf1.jpg4cea82bb6983e2c0a30578bccf478055.jpge401adba98797180188de374195da1e9.jpg1a16be87e071458d801154dc39a88e67.jpg090ddf0713737f6eaba79811fc5eba65.jpgedea9c8516e20cda7829ab3de563b79b.jpg

Sent from my Pixel XL using Tapatalk
 

Attachments

  • edea9c8516e20cda7829ab3de563b79b.jpg
    edea9c8516e20cda7829ab3de563b79b.jpg
    104.5 KB · Views: 4
  • 5f756777c600e0f62e86f43ec8630bf1.jpg
    5f756777c600e0f62e86f43ec8630bf1.jpg
    95.1 KB · Views: 1
  • 4cea82bb6983e2c0a30578bccf478055.jpg
    4cea82bb6983e2c0a30578bccf478055.jpg
    95.5 KB · Views: 2
  • e401adba98797180188de374195da1e9.jpg
    e401adba98797180188de374195da1e9.jpg
    111.8 KB · Views: 3
  • 1a16be87e071458d801154dc39a88e67.jpg
    1a16be87e071458d801154dc39a88e67.jpg
    129.8 KB · Views: 3
  • 090ddf0713737f6eaba79811fc5eba65.jpg
    090ddf0713737f6eaba79811fc5eba65.jpg
    121.5 KB · Views: 3
OP
R

rrich1

Well-known member
Joined
Oct 7, 2015
Messages
793
13c23dadbe4cdf66443df693304c5544.jpgb5a725ef8db709a4bf8ce395af145a22.jpg5914e4c703d0a7249d790b1f35e894d7.jpg

Sent from my Pixel XL using Tapatalk
 

Attachments

  • 13c23dadbe4cdf66443df693304c5544.jpg
    13c23dadbe4cdf66443df693304c5544.jpg
    118.7 KB · Views: 3
  • b5a725ef8db709a4bf8ce395af145a22.jpg
    b5a725ef8db709a4bf8ce395af145a22.jpg
    130.8 KB · Views: 3
  • 5914e4c703d0a7249d790b1f35e894d7.jpg
    5914e4c703d0a7249d790b1f35e894d7.jpg
    59.8 KB · Views: 4

FrankLee

Well-known member
Joined
Sep 13, 2010
Messages
3,617
Location
seMI, 48317
Lookin' good so far!

Are you replacing bearings too?

Are those lock cylinders stuck in the head frame and table?
 
Last edited:
OP
R

rrich1

Well-known member
Joined
Oct 7, 2015
Messages
793
Lookin' good so far!

Are you replacing bearings too?

Are those lock cylinders stuck in the head frame and table?
Everything is out of the head assembly now. The lock cylinder in the table are still in. Do I need to take the pin out first to get them out? Do I do take the pin out from the bottom or top.

I had bought a set of bearings to replace but am not sure where they are at. When I did have it turned on everything sounded good. Everything spins very freely as well. I might hold off on the bearings for now or should I just replace them?

Sent from my Pixel XL using Tapatalk
 
Last edited:
OP
R

rrich1

Well-known member
Joined
Oct 7, 2015
Messages
793
50cc40377a65be30ce46045838052ff6.jpg3a92e11be56418fd2d2311682cc7f8eb.jpg9614495187e501eaf147a235701df0fa.jpg

Sent from my Pixel XL using Tapatalk
 

Attachments

  • 50cc40377a65be30ce46045838052ff6.jpg
    50cc40377a65be30ce46045838052ff6.jpg
    323.5 KB · Views: 4
  • 3a92e11be56418fd2d2311682cc7f8eb.jpg
    3a92e11be56418fd2d2311682cc7f8eb.jpg
    328 KB · Views: 1
  • 9614495187e501eaf147a235701df0fa.jpg
    9614495187e501eaf147a235701df0fa.jpg
    312.2 KB · Views: 2

FrankLee

Well-known member
Joined
Sep 13, 2010
Messages
3,617
Location
seMI, 48317
Everything is out of the head assembly now. The lock cylinder in the table are still in. Do I need to take the pin out first to get them out? Do I do take the pin out from the bottom or top.

I had bought a set of bearings to replace but am not sure where they are at. When I did have it turned on everything sounded good. Everything spins very freely as well. I might hold off on the bearings for now or should I just replace them?

Sent from my Pixel XL using Tapatalk

The taper pin will tap out from the bottom. It doesn't matter if it's in or out to remove the lock cylinders.

The tilt lock cylinders are slightly different than the table lock cylinders. They have a larger/longer bevel to them.

Bearings are a judgement cAll. If those are the originals they are 60+ years old.
 
Last edited:
OP
R

rrich1

Well-known member
Joined
Oct 7, 2015
Messages
793
The taper pin will tap out from the bottom. It doesn't matter if it's in or out to remove the lock cylinders.

The tilt lock cylinders are slightly different than the table lock cylinders. They have a larger/longer bevel to them.

Bearings are a judgement cAll. If those are the originals they are 60+ years old.
I just rechecked the bearings on the pulley assembly. They will need to be replaced. I think I have the model numbers equivalent for new bearings bookmarked somewhere.

Sent from my Pixel XL using Tapatalk
 
OP
R

rrich1

Well-known member
Joined
Oct 7, 2015
Messages
793
After work I got the logo and model plate off. I'm not sure how everyone has done it but I went at them from the backside. Used an old drill bit and a hammer. Came right out. Also put on some citrus paint stripper. Going to leave it on over night. 67358af3d189b324e810d1312ce000df.jpg8001af38e303abffa18305babfe26245.jpgc80786fd70951c2b227c8a3fb7497c63.jpgf7447da1ef2e1871c68a1f77e306f6fb.jpg

Sent from my Pixel XL using Tapatalk
 

Attachments

  • 8001af38e303abffa18305babfe26245.jpg
    8001af38e303abffa18305babfe26245.jpg
    118.7 KB · Views: 1
  • c80786fd70951c2b227c8a3fb7497c63.jpg
    c80786fd70951c2b227c8a3fb7497c63.jpg
    88.8 KB · Views: 1
  • f7447da1ef2e1871c68a1f77e306f6fb.jpg
    f7447da1ef2e1871c68a1f77e306f6fb.jpg
    98.9 KB · Views: 1
  • 67358af3d189b324e810d1312ce000df.jpg
    67358af3d189b324e810d1312ce000df.jpg
    74.8 KB · Views: 3
OP
R

rrich1

Well-known member
Joined
Oct 7, 2015
Messages
793
well after church today i tried to take off the paint stripper. it worked so so. getting into the small areas is a huge pain in the ****. I put a second coat on and will either try again after work tonight or tomorrow. I used a combination of wire brush, pneumatic air grinder, scraper, and these bristle brushes for the drill. i will need to buy more pads for the air grinder.
 
OP
R

rrich1

Well-known member
Joined
Oct 7, 2015
Messages
793
Got the main body pieces cleaned up. I'll run past them again with a brush and then use some acetone before printing them. I also go the motor mostly apart. Got one side off but not the side with the wires. Hopefully I can get them off today so I can paint all of the pieces at once. I don't think that will happen though. a09788afaf36ea48d3fc6920e7f2858f.jpgff4729d3ed36a6883dcc368a7d3fce78.jpgd847b72825bdbda7cf56ac7495fc61de.jpg

Sent from my Pixel XL using Tapatalk
 

Attachments

  • a09788afaf36ea48d3fc6920e7f2858f.jpg
    a09788afaf36ea48d3fc6920e7f2858f.jpg
    100 KB · Views: 3
  • ff4729d3ed36a6883dcc368a7d3fce78.jpg
    ff4729d3ed36a6883dcc368a7d3fce78.jpg
    78.3 KB · Views: 2
  • d847b72825bdbda7cf56ac7495fc61de.jpg
    d847b72825bdbda7cf56ac7495fc61de.jpg
    76.1 KB · Views: 2
OP
R

rrich1

Well-known member
Joined
Oct 7, 2015
Messages
793
Pieces primed and waiting to be painted. b2dbe0d761f8eff994cff4de413cc8e5.jpg0632c55bc368fbe003a64cf33fd5e351.jpg

Sent from my Pixel XL using Tapatalk
 

Attachments

  • b2dbe0d761f8eff994cff4de413cc8e5.jpg
    b2dbe0d761f8eff994cff4de413cc8e5.jpg
    63.3 KB · Views: 1
  • 0632c55bc368fbe003a64cf33fd5e351.jpg
    0632c55bc368fbe003a64cf33fd5e351.jpg
    52.2 KB · Views: 1

bagged89s10

Well-known member
Joined
Mar 13, 2005
Messages
4,607
Location
CT
Pieces primed and waiting to be painted. b2dbe0d761f8eff994cff4de413cc8e5.jpg0632c55bc368fbe003a64cf33fd5e351.jpg

Sent from my Pixel XL using Tapatalk


I'll be following this. Can't wait to see more. What color did are you painting it?
 

Attachments

  • 0632c55bc368fbe003a64cf33fd5e351.jpg
    0632c55bc368fbe003a64cf33fd5e351.jpg
    51.3 KB · Views: 2
  • b2dbe0d761f8eff994cff4de413cc8e5.jpg
    b2dbe0d761f8eff994cff4de413cc8e5.jpg
    62.4 KB · Views: 2
OP
R

rrich1

Well-known member
Joined
Oct 7, 2015
Messages
793
I'll be following this. Can't wait to see more. What color did are you painting it?
Ford dark shadow gray. Just put a first coat on. I'll get some pics here in a bit. Most likely be doing 3 coats. Then clear on top of that. This is acrylic paint and not enamel.

Sent from my Pixel XL using Tapatalk
 
OP
R

rrich1

Well-known member
Joined
Oct 7, 2015
Messages
793
First coat of paint on 51f760b767b07f81fb3d69d50e849fb8.jpge522d2f256a30e0a230e21717c263ee3.jpg2cb3c668107e924fe5a46801ecbb7f12.jpg

Sent from my Pixel XL using Tapatalk
 

Attachments

  • e522d2f256a30e0a230e21717c263ee3.jpg
    e522d2f256a30e0a230e21717c263ee3.jpg
    82.3 KB · Views: 2
  • 2cb3c668107e924fe5a46801ecbb7f12.jpg
    2cb3c668107e924fe5a46801ecbb7f12.jpg
    68.8 KB · Views: 2
  • 51f760b767b07f81fb3d69d50e849fb8.jpg
    51f760b767b07f81fb3d69d50e849fb8.jpg
    69.7 KB · Views: 3
OP
R

rrich1

Well-known member
Joined
Oct 7, 2015
Messages
793
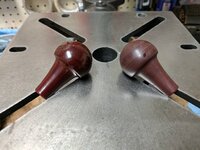
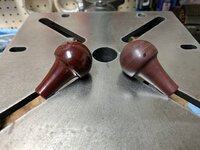
Got the motor apart tonight. Got the rest of the pieces that were originally painted soaking in stripper right now. Also took the time to clean up the knobs and handles. I don't have a grinder right now so I used a drill with bit plus my pneumatic angle grinder. I purchased a Ryobi buffer wheel set for the drill but it is **** and doesn't work. My friend took the pulley assembly to his work to get the second bearing off. He will clean up both pulleys as well. 757f90e7318a1c164ef8d929df5131c9.jpgc7f5f46e9e905d7ba8ed50d3448f7509.jpg31210afde9f2a0b1c75612d2b0d34cba.jpg

Sent from my Pixel XL using Tapatalk
 

Attachments

  • 31210afde9f2a0b1c75612d2b0d34cba.jpg
    31210afde9f2a0b1c75612d2b0d34cba.jpg
    109.3 KB · Views: 5
  • c7f5f46e9e905d7ba8ed50d3448f7509.jpg
    c7f5f46e9e905d7ba8ed50d3448f7509.jpg
    111.7 KB · Views: 1
  • 757f90e7318a1c164ef8d929df5131c9.jpg
    757f90e7318a1c164ef8d929df5131c9.jpg
    108.1 KB · Views: 2
OP
R

rrich1

Well-known member
Joined
Oct 7, 2015
Messages
793
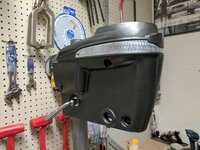
I got the handles buffed a little more today. I also got the main body pieces all sprayed and cleared. 3 coats of each. I polished up the head and as well. I cleaned up the last of the painted pieces with Paint stripper and those are ready to be cleaned and taped off before painting.54c4871fc88a6e7b2339162e22f4bb37.jpgd54d8d550d8e4d5e2a7e637e9562fe67.jpg

Sent from my Pixel XL using Tapatalk
 

Attachments

  • 54c4871fc88a6e7b2339162e22f4bb37.jpg
    54c4871fc88a6e7b2339162e22f4bb37.jpg
    51.7 KB · Views: 3
  • d54d8d550d8e4d5e2a7e637e9562fe67.jpg
    d54d8d550d8e4d5e2a7e637e9562fe67.jpg
    51.8 KB · Views: 3
To avoid these ads, REGISTER NOW!
OP
R

rrich1

Well-known member
Joined
Oct 7, 2015
Messages
793
Great progress! This is going to be one clean drill press when you're done.
Thanks! Thanks again for the handle.

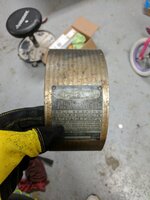
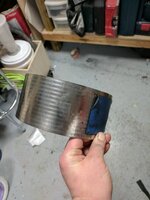
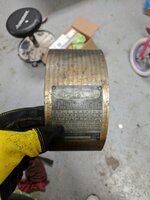
I got the motor wrap cleaned up this morning. Not sure if I will try and do anymore to it. I also think I am going to leave the name plate alone. Try and get the dirt off of it but that is it.
48fcf9dba8b5fb96fdb4eef3d28ccdaf.jpg53921f9381d0b8bf83602df9507f9280.jpg4f08104eaf6f04570821abe12aa713f6.jpg4207b12962a5642b8abfb9fed52a0dd6.jpg

Sent from my Pixel XL using Tapatalk
 

Attachments

  • 48fcf9dba8b5fb96fdb4eef3d28ccdaf.jpg
    48fcf9dba8b5fb96fdb4eef3d28ccdaf.jpg
    73.2 KB · Views: 1
  • 53921f9381d0b8bf83602df9507f9280.jpg
    53921f9381d0b8bf83602df9507f9280.jpg
    66.3 KB · Views: 1
  • 4f08104eaf6f04570821abe12aa713f6.jpg
    4f08104eaf6f04570821abe12aa713f6.jpg
    58.6 KB · Views: 1
  • 4207b12962a5642b8abfb9fed52a0dd6.jpg
    4207b12962a5642b8abfb9fed52a0dd6.jpg
    62.1 KB · Views: 1

ckadams00

Well-known member
Joined
Sep 12, 2011
Messages
1,273
Location
Seattle, WA
rrich1 you are doing a great job - that drill press looks like it was still in very good shape! I have a 150 floor model and three more floor models waiting to be restored when it warms up a bit.
The wrapping on your motor wiring looks pretty shot - I've always had good luck just re-covering them with shrink-tubing.

I always wonder about how the nameplates get so worn when the rest of your drill looks perfect. . .

You got a great deal for $50!
 
OP
R

rrich1

Well-known member
Joined
Oct 7, 2015
Messages
793
rrich1 you are doing a great job - that drill press looks like it was still in very good shape! I have a 150 floor model and three more floor models waiting to be restored when it warms up a bit.
The wrapping on your motor wiring looks pretty shot - I've always had good luck just re-covering them with shrink-tubing.

I always wonder about how the nameplates get so worn when the rest of your drill looks perfect. . .

You got a great deal for $50!
Thanks. My friend and I are going to rewire what we can and shrink wrap what we cant replace.

I spent the last hour cleaning up bolts, nuts, and lock cylinders with a wire wheel on the drill. Look so much better.

Sent from my Pixel XL using Tapatalk
 
OP
R

rrich1

Well-known member
Joined
Oct 7, 2015
Messages
793
Im really going to like this! 4b8f57cf2192f84cf14f1fee8d69b191.jpgb3621155017c283a82f517ddf7c47440.jpg0ee79739dc0931cb6eb6b65e1782528d.jpgdd6fa5754f214842f324674be0776940.jpg77f3fbce72534bb3b0d5b4c17612bfa0.jpgd75ed6ff350c02451058c074bcd4efc1.jpg

Sent from my Pixel XL using Tapatalk
 

Attachments

  • d75ed6ff350c02451058c074bcd4efc1.jpg
    d75ed6ff350c02451058c074bcd4efc1.jpg
    99.4 KB · Views: 2
  • 77f3fbce72534bb3b0d5b4c17612bfa0.jpg
    77f3fbce72534bb3b0d5b4c17612bfa0.jpg
    80.9 KB · Views: 1
  • dd6fa5754f214842f324674be0776940.jpg
    dd6fa5754f214842f324674be0776940.jpg
    87.6 KB · Views: 3
  • b3621155017c283a82f517ddf7c47440.jpg
    b3621155017c283a82f517ddf7c47440.jpg
    140.3 KB · Views: 2
  • 4b8f57cf2192f84cf14f1fee8d69b191.jpg
    4b8f57cf2192f84cf14f1fee8d69b191.jpg
    110.6 KB · Views: 3
  • 0ee79739dc0931cb6eb6b65e1782528d.jpg
    0ee79739dc0931cb6eb6b65e1782528d.jpg
    131.3 KB · Views: 5
OP
R

rrich1

Well-known member
Joined
Oct 7, 2015
Messages
793
Today I got the last of the body and motor pieces cleaned, primed, and two coats of paint on. Will do another coat after work and then a few coats of clear. Got my motor bearings in today as well. Hopefully get it rewired on Monday and start getting it really back together.

Sent from my Pixel XL using Tapatalk
 
OP
R

rrich1

Well-known member
Joined
Oct 7, 2015
Messages
793
Nice job! What brand and color of paint?

it is duplicolor spray touch up paint from any auto parts store. the color is Ford dark shadow gray. i just picked up a craftsman block grinder and going to two tone it with the same gray plus a lighter silver metallic when i find one i like. :rocker:
 
OP
R

rrich1

Well-known member
Joined
Oct 7, 2015
Messages
793
Cleaned the handles last night. Soaked them in dawn to release the dirt and grime. Once dried they needed a good buffing. A before and after the buffing. Turned out pretty well. 601a59fbc5ef54fab5dbfefef6fa5fbc.jpg


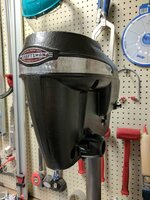
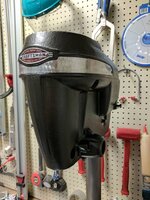
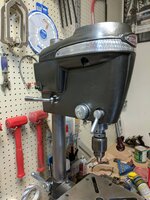
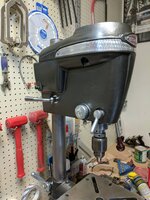
Also got the logo on as well. Just took some soap to it. Didn't want to risk damaging the letters. Going to do the same thing to the motor plate as well. Don't care about it not being cleaned up too well. Will give it a nice accent to the restored drill press I think. I'm loving these colors together. [emoji7] the rest of the pieces have 2 coats of clear on them and will get a third coat after work. 921028ccabae69372e06971243aee478.jpg5358025e026d090fd437f4cd1dc4b647.jpg

Sent from my Pixel XL using Tapatalk
 

Attachments

  • 5358025e026d090fd437f4cd1dc4b647.jpg
    5358025e026d090fd437f4cd1dc4b647.jpg
    93.7 KB · Views: 3
  • 921028ccabae69372e06971243aee478.jpg
    921028ccabae69372e06971243aee478.jpg
    92.1 KB · Views: 3
  • 601a59fbc5ef54fab5dbfefef6fa5fbc.jpg
    601a59fbc5ef54fab5dbfefef6fa5fbc.jpg
    81.6 KB · Views: 1
OP
R

rrich1

Well-known member
Joined
Oct 7, 2015
Messages
793
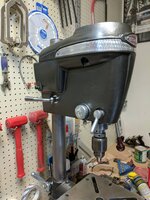
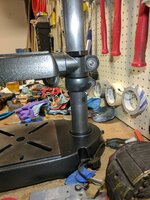
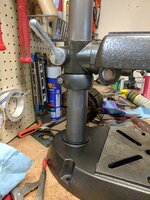
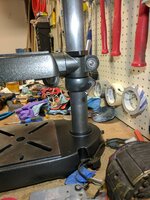
Here is where I am at right now. My friend has both pulleys and the motor is still apart. He is coming over tomorrow so hopefully we can get the rest of it assembled. For some reason the table lock collar came out a different color and not sure why. Kinda irritating. We'll see how much it bugs me. c1c449dab57f2b544784f3293c32cbf3.jpg14063a61aaffd87b90dec2119984becf.jpg122e30079ca48825be2d619c24b27a13.jpg6d18a5804d72b7cbdf761153e4416bdb.jpg8d58d3a22e389b82c044cf281029b9f2.jpgb0b72367ff0cf82918c74f512a7fb2bf.jpg

Sent from my Pixel XL using Tapatalk
 

Attachments

  • 6d18a5804d72b7cbdf761153e4416bdb.jpg
    6d18a5804d72b7cbdf761153e4416bdb.jpg
    116.8 KB · Views: 1
  • 8d58d3a22e389b82c044cf281029b9f2.jpg
    8d58d3a22e389b82c044cf281029b9f2.jpg
    99.9 KB · Views: 3
  • b0b72367ff0cf82918c74f512a7fb2bf.jpg
    b0b72367ff0cf82918c74f512a7fb2bf.jpg
    110 KB · Views: 1
  • 122e30079ca48825be2d619c24b27a13.jpg
    122e30079ca48825be2d619c24b27a13.jpg
    112.1 KB · Views: 2
  • 14063a61aaffd87b90dec2119984becf.jpg
    14063a61aaffd87b90dec2119984becf.jpg
    103.1 KB · Views: 2
  • c1c449dab57f2b544784f3293c32cbf3.jpg
    c1c449dab57f2b544784f3293c32cbf3.jpg
    128.8 KB · Views: 2

bagged89s10

Well-known member
Joined
Mar 13, 2005
Messages
4,607
Location
CT
Here is where I am at right now. My friend has both pulleys and the motor is still apart. He is coming over tomorrow so hopefully we can get the rest of it assembled. For some reason the table lock collar came out a different color and not sure why. Kinda irritating. We'll see how much it bugs me. c1c449dab57f2b544784f3293c32cbf3.jpg14063a61aaffd87b90dec2119984becf.jpg122e30079ca48825be2d619c24b27a13.jpg6d18a5804d72b7cbdf761153e4416bdb.jpg8d58d3a22e389b82c044cf281029b9f2.jpgb0b72367ff0cf82918c74f512a7fb2bf.jpg

Sent from my Pixel XL using Tapatalk


Did all the craftsman drill presses come with a table lock collar? I'm pretty sure mine doesn't have one.
 

Attachments

  • c1c449dab57f2b544784f3293c32cbf3.jpg
    c1c449dab57f2b544784f3293c32cbf3.jpg
    124.8 KB · Views: 2
  • 14063a61aaffd87b90dec2119984becf.jpg
    14063a61aaffd87b90dec2119984becf.jpg
    100.2 KB · Views: 1
  • 122e30079ca48825be2d619c24b27a13.jpg
    122e30079ca48825be2d619c24b27a13.jpg
    108.8 KB · Views: 1
  • 6d18a5804d72b7cbdf761153e4416bdb.jpg
    6d18a5804d72b7cbdf761153e4416bdb.jpg
    113.4 KB · Views: 1
  • 8d58d3a22e389b82c044cf281029b9f2.jpg
    8d58d3a22e389b82c044cf281029b9f2.jpg
    96.9 KB · Views: 1
  • b0b72367ff0cf82918c74f512a7fb2bf.jpg
    b0b72367ff0cf82918c74f512a7fb2bf.jpg
    107.3 KB · Views: 1
OP
R

rrich1

Well-known member
Joined
Oct 7, 2015
Messages
793
what do people do with their pulleys? do you clean and paint them? polish? trying to figure out what to do with the motor pulley. i put the quill pulley on without thinking and am going to leave it since it wont be seen anyways.
 

JZiggy

Well-known member
Joined
Dec 1, 2014
Messages
990
Location
Atlanta
The belts polish them, sort of :) I wouldn't paint them, I don't think it would stay on where the belts run.
 

Cahark

Well-known member
Joined
Sep 28, 2016
Messages
340
Location
Dayton,Oh
I have the same drill press. I may have to clean mine up now. Looks really good!


Sent from my iPhone using Tapatalk
 
To avoid these ads, REGISTER NOW!
Top Bottom