To avoid these ads, REGISTER NOW!

Help me set up my air compressor plumbing please!

mharris2007

Well-known member
Joined
Jun 10, 2012
Messages
91
Hi,

I have a Quincy two stage 60 gal. I just finished putting in my mini split and getting the compressor in its final position. I was hoping I could get some advice on the need for a manifold of some type. My garage is typical handyman stuff: working on cars, painting furniture, metal work etc.

Here's the wall space available for a manifold of some type. Keep in mind the compressor will have to be pulled out occasionally for maintenance. I have an IR oil/water separator.


I'm also going to hang a reel on the ceiling


I was also considering running a line above the cabinets to service the other side of the garage.


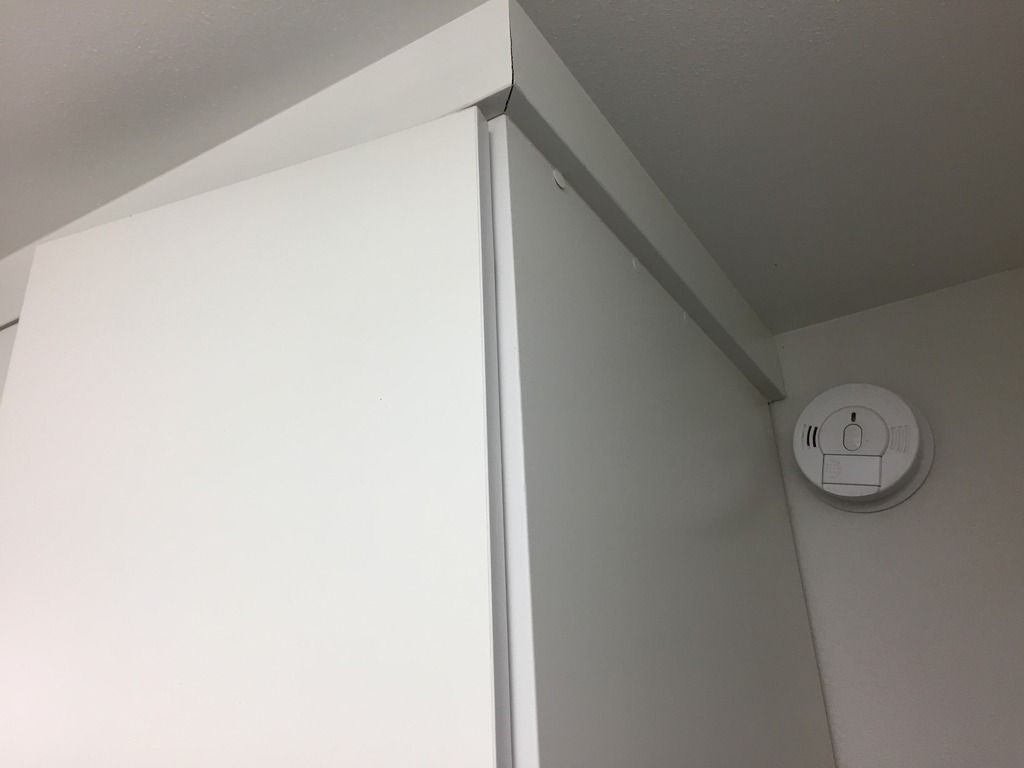
You can see the compressor in the right side of the below picture and how far the line would go above the cabinets: circa 15 feet.


Thanks for your advice and help.

Matt
 
To avoid these ads, REGISTER NOW!

hedgehog

Well-known member
Joined
Mar 11, 2010
Messages
115
Location
Southern Ontario
you can go mild to wild. black pipe or a kit like this would be easy

compressor7-1024x768.jpg
 
OP
M

mharris2007

Well-known member
Joined
Jun 10, 2012
Messages
91
you can go mild to wild. black pipe or a kit like this would be easy

compressor7-1024x768.jpg


Definitely not going wild. Appreciate the picture and the link. I glanced st the YouTube video (putting my baby to sleep) and it looked like they were using pex? Or maybe it was rapiair? I'm definitely not using that but will place close attention to the methods he's using.

Matt
 

Franz1.0©

Banned
Joined
Feb 8, 2017
Messages
134
You need to relocate your smoke detector.
It's in a dead spot which will delay activation.
 

bastage

Well-known member
Joined
Feb 6, 2017
Messages
234
Location
Kuna ID
Hat rapid air kit actually looks perfect. Where did you buy your kit from?

I have seen it on Northern Tool, Amazon & Home Depot.. Its fairly common. Lowes also has a cheaper version of their own. But it seems like its a bit too cheap with smaller lines & some plastic instead of aluminum. It does appear to be a more complete kit though.
 
OP
M

mharris2007

Well-known member
Joined
Jun 10, 2012
Messages
91
You need to relocate your smoke detector.
It's in a dead spot which will delay activation.

Thanks.

I have seen it on Northern Tool, Amazon & Home Depot.. Its fairly common. Lowes also has a cheaper version of their own. But it seems like its a bit too cheap with smaller lines & some plastic instead of aluminum. It does appear to be a more complete kit though.

Wow didn't know it was that widely available. Thanks for the heads up. I think that would be the easiest way to get it setup: using the rapid air system.
 

matt_i

Well-known member
Joined
Mar 14, 2008
Messages
10,730
Location
SE Michigan
I'm a fan of metal pipe if you have the knack for pipe-fitter work. Imo copper is the ultimate but has to be sweat-soldered which can jack up finished surfaces because of the "jetwash" from the flame. Black pipe is joined cold, if doing that, I would clean it and paint it separately, then assemble, touch up the bite marks later from the pipe wrenches when in-place.
 

bastage

Well-known member
Joined
Feb 6, 2017
Messages
234
Location
Kuna ID
Wow didn't know it was that widely available. Thanks for the heads up. I think that would be the easiest way to get it setup: using the rapid air system.

Yeah there is actually I think 4 or 5 different variety's of the rapidair system from rapidair. The price steps up quickly after that one though. Its 75-80 & the next up is like 160. The most expensive one I have seen was priced at 999 but I didnt even bother looking to see what was so special about it.

I am probably going to use the basic one. Seems like the best bang for buck & in a smaller garage I think its still way more then needed.
 

NewShockerGuy

Well-known member
Joined
Oct 12, 2010
Messages
2,481
Location
Northern Virginia / DC
I am debating the HD rapid air kit for $80 or actual copper pipe.

I've never joined copper pipe together but I can't imagine it being hard. I know how to solder electronics so pipes don't bother me, at least I'd learn something new.

The ONLY thing that really drives me nuts with the rapid air kit is because of the flexible tubing it's never straight. IE: When I run it up the wall or across the wall it won't be 100% flat like a straight pipe would be. The tubing would be wavy to an extent and that really bothers me for some reason, plus the pipe is blue, and I have nothing blue in the garage. At least with the copper pipe I can paint it white so that it would blend 100% into the wall/ceiling and not be noticed.

I haven't checked pricing on the copper pipe but I know the damn fittings are always expensive at like 2-5 bucks which I think with the price of the copper piping would be much greater than the rapid air cost. However with the rapid air kit, it doesn't seem like one gets enough fittings, and those too run 3-5 bucks.

What I might do is run the copper piping and then use the rapid air blocks for a nice finished look.

I'm not a fan of the black steel pipe at all so I would not run that in the garage for air.

-Nigel
 
OP
M

mharris2007

Well-known member
Joined
Jun 10, 2012
Messages
91
I'm a fan of metal pipe if you have the knack for pipe-fitter work. Imo copper is the ultimate but has to be sweat-soldered which can jack up finished surfaces because of the "jetwash" from the flame. Black pipe is joined cold, if doing that, I would clean it and paint it separately, then assemble, touch up the bite marks later from the pipe wrenches when in-place.

I agree with copper or black pip being the best, the only issue I have is that if I mount it on the wall next to the compressor I'm afraid it would get hit when I'm moving the compressor out for service occasionally.

Yeah there is actually I think 4 or 5 different variety's of the rapidair system from rapidair. The price steps up quickly after that one though. Its 75-80 & the next up is like 160. The most expensive one I have seen was priced at 999 but I didnt even bother looking to see what was so special about it.

I am probably going to use the basic one. Seems like the best bang for buck & in a smaller garage I think its still way more then needed.

I need to look into this more. Seems like the best way to go for something simple and easy. Or I can use copper on the wall then use transition to rapid air for the run across to the other side of the garage.

It's not PEX, it's Pex-Al-Pex. Different beast altogether.
Cheers.

Yeah I got that. Thanks.

I am debating the HD rapid air kit for $80 or actual copper pipe.

I've never joined copper pipe together but I can't imagine it being hard. I know how to solder electronics so pipes don't bother me, at least I'd learn something new.

The ONLY thing that really drives me nuts with the rapid air kit is because of the flexible tubing it's never straight. IE: When I run it up the wall or across the wall it won't be 100% flat like a straight pipe would be. The tubing would be wavy to an extent and that really bothers me for some reason, plus the pipe is blue, and I have nothing blue in the garage. At least with the copper pipe I can paint it white so that it would blend 100% into the wall/ceiling and not be noticed.

I haven't checked pricing on the copper pipe but I know the damn fittings are always expensive at like 2-5 bucks which I think with the price of the copper piping would be much greater than the rapid air cost. However with the rapid air kit, it doesn't seem like one gets enough fittings, and those too run 3-5 bucks.

What I might do is run the copper piping and then use the rapid air blocks for a nice finished look.

I'm not a fan of the black steel pipe at all so I would not run that in the garage for air.

-Nigel

I'm in the same boat. Copper would be nice, I have no experience using it for soldering it. I guess it would be good to learn for plumbing repairs if needed in the future. My neighbor knows how to do it so I'm sure I could learn and get off to the right start. Cost isn't really an issue, I just want something functional more than anything.

Thanks for the replies.

Matt
 

sberry

Banned
Joined
Jun 18, 2005
Messages
35,747
Location
Brethren, Michigan
Put a ball valve on the comp, a hose to a filter reg and plumb that to a hose reel to start with and see if you need anything else. Put some synthetic comp oil in the comp and forget it, the only maintenance you will need to do is tighten the belts a pinch in about 5 years.
 
OP
M

mharris2007

Well-known member
Joined
Jun 10, 2012
Messages
91
Put a ball valve on the comp, a hose to a filter reg and plumb that to a hose reel to start with and see if you need anything else. Put some synthetic comp oil in the comp and forget it, the only maintenance you will need to do is tighten the belts a pinch in about 5 years.

Ball valve comes with the compressor so I'm set there. I was thinking that would be the easiest way but I was most concerned with moisture in the lines when spray painting and/or using my cut off wheel for metal fab. I hate moisture coming out of my air tools and I thought the manifold would help cure that problem.
 

sberry

Banned
Joined
Jun 18, 2005
Messages
35,747
Location
Brethren, Michigan
Ball valve comes with the compressor so I'm set there. I was thinking that would be the easiest way but I was most concerned with moisture in the lines when spray painting and/or using my cut off wheel for metal fab. I hate moisture coming out of my air tools and I thought the manifold would help cure that problem.

See what happens. I know several guys done just fine with a simple system. Thats a pretty nice comp, it should short run for a small shop.
 
Last edited:

Franz1.0©

Banned
Joined
Feb 8, 2017
Messages
134
When do we get to the Gorilla tape & PEX routed through the attic since there's insufficient space above the cabinets to do proper drop takeoffs?

Then we can do airstream drag factors comparing PEX with iron pipe and copper tube.
 

matt_i

Well-known member
Joined
Mar 14, 2008
Messages
10,730
Location
SE Michigan
I agree with copper or black pip being the best, the only issue I have is that if I mount it on the wall next to the compressor I'm afraid it would get hit when I'm moving the compressor out for service occasionally.

If you go the route of buying a tractor supply (or wherever) hydraulic hose to decouple the compressor from the hard pipe system, then you can just start the rigid piping higher on the wall so its completely out of the way.

When needed to service, just unscrew the hydraulic hose...better to buy the female JIC swivel fittings on the hose and male JIC-to-pipe thread steel adapters for both ends of the pipe. Then the hose will be off as fast as you can find an adjustable wrench to loosen the fittings, no sealant or o-rings to mess up, its all just metal-to-metal.
 

sberry

Banned
Joined
Jun 18, 2005
Messages
35,747
Location
Brethren, Michigan
I put a little filter/reg final before the reel to my paint. Let's me set the pressure without fussing with the rest of it. I relocated some pipe recently and eliminated some line in the meantime by moving one of the reels utilizing the same line for 2 reels.
 

Attachments

  • new hose reel turned.JPG
    new hose reel turned.JPG
    37.7 KB · Views: 147
  • paint air 2.jpg
    paint air 2.jpg
    142.3 KB · Views: 149
Last edited:
To avoid these ads, REGISTER NOW!

mike93lx

ALLIANCE MEMBER
Joined
Dec 9, 2013
Messages
37,702
Location
Richmond, VA
I would rotate the compressor 180 degrees to give easy access to the pump for oil changes and bolt it down permanently. There isn't any reason to need to be able to move it around for maintenance.
 
OP
M

mharris2007

Well-known member
Joined
Jun 10, 2012
Messages
91
Nice compressor, did you find a decent price on it?

This is the one I bought. I paid $1249 for it from them. Northern tool had it for the same price.

See what happens. I know several guys done just fine with a simple system. Thats a pretty nice comp, it should short run for a small shop.

I think I may just cheap out and keep it simple like you suggested. Worst thing that can happen is I have to re do it but a simple setup would be easiest and probably suit me fine.

When do we get to the Gorilla tape & PEX routed through the attic since there's insufficient space above the cabinets to do proper drop takeoffs?

Then we can do airstream drag factors comparing PEX with iron pipe and copper tube.

Ha ha. The attic is finished and is 500 sq feet full of my wife's **** for the holidays and allot of my bigger tools. I have the large version of this to take stuff up and down: https://versaliftsystems.com/ Worked out really well. Installed it myself. I think there's enough space above he cabinets for the hose but nothing else.

If you go the route of buying a tractor supply (or wherever) hydraulic hose to decouple the compressor from the hard pipe system, then you can just start the rigid piping higher on the wall so its completely out of the way.

When needed to service, just unscrew the hydraulic hose...better to buy the female JIC swivel fittings on the hose and male JIC-to-pipe thread steel adapters for both ends of the pipe. Then the hose will be off as fast as you can find an adjustable wrench to loosen the fittings, no sealant or o-rings to mess up, its all just metal-to-metal.

That's for sure what I was going to do: tractor supply hydraulic hose to hard pipe. That is if I was going to do a fancy manifold system onteh wall. The only issue is that the rigid pipe can't go high on the wall because of the mini split I just finished. The only space for the rigid pipe is below the minis split between the compressor and the sub panel.

Thanks for the advice on the fittings too. I'll do that for sure.

I put a little filter/reg final before the reel to my paint. Let's me set the pressure without fussing with the rest of it. I relocated some pipe recently and eliminated some line in the meantime by moving one of the reels utilizing the same line for 2 reels.

Nice. Thanks for the advice, that's smart. I'll have to look at my filter/water separator I bought and see if it has a regulator function too.

I would rotate the compressor 180 degrees to give easy access to the pump for oil changes and bolt it down permanently. There isn't any reason to need to be able to move it around for maintenance.

No can do because then I wouldn't be able to get to the compressor air outlet to hook everything up to the output side. I made a miscalculation when I was designing the cabinets. I looked at the size of the compressor on the quincy website and only noted the length not the width which is why it's in that tight space. I have no choice but to move it in and out for maintenance. Like someone else suggested, using some synthetic oil and calling it a day wouldn't be a bad idea.
 

Franz1.0©

Banned
Joined
Feb 8, 2017
Messages
134
That versalift is an interesting contraption. It looks like somebody remembered the 19th-20th Century sidewalk elevator and put the door on the other end.

Wife + Christmas ***$* I fully understand. I hope yours isn't an angel collector. We have Rubbermaid containers large enough to comfortably bury a 5 foot tall person in, with a block & rope setup.

Since you're on compressed air, you should install a line to the door with a regulator at the door end that can be adjusted to around 5psi and have a hose with venturi blow gun available for the wife to blow dust off her decorations. Above 5psi may cause minor damage to decorations, and irreparable harm to your ribs.

A hint you may want to file away, the quick and easy cure for mold on cloth covered Christmas items is vaporized Chlorine bleach in a Rubbermaid tote.

Assert your manhood, run an air header through the attic. Hang it from the rafters and you can do the taps properly, from the top of the header.
 
OP
M

mharris2007

Well-known member
Joined
Jun 10, 2012
Messages
91
That versalift is an interesting contraption. It looks like somebody remembered the 19th-20th Century sidewalk elevator and put the door on the other end.

Wife + Christmas ***$* I fully understand. I hope yours isn't an angel collector. We have Rubbermaid containers large enough to comfortably bury a 5 foot tall person in, with a block & rope setup.

Since you're on compressed air, you should install a line to the door with a regulator at the door end that can be adjusted to around 5psi and have a hose with venturi blow gun available for the wife to blow dust off her decorations. Above 5psi may cause minor damage to decorations, and irreparable harm to your ribs.

A hint you may want to file away, the quick and easy cure for mold on cloth covered Christmas items is vaporized Chlorine bleach in a Rubbermaid tote.

Assert your manhood, run an air header through the attic. Hang it from the rafters and you can do the taps properly, from the top of the header.

Lmao!!!! Ha ha ha!! I'm dying laughing!!

I see your point about the drops from
The attic. I'd only have to drill two holes in the ceiling/attic floor. One to get the pipe up into the attic and one to get the pipe down on the other side of the cabinets near the door. I would really need to see where that would map out in the attic though, because if it's in the middle of the floor of the attic it won't work. There'd be no way to get my table saw, chop saw, etc over to the lift and down to the garage floor.


You can see the bottom of the lift in the top left of this picture.


And here are some befores of the garage Reno in progress along with some pictures of the finished attic with the lift.


This shows the cutout for the lift framed in


Franz1.0©

Banned
Joined
Feb 8, 2017
Messages
134
As the saying goes, 'Everything old is new again'
https://ia600309.us.archive.org/8/items/AmericanElevators_981/AmericanElevatorsN.d.C.1910..pdf
The only difference seems to be now it comes from China in a cardboard box.

I see more than sufficient space at the rafters to run the air line header, and plenty of space to do proper top of header takeoffs to add insurance to a water free airstream. There is even sufficient space to pitch the header to drain condensate in the header.

If you go with copper you can use copper adhesive and eliminate fire potential during install. You can also add additional drops easily in the future. Don't forget the little woman's low pressure drop for dusting the BahHumbugh decorations, and if she makes jam & jelly, run a line to the kitchen so you can get her an air driven Lightning stirrer to eliminate stirring labor/ yours/ moving the damn spoon while she gets the sugar and Certo ready. I have no idea why either needs to be readied, but they do! I installed the Lightning mixer option inside the cabinet next to the stove.

I also installed the mandated hot & cold adjustable outdoor hose bib next to the kitchen door for canine washing as requested. I highly recommend the outside hose bib & knobs.
 

sberry

Banned
Joined
Jun 18, 2005
Messages
35,747
Location
Brethren, Michigan
Here is my take. This is a 2 car garage. Do we need several air drops , one in each corner, are we going to have a crew doing 4 jobs at once? Start simple, do it basic enough that as you get going it's not a huge investment to tailor or add something , not so committed that you hate to move something and not invested in gobs of stuff you never use. 1 reel in the right spot is worth a dozen arbitrarily installed . Air doesn't have the parsitic installs like electric and in the end will find the one thing you use, the rest will simply sit or not end up in the ideal spot anyway.
Get workwise, need something add it. I actually removed some in my last remodel, never used it from day 1, seemed like a great idea at the time, 1 place was a pain in the ***, I finally had it one day and spend a couple hrs replumbing. Would have been way easier to wait till I had it figured out.
 
OP
M

mharris2007

Well-known member
Joined
Jun 10, 2012
Messages
91
As the saying goes, 'Everything old is new again'
https://ia600309.us.archive.org/8/items/AmericanElevators_981/AmericanElevatorsN.d.C.1910..pdf
The only difference seems to be now it comes from China in a cardboard box.

I see more than sufficient space at the rafters to run the air line header, and plenty of space to do proper top of header takeoffs to add insurance to a water free airstream. There is even sufficient space to pitch the header to drain condensate in the header.

If you go with copper you can use copper adhesive and eliminate fire potential during install. You can also add additional drops easily in the future. Don't forget the little woman's low pressure drop for dusting the BahHumbugh decorations, and if she makes jam & jelly, run a line to the kitchen so you can get her an air driven Lightning stirrer to eliminate stirring labor/ yours/ moving the damn spoon while she gets the sugar and Certo ready. I have no idea why either needs to be readied, but they do! I installed the Lightning mixer option inside the cabinet next to the stove.

I also installed the mandated hot & cold adjustable outdoor hose bib next to the kitchen door for canine washing as requested. I highly recommend the outside hose bib & knobs.

Seems like allot of work for just two locations I need air?? I need it where the compressor is and one on the other side of the cabinets. I think I'm leaning towards rapid air and see how that holds up for me for a minute. I think I may do a small manifold on the wall near the compressor then up and over to the other side of the cabinets and call it a day.

Here is my take. This is a 2 car garage. Do we need several air drops , one in each corner, are we going to have a crew doing 4 jobs at once? Start simple, do it basic enough that as you get going it's not a huge investment to tailor or add something , not so committed that you hate to move something and not invested in gobs of stuff you never use. 1 reel in the right spot is worth a dozen arbitrarily installed . Air doesn't have the parsitic installs like electric and in the end will find the one thing you use, the rest will simply sit or not end up in the ideal spot anyway.
Get workwise, need something add it. I actually removed some in my last remodel, never used it from day 1, seemed like a great idea at the time, 1 place was a pain in the ***, I finally had it one day and spend a couple hrs replumbing. Would have been way easier to wait till I had it figured out.


I agree. I think I'm going to keep it as simple as possible. Maybe even forego the manifold to start and see how much water gets in my lines. We'll see. Just so stoked to have a sufficient compressor after using my crappy porter cable pancake for all these years.
 

sberry

Banned
Joined
Jun 18, 2005
Messages
35,747
Location
Brethren, Michigan
This is and was a good place to stretch the budget some. It's a little like stepping up a class in mig welders, but once right out of the chute and don't have to try to make up forever. I can get along with a lot of more economical tools and do, I am not so fussy about common wrenches for many uses, we find stuff that works, but this is a one shot deal.
Good chance you never got to do a thing to it but crack the drain on occasion and tighten the belts in a decade. Couldn't wear it out if you tried.
This machine will run 1000's of hours and you will run it 100's.
 
Last edited:
OP
M

mharris2007

Well-known member
Joined
Jun 10, 2012
Messages
91
This is and was a good place to stretch the budget some. It's a little like stepping up a class in mig welders, but once right out of the chute and don't have to try to make up forever. I can get along with a lot of more economical tools and do, I am not so fussy about common wrenches for many uses, we find stuff that works, but this is a one shot deal.
Good chance you never got to do a thing to it but crack the drain on occasion and tighten the belts in a decade. Couldn't wear it out if you tried.
This machine will run 1000's of hours and you will run it 100's.

Stretching the budge, you're referring to the compressor I think correct? Cause that's definitely where I stretched it! I'm just trying to get the driest cleanest air possible at my tool or spray gun. I really appreciate your and everyone's help on this thread.
 

extropic

Well-known member
Joined
Aug 4, 2015
Messages
87
Location
Kalama, WA
"I'm just trying to get the driest cleanest air possible at my tool or spray gun."

Air clean enough (particulates & oil) for air tools & spray guns isn't much of a problem using commercially available filters.

Getting the air dry is a much bigger problem. You'll have 660 gallons of free air in that 60 gallon receiver @ 150 PSI. Compression heats the air, increasing it's ability to hold water vapor. The way to dry the air is to cool it to low enough temperature to precipitate out the desired amount of water and drain away the liquid water.

http://www.humiditysource.com/RH_101.html

People do all sorts of inefficient things to try and dry their compressed. Harbor Freight sells a refrigerated air dryer for $400 (minus a 20% coupon=$320). Read the specs.

http://www.harborfreight.com/compressed-air-dryer-40211.html
 

Superbec

Well-known member
Joined
Sep 7, 2015
Messages
931
Location
Netherlands
Put a ball valve on the comp, a hose to a filter reg and plumb that to a hose reel to start with and see if you need anything else. Put some synthetic comp oil in the comp and forget it, the only maintenance you will need to do is tighten the belts a pinch in about 5 years.

THIS !


I would also add a hose reel outside the garage , I didn't and now I miss it ,

Rapid air is very nice for your needs, it just works, don't over-think it .

I Have mine for about 1 year now and very happy with it , I just need to take a line outside the shop for another reel.
 

sberry

Banned
Joined
Jun 18, 2005
Messages
35,747
Location
Brethren, Michigan
Now you know exactly where you want it and it will be a sure bet.
Stretching the budge, you're referring to the compressor I think correct? Cause that's definitely where I stretched it!
Yes, this is what I was referring to. I saw a thread on a forum not too long ago where an engineer bought a 400 $ comp and had calculated using about a dozen formulas that the unit he got would be "adequate" for his needs and a 10% factor of some kind,, he should have been using a general estimate of 1.5 but then proceed to spend about 4 grand trying to make it work which it never really will.
Yours will work well, its not 10X overkill but it is big enough it will shut off for the type of work you will do. The 1200 may seem like a lot but my Dad bought the one I use now in the early 70's and it cost 200 more than that then. I treated it poorly, had to replace a rod brg about 15 years ago and only recently had to service the motor and it has seen 1000's of hours, not sure exactly but no way a home brew user will ever put 10% of it on and as the conditions improved and I take better care of it, oil improved to the point I am now on the 10 yr schedule it runs the same as it ever did.
 
OP
M

mharris2007

Well-known member
Joined
Jun 10, 2012
Messages
91
"I'm just trying to get the driest cleanest air possible at my tool or spray gun."

Air clean enough (particulates & oil) for air tools & spray guns isn't much of a problem using commercially available filters.

Getting the air dry is a much bigger problem. You'll have 660 gallons of free air in that 60 gallon receiver @ 150 PSI. Compression heats the air, increasing it's ability to hold water vapor. The way to dry the air is to cool it to low enough temperature to precipitate out the desired amount of water and drain away the liquid water.

http://www.humiditysource.com/RH_101.html

People do all sorts of inefficient things to try and dry their compressed. Harbor Freight sells a refrigerated air dryer for $400 (minus a 20% coupon=$320). Read the specs.

http://www.harborfreight.com/compressed-air-dryer-40211.html

Man that stuff looks super sophsticated and out of my reach for the moment. I think I might start small then go up from there. I don't have a blast cabinet (yet) otherwise a dryer would be on the list for sure.

Millions of compressors are used every day without adding every idea someone can find on the internet. How can this be?

Truth.

THIS !


I would also add a hose reel outside the garage , I didn't and now I miss it ,

Rapid air is very nice for your needs, it just works, don't over-think it .

I Have mine for about 1 year now and very happy with it , I just need to take a line outside the shop for another reel.

I think that's what I'll do. I'm going to do the rapid air design quote sheet thing I think and give them a ring. Seems like the easiest, most effective way to get things sorted out to get up and running.

Now you know exactly where you want it and it will be a sure bet. Yes, this is what I was referring to. I saw a thread on a forum not too long ago where an engineer bought a 400 $ comp and had calculated using about a dozen formulas that the unit he got would be "adequate" for his needs and a 10% factor of some kind,, he should have been using a general estimate of 1.5 but then proceed to spend about 4 grand trying to make it work which it never really will.
Yours will work well, its not 10X overkill but it is big enough it will shut off for the type of work you will do. The 1200 may seem like a lot but my Dad bought the one I use now in the early 70's and it cost 200 more than that then. I treated it poorly, had to replace a rod brg about 15 years ago and only recently had to service the motor and it has seen 1000's of hours, not sure exactly but no way a home brew user will ever put 10% of it on and as the conditions improved and I take better care of it, oil improved to the point I am now on the 10 yr schedule it runs the same as it ever did.

I'm super glad that I over did it on the compressor. My dad had a 20 gal that we wore out when I was living at home rebuilding my VW bug. That thing would run non stop and was the loudest thing I'd ever heard. I knew I didn't want that at, now that I could afford something a little nicer. You never think about the having a nice air compressor until you need it! I'm excited to get this doing. I just wish I would have thought about then when I was finishing the garage! Oh well.

Matt
 

JTG

Well-known member
Joined
Sep 24, 2009
Messages
408
Location
New Jersey
I vote for the keep it simple method. I'd start off with a ceiling mounted reel between those two florescent lights between the 2 cars. When you're painting the cars won't be in there so the air hose is now centrally located. If you're at the bench the hose is right behind you.
 
OP
M

mharris2007

Well-known member
Joined
Jun 10, 2012
Messages
91
I vote for the keep it simple method. I'd start off with a ceiling mounted reel between those two florescent lights between the 2 cars. When you're painting the cars won't be in there so the air hose is now centrally located. If you're at the bench the hose is right behind you.

Agreed. I guess it may just be a little ugly with a little run of house surface mounted on the ceiling. But oh well.
 

extropic

Well-known member
Joined
Aug 4, 2015
Messages
87
Location
Kalama, WA
OK. my previous post recommended a "super sophisticated" approach. Seeing the pics of your super clean garage (even flooring in the attic), I thought it appropriate.

Here is a chart showing the basics of air plumbing design.

Compressed Air Piping Recommendations.jpg
 
Last edited:
OP
M

mharris2007

Well-known member
Joined
Jun 10, 2012
Messages
91
OK. my previous post recommended a "super sophisticated" approach. Seeing the pics of your super clean garage (even flooring in the attic), I thought it appropriate.

Here is a chart showing the basics of air plumbing design.

Compressed Air Piping Recommendations.jpg

Oh dear. You're too funny. In the attic however, the lines would have to be run across the floor right where it would be most inconvenient. I guess that's the major problem issues. I could run the pipe into the attic and to the roof rafters with some clamps to keep the line out of the way??? Thanks for the attachment too.

Too many options.
 
To avoid these ads, REGISTER NOW!
Top Bottom