To avoid these ads, REGISTER NOW!

VISE REPAIR 101 all vise repairs, lubricants, sources for parts and the tricks to fix

Shiftless

Well-known member
Joined
Mar 9, 2014
Messages
14,579
Location
East Bay SFO
Wow, a member for over 8 years and this is your first post.
Welcome to one of the GJ vise threads.
Hop over to the main vise thread to learn more about bench vises.

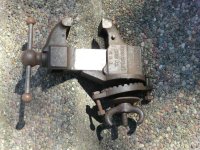
Your vise looks like an Asian import to me.
 
Last edited:
To avoid these ads, REGISTER NOW!

Outlawmws

Well-known member
Joined
Aug 9, 2011
Messages
39,315
Location
The Badlands
Get, :+1: What HC said. Preheating and slow cooling in particular is key to the strength of the bond. In that case after the oven I think I'd have setup to have a Bernz-O-Matic torch aimed at the underside of the area you were brazing...

In guessing the surrounding metal is leaching your heat away. I tend to preheat large pieces in my kitchen oven for a few hours.

With a big crack like that I would stick the propane weed burner on it right after.

Remember to post cool in the oven or you will see cracks.

Brazing flows towards the heat. So heat away from the crack moving towards the crack. As the cracked area heats up the braze should flow out to where you started heating.

Cleanliness of metal is important but not always practical or possible.

As to flux... I don't like the pre-fluxed rods. I have had the best luck with plain old borax powder.

When I have really tough adhesion issues I'll go to silver solder flux paste. The stuff is pricey and normally reserved for actual precious metals but because it's a paste you can cram it into cracks better. I use flux royally.... something that stuck from the jewel crafting days and has never let me down.

f68d2881ad085e5047a3e230fd4429e6.jpg

Also remember to run the oxy gas mixture slightly leaner (but still a blue flame) the yellower the flame the more soot...

I gave up on acetalyne a few years ago. Too much hassle. I propane oxy braze and solder now. Not quite as hot but less soot, cheaper and easier to get. When I need high heat I'll tig.

Finally, I posted a cold repair method a few pages back. It's perfect for long cracks like those on a vise slide.

Cheers,

Niels


Sent from my iPhone using Tapatalk
 
OP
D

drivesitfar

Well-known member
Joined
Oct 23, 2013
Messages
36,053
Location
Pacific Northwest
WhoDom: welcome to the forum. either you've been reading a lot and forgetting to post or maybe you were just waiting until you bought a big vise? in any case you have waited patiently and hopefully learned a thing or two about stuff reading a few of the threads.

i'd have to agree with the others that your vise looks like it might have originated in Taiwan and even with the trade you might have paid top dollar for it, but if you like it then i'm sure it will work as a vise if treated like a vise and not a press or beat on with a BFH.

i have to ask cause it's rare (I can't say i've ever seen any at shops around here) when you see an anvil much less two nice clean looking ones sitting at a shop for sale. any chance you might have noticed what the price was on those and did you snag one?

Get: good luck with the cracked slide fix.
 

Provincial

Well-known member
Joined
Sep 21, 2011
Messages
6,874
Location
Near Salem, OR
Anyone have a horned nut for the underside of a trough-the-bench mount vise? It has 3/4-10 NC threads on the vise base.

If no nut available, is there a suggestion on how to make one?
 
OP
D

drivesitfar

Well-known member
Joined
Oct 23, 2013
Messages
36,053
Location
Pacific Northwest
PROVI: post up a few pictures of your vise and especially the screw you are missing the big WING NUT for. i have yet to see any of those WING NUTS laying around a sale even at 100 year old guy's shops, but i've seen lots of that style vise mounted with washers and big bolts.

is the HORNED NUT as you call it look like the WING NUT i have on my REED 31?
 

Attachments

  • 00101_a5KCr05T7Kb_600x450.jpg
    00101_a5KCr05T7Kb_600x450.jpg
    59.6 KB · Views: 24
  • Reed No 51 strap vise.jpg
    Reed No 51 strap vise.jpg
    122.3 KB · Views: 17
  • a55c8997d14e5859ed4b63020a8b583d.jpg
    a55c8997d14e5859ed4b63020a8b583d.jpg
    71.8 KB · Views: 18

Shiftless

Well-known member
Joined
Mar 9, 2014
Messages
14,579
Location
East Bay SFO
Prov:
I agree with Drives that you're not gonna easily find decent condition horned nuts laying around. Unless that vise is going it on a museum like display space, if I was going to use it on my bench, I would just get some washers and a modern 3/4 - 10 nut and go from there. If I wanted to swivel the vise regularly, I would consider making up a captive wrench for under the bench using a sacrificial 3/4 inch box end wrench. Shorten it up and tack weld it onto the nut.

Or as Drives suggested, just use a 3/4 bolt and grab a socket wrench when you want to loosen the swivel.
How often do we swivel our vises around anyway? I hardly ever do.

Have you searched for a new 3/4 inch wing nut? I found this. IIWY, I'd just buy one of these and not try to fab one up myself. Zoro sells packs of 10 but somebody else must sell just one.
 

Attachments

  • image.jpg
    image.jpg
    25.2 KB · Views: 9
Last edited:

taumac

Well-known member
Joined
Aug 30, 2011
Messages
8,104
Location
Brooksville, Fl
Prov:
I agree with Drives that you're not gonna easily find decent condition horned nuts laying around. Unless that vise is going it on a museum like display space, if I was going to use it on my bench, I would just get some washers and a modern 3/4 - 10 nut and go from there. If I wanted to swivel the vise regularly, I would consider making up a captive wrench for under the bench using a sacrificial 3/4 inch box end wrench. Shorten it up and tack weld it onto the nut.
You don't have to saw a Snappy in half to get something useable... :evil:

But if you have a duplicate stubby laying around, I bet one like this would work. :)

Or as Drives suggested, just use a 3/4 bolt and grab a socket wrench when you want to loosen the swivel.
How often do we swivel our vises around anyway? I hardly ever do.


I swivel mine a lot. I have a small garage so I always swivel them out of the way when not using them. It give you more room when don't have big vise protruding half way into the walking path.
 

Shiftless

Well-known member
Joined
Mar 9, 2014
Messages
14,579
Location
East Bay SFO
taumac:
You have an excellent point. I didn't consider that factor for some guys working in extremely tight spaces. (nobody likes banging their hip into a huge chunk of cast iron.) I have heard from some that getting a vise with a dynamic REAR jaw helps them deal with inadequate space in front of the workbench. But with that, you lose the ability to clamp long pieces vertically against the rear jaw and the front of your bench.
 
Last edited:

Carla

MEMBER EMERITUS
Joined
Nov 27, 2010
Messages
672
Anyone have a horned nut for the underside of a trough-the-bench mount vise? It has 3/4-10 NC threads on the vise base.

If no nut available, is there a suggestion on how to make one?

Yes, you could make one which would look reasonably close to the original style, but, unless you are really 'determined' to have this part be 'correct', in terms of 'restoration', it may be too much work to be a practical project.

The obvious way to replicate the part would be to ask the someone here who owns a vise with that size/style of nut to make up a sketch of its dimensions.

With the dimensions known, you could readily carve a replica in any good dense hardwood, a suitable over size for shrink, to make a pattern for casting. Send the pattern to a specialist foundry which does small lot iron castings, such as the 'Cattail' works, and have several of the parts run (the others would likely be quite salable here, for other old style vise owners)

Improvising a fixture to hold the part for drilling/tapping 3/4-10, and facing a bit of a flat 'washer surface', or 'bearing surface' would be a simple, easy task using a Bridgeport class vertical mill .

Another option would be to replicate an 1870-ish vintage New England style, which would be to obtain a short length of, say, 1-1/2" square steel, drill/tap 3/4-10 at mid-length, then set the part up in a 4-jaw, and turn the ends round to a, say, 3/4" diameter, faired to the centre square section with a, say, 3/8" or so radius.

The 3/4 diameter should then be turned taper down to 5/8"-ish near the tips, and the tips finished with a 'ball' configuration. The part should then have the tips curled, heating only the tapered end to a full red, and bending gently/carefully to an aesthetically nice curve, taking care to bend the tips uniformly. The part should then be highly polished, the traditional so-called 'lime polish', heated to a 'straw, just beginning to get purple flecks' colour, oil-quenched, cleaned and varnished.

'Hmmm', you might say, 'either one of those techniques would require way too much working time to be a practical thing to do, just to restore an old vise'......well, I suppose you're right, considering that a hardened 3/4-10 heavy pattern nut is available 'off the shelf' as mill furniture, and might cost a dollar and a half, or so, and you already have an 1-1/4" wrench (or a 12" Crescent) ready to hand.

cheers

Carla
 

Provincial

Well-known member
Joined
Sep 21, 2011
Messages
6,874
Location
Near Salem, OR
Thanks for the good responses!

Here is a link to a thread that shows photos of a vise like mine. I am missing the base plate, the stud, and the nut. I see two types of nuts, the "horned" style and the woodcut of the "looped" nut on the Smith's. Of the two, the horned one would be easier to make.

http://www.garagejournal.com/forum/showthread.php?t=220573

I suspect that these nuts were supplied from a vendor, since many early vises had nuts that were identical, or nearly so.

As Carla pointed out, I can make do with a regular hex nut until I find or build a replica original nut.

I can make a base plate from a flame cut circle, since the original doesn't have any fancy teeth or other locking device cast in.
 

Outlawmws

Well-known member
Joined
Aug 9, 2011
Messages
39,315
Location
The Badlands
Prov, if you need it for short term functionality without a wrench, take that hardware store nut and weld on 2 flat bars either bent, curved or at an angle.

Maybe even a slice of a 5-6" pipe cut into sections and grind the edges rounded...
 

Provincial

Well-known member
Joined
Sep 21, 2011
Messages
6,874
Location
Near Salem, OR
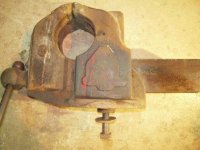
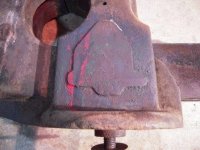
Here are some photos of the vise, an Oswego No. 3 Combination. Notice that there is a boss cast into the side of the static jaw that looks like the outline of a bell, including the clapper below the lip of the bell.

The jaws have been brazed in place, but the cast bodies don't seem too bad. At least no chunks broken out.
 

Attachments

  • Oswego 1. comp.jpg
    Oswego 1. comp.jpg
    35.7 KB · Views: 21
  • Oswego 4. comp.jpg
    Oswego 4. comp.jpg
    39.2 KB · Views: 18

Fretters

Well-known member
Joined
Jan 25, 2014
Messages
4,217
Location
South Yorkshire, England
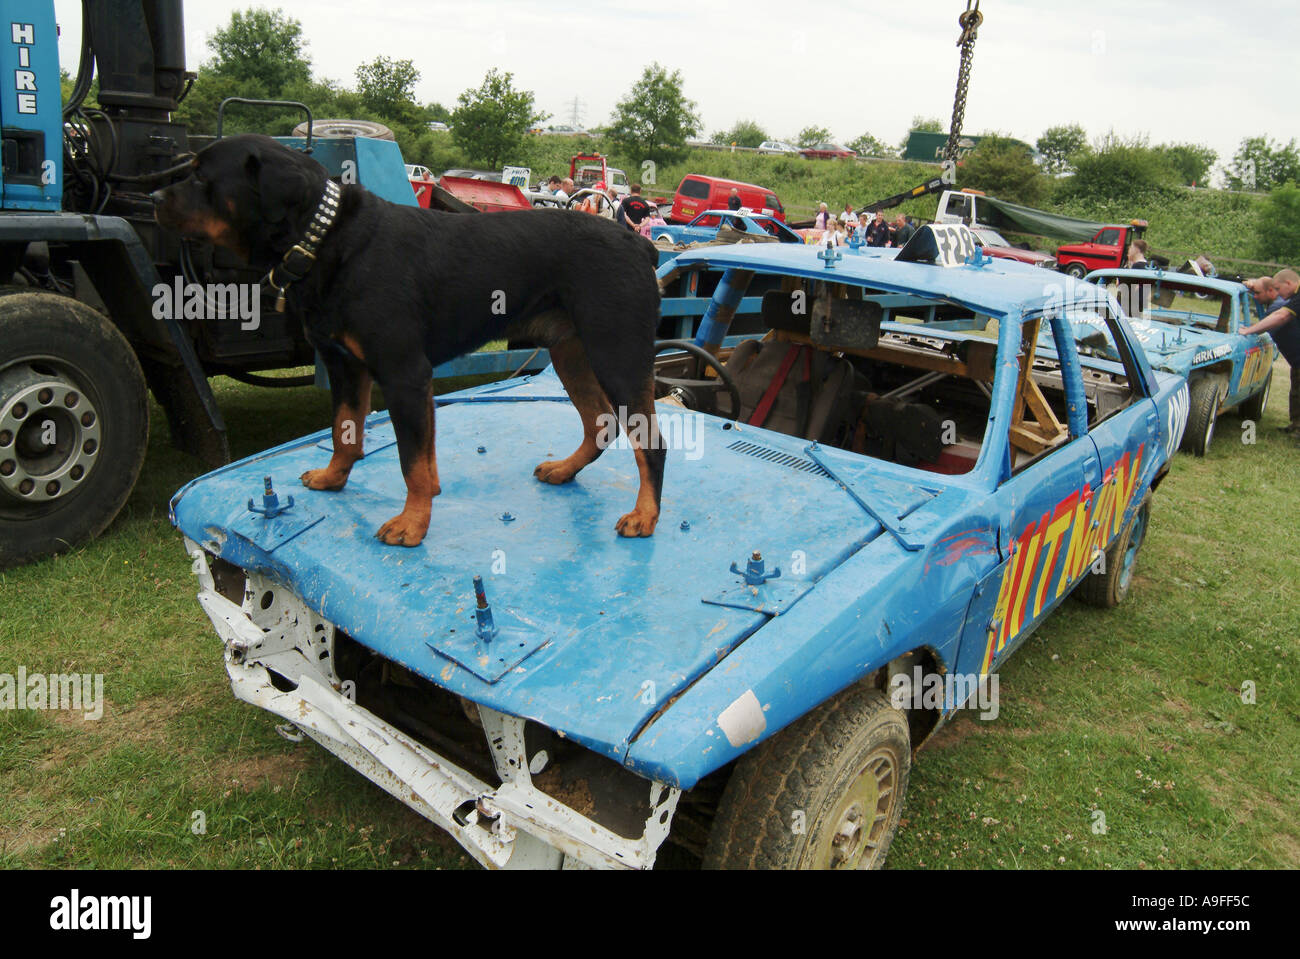
If you know anyone who does stockcar or banger racing, they tend to use a heavy duty wingnut for clamping down the bonnets and suchlike. Not an exact replacement, but would be a good modern equivalent.
 

CwazyWabbit

Well-known member
Joined
Jan 9, 2015
Messages
1,189
Location
Surrey, UK
If you know anyone who does stockcar or banger racing, they tend to use a heavy duty wingnut for clamping down the bonnets and suchlike. Not an exact replacement, but would be a good modern equivalent.

Pretty sure they are scaffolding/form work wing nuts ;)
 

Fretters

Well-known member
Joined
Jan 25, 2014
Messages
4,217
Location
South Yorkshire, England
Not seen those on any scaffolding as yet. I'd have a collection by now if I had. :D You wouldn't happen to have any links to suppliers for those type of wingnut, by any chance? :)
 
Last edited:

CwazyWabbit

Well-known member
Joined
Jan 9, 2015
Messages
1,189
Location
Surrey, UK
Looking at them they are incredibly coarse threaded as I think the screw on to rebar http://www.ebay.co.uk/itm/Formwork-Tie-Nuts-Steel-For-Strongback-Soilders-Bigger-Nut-/142220006206
You'd probably end up drilling and retapping it more sensibly ....

(I'm pretty sure that is what they use on the banger racers, they also use a spreader plate which again is a formwork plate http://www.ebay.co.uk/itm/FORMWORK-TIES-5-8-SHE-BOLTS-WALER-PLATES-/232244418527 )
junk-yard-dog-banger-racing-car-at-smallfield-dirt-track-banger-racing-A9FF5C.jpg
 
Last edited:

va.grouseman

Well-known member
Joined
Mar 26, 2011
Messages
4,965
Location
Southern-Central VA.
Anyone have a horned nut for the underside of a trough-the-bench mount vise? It has 3/4-10 NC threads on the vise base.

If no nut available, is there a suggestion on how to make one?


Provincial, not sure just what kind wing-nut you are looking for or what size, but both of these were found on EBay.---I just typed in (vintage vise parts), and put it in my (followed list).---Of course they are not like the originals but finding those would be like finding a chicken with teeth.---But they make a pretty good substitute.---Just a suggestion.
 

Attachments

  • 100_3564.jpg
    100_3564.jpg
    147.5 KB · Views: 44
  • 100_3563.jpg
    100_3563.jpg
    147.5 KB · Views: 43
To avoid these ads, REGISTER NOW!

Shiftless

Well-known member
Joined
Mar 9, 2014
Messages
14,579
Location
East Bay SFO
I still suggest buying something off the shelf.
Here is another option (again from Zoro.) $21 each in packs of 5
 

Attachments

  • image.jpg
    image.jpg
    14.4 KB · Views: 17
Last edited:

j p smith

Well-known member
Joined
May 22, 2013
Messages
1,213
Location
Glendale, Arizona
Have these jaws but do not know what Vise they fit. 4" wide, jaw face 1 1/8" groove 1/2" wide
 

Attachments

  • P1040827.jpg
    P1040827.jpg
    145.5 KB · Views: 26
  • P1040829.jpg
    P1040829.jpg
    147.6 KB · Views: 25
  • P1040828.jpg
    P1040828.jpg
    147.3 KB · Views: 28

CRSINMICH

Well-known member
Joined
Aug 15, 2015
Messages
2,418
Location
Southeastern Michigan
Aznboi: Welcome to the thread. I think you're right. Here's an ad from 1974. It's hard to say for certain but it looks very similar to yours.
 

Attachments

  • 1974 Columbian ad.jpg
    1974 Columbian ad.jpg
    71.5 KB · Views: 38

dragoneggs

Member
Joined
Jan 21, 2017
Messages
22
Gents... I'm restoring a Rock Island No. 594 vice. I think 1938 vintage. Any ideas on proper color? Pics? Or otherwise paint suggestions?
 

454ragtop

Well-known member
Joined
Mar 24, 2008
Messages
5,011
Location
Carver, MA
Gents... I'm restoring a Rock Island No. 594 vice. I think 1938 vintage. Any ideas on proper color? Pics? Or otherwise paint suggestions?

Unless you're really hung up on the correct color for some reason, just paint it whatever floats your boat. It's not like a car, 6 months from now if you decide you don't like it, blow it apart and paint it a different color. Here's a Rock Island I did a while back in Alpine Green, just cause I had enough in a spray can hanging around I wanted to get rid of. http://www.garagejournal.com/forum/showthread.php?p=3120305&highlight=Rock+Island#post3120305
 

dragoneggs

Member
Joined
Jan 21, 2017
Messages
22
Unless you're really hung up on the correct color for some reason, just paint it whatever floats your boat. It's not like a car, 6 months from now if you decide you don't like it, blow it apart and paint it a different color. Here's a Rock Island I did a while back in Alpine Green, just cause I had enough in a spray can hanging around I wanted to get rid of. http://www.garagejournal.com/forum/showthread.php?p=3120305&highlight=Rock+Island#post3120305
Yeah I know... just being **** here. Will probably go with dull metallic gold for some reason.
 

ganymede

Well-known member
Joined
Nov 29, 2012
Messages
2,332
Location
New England
Gents... I'm restoring a Rock Island No. 594 vice. I think 1938 vintage. Any ideas on proper color? Pics? Or otherwise paint suggestions?

They came in machine tool grey or a weird sort of barn red.
I don't know which came first.
User snapmom has a red one and has posted pics of it . I searched for it but can't find it. :/
 

ALLFAST

Well-known member
Joined
Feb 20, 2017
Messages
1,233
Location
Northern California
Hello everyone,
I finally figured out where this vise resource page is....where is the sign up for Vise Addicts Anonymous? ! This is all too cool.
I've been communicating with "DIF" about the Rock Island 577 that I rescued from a slow ride to the scrap yard yesterday (paid $25). It could use a new swivel base and the accompanying hardware. I thought I read that any other manufacturers base would work, as long as the circumferences match up and there are no obvious interference/fitment issues. Does anyone have a spare 577 base for sale, or know which other model vise base might interchange ? One mounting ear is sheared off, and the owner welded the base to the lower vise body....I'll be spending some time grinding them free here real soon.

The person in AZ with the teal blue 577, we'll DIF sent me those and other photos and now I'm all.ENTHUSED to fix her up !
Any help would be appreciated,
Thanks-Shawn
 

ALLFAST

Well-known member
Joined
Feb 20, 2017
Messages
1,233
Location
Northern California
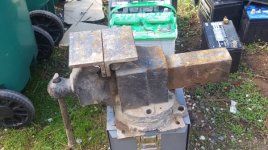
The 577 when it was picked up. I already have the homemade jaws removed and the original threads are all excellent.
 

Attachments

  • 00x0x_gW3wKRE8wTQ_600x450.jpg
    00x0x_gW3wKRE8wTQ_600x450.jpg
    42.9 KB · Views: 48

ALLFAST

Well-known member
Joined
Feb 20, 2017
Messages
1,233
Location
Northern California
It has a broken mounting ear, and missing hold down clamp. The owner welded the base to the bottom of the vise. The next step is to CAREFULLY and precisely grind off the old beads (without destroying the underside of the vise) and free the two components.
 

scooternut

Well-known member
Joined
Jul 31, 2013
Messages
684
Location
Pittsburgh, PA
Pretty certain that I have the 577 base that you seek. Ill send up a pic or two in a minute.
IMG_0706.JPGIMG_0707.JPGIMG_0708.JPG
There was some hardware in it, no idea if it belonged there.
 
Last edited:
OP
D

drivesitfar

Well-known member
Joined
Oct 23, 2013
Messages
36,053
Location
Pacific Northwest
Scooter: i remember now you asking me about that base a few months ago. wouldn't that be too cool if it fit AF's 577?

AF: i don't think the pictures of the blue 577's i sent you showed up on your posts here. you can edit your post or maybe better yet just make a new post and add the 577's so you can show others what you want your 577 to look like?

good luck!!!
 

ALLFAST

Well-known member
Joined
Feb 20, 2017
Messages
1,233
Location
Northern California
Scooter nut !!!!!

You are my absolute Hero ! I have emailed with DIF here, and MIVises....MIVises has referred me to Demo Man and VISEs.
DIF...I just figured out how to post pictures here, and will soon post that Blue BEAUTY.
What is protocol Scooter man ? Do I need to PM you or can we discuss things here ?
I read that old thread about a 577 needing a 9 to 9.25" base opening. Is this your number ?
I'll chat with you soon. Thank you for such an expeditious response. I figured I'd be chasing leads for months.
Shawn
 

ALLFAST

Well-known member
Joined
Feb 20, 2017
Messages
1,233
Location
Northern California
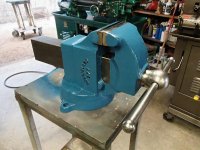
Here is the beauty that DIF sent a picure of early this afternoon. I think it belongs to a member in AZ ? I haven't been this excited over any tool in quite some time. I think it's because I had abit of a chase and rescue involved in the acquisition. I'm already making progress. I've already PM'd Scooter .

Thanks Again everyone,

Shawn
 

Attachments

  • 2017-02-23 11.45.46.jpg
    2017-02-23 11.45.46.jpg
    141.3 KB · Views: 67

ALLFAST

Well-known member
Joined
Feb 20, 2017
Messages
1,233
Location
Northern California
This was earlier this evening. I jettisoned the prior owners angle iron jaw assembly and the original jaw mount threads are all excellent. I spent about 30 mins just wire brusing critical areas, etc. It's all squart and looks just great.
Tomorrow I do a preliminary spray of PB Blaster from the handle down to the drives crew and some on the slide surface. This should smooth things up conziderably. It looks like it's NEVER been apart. All the original hardware is intact and unmolested. The screw looks dead straight and is mildly lubed but it is all dry. The jaws close up with good alignment, and there is no excessive play . If I had a set of Kevin's jaws mounted up, the clearances with the dynamic jaw fully closed looks to be perfect.
 
To avoid these ads, REGISTER NOW!
Top Bottom